


Likes
Comments
Share

@DeepRootsGrowTrees
Follow
JOANNE'S CBD / ROYAL QUEEN SEEDS
WEEK #22 OVERALL
WEEK #10 FLOWER
This lady started a little slow but definitely made up for the slow start she produced some fat buds and has a nice aroma to her!! Stay Growing!!
Thank you for stopping by and taking a look it's much appreciated!!
THANK YOU ROYAL QUEEN SEEDS!!
ROYAL QUEEN SEEDS / JOANNE'S CBD

Likes
260
Share


@SlowpokeFuegobud
Follow
🐒 🍌 🌴🐒 🍌 🌴🐒 🍌 🌴🐒 🍌 🌴🐒 🍌 🌴🐒 🍌 🌴🐒 🍌 🌴
So here we are! (sniff) ❤️ That was a fun grow! 🐒 🐒
Maybe interesting to mention that my light was running on 75% the whole time. 💡
Fun fact: the Monkey that was standing directly under the lights produced 2/3 of the whole harvest while (logically) the monkey on the side only produced half the amount of her sister's! WOW! 😬
Thanks everybody who jumped on the monkey train with me UHUH UH!! 🙏 😘
This variety is great, just get a good carbon filter, growmies! 😜
Thanks, my growmies for visiting and reading and commenting, I love reading your comments! Mwah! 😘
Thank you, @Kannabia, for sponsoring this grow, aaaaand for the amazing gift pack! 😍 I hope to make you proud! 🧡
Special shouts out to my fantastic sponsor @GreenBuzzNutrients! Thank you for trusting me with your awesome products, I'm a longtime fan! 💚 🙏 Green + juicy growmie hugs to my Greenbuzzers!! 😘 Get a generous discount code for their products in my set up section ⬇️ !!
Grower Love everybody!!!11 💚 💚💚💚💚💚💚💚
Wishes do come true, they just take a lot of time sometimes.. ✨
__________________________________________________________________
https://www.kannabia.com/en/feminized-cannabis-seeds/monkey-grease
Monkey Grease
Its own personality
At Kannabia Seeds we have put all our effort into bringing out our own feminized Monkey Grease, a cross between Monkey Grease x White Widow, focusing above all on giving it its own personality in flavor and aroma (frankly unmistakable) and, of course, in Highly demanded characteristics, such as high resistance to diseases and pests, and adaptability to all types of growing conditions, making it close and easy to grow to the widest possible range of growers. The result is a really powerful and versatile indica-sativa marijuana seed, with a powerful relaxing effect, ideal for those moments when you want to disconnect from the madding crowd.
Cultivation of Monkey Grease
Which cultivation method would be most appropriate for this variety? Good question… and one that is easy to answer. Its versatility and adaptability make it a true all-rounder, with remarkably uniform results, whether you choose SOG, SCROG, hydroponics or guerrilla growing. Moreover, we invite you to experiment and play, varying the techniques from moment to moment, and to draw your own conclusions. We are convinced that in all cases, apart from minor variations, the results will always be optimal, giving remarkable yields and in a short time.
Attention should be paid to its high bud production, which can be fat, dense and heavy, although its sturdy branches are able to bear heavy loads without major problems. If you are a fan of extractions, our Monkey Grease is also optimal, given its high production of caramelised resin.
If it is already amazingly productive indoors, this variety excels on its own merits outdoors, where it can easily reach 200 cm in height, and can reach between 700 and 800 grams per plant.
It is therefore an easy and grateful plant, which demands little from its gardeners, making do with simple basic care, and with little or no propensity to develop diseases or mildew, or to attract pests (despite its striking aroma!).
Taste and effect of Monkey Grease
Our Monkey Grease stands out first and foremost because of its powerful, strong smell, which is hard to camouflage. A penetrating aroma that unfolds, in a balanced way, on the palate in the form of a wide range of spicy and sweet flavours, reminiscent of wild honey, nougat and cinnamon, and distant notes of milk chocolate. A delicious treat to be savoured calmly, without haste, as a preamble to its pleasant effect: extremely relaxing and narcotic, powerful, ideal for meditation and moments of introspection and meditation.
Don’t be in a hurry with Monkey Grease. It can be your perfect ally to treat those stress and anxiety problems, but for that you must let yourself go, surrender to its charms, especially if you are inexperienced.
________________________________________________________
Setup:
140x70x200 cm Spiderfarmer tent
2x Monkey 16W fans (not oscillating)
1x box fan 50W oscillating (on lowest level)
LED
Full Spectrum 320W AGLEX AGL-320W-MA
5,6 kg
foldable, dimmable
864 pieces Samsung LH301H
864umol/s
2,7umol/J
full spectrum white + RED 660nm + IR 740nm
wavelength range 380-780nm
covering 3x4ft
Green Buzz Nutrients https://greenbuzzliquids.com/
❗ Use code GD42025 for generous 25% discount (for orders of minimum 75€) 💚
Plagron Growmix
Can Lite Filter 125/ 400cm³/h
PrimaKlima exhaust EC 125-400/240 cm³/h
tab water pH 8 - EC 0,25 with Calmag to 0,5
Advanced Hydroponics pH minus Grow + Bloom to pH 6.2 💧
🐒 🍌 🌴🐒 🍌 🌴🐒 🍌 🌴🐒 🍌 🌴🐒 🍌 🌴🐒 🍌 🌴🐒 🍌 🌴

Likes
2
Share


@Saintvicious
Follow
Looks like a lot of top sights. Afraid stretching too much. Hopefully it fills in.
Likes
38
Share


@Cariboo_OG
Follow
Utopia Haze is a rare heavily sativa dominant hybrid (90% sativa/10% indica) strain created through back crossing Brazilian Sativa strains. This tasty little bud took home 1st Place for Best Sativa in the 2008 High Times’ Cannabis Cup and for good reason – with its potent 18-22% average THC level and long lasting cerebral effects, Utopia Haze is one powerhouse smoke. The Utopia Haze high comes on soon after you finish your first toke, hitting you with a strong cerebral lift that infuses you with a sense of hazy relaxation.
Type: Feminised/Photoperiod
Cultivation: Indoor/Outdoor
Flowering Time (days): 70-75
Indoor Yield (g): Up to 650
Feminised Outdoor Harvest Month: October
Feminised Outdoor Harvest Month Week: 3rd-4th week
Aroma: Citrus, Woody, Pungent, Mint
Effect: Cerebral Lift, Hazy Relaxation, Sleepy
Welcome Everyone to the Final Entry of my Utopia Haze Grow !
There is so much to discuss ! I have been extremely busy as of late trying to get this Harvest together, but i am happy to have it here for you now !
I Seriously under estimated the amount of time, help from others, and my own necessary skills to pull this off.. and i still kind of screwed it up lol !
But its worth noting i have never actually done this before and trying to document it during....was extremely hard.
It is next to impossible to work an iPhone with rubber gloves on !
First I want to discuss everything step by step so before you jump straight into the comments on how the end product is so small in "quantity"
Rest assured i am happy with its"quality"...and thats all that matters to me because Life is a journey not a destination! and i have learned so much from this grow that I couldn't be any happy even if i messed some things up :)
But at the very least I hope you read through this entry in its entirety with an open mind and focus more on the process, rather than just the outcome!
I ran out of Ice & i was only able to wash three times..(normally I've heard you should go sometimes 5-6 washes)
Preparation is Key & things will be much better next round :)
Photos 1-22
These are pretty self explanatory but for those of you just tuning in now.. this is what happens to a very happy plant when you don't have the necessary tools to monitor key components of growing cannabis.. Ph, as well as EC levels play a very key role in the outcome of your grow lol that being said I was just able to save this plant by purchasing both tools but that doesn't mean the plant didn't suffer because of the prior events.. This was a Huge reason behind me choosing to turn this harvest into what i would consider
"Solventless Hash Rosin" from "Ice water extracted Bubble hash".
Pictures 23
The idea here is the process of using "fresh Frozen Cannabis" this has been discussed many a time online on such sites as instagram and here on grow diaries as well.. I personally have Never tried the process so i decided to try it out and make a judgement for myself..
Video 24
The Cannabis has now been in the freezer for 72 hours making it very well frozen.. as you can tell i struggled getting it all into the 25u Screen Wash Bag. One thing of note i would do differently is i will de-stem my next batch as i also believe this played a part in the amount of plant matter that escaped through the sieves.
Photo/Video's 25-28
The idea here is "ice water Seiving" & especially with the bags that I am using here that are only have screen material on the bottom portion of the bag it is very important to have spaces in-between the screens to allow the water to pass directly through the screens into the bottom bucket with the least amount of resistance.. because the hash is so extremely temperature dependant if it gets warm on the side of the bag.. it will stick there and not make it to the bottom to become use able product..
29
You do not need to use as much Ice as i used here lol... the idea is to keep everything very cold..i certainly achieved that but at the sacrifice of using so much that i ended up grinding product and producing "contaminants" but in the end they are just plant matter that i would be smoking when i rolled up my joint either way so.. I'm not super disappointed..
But it should be noted that what you want to achieve here is a Layering effect where you have the wash bag between two small layers of ice while the "water current" washes the Trichomes away allowing them to be separated by the screens setup below :)
Before Starting the machine you should allow some time (i.e.;10-12minutes pre soak to allow the product to become saturated) before the first cycle.
By video 32 I have just ran out of ice lol..
Video 33-34
Here I have a tip for you.. to separate the screens that you sieve through.. cut 5 gallon buckets to stretch them across nice and tight.. it'll make scooping your Bubble that much easier ! i learned this from the many "Frenchy" videos I have watched :)
Picture 35
Here in lays the problem for most people.. drying your hash without loosing vast amounts of "Terpenes" whilst also stay ever vigilant against mold !
Thanks to all those videos I've watched on youtube.. id like to think this was one of my most successful parts of this process..
Things to Note; Terpenes start to seriously evaporate at temperatures 68F or 20C
you need to stay as cold as possible whilst bringing the Relative Humidity in the space down into the 40-30% to stay away from that nasty mold !
I used my cold storage room in the basement.. with a dehumidifier running to keep the space at 45% RH & staying at a constant 15c.
All while spreading the hash as thin as possible across parchment paper, on top of the white screens with a fan moving air across both sides of the paper.
Pictures 36-38
These are some macros i took in the middle of my drying session I fell in love with the colour.
Yes i know the black spots are plant material but they will get caught when i bag the hash & squish the oil out.
Thing to Note; at this stage it is important to ensure you 'micro plane" the hash down as fine as you can whilst staying weary of the temperature... any "chunks" will hold pockets of moisture.. that lead to potential problems..ie; mold ...
Picture/Video 39-41
Successfully planed bubble hash ready to be bagged and Squished !
Picture 42
Ive decided to follow Pedro.. from Pedros Grow Room and double bag to be on the safe side so i don't have any blow outs.
So thats One 25u bag inside one 160u bag ! :)
Pictures 43
This is almost 3 grams of the bubble hash from above, already melting in the bag.. this is where i ran into trouble again lol things started getting to warm in the house and i was only able to get one of the three squish's i did on video :( things started getting sticky.
Picture 44
This is basically just a photo of the equipment I'm using; 3x5 LowTemp Cage in the frame I built myself, with a 20Ton bottle jack.
Something to note here is this is an older Lowtemp model with only a single heating zone which is which i have it closed here heating Both sides of the press :)
As well as the importance of having adequate pressure on your plates.. my rig is very overkill for the size of hash bags..lol
Video 45
Here is the lovely press video.. its didn't quite work the way i wanted either lol my directional folding wasn't quite tight enough for a big "drip" :)
&the Press was set to 65°c
Photo's 46-50 are pretty self explanatory :) I had a blow out.. but still managed to pull an 80% return from the hash once squished...& yes it tasted amazing :)
Was it worth it in the end... that could be debated.. for some..i understand..its not your thing, but for those of us that are interested in making our own concentrates.. free from Solvents...
I wouldn't make it any other way :)
If even ONE of you reading this diary finds it helpful to reference for ANYTHING.....even if its "what not to do" ill consider it a success !
Thanks again for tagging along on this garden adventure.. its been one heck of a journey !
Much Love from B.C. Canada,
Until Next time,
Cariboo


Likes
6
Share

@DogDoctorOfficial
Follow
🥒 Project Blue Tent – Week 7
Pickle Lemon Haze F1 – Pheno A (Folder 14A)
Hello everyone, and welcome back to another chapter of Project Blue Tent! 💙🌱
If you're discovering this diary for the first time, welcome aboard!
Project Blue Tent follows four individual plants, each documented in its own dedicated diary from seed to harvest.
All four plants share the same environment, lighting, irrigation system, nutrition and training strategy. By keeping as many variables identical as possible, we can observe something particularly interesting:
How much personality can an individual phenotype still show when everything around it remains the same?
Every plant has the same opportunity.
Every plant receives the same care.
Yet somehow...
They still manage to tell their own story.
Today we're checking in with Pickle Lemon Haze F1 – Plant A.
And this week marks a pretty important moment in her story.
The canopy is full.
The structure is ready.
And we're preparing for the final step before flowering.
────────────────────────
🌱 Week Seven – From Building to Preparing
For the last several weeks, the entire focus has been on building the canopy.
We topped.
We trained.
We installed the SCROG.
We guided branches through the screen.
And slowly, square by square, the empty spaces disappeared.
Now the Blue Tent has reached the point where the plants have essentially done their job.
Looking from above, the canopy is remarkably even.
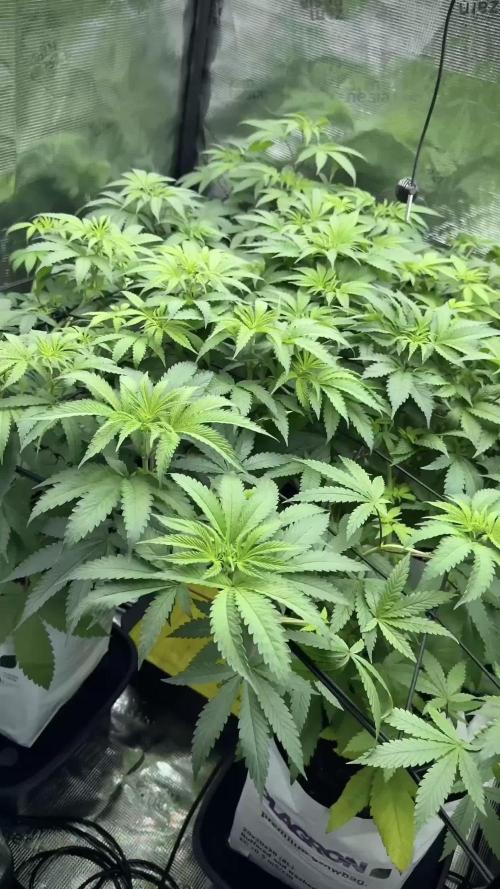
All four sisters are sitting at approximately 60 cm, and because the SCROG net was lowered and tightened earlier in the grow, the majority of the new growth has been directed horizontally rather than vertically.
That was the objective.
Not taller plants.
More usable canopy.
And Plant A has done an exceptional job filling her allocated space.
Her foliage is rich green, her branches are strong, and the amount of healthy growth packed into that screen is impressive.
But there comes a point where adding more foliage isn't necessarily the goal anymore.
Now we need to prepare what we've built.
────────────────────────
🕸️ The SCROG – Mission Accomplished
The SCROG has been one of the most important techniques we've used during this vegetative cycle.
For anyone unfamiliar with it, SCROG means Screen of Green.
Instead of allowing the plant to develop a few dominant vertical branches, we repeatedly guide the growing shoots underneath a horizontal screen.
As each branch moves through the screen, we can distribute the future flowering sites across a much larger area.
The result we're looking for is a relatively even canopy rather than several tall branches competing with one another.
And this isn't something that happens in one afternoon.
It's a process.
A little tuck here.
Another branch redirected there.
A few minutes of observation every day.
Eventually, the plant does most of the work itself.
This week, looking across the Blue Tent, that process has reached its goal.
The screen is effectively filled.
And that means it's time for the next stage.
────────────────────────
✂️ Defoliation – Cleaning the Canopy Before Flower
This week's main event is defoliation.
And because this technique is sometimes misunderstood, I want to explain exactly what we're doing and, perhaps more importantly, what we're not doing.
Defoliation is not simply removing leaves because we don't like seeing them.
Leaves are essential to the plant.
They're responsible for capturing light and supporting photosynthesis, so removing them unnecessarily doesn't automatically make a plant healthier.
The objective here is different.
After weeks of vigorous vegetative growth and SCROG training, the interior of the canopy has become extremely dense.
Leaves overlap.
Branches cross through one another.
Lower sections become increasingly shaded.
Air movement through the middle of the plant becomes more difficult.
And some foliage is simply contributing less to the productive upper canopy.
So we're performing a deliberate cleanup.
Removing selected leaves.
Opening congested areas.
Improving visibility.
Creating more space between branches.
And preparing the structure for the very different demands of flowering.
The goal isn't:
"Remove as many leaves as possible."
The goal is:
"Remove what isn't helping the structure we're trying to build."
────────────────────────
🌬️ Why Defoliate Now?
The timing is just as important as the technique.
A significant defoliation is a form of stress.
Even a perfectly healthy plant needs time to respond after losing a meaningful amount of foliage.
That's why we're doing this while the plants are still in vegetative growth rather than waiting until we're well into flowering.
Right now they're running 18/6.
They're actively growing.
They're not yet trying to produce flowers.
So if the plants need a little time to rebuild their balance after the cleanup, we have that time.
The sequence we're following is very intentional:
Build the plant.
Fill the screen.
Clean the canopy.
Allow recovery.
Then flip.
I would much rather have the plants enter flowering already recovered from this work than perform a major cleanup while they're simultaneously dealing with the transition into flower.
Once the lights are flipped, the priorities change.
The plant will begin redirecting its energy toward reproductive growth, and I want that transition to happen with a clean, well-organised canopy rather than asking her to recover from major training at the same time.
────────────────────────
🧠 Defoliation Isn't a Magic Trick
Another thing worth mentioning is that defoliation isn't some magical technique that automatically produces bigger flowers.
It's a canopy-management tool.
We're trying to improve the relationship between:
🌱 Growing sites
💡 Light distribution
🌬️ Air movement
🍃 Leaf density
? Plant structure
The upper canopy is already receiving strong light.
The problem we're addressing is congestion.
When four vigorous plants share a 100 × 100 × 200 cm space, the interior can become incredibly dense.
By selectively removing some unnecessary foliage, we're opening pathways through that structure.
Better airflow.
Better visibility.
Less congestion.
And a cleaner starting point for flowering.
It's about managing the environment that exists inside the canopy, not simply making the plants look prettier.
Although...
I have to admit...
They do look pretty spectacular after the cleanup. 😂💙
────────────────────────
🌿 Pickle Lemon Haze F1 – Plant A
And now, back to our girl.
Plant A continues to be exactly the phenotype I thought she might become when she first started showing her personality.
Vigorous.
Responsive.
Confident.
She has consistently been one of the most energetic plants in the Blue Tent.
Every time we've given her something to work with, she's responded with more growth.
Topping?
She recovered beautifully.
SCROG?
She filled it.
Daily training?
She simply kept producing new shoots.
Her internodal spacing remains nicely compact, her stems have thickened substantially, and the foliage has developed that rich green colour we've been looking for.
The most impressive part is probably how much growth she's managed to produce while still maintaining a very manageable structure.
She's not simply growing wildly.
She's growing usefully.
And that's exactly what we want at this stage.
────────────────────────
🥥 Feeding – No Changes Yet
The nutrition remains completely unchanged.
And honestly...
Why change something that is working?
Current feeding:
• Plagron Hydro A — 1.9 ml/L
• Plagron Hydro B — 1.9 ml/L
• Plagron Hydro Roots — 1 ml/L
Current EC:
1.92 mS/cm
pH:
5.8
The plants are showing excellent colour and vigorous growth, so I'm not interested in increasing the nutrient strength simply because we're approaching flowering.
Instead, we'll watch their response to this week's defoliation.
If they continue consuming aggressively and maintaining that healthy green colour, we may increase the nutrition next week as flowering begins.
But for now...
The plants are happy.
And happy plants don't need unnecessary changes.
────────────────────────
💧 The Drip Irrigation Continues to Impress
The Mars Hydro automatic drip irrigation and drainage system has also become one of those pieces of equipment that quietly proves its value every day.
Each plant is receiving approximately 1.2 litres of nutrient solution per 24 hours, delivered through the individual drip system.
The solution passes through the coco and the resulting runoff is automatically collected and removed.
That consistency is particularly useful in a project like this.
We're trying to keep four plants under almost identical conditions.
Manual watering can certainly work, but maintaining exactly the same routine every day becomes increasingly difficult as plants get larger and more demanding.
The automated system removes much of that variation.
The roots receive a consistent supply.
The plants receive the same routine.
And I get to spend less time carrying water...
And more time observing the plants.
That's a pretty good exchange in my book. 😄
────────────────────────
🌡️ Blue Tent Environment
The environment has remained very stable as we approach the transition into flowering.
This week's average conditions were:
• 🌡️ Day Temperature: 28°C
• 🌙 Night Temperature: 25°C
• 💧 Relative Humidity: 65%
• 🥥 Substrate Temperature: 24°C
• 💦 Nutrient Solution: 18°C
• ⚗️ pH: 5.8
• ⚡ EC: 1.92 mS/cm
• 💨 CO₂: approximately 450 ppm
• 💡 Light Schedule: 18/6
• 💧 Irrigation: approximately 1.2 L/plant/24h
• ? Pot Size: 8 L
• 📏 Plant Height: approximately 60 cm
At this point, maintaining consistency is more important than constantly chasing numbers.
The plants are growing beautifully.
The canopy is healthy.
The irrigation is performing reliably.
And the nutrition is producing exactly the response we're looking for.
So for now...
We observe.
────────────────────────
🌿 Four Plants Starting to Look Like One
One of my favourite things about this stage of Project Blue Tent is looking at the tent from above.
It's becoming genuinely difficult to tell the four plants apart.
The canopy is so even that the individual plants almost disappear into one continuous sea of green.
And that's actually a fantastic result from the SCROG.
We started with four individual plants.
Different branches.
Different growth patterns.
Different personalities.
Now we've shaped them into one remarkably uniform canopy.
But underneath that uniformity, the individual characteristics are still there.
And that's what makes documenting them separately so interesting.
Plant A still has her particular way of growing.
She's still one of the most vigorous.
She's still incredibly responsive to training.
And she's still quietly trying to occupy every available centimetre of space.
────────────────────────
🌬️ Cleaning for the Next Chapter
Once the defoliation is complete, the room should immediately feel different.
More open.
More breathable.
Less congested.
And that is exactly what we're looking for before the flip.
We're not trying to make the plants small.
We're not trying to weaken them.
We're simply creating a cleaner structure from which the flowering cycle can begin.
The canopy has been built.
Now we're refining it.
Then comes recovery.
And after that...
Flower. 🌸
────────────────────────
👀 Looking Ahead
This is one of those weeks where the best thing we can do after the work is simply give the plants some peace.
We've spent weeks manipulating their structure.
Now they need time to respond.
I'll be watching the new growth closely, keeping the environment stable and monitoring how quickly they recover.
The nutrient recipe may increase next week depending on what the plants tell us.
The irrigation will continue doing its job.
And if everything looks as good as it does now...
We'll be ready to flip the Blue Tent into flowering.
The SCROG is full.
The canopy is organised.
The plants are healthy.
The cleanup is done.
Now we let them recover.
Then...
we turn the page.
────────────────────────
💙 Thank You
A huge thank you to Zamnesia for making Project Blue Tent possible and for providing these fantastic Pickle Lemon Haze F1 genetics.
A heartfelt thank you to Plagron for the Premium Growbags and Hydro nutrient line that continue supporting this beautiful vegetative growth.
A special thank you to Phytonaut for the LED lighting helping us maintain such a consistent and beautifully structured canopy throughout the tent.
And a massive thank you to Mars Hydro for the automatic drip irrigation and drainage system, which continues making consistent irrigation so much easier.
Thank you to GrowDiaries for providing a place where growers from all over the world can document their journeys, share knowledge and learn from one another.
And finally...
Thank you to everyone following Project Blue Tent.
Whether you've been here since the beginning, just discovered this diary, leave comments every week or simply enjoy watching these plants develop...
I genuinely appreciate you being here. 💙
Four sisters.
One environment.
One experiment.
And four very different little personalities hiding underneath an increasingly uniform canopy.
For Plant A, this week is about finishing what we started.
The canopy is built.
The cleanup is complete.
Now she gets to recover.
And very soon...
🌸 Flowering begins.
Until next time...
Growers Love, happy growing, and take care everyone! 🌱💙
Likes
32
Share


@valiotoro
Follow
This new Banana version is just incredible! I’ve grown the original before, both in soil and in coco, but this RF3 really blew me away 😮
I ended up with two distinct phenos. One turned out purple with amazing tropical fruit and citrus terps super vibrant and exotic. The other one stayed green and was my personal favorite, completely covered in an insane layer of trichomes, with rich banana bread terps that really stood out.🍌🍊🍋
Both phenos were top quality, but that green one was on another level.✔️
Likes
44
Share


@Chedderbob112
Follow
This week I am vegging using an led in my toilet 26 watt on 24 hours a day but am Goni leave the three chronic to hang dry a can’t really fill in ma diary properly n can’t seem to get on to the group chat has been like this for couple of days now so am playing the waiting game but soon as they come out the tent ⛺️ while I will be in trim jail hopefully a get a haf decent harvest it will be a nice smoke but am not rushing the drying process depending on wit results a get but am confident in the quality of the smoke that a hav produced definitely and will grow this strain again anyone with any favourites hit me up @chedderbob112 s2340420


Likes
13
Share


@FlavoursUk
Follow
Week 2 of flower, RO water change with an EC of 1.3. Will adjust from here and observe the next day or two.
Although you watched as I did a major defoliation, as you can see, they have bounced back pretty quickly. As of now, I will be defoliating every few days just to keep the light penetrating the canopy so we have some nice buds come harvest time.
Will be back to update in a few days to update where they are at and if they need more nutrients. pH is set and stable.
Stay tuned until the next update and follow my YouTube and Instagram (Link on growdiaries profile)

Likes
41
Share


@Kmikaz420
Follow
Bonjour a toutes et tous (cette semaine j ai eu un petit soucis sur une melon gum (bud rot) alors que je ne dépasse jamais 50% d humidité mais je pense le problème viens d autre part (les têtes ont triplé de taille en une semaine et vue qu'elles sont en contact c est pas top pour la circulation d air j ai donc enlevé les 2 têtes et désinfecté comme il le faut , j ai également monté un gros ventilateurs en plus )
Autrement tous ce passe plutôt bien d ici fin de la semaine on passera au flusch voilà voilà les amis j ai enfin trouver la force et le temp de sortir les plantes de la tante (hors mis les 2 plus grande melon gum / et cherry cookie) mais promis je les sortirais très vite.




Likes
13
Share


@Sadhus
Follow
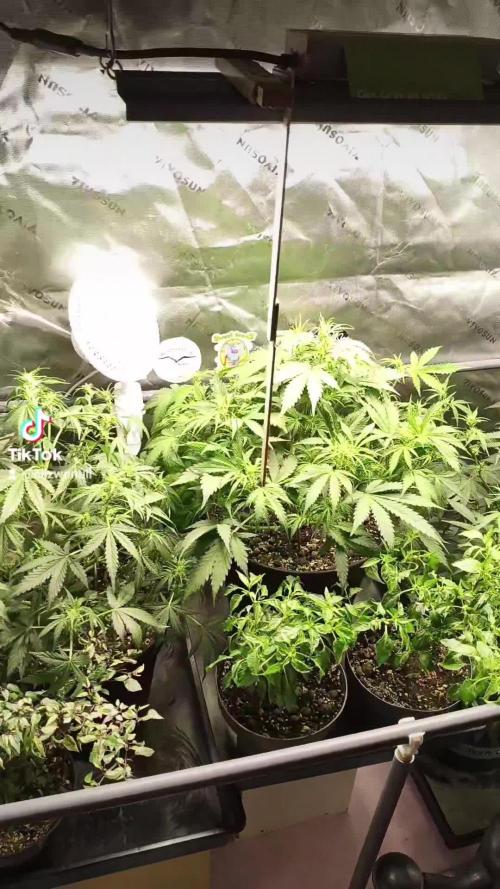
4 ème jour en 12/12 , vpd autour de 1 , légère defoliation, le stretch commence a se faire, plante saine , je suis satisfait pour le moment, les boutures sont très jolies ma table a marée est devenue une vraie jungle bien dense x)
#trolmaster
#madame grow
#seedstocker

Likes
11
Share


@merchandise91
Follow
Just on day 22 now the video taken this morning had few issues very strong through week one, then week 2 I believe nitrogen toxicity as iv done lots and lots of research.... started watering twice in between each feed.. showing pistils now.. plants were tied down day 14.. I am happy with progress overall any tips welcome
Pic of individual plant seems to be behind and leaf curling going to give water today and hopefully that will sort it out
Day 23 - decided to do some defoliation as the growth since yesterday is very noticeable and starting to see signs of budlets at apex.. going to feed them tomorrow 8th strength grow, 8th strength bloom then by day 30 ish just quarter strength bloom is the plan then continue to up dose until half strength bloom at which point I’ll also add some boost.. any pointers appreciated 👌

Likes
12
Share


@Boomer911
Follow
Stage: Week 8 of flowering
Height: The plant has reached an impressive height, with a strong, vertical growth pattern.
Buds: The buds are getting thick and dense, forming a long, massive cola that runs almost the entire length of the main stem. They’re covered in trichomes and emit a strong, citrusy aroma.
Health: The plant is thriving, showing no signs of stress or deficiencies. The leaves are a healthy green, and the buds continue to swell nicely.
Strain Description: Critical Orange Punch by Dutch Passion is known for its vigorous growth and high yield potential. It produces dense, resinous buds with a sweet, citrusy flavor and a balanced, relaxing effect. 🍊🌿
Thank you to Dutch Passion for this incredible strain! 🌱

Likes
21
Share


@OGTrauma
Follow
Ok homies, here i did a topping cut on a , indica mix but a bit updated with some random yet a bit unstable yet updated that marked even more the phenos diferenced as there are clearly two stretchers maybe possesing a slighlty more sativa may happen sometimes on og kush family and expect too as are the more usual indica type, but i hope cut time are similar .It's quite in terms of growing stretch its very short and not good & the ideal if u need some that nor get tall fastly , but im getting into it as i intended tto give better usage on the net i use to not burn my leaf and bud as can be a hazzard on both veg and flower stretch that shit is controllable and im happen future with hopeful distribution . trying to learn from the previous grow 🎈🎂🍰🤙🔥💯
I got like a good reaction to feeding this challeging earth called organic life mix as im taming it by giving a more nitrogen update , including ca mg and at the same time spray them with barrier as both food and pest control uptake. They are far better also in terms of how they are dealing with the previous spotted defficencies. and the growth is as fast as expected of a fast substrate too, but 4 real its more demanding on food as it showed me carencies very early , so you may need to improve it or have a better feeding plan. mine is basic but works.
Likes
14
Share
@Arcadium
Follow
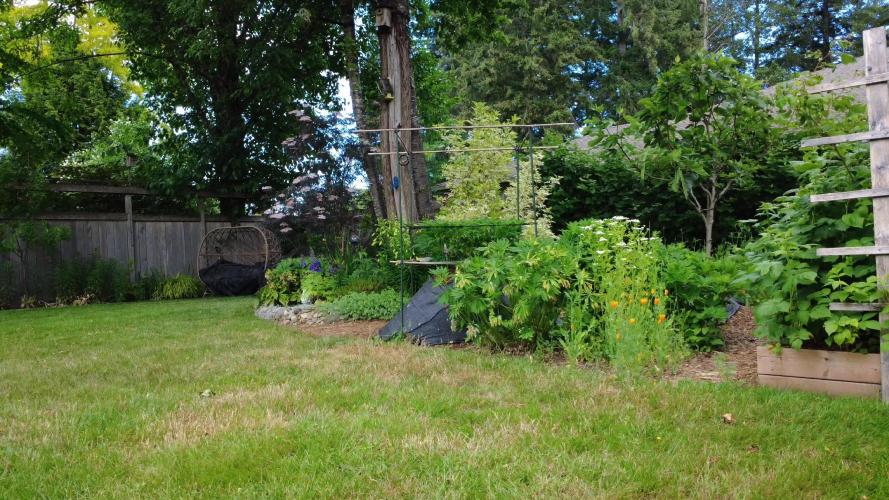
Smooth sailing this week, she's sure gaining height quickly now. Still using bud clips and using the net to guide leading nodes for even spacing, canopy is filling out nicely.
Made a quick compost tea, 20ml Kelp, 4tbsp epsom salts, 4tbsp molasses, ~2 cups home made compost, 4gallons of water, aerate 24hrs, use immediately.
10g airpot is into flower, much more thirsty, had to up the schedule to 90min drip every 4 days, maybe even 3 days, will see. Noticed some minor thrips, nothing major. She should gain another 2-3ft in the next month I'm sure!


