


Likes
Comments
Share


@Bread_n_Buds
Follow
Here we are again ready to start again, always under the sign of Zamnesia, we make our fantastic plants and we show you what we are capable of. We have 5 autoflowering strains and 5 photoperiodic ones and now we present them to you.
This time we are faced with an absolute novelty from Zamnesia, a plant from the latest generation of an immense series that Zamnesia is bringing out, ready to try them all. Here we have excellent parents, the primette result is great, let's also try the Karen Kush. I was amazed by the perfect branding for this strain and so let it be Karen.
To explain my germination method which is a combination of experiences acquired in the field and readings of the right advisors, I have chosen to divide it into phases so whoever wants can follow them and understand better step by step.
- Preparatory Phase ---- Check the average temperature in the room, humidity status to understand if it is the case to start or wait, I decided for the end of August because the temperatures start to drop towards the 22-25 degrees recommended for germination.
Then another thing more or less credible depending on the sensitivity is the control of the lunar phases. I believe in it a lot, it is a method that ancient farmers used to understand when it was best to plant depending on the attraction of the moon. To make my life easier I use a simple app that advises you on the right time to plant, harvest and put in the jar (depending on the lunar phases).
- Phase 1 --- Soaking in water. There are many authoritative friends who advise against this method due to the risk of drowning, but I have always been fine and I follow the rule if it opens in water the seed is almost certainly healthy and will come out of the ground 90% normally.
- Phase 2 --- Opening the seed in water. As soon as the seed opens and the root comes out a little, you have to be very very careful not to leave the seed in the water open for too long. This is why there is a risk of drowning. So as soon as the root comes out, it must be planted. Do not wait for it to stretch out a lot, you can wait a little longer in the absorbent paper, but not in water.
- Phase 3 --- In the meantime, while I soaked the seeds, I prepared my pots: I use small biodegradable pots (choose the ones with holes underneath for drainage). A few hours before working with the opened seeds, I moistened the soil with water adjusted to the right pH (5.8 - 6.2) and Plagron Power Roots. The small root is now open and we can make a little hole with a toothpick, widen it and insert the seed. Not too deep with the root facing downwards. From Serious Seeds we learned the dome technique: if you put a small dome of soil on the seed the water will settle on the sides avoiding overwatering problems.
- Phase 4 --- The plant emerges from the soil. So far I have not put the light, now I turn it on at minimum after half a day of soil to give direction to the seedlings. The first week the light will be gradually brought from 40% to 60% to go to 70% - 75% in the remaining weeks of veg. During the first week maximum, I keep the cycle of 24 hours to avoid stretching. Be careful not to exceed the first week at least with photoperiodic plants.
- Germination % --- In water 20/20 seeds have opened for good luck I'm waiting to talk when they come out of the ground but it seems that we are going towards an excellent percentage of germination..."Not too bad"...
- Soil and Food --- The soil used is entirely organic in every part and is the Plagron Promix that will be used with the 100% organic pack provided by Zamnesia complete with all the main fertilizers for your plant buy it at the link --
https://www.zamnesia.io/it/11457-plagron-easy-pack-natural.html
// Strain Description // Formidable genetics: These seeds contain the genes of Monster Bud Kush and White Widow. High THC content: With 24%, the effects are pronounced and intense. Fast flowering: This indica-dominant hybrid needs just 8–9 weeks to reach harvest. Excellent yield potential: This plant is very generous, if grown in the right way!
- Get a seed of this fantastic strain --- https://www.zamnesia.io/it/10780-zamnesia-seeds-karen-kush.html
- Soil and Fertilizers entirely organic --- https://plagron.com/en
- Growbox --- https://www.secretjardin.com/
- Music and sound --- I made my girls listen to 432hz frequencies and music from www.radionula.com
- Z --- You can find these seeds, much more from the world of cannabis, mushrooms and an incredible series of accessories and gadgets on the reference site not only mine but of many growers ---- https://www.zamnesia.io

Likes
2
Share
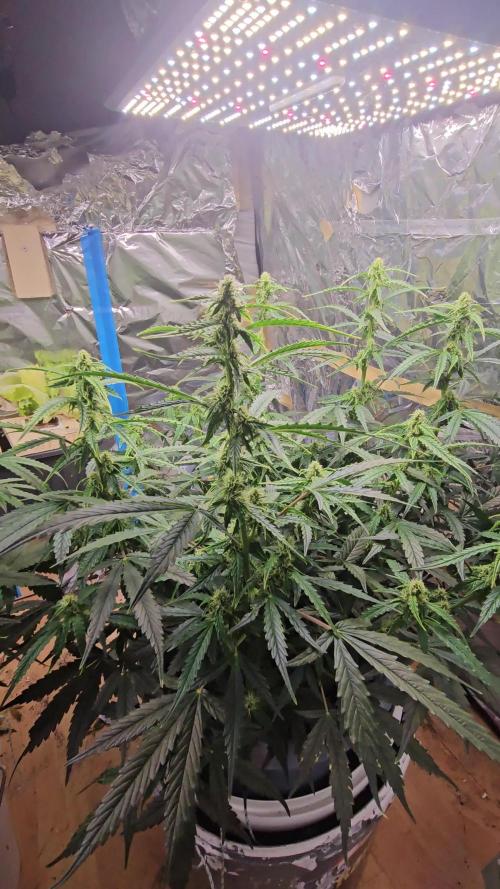

@ReMS90
Follow
Ab jetzt gibt leider kein weiteres schnelles Update da sie jetzt weiter wachsen müssen 😊


Likes
44
Share


@The_Good_Twin
Follow
22 Aug 2021
Today I’m starting to give some nutrients to assist my ladies in their development. I have been using plain pH’ed water to use the nutrients in the soil before giving anything extra.
My girls are looking bleached out and weak. Maybe trying to reduce the nutrients by using the soil for the first week or so in their new homes isn’t paying off. I was hoping to see them flourish, but they aren’t. Growing is all about trial and error, and I’m hoping that my error isn’t going to hurt them in the long run!
I’m starting the “Late Growth, stage 4” on my Flora-Trio 6 part feeding chart, but in the beginning I’m going to give them only half of the recommended amount to hopefully prevent any nutrient burn that they might experience. If there are no negative impacts seen, then I’ll adjust the amount as necessary.
Today I’m giving them a half gallon of water with the following nutrients: CALiMAGic 2ml, FloraMicro 3.8ml, FloraGro 4.5ml, FloraBloom 2.5ml, and Floralicious Plus 1ml.
The initial pH was as follows: C1 - 6.4, C2 - 6.3, C3 - 6.3. I did not need to adjust it, so I didn’t. The TDS going in was: C1 - 636 ppm, C2 - 634 ppm, C3 - 653 ppm.
I was originally planning on giving each plant a gallon of water, but I received enough runoff after only half a gallon. I guess they still haven’t developed an extensive root system enough to require the additional water. It just made it to where I don’t have to worry about making more to give them in a couple of days.
The runoff pH and TDS were as follows: C1 - pH 5.7, TDS 498 ppm; C2 - pH 6.0, TDS 562 ppm; C3 - pH 5.7, TDS 707 ppm.
It’s always funny to see how plants in the same type of soil, and given nearly the same solution still have such varying pH and TDS runoff levels. 🤷♂️ That’s all I have to say. It’s a mystery, but not an overly important one as long as they’re healthy.
The heat in the tent today was somewhat warm, but not as bad as it has been lately. The temperature was 81F, and the humidity was 56%. I’m hopeful that adding nutrients today will improve their color and get them to start developing their branches some more so I can flip them to flower in a little bit. We’ll have to see how it goes.
25 Aug 2021
Today I gave my ladies the second half of the gallon that I prepared a few days ago. They received the first half gallon on the 22nd, so I’m not going to repeat everything here again. To see what they were given read the note above.
I am going to note the runoff levels and the temperature and humidity because they are important to note.
Runoff was as follows:
C1 - pH 6.0, TDS 610 ppm
C2 - pH 6.1, TDS 546 ppm
C3 - pH 6.0, TDS 765 ppm
Again, it just weird seeing plants with different pH and TDS levels when they’re given nearly the exact same solution. 🤷♂️
The temperature in the tent was 81F, and humidity 62%.
Overall, my little ladies are looking better since starting the nutrients. They no longer look bleached out, and the green is returning to her leaves quite well. I decided to measure them today as well to document their growth. C1 is now 16 inches tall, and C2 is 15 inches, and C3 is 16 inches. C1 and C2’s lights were adjusted to be 19 inches away, and C3’s light is at 18 inches to keep the light canopy level. The difference in the light and size is due to the size of the pot C3 is in. She stands taller because her pot is half a gallon larger, but also because the pot has small legs on which it stands on so it sits higher. They’re looking better, so that’s all that I care about in reality.
Good luck, and happy growing everyone!!

Likes
2
Share


@EtnoGrow
Follow
todo muy bien! esperando paciente el desarrollo de los cogollos, conociendo y viendo los puntos de maduracion asi como la fertilizacion ajustando a su maximo que creemos posible para incentivar que los cogollos engorden, ahora en adelante les hare segumiento de la grande principalmente, que es la que cumple con la edad del diario, ya que las otras como se explico en un principio venian recien cultivadas por eso tienen un par de semanas de retraso , tambien hay una hermafrodita, que al detectar como comentamos semanas anteriores aplicamos al tecnica vista de un cultivador mexicano, consistia en romper los brotes de machos las pelotas con el fin de que no vuelvan a salir, dejando solo los pelos estigmas de las hermbras, si bien el cogollo queda maltratado, al parecer se detiene el crecimiento, asi que estamos viendo como rinde ese experimento.
Likes
10
Share


@Martymar021208
Follow
So I had to run out and get cal mag this grow because as you can see they needed it. I would have bought it sooner but my kids come before me and my grow room and just couldn't afford it at the time luckily this flower time is a longer time for this strain and needs to run almost 11 weeks gonna depend on when they tell me there ready but but late then never I hope and I will make sure to flush properly at the end. Overall happy with everything else so far and have a lot to learn still. I won't complain for my first grow ever. Excited about my other grow tho.


Likes
21
Share


@OGTrauma
Follow
Ok brothers and sisters i had a minor drawback regarding to external weather so conditions like ventilation and how much heat generates the lights itself were on check on this week, i peaked with 28°c and 30% humidity, so that explain also the increased ddistance between the lights and the plants , as temperatures are on the rise. Additional height control through some lst and changing positions at ones possibly where the stem and branches lignificated and the support plays no role anymore in order to control the new stems , thus avoid hitting top bulb or side bulb radiation , or ventilators or other plants - food scheme stays on the stimulant side with the exception of barrier as i'm spraying as long as i can during flowering . probably until end of month.
on the side note the autoflowering one is a bit behind compared to the others but is not that bad - for now. finishing result should be monitored if density and potency was affected by non optimal photoperiod for that one gal.
Kind regards :) .

Likes
21
Share


@BLAZED
Follow
W19 (Harvest)
6-6
Last day before harvest.
7-6
Harvest day!
Installed a humidifier outside the tent, set to 55% aiming for a 60% humidity inside the dry tent.
17-6
After 10 days of drying she is ready to be trimmed.
While posting this a couple of months later i found out that i totally forgot to make pictures and video's of the trimmed buds 😅
End result #1:
37 Grams of dried buds.
35.84 Grams of dried trim and very small buds, into the freezer.
I would describe pheno 1 as normal frosty, almost stone like buds, smells chemical with hints of dish soap (i really like it!)
I cant describe the taste but it was very tasty out of the box, before the cure, very sad i only had 37 grams of it haha.
End result #2:
Around 70 grams of dried buds.
43.23 Grams of dried trim and small buds, into the freezer for bubble hash.
I would describe pheno 2 as very frosty buds, little bit fluffy, smells very gassy, with a nice sour taste after curing a couple of months.
Very interesting strain, i will definitely grow it again!
I have some trim and small buds saved up from different strains and i will be posting a diary of the full process making hash of them!
If you are interested in me making bubble hash feel free to follow me as i will make some in the next month, this way you keep notified!


Likes
10
Share


@XoticGROW666
Follow
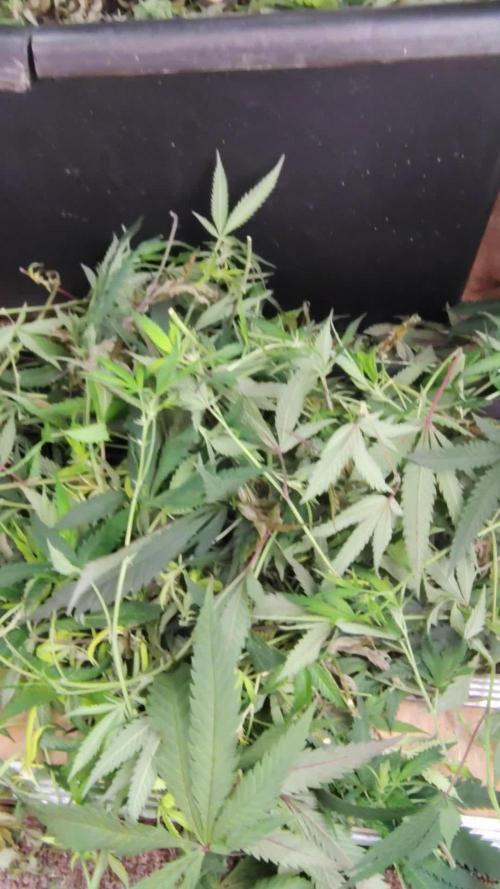
Day 4 in flower. As yu can See this happy wifi gelato is bin repotted all organic grown compost tea & SST tea no bottles no nutes


Likes
23
Share


@Vincent11
Follow
Hi Everybody hope you got a great week. And that you will have even a better one this week.
Little disappointed this week. All been great after defoliation cleared all leaves in way off buds. Responded well.
Been away for 2 nights and because off that that it's a cupboard Grow I needed to close the door at nigh to keep 22/24degrees at night.
But like you understand I was away so night temperature dropped to below 20 degrees in 2 nights and I got a cold Burn on my Gorilla Glue Autoflower.
By the looks off things all I can do is give her another week maximum Two.
And get her down. Next week will be week 8 that's what the Royal Queen seeds site says for finishing it. 8/10 weeks
Sorry to disappoint everyone with that grow.
Have a great week.

Likes
53
Share


@Still_Smoq
Follow
10 September Harvest - see pictures. While some growers leave the plant whole when they cut, I do not. It is a personal preference and situational convenience if your a home grower. I chose to cut large, long branches, and remove any whole water leaves, as long as it doesn’t interfere with the bud formation. I don’t trim yet. This is done for a few of reasons: 1) It’s my last good close-up look at her until another 5 days or more, 2) I don’t want wet leaves drying on my buds if I can help it, and 3) I occasionally like being able to shine a small LED flashlight on the flowers while its drying. Mold is our greatest problem as growers, it can destroy a beautiful grow right up until the end process. Then I hang it in a dark closet, provide circulation and ventilation. Light and heat, anything above 80 degrees F, will start a break down in cannabinoids during the dry, it is ideal to stay away from both. I’m fortunate that a humidity level of 50- 55% and temperature of 65-70 degrees F is fairly consistent and easy to maintain. Anything below 60 degree F will prevent the adequate drying out of chlorophyll. Almost all my flower routinely take 5-7 days, some a little longer, to properly dry out.
15 September Trim - see pictures. First you’ll notice the buds have shrunk up to half their original size. This is just a fact that we growers have to deal with. Due to evaporation without uptake of water, it takes about 3 days for the chlorophyll to dry up, then slowly go through a chemical change. Along with the leaves, cannabinoids also begin a chemical change after 3 days called decarboxylation. A slow process where the THC level increases while curing. You want the leaf to be dry so they can be hand trimmed easily, but you do not want that bud so dry that it starts to fall apart in your hand. Try to handle carefully by the main stem to avoid touching the bud all together. A lot of these cut leaves will be covered with trichomes, good for making oils, or other products, it’s an option worth looking into keeping it. After trimming, I do separate a few premium flowers for my first smoq. Then loosely fill wide mouth quart mason jars with about 1 oz/28 gr of product per jar. I seal the lids for a few hours to determine what relative humidity they are at, see hygrometer pic, before making a decision to put in a 62% humidity control pack of my choice or to wait, then place in secure in a cool dark place with stable humidity and temperature. It is very important to then observe/burp or exchange the air as needed, up to several times a day, until 62% rh is achieved. Once your close to to your mark, put in your desired RH level control terpene shield. If you have a problem getting there: 1) it has dried out too much, no real solution, try to put several large cut stems left over from harvest into the jars with the buds to try and increase humidty, 2) it has not dried out enough, in this case no problem, just remove and dry out a little more. This is also a personal choice, some people like it drier in the 50% plus range. Whatever you do, research and preserve. At that time burping is no longer required. Cannabis will reach its peak potency potential at about 40 or so days into the cure.
The finished product should be a perfect grind when cured correctly without clogging up your grinder, this could take a month. Now that I’ve said that, I’m sure someone has grown something that they have not been able to grind. It can remain in this state for an easy 6 months with little change, locking in all the terpenes and potencies. All you need to do is occasionally check the product to ensure there are no molds. If your grow/harvest/cure techniques are good this should not be an issue. It would not be uncommon to find many cannabis strains will last, with small degradable change, for up to one year after being stored this way. Using an airtight glass container, controlled relative humidity, maintained low temperature, and kept in darkness will equal maximum shelf life. Always avoid direct sunlight and temperatures above 80 degrees F.
The reasons I’ve ultimately chosen Deep Water Culture as a grow medium. Each has their own pros and cons indeed. I found the most efficient, less maintenance and ideal solution for my situation was DWC. Burdens to overcome depend on size up set-up; initial equipment cost, size of containers, ph monitors, air pumps, type of water to use-reverse osmosis, RO cost/set-up/maintenance, ways to transfer/change water and nutrients, what nutrients to use and schedules, takes several grows to learn and understand, a 1 year learning curv, easy to nutrient burn. The Benefits of growing in water; no dirt, no bugs, no diseases, rare nutrient deficiencies/toxicities, steady and rapid growth that enables the plant to reach its genetic potential. After harvest, there is about a 1 hour equipment cleanup, sterilization and turn around process before replanting. Cannabis will perform in so many different ways and mediums, no one way is the best and the best way is the one you are using, right. Chose what works for you in the long run. There will always be an initial cost in set-up. My advice if one were in need to cut corners, I would not recommend cheap lights. This single factor is the most critical, afford for the best. The notion that organic and water has a different taste, flavor and potency effect is absolutely debatable. The more we learn the better we grow and experience is always the best teacher.
This is what works for me and my methods of growing in general from beginning to end. A BIG “Thank You” to everyone who stopped by to take a look. My next diary will start at the beginning of October 2023 with a Forbidden Runtz Auto. There will be minor differences during the grow. I enjoy Auto strains simply by what can be achieved in a short time. No matter the strain they will unveil one thing in common, the demand for attention. Many times over it is the anecdotal gardener that surmount plant scientist. Last should I mention, do not forget to stop and enjoy the fruits of your labour...


Likes
19
Share


@Ixnay
Follow
First pistils came through this week! Switched the 'bloom' switch on the light to double LED count and add the red to the spectrum.
Defoliated lower growth again on day 45 before noticing the pistil 48 hours later.
Spotted a nutrient burn, and that I haven't been watering until enough runoff so possible nute/salt buildup?
I also realised the plant was drooping before feeding so going to increase feed volume to keep the coco more moist.
A nice amount of main colas considering her rough childhood.
Fed no nutrients from day 47-49, just feeding 5.8pH water to reduce salt content. Water was 60PPM at 5.8pH and after 8L still got 500PPM runoff. Definitely need to change feeding method. Thanks for the tips to those who answered!

Likes
32
Share


@MadeInGermany
Follow
Info:
Unfortunately, I had to find out that my account is used for fake pages in social media.
I am only active here on growdiaries.
I am not on facebook instagram twitter etc All accounts except this one are fake.
Hi everyone :-)
It has developed really well so far :-).
Next week she will be put in the flower tent and before that cuttings will be taken :-)
It was poured twice with 1 liter each this week.
Otherwise everything was cleaned and cleaned.
Have fun and stay healthy 🙏🏻
You can buy this Strain at :
https://www.zamnesia.com/de/5165-zamnesia-seeds-kalini-asia-feminisiert.html
Type:
Kalini Asia
☝️🏼
Genetics:
Black Domina x Purple Kush
👍
Vega lamp:
2 x Todogrow Led
Quantum Board 100 W
💡
Bloom Lamp :
2 x Todogrow Led
Cxb 3590 COB 3500 K 205W
💡💡☝️🏼
Soil :
Canna Coco Professional +
☝️🏼
Fertilizer:
Green House Powder Feeding
☝️🏼🌱
Water:
Osmosis water mixed with normal water (24 hours stale that the chlorine evaporates) to 0.2 EC. Add Cal / Mag to 0.4 Ec Ph with Organic Ph - to 5.5 - 5.8 .
Likes
11
Share


@GREENPHOENIX6262
Follow
*Week 5 Flower 09/24*
Thus far both both plants are flowering and budding nicely, Trichomes are setting in accordingly, Increase in Phosphate and Potassium nute feeds.
Both plants have appeared to stop growing in height settling in at 48Inches.
Top COLAS are pretty dense and the aroma coming off both of them is bright and vibrant
White Hairs are starting to turn bright orange.
*Week 5 Flower Mid week update - 09/28*
Both plants have reached max height (48 Inches)
Bud sites are filling up and have become more dense with trichomes cover through the flowered bud.
60% orange hair coverage - Nearing harvest
*Week 5 Flower End week recap 09/30*
Both Apple Fritter and Critical+2.0 nearing harvest
Cutting back on nute feeds starting tomorrow and will increase clean water feeds
Flushing will begin in a week - both will be harvested in 2 weeks.


Likes
9
Share


@russrahl
Follow
Plants took a hard hit with bad ph levels in week 4 for a few days but are growing strong again and I will probably veg till the end of week 6 on these girls and switch to flowering in week 7. Overall it’s going good, water temps are a steady 18 Celsius with the thermoelectric water cooler I built and the small ac unit In the tent is holding the air temps between 23-25 Celsius. I added 4 gal of fresh water and nutrients at full strength to the reservoir on Day 38. Also the first lower screen was installed and I tied down/tucked a few of the larger branches to the screen.

Likes
22
Share


@ButterfliesLittleFarm
Follow
Hello Diary.
The third week of flowering is over, what I would comment on first this week is the scent. Fat Banana began to spread a wonderful fruity scent, like some fruity candy. 😋 So far on my small farm no strain has smelled like this at this stage of flowering.
The plant is full of flowers and as you can see in the photos, they fill up nicely. 👍
Brownish spots have started to appear on some leaves, I will monitor the development and try to detect what the cause is. 😯
Watering is standard, I water the plants about every three days. Preventively for now I add CalMg and every other time I add BioBizz. I am preparing about 7 lit. water with which I water all three plants evenly.
Here’s what he looked like all week.
02/11/2020 - Day 39.
Watering. I added BioBizz and preventive CalMg. p.H. I adjusted to 6.5 with Plagron’s Lemon Kick.
Temp / Humidity on the farm - 26.7 degrees and 42% humidity.
05/11/2020 - Day 42.
Photographing and watering. This time I just regulated p.H. at 6.4 and I didn’t add anything else. Fat Banana really looks beautiful so I also took photos on a black background.
Temp / Humidity on the farm - 25.6 degrees and 41% humidity.
That’s all for this week, see you soon.
Likes
16
Share


@NAG420
Follow
Start of week 6 the end of week 5 she was just having her pistols come out. She is doing great growing fast I might have to buy bigger tent but will see what happens. Daytime temps are74/76 and nighttime temps 68/70 RH is now at 54%. New I have not even flushed or used sledgehammer because she looking so hungry at times. I did major defoliation on her had some many big fan leafs block lower bud sites to be also did a ton of tie down to try to get the last few stretches out the lower area.