Likes
Comments
Share
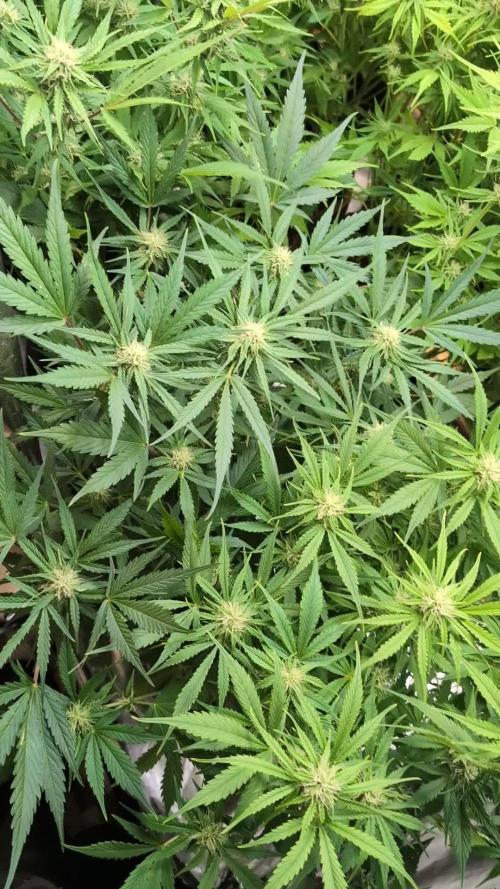
Tag 49 - Ende der 7. Woche. In dieser Woche haben die Blüten nochmal ordentlich an Volumen dazu gewonnen und produzieren eine dicke Harzschicht. Auch der Duft der Blüten wurde in dieser Woche intensiver. Da sich die Pflanze nun vollkommen auf die Produktion der Blüten konzentriert, habe ich den Dünger nochmal etwas angepasst/verändert um der Pflanze alle Nährstoffe zu liefern die sie für die Produktion der Blüten benötigt. An Tag 43 wurde die Pflanze gedüngt. Nährstofflösung: 2 ml/l - B-52 Advanced Nutrients. 4 ml/l - pH Perfect Sensi Bloom Part A 4 ml/l - pH Perfect Sensi Bloom Part B 2 ml/l - Bud Candy Advanced Nutrients. 2 ml/l - Big Bud Advanced Nutrients. Davon hat die Pflanze 1l an Tag 43 erhalten.
Likes
48
Share
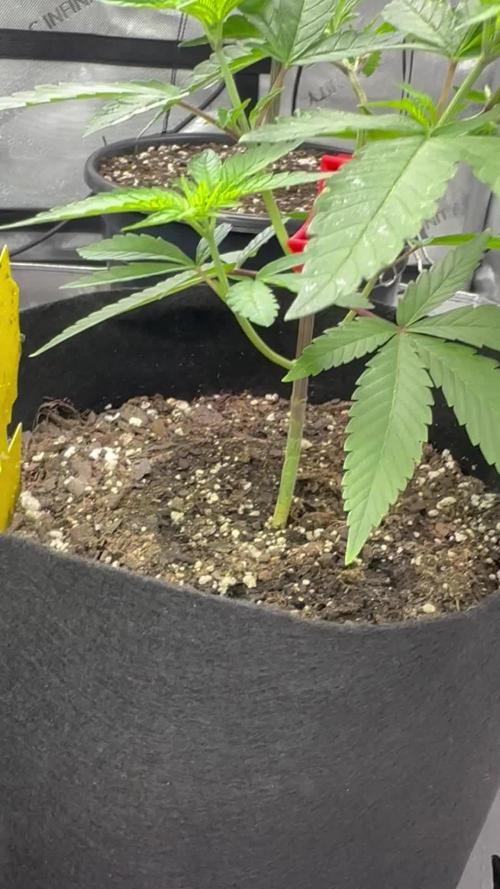
Day 17 17/07/24 Wednesday De-chlorinated tap Water today with calmag pH 5.9. It was a humid week🤦‍♂️, green house could not air out!! She is surviving and doing well though. Day 19 19/07/24 Friday Lite Feed today, 250ml each pot small run off. Seeing excellent start to these babies. Let's get it 👌💚 Day 21 21/07/24 Sunday De-chlorinated tap water pH 6 with calmag 5ml to 5L. Watering in 1L each day from now. Updated video
Likes
12
Share
@OGbros
Follow
the roots broke the plastic basket😱 Very strong genetic, very recommended👽
Likes
6
Share
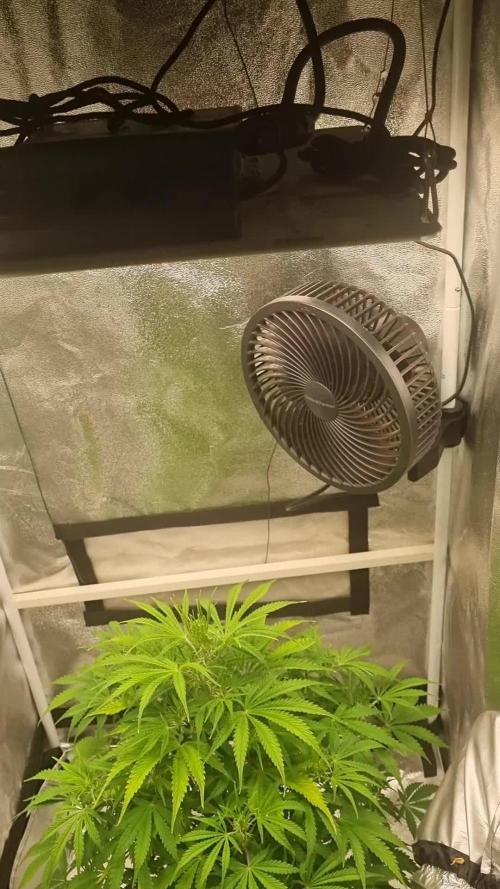
She's coming along really well, I think she's almost done stretching, hopefully we will begin to see her bud structure fill out really well. The weather has been frigid outdoors, 11°F all week. My heater from AC Infinity is holding up incredibly against the temps. Can't wait to see this one through, I just know it'll be a good one.
Likes
43
Share
@Coopmc
Follow
One starting week 3 the other starting week 1 I’m so impressed!! So excited!!
Likes
24
Share
@Doubleb84
Follow
Great harvest! Ended up a little shy of 12 ounces from the two plants, all super dense sticky top buds!! It’s smooth, flavorful and strong! Love it!
Likes
24
Share
Muy buenas familia justo ahora mismo las acabó de regar y creo que será el último riego con alimentos que le daré los siguientes sólo serán con el pH a medida y asta cochesar según yo ya más o menos le quedan un par de semanas y la verdad q tienen una pinta 🤤🤤🤤ya quiero darles un mordisco 🤣🤣🤣🤣🤣🤣e visto las hojas como un poco estresada nose si es por que se me fue la cabeza y tarde un poco en hacer el riego o se me está torciendo en la recta final ustedes como la ven familia espero sus consejos que tengan buena semana familia paz
Likes
70
Share
All feeds with nutes use either a whole ratio or combination of "Veg Mix" and "Bloom Mix"concentrates DILUTED in water until a total ppm of add in is reached using a (Total Dissolved Solids)TDS Meter measured in PPM (parts per million). The "Veg Mix" concentrate will eventually be added in smaller ratios and "Bloom Mix" concentrate what will eventually replace the "Veg Mix" concentrate entirely with the ppm and ratios listed when I feed. Veg mix recipe is on week 3. Bloom Mix recipe is on week 5. Day 28 Just a quick update for this morning since I had to move the ties a little. LST, I now have them above the 3rd node branches. Stats are normal and the growth tips are turning upward now. Stats 73F/ 63% RH /IL Vent at 33% - Lights also same as before 345ppfd highest, 330 center, and 315 at lowest. No need for adjustment. She seems to be taking the training well. Day 29 Water day - checked last night and decided it was time again - Water by weight again so no runoff to measure at about 4 cups. (4 days since last feed by weight) 13lbs even par is 15lbs 4oz so I prepared 2lbs 4oz of water. Tested my meter and discovered it needed calibration (the temp is off and cant be calibrated - so I used a trusty meat thermometer. started with 4ppm and added 300ppm of epsom and vegmix ph balanced to 6.34 at 69.8F - then splashed with H2O2. Poured around roots and splashed the stem base - sprayed some on the leaves and use the whole amount. Had to adjust lights now to be brighter so I brought them down to 18.5" and ppfd is now 375highest 360 center and 345 at lowest. VPD is normal at 1.0 with 73F /63% RH /33% IL Vent - fans are pointed to directly now as the leaves are starting to get rough feeling - so I moved them a bit to blow less directly Training is doing good nice upward turn on the training (making small LST movements with the ties other than than... just letting it make new branches. Day 30 Checked PH and got 5.0 on my meter(+1.25 tested differential = 6.25) Stats normal too - 73F /64% RH /33% IL Vent - Lights at 385highest 370 center and 355 at lowest Removed cross ties since they are no longer needed to hold the fan leaves- training still looking nice as the new nodes are formed with 2nd node leaves growing already. Day 31 Identified an issue this morning - went back through my pictures, identified the start, looked at the day before, and noted my changes that I took notes on at that time. Went to google to diagnose a few possible hypothesis and am now testing with a treatment. (suggestions from more experienced growers welcome) This morning the issue was brown spots on the older fan leaves. Mostly just the left fan leaf. Seems to have started 2 days ago (day 29) when I changed the lights and fed her. When I fed her, I left water droplets on the leaves instead of drying them off after a short time (I had been drying them with a tissue after a wet pic. The fans were also adjusted after the lights were dropped closer as well. Hypothesis: I think the water was magnifying the light and caused light stress at the those spots. I dont think the wind of the fan had much to do with it other than they helped dry the leaves faster as noted by the water being completely gone by the time I took pictures later that night for measurements. Test: Raised my lights to a max of 350ppfd (from 385 highest reading this morning) Had to adjust fans again since they rest on my lights. Will observe looking for improvement over the next few days. ... another possibility was given to me by Guru @Roberts (thank you) as it possibly being a ph issue locking out calcium. So I thought I might test ph and then try diluted cal/mag in a spray if my soil is too low (also looked at pics and seen VERY close similarities in my pics and those) and so on that advice, I tested/calibrated my soil meter (it FINALLY calibrated for me!)I found my soil was avg of 3 readings at 5.153 (5.08,5.09,and 5.29) NOT GOOD - potentially locking out most all nutes. I weighed out about 2 cups of purified water with and added about half ml of CalMag, ph balanced the water to 6.5 at 69.7F (my research shows Calcium lockout starting at 6.3 or lower) and splashed with H2O2 - I poured most around the base and sprayed the leaves too. I made sure to use the whole solution by pouring the last of the solution in the spray bottle over the stem and stem base. EOD follow-up Found a possible calcium blockade in my ph and on my leaves (of which are now starting to curl so I placed my fans on oscillate to ensure they aren't doing more damage) --- fully documented now. otherwise measurements are now documented too. -- second node is starting to pull away from the last top so I will be looking to top again (3rd of possibly 4 total) and then HST and bind in a new spot Day 32 Doing a morning and evening check her now while I see this issue resolved. So far no sign of improvement since last night - might have gotten worse in comparison (will check pics side by side today) but I think because it's a immobile micronutrient so it should take time to stop then reverse. So in the mean time I am doing a slurry test as a 2nd test for my soil before I treat it. I took soil from 3 different spots and made sure I got some from about 4 inches deep in each spot (ensured calibrations were still good with buffer tests) 1st test is a PH meter tested directly in the soil. After using the 2 cups of 6.3 yesterday I got 3 readings today = 5.47, 5.32, and 5.5 to avg 5.43 - (yesterday's readings prior to treatment were 5.08, 5.09, and 5.29 to avg 5.153) - still far below the normal 6 to 7 for soil and the requirement of 6.3 and above for calcium to enter roots. suggesting again lockout. So while I am checking the plant conditions I also looked at the new nodes - 2nd node is starting to pull away from the first, but not quite enough to top yet - thinking I will be able to top tomorrow evening - should be able to correct the ph tonight, so I can see if there's results in that by then as well. I also set the fans to oscillate last night, so here's a video for that now. Measurements, ppfd, and vpd will be in tonight's check-up Day 32 So I started this evening by testing the run off with 2 meters, 5.7 and 5.67 - prepared 1 gallon of 7.5 ph water and splashed with H2O2 (checked with both meters) Before flushing, I documented the leaves again - still curled and look very dry but they still have some flexibility with them - they dont seem to getting any worse so the spray may have gotten enough to the leaves most affected. The new nodes and growth tips seem to be okay but not growing as fast as they were. That would still mean that the soil needs treatment before the roots begin to die off and I end up with stunted growth overall. SO I flushed the whole gallon and noted the runoff from the sides and bottom. I then tested the soil directly with 3 readings 5.95, 5.8, and 5.73 for avg 5.826 and tested the runoff water with 2 separate meters for 5.91 and 5.85 Not sure if I should feed dunk in 7.5 still or just use that number on the next feed in like 3 or 4 days. will discuss Other than that ppfd highest is 360, 350 at center, and 330 at lowest. VPD was 1.0 with temp at 74F /63% RH /33% IL Vent Growth tips could be ready to top again tomorrow night, but I would like the get the ph taken care of first. Day 33 Started the day by noticing the lower branches seem to stop turning and the next level branches seemed to have finally turned but nearly as fast as the first. (Noticed them having a start yesterday) Newer branches dont have any signs of issues. So the plan today is to make Bloom Juice for later. Feed Dunk with 100% Veg Juice at a ph of 7.3 test runoff and ppm. Top the 4 nodes and remove the lower leaves. Calcium issue or not, that was always the plan with main-linning the plant. However, because of the health issues, I dont think I am going to go past these 8 colas - rather instead I will simply stop here and do some HST to set them how I want them to grow and let her recover and finish her veg for about two or three weeks. Dunk had 300ppm of Epsom, Veg juice, in a little over 3 gallons of purified water. I had 7.4 ph and splashed with h2o2. I pushed the entire plant into the water and soaked for a few seconds. Drained by hanging the pot up for about 10 minutes and the stream started dripping instead. Checked the runoff with 2 meters 6.01 and 5.93 with 2580ppm. Then I topped all four nodes and removed the fan leaves from under my mainline. I used LST to finger press the new branches apart into the direction I plan to move them to get the nodes powering up. Next I will wait for a day to do HST on those new branches. Tonight I will simply let her rest. VPD still at 1.0 - 73F /63% RH /33% IL Vent - Lights are at 365 highest, 355 center, and 335 lowest. No need to measure for growth now as I dont plan to top anymore Day 34 Early entry to day for HST the morning after topping. So I started off the morning checking stats and health. PH levels are still low. 3 soil meter tests 5.41, 5.41, and 5.44 for an avg of 5.42 - kinda at a loss here but can only monitor now. VPD and lights are mostly the same - 74F /63% RH / 33% IL Vent - VPD not relevant today as the settings are the same and I am using HST to change the plant position. leaves are noted for future reference - all four lower fan leaves have signs of calcium deficiency but not progressing nearly as fast as the first two did, so I think my attempts via higher ph water and feed may have helped. (I know the microbes in the soil are supposed to help get past ph issues , but mine seem to not be heathy) HST used a cuticle rod from my wife's nail case and a paint stick to press the rod against the branches and smash the inside of the elbows I want to bend. LST I then cut 4 strips of garden wire at the same length, hooked the ends like candy canes and aligned them about 1/2 inch above the new node and into the soil. From the side they look level but have the leaves now facing sideways. They will turn in a day or two.
Likes
24
Share
GORILLA COOKIES 🍪 FF / FASTBUDS WEEK #12 FLOWER WEEK #4 FLOWER This has been another good week for this lady her buds are getting bigger with decent trichomes coverage! Stay Growing!! Gorilla Cookies FF / FASTBUDS
Likes
18
Share
@Siriuz
Follow
Hey guys whats up? We move her to a bigger pot to make sure she expand her roots and grow bigger We add water every 24hrs to keep her humid but not too much just enough Also we have been adding veggie nutes until today... We switch to bloom nutes and now we are around 1500ppm. Added like 300/400ml plus 50ml of plain water.... And thats about it.... Let's see how she grows I am sad my kitty escaped from home We have been waiting for her to come back This is the third night without her We did everything we could to find her This really sucks but the only thing we get to say is that we never saw her dead Which give us hope.... We really hope she does come back This is the first time she does something like that we dont even know if she ever will But people said to wait for at least 1week to a month the la test.... I just hope she does! Anyways.... Reason im mentioning my girl Is because her name was bunny And the day she escaped She ate Part of my strawberry cheesecake (of one of those fan leaves) And I will keep that one til end Because yeah she will always remind me... Oh well... Lord im just.... Waiting for this strawberry cheesecake so I can chill and keep hoping she comes back >.<
Likes
63
Share
@MarcXL
Follow
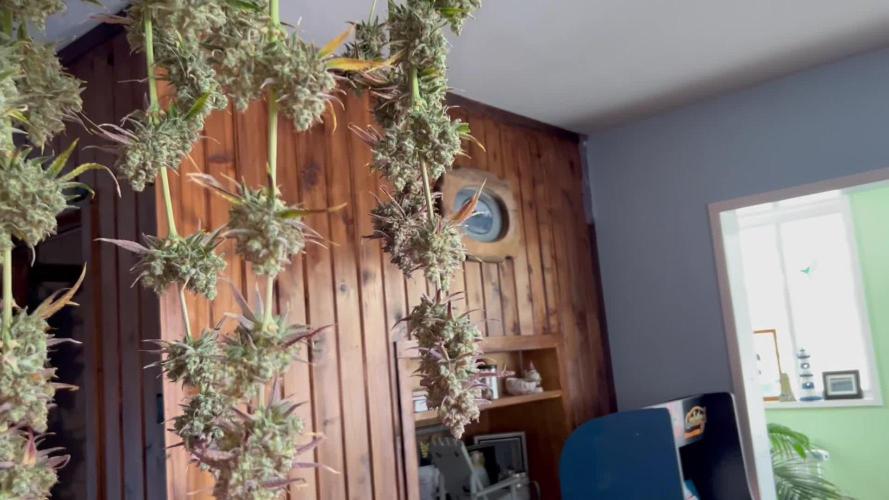
Easy grow cycle, 5 weeks of vegetation and 7 to 8 weeks of flowering and they are good to harvest. For drying I only removed the bigger fan leaves. Now they are hanging upside down in the tent to dry for about 8 to 10 days before trimming and getting a proper dry weight.
Likes
50
Share
Week 5: Transplant Time & Root Power! Oh man, this was one of those weeks! We transplanted all five phenos into bigger pots, and let me tell you, they’re thriving! (Check out the complete video episode for all the details 😉). The girls are looking amazing, all pretty much the same size for now, so I don’t have any favorites yet—but let’s see what the future holds! For photos, I used both my Nikon P900 and Sony A6000, with a bunch of lenses and filters to preserve the true colors—these LEDs are powerful! Current Setup & Conditions This week, they’re still chilling with their sisters in the big tent, but in about a week, they’ll be moving into the TrolMaster ecosystem for even better environmental control. Watering: pH 6.06, EC 0.96 Temperature: A bit cold , but it is what it is. We’re facing some freezing outdoor temps (as shown last week in the frosty veggie garden pics!), yet these Runtz are holding strong like true champions. 💪❄️ Nutrition: Still on the Aptus Clean Program, with: Regulator System Clean RO Water Conditioner All-in-One Liquid Root Development: The Real MVP! Let’s go deep on roots! The mycorrhizae in the Pro-Mix soil has been working its magic, and I’m still boosting them further with a touch of Aptus Holland Mycor Mix. The root development on this transplant was insane—super white, healthy, and ready to explode with growth. What Are Mycorrhizae? The word “mycorrhiza” comes from Greek: • Myco- meaning fungus • Rhiza- meaning root Mycorrhizae are a type of beneficial fungi that form a symbiotic (mutually beneficial) relationship with plant roots. These fungi extend far beyond the root zone, creating an underground network that helps plants absorb water, nutrients, and improve overall health. This is not a single species but rather a whole category of fungi, mainly divided into: 1. Ectomycorrhizae – Live on the outside of plant roots, forming a sheath around them. Common in trees like pines and oaks. 2. Endomycorrhizae (Arbuscular Mycorrhizae, AMF) – The most beneficial for most crops and cannabis. These penetrate root cells, forming structures inside the roots that exchange nutrients. Where Are Mycorrhizae Found in Nature? Mycorrhizae naturally occur in forests, grasslands, and undisturbed soils worldwide. They play a crucial role in maintaining ecosystem balance by helping plants access nutrients from the soil. In a natural environment, plants are constantly forming relationships with these fungi. However, in modern agriculture, excessive tilling, chemical fertilizers, and fungicides have reduced their populations, making supplementation necessary in many cases. How Do Mycorrhizae Work? Once mycorrhizae colonize a plant’s roots, they start forming an underground fungal network called the mycelium. This network extends the plant’s reach into the soil, acting as a second root system. Benefits of Mycorrhizae: ✅ Enhanced Nutrient Uptake – Mycorrhizae help plants absorb phosphorus, nitrogen, and micronutrients that would otherwise be unavailable. ✅ Improved Water Absorption – The fungal network can reach deeper into the soil than roots alone, helping plants survive drought conditions. ✅ Stronger, Healthier Roots – They promote thicker, more robust root systems, reducing transplant shock. ✅ Better Soil Structure – They produce glomalin, a protein that improves soil aggregation and helps retain moisture. ✅ Natural Pest & Disease Resistance – Healthy plants with strong mycorrhizal relationships tend to be more resistant to soil-borne pathogens. How Mycorrhizae Help in Cannabis & Gardening In controlled growing environments, using mycorrhizae is a game-changer. Since cannabis relies heavily on phosphorus, the enhanced nutrient uptake provided by mycorrhizae is especially beneficial. Best ways to apply mycorrhizae: • At transplant – Dust roots with mycorrhizae powder or mix into soil. • As a soil drench – Some liquid formulations allow fungi to colonize even after planting. • Mix into your growing medium – Using pre-amended soil like Pro-Mix HP Mycorrhizae ensures roots have early access. Pro Tip: Mycorrhizae need living roots to survive! Avoid using synthetic fungicides or excessive chemical fertilizers, as they can kill the fungi. Think of mycorrhizae as a natural root booster. They’ve been around for hundreds of millions of years, helping plants thrive in all conditions. By using them in cultivation, you’re mimicking nature, ensuring your plants grow stronger, healthier, and more resilient. When used correctly, mycorrhizae can increase yields, improve plant health, and reduce the need for synthetic inputs—making them a must-have for any serious grower! Can’t wait to see how they’ll look in the next transplant! I made a few changes to my improvised photo studio, including a pink background for now—because why not? Let’s keep things fun and full of color! 🌸📸 Massive gratitude to all our sponsors and of course, a special shoutout to Zamnesia, Plagron, and Grow Diaries for making this amazing cup happen. 🙌 And to the community—followers, supporters, lovers, haters—I love you all! ❤️ Let’s keep pushing forward, learning, and making this grow legendary! Stay Tuned for More! Next week, i may be moving them into bigger pots and getting them into their final environment. You won’t want to miss this next stage! See you all next week—stay tuned, keep growing, good luck to all and let’s make history together! 🚀🌱 Genetics - Runtz https://www.zamnesia.com/6000-zamnesia-seeds-runtz-feminized.html Nutrients - Plagron https://plagron.com/en/hobby - Aptus Holland https://aptus-holland.com/ Controls - Trol MAster https://www.trolmaster.eu/ LED - https://www.futureofgrow.com/en LED - https://www.thinkgrowled.com Soil - https://www.promixgardening.com/en Germination - Cannakan https://cannakan.com/?srsltid=AfmBOopXr-inLXajXu3QFgKXCXXos4F1oEvScjMKIB5MR5dk8-GJ-F49 DOGDOCTOR 15% off Smoking Papers - https://ziggioriginal.com/ Terpene saver - https://grovebags.com/ As always thank you all for stopping by, for the love and for it all , this journey of mine wold just not be the same without you guys, the love and support is very much appreciloved and i fell honored with you all in my life With true love comes happiness Always believe in your self and always do things expecting nothing and with an open heart , be a giver and the universe will give back to you in ways you could not even imagine so As always, this is shared for educational purposes, aiming to spread understanding and appreciation for this plant. The journey with nature is one of discovery, creativity, and respect. Let’s celebrate it responsibly and continue to learn and grow together! Growers Love To you All 💚 #EternityGrowCup #RuntzHunt #GrowersLove #CannabisCommunity #AptusHolland #ProMixSoil #TrolMaster #Zamnesia #Plagron #ZiggiPapers #Grovebags
Likes
37
Share
@eezeegrow
Follow
Babies are growing soooo fast. Very happy about this strain! Can't wait for a tasting session... 😉
Likes
5
Share
@MyStery21
Follow
Same as her sister, Compost tea for the first time, hope she gets better.
Likes
8
Share
It's Day 54 Week 08 0f Flower For My 02 Kombucha Cream by atlasseed . And For My Snow White and SpliffStrawberry by Spliff Seeds Amsterdam . So Today I Started My Day By Checking My Tricomes On My 2 Kombucha Cream. The 02 Where Looking Fully Milky So My 02 Kombucha Cream Got Flushed TODAY with Some Flawless Finish by Advanced Nutrients . The 2 Received 80ml of Flawless Finish mix with 1OGallons Of Water Ph at 6.0. Tomorrow they will get Rinse off with ph balance water. Yesterday I watered my Snow White and SpliffStrawberry Ppm where down to 100ppm. All 4 Plants will get a nice ice bath in a few days. My plan is to check the Tricomes on the SpliffStrawberry In a few more days she was still Milky when I check her yesterday. I will chop her down next weekend. And the rest will get the chop at 30%Amber Tricomes. Happy Growing Growmies 🤘🏻
Likes
7
Share
Esta cosecha fue muy buena con excelentes resultados de flores muy compactas y demasiado resinosas , la genética en sí es muy resinosa con olor muy característico , con sabores terrosos muy marcados .
Likes
20
Share
Was a productive week with the aerogarden grow box. Cleaned the tank, water pump, air stones, nutrients probe and a massive massive clean up with the plant itself. I must have removed close to a pound in leafs from this plant over a 3 day period, every time I'd look at it id see a section that I missed. I lowered the PPM down a bit and also trying to keep the temperature in the res down a bit also. Hoping to be done in a few weeks. Happy growing everyone
Likes
80
Share
Hi all. Welcome to this run withbthe Viparspectra XS1500 which i was kindly sent to try by their helpful rep Valerie. As I have a fairly good space to use for my main grow , it seemed an ideal time to explore a few options while I wait for space to appear following upcoming harvests. The opportunity hit at a good time and has now driven the future play time. lol The light is a full spectrum 150W( at the socket) , Dimmable and very well made unit. As summer is here now , my concerns of more heat being an issue have stopped me from adding my other light so the smaller 2ftx2ft area covered by the XS1500 is a good option , The heatsink is built into the case design with a finned top to dissipate the heat so no noisy fans. Switching it on to full power was a nice surprise as the footprint was way wider than I had expected and the actual coverage is even better for my Nursery to harvest plan.... I am growing autos perpetually at present and have been able to throughput the plants with just 2 lights and using the overlaps at the edges to bring seedlings along to veg/flowering, as harvesting is finishing. The timing had been working well but the plants were getting smaller towards the last runs . I gave it some thought and Rh % came to mind. With the perpetual runs not having a higher rh in their veg periods due to other plants needing a lower Rh% in flower , the vapour pressure deficit (vpd) was not within veg periods healthier range. This current run has exploded and filled my normal space very quickly which in turn means I cannot use the same principle as the last perpetual run of bringing the next ones along ready for the exchanges. The XS1500 takes care of this issue with it being perfect for an initial nursery light that is easily covering all the new seedlings but is also able to cover my experimental "5 plant 1 Pot" attempt. I have placed 5 of my own autob seeds from a previous seeding in a single 60 L pot and intend to strip them to their 4th nodes and only allow 2 mains per plant to develop and flower. Inam hoping to have 10 mains growing in it that will be under the xs1500 solely as the other plants outgrow the lights footprint and space they are in. They will go into the main grow space once able so i can really see how well this new light can flower with the 10 mains to fill the space. Until that point , I will diary as we go and see what we can achieve.