Processing
Likes
Comments
Share


@Pallanzo122
Follow
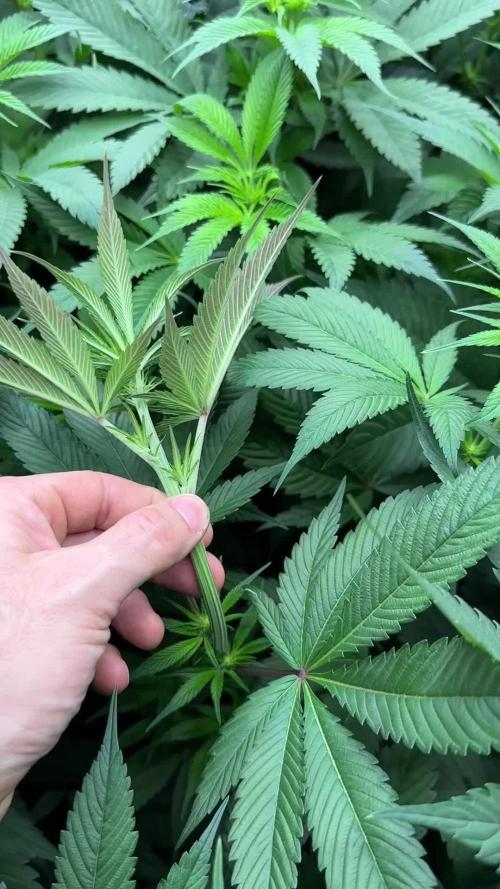
Yes man à la jamaïquain les frère la bonne sensimilia qui defonce les poto la prochaine arrivé


Likes
3
Share


@Mett420
Follow
Un po’ di problemi con la lampada, il bulbo non era di qualità e momentaneamente con il bulbo lumatek si spinge effettivamente come volevamo.

Likes
2
Share


@DrBud420
Follow
02.11.'24
After 5 days of drying, this little girl who was a little bigger than a meter gave 950 grams and a little bit of popcorn...this picking was 870 and a little bit of popcorn, and 4-5 weeks ago during a storm, one branch broke, which yielded about 100, but let's say 80 for sure, a total of 950 grams of beautiful, huge, potent buds

Likes
37
Share


@Roberts
Follow
My little mutt mix strain has been a very interesting, and unique grow. Huge plant tiny potter, lighter comparison pictures above. I Just started seeing a few stray amber trichromes. I will start her on just ph water in a day or two. Letting her use up what energy she has left. This was a struggle of a grow. It's a baby monster plant. I did juice her too much in flowering. We made it through, and she has some nice flowers with a fruity, and kinda earthy aroma. The next update may be a few days late, but it will be the harvest most likely. She grew great in my autoflower room under the Mars Hydro FC4800 light. I will see you soon for the chop. Thank you Mars Hydro. 🤜🏻🤛🏻🌱🌱🌱
Thank you grow diaries community for the 👇likes👇, follows, comments, and subscriptions on my YouTube channel👇. ❄️🌱🍻
Happy Growing 🌱🌱🌱
https://youtube.com/channel/UCAhN7yRzWLpcaRHhMIQ7X4g
Likes
1
Share

@DrStoned067
Follow
Didnt touch the Plants really Sinne 2 of them hermed. Just Talking off Fan Leaves.
Ec: about 1,4-1,5 now
Likes
5
Share


@DemonDabsSolventless
Follow
Hello dear confreres,
Today I start a completely new journey for me, which is indoor cultivation.
- Goals
Germinate 10 seeds and create an environment with good crops
- Method chosen
Hydrated Jiffys with 400ml of water + 0.4ml of VodooJuice + 0.4ml of CalMag
After hydration, we place the seeds on the discs and give them 24/0 light and wait.

Likes
4
Share


@IamCy
Follow
We have our color. Now for the buds to become more dense 😁
Edit: Just found out that this is a cross between Queen of the South from Relentless Genetics and Sugar Cane from Inhouse Genetics 🤯🤯🤯🤯
Likes
4
Share


@Ieiogrow94
Follow
Eccoci qui...
Siamo quasi alla fine del cultivo, odore, resina e colore ci sono. Attendiamo solo la maturazione delle cime che richiederà 1/2 settimane....
NON VEDO L'ORAAAA...
Seguiranno aggiornamenti, grazie a tutti per il supporto🔥🌲❤️
Likes
2
Share


@Aleks555
Follow
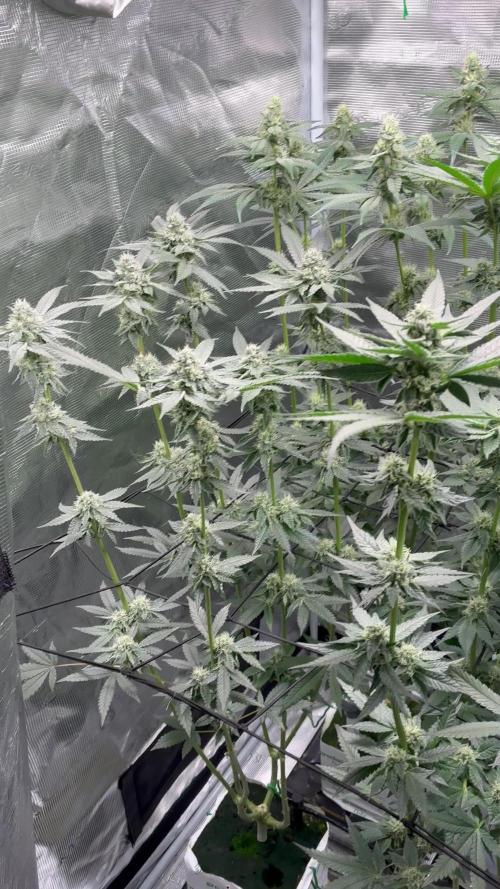
Week 9 – Bloom in Full Swing!
We’ve reached Week 9, and our Gorilla Girl from Sweet Seeds is thriving!
She now stands tall at around 70 cm, with a strong structure and wide canopy supported by the SCROG net. The training and care are clearly paying off — she's growing vigorously and looking beautiful.
We’re continuing with Xpert Nutrients Bloom Formula, and the results are impressive: lush foliage, strong branches, and flowers developing steadily.
Big thanks to Sweet Seeds for the amazing genetics and to Xpert Nutrients for the top-notch support throughout the grow. Full bloom is here — and we’re loving every moment!

Likes
32
Share


Likes
9
Share


@Headies
Follow
This is the beginning of each week. So I flushed them and switched nutrients. They were mag deficient, nitro toxic. Not PH actually. I'm adding co2 next week after I seal the room. I think I need to back the PAR down to 800 but they are still alive and it's over half way done.
How any more weeks? I thought this was a 65 day auto. Hydro in a 5 gallon pot could add up to three weeks I heard with Autos. could these go 12 weeks total?


Likes
15
Share


@Messypies
Follow
will post some drying pics here and do a full summary when trimmed and fully harvested
Peanut butter cookies has been flipped into flower. Lightly defoliated and lst'd for the stretch. Haven't done as much training as I would have liked but the plant is more of an experiment than anything else.


Likes
9
Share

@ProlificGrowth410
Follow
Smelling sweet creamy vanilla undertones of gas this the same girl that almost died before she fully sprouted

Likes
1
Share


@Sur_cannabico
Follow
En plenitud de floración de la mano de Royalqueenseeds y Quemanta Nutrientes.
Engordan y engordan estas flores,
Se viene cosecha!
solo un par de semanas mas y a piso 🌴
Likes
2
Share


@AestheticGenetix
Follow
7/8/25 Starting to look very very nice. Some nice purple flakes on the edges of the sugar leaves with bright hairy orange pistils on nice bulbous shaped buds.
Very strong sherbet smell coming from this plant now. Reminiscent of the RS11 clone
Likes
49
Share


@masterofsmeagol
Follow
8/15 Yesterday the girls finally got some sun. They're flowering. Like crazy. I do need to do an application of BT once this rain stops. It just started up again. Went back over and things were dry. I decided to hold off watering until tomorrow when I feed.
8/16 Watered the 50 2 gallons, 10 1 gallon, and the rest about 1.5 gallons. I fed a pint to the ten, 2.5 pints to the 30 and 2.5 pints to the FIMMed bluecheese that looked hungry. This way I can tell if they can handle larger doses. I'd like to keep it as small and simple as possible. Gave me a fright this morning when a sheriff pulled in while I was feeding. He was on his way to a neighbors but it looked like he was just admiring things lol. I'm all legals there's no problem there. I put off spraying BT last night because dad had a couple ppl drinking and I didnt want to interact with them. Plus it was to early. The sun hadn't crested the barn yet. At least now u know what time to go spray. I'm finding some lady bugs and I killed my FIRST aphid of the season. I still have caterpillar holes in some leaves though so I might as well hit them with the BT (even though I actively hunt them). No one ever said growing cannabis is easy. Oh and my soil must be BANGING because I found some mushrooms growing in it and like a mycelium web which is awesome.
8/17 This was a quick morning due to an upcoming doctor's appointment. Removed some grass that had grown on the tar from spilt soil as it had diseases on it. I don't want that spreading to my plants. I have one blueberry cheese that I FIMed with four cola's that doesn't have as many leaves and has dropped a few leaves but looking at ot from the other side it doesnt look as open. I know that these girls are transitioning and this is the time I lose leaves. However some plants still seem totally green with no problems despite flowering. I'm wondering if it's a specific phenome thing. I also noticed that the caterpillars are still there and this morning would've been a great time to apply BT but I didn't have time and since I upped the feed I didnt want to do two things at once and have a problem and not know what it is.
8/18 Rained overnight. Plants were soaked. It's not raining now. Plants are definitely overwatered. I'm losing a few more leaves that are yellowing on the bottom interior of a couple plants. Some of it could be from the transition to flower ir the large amount of rain we've been getting. At least my drainage is really good. I need to pull the fence out and co soder cutting a pallet I. Half to better utilize space. I know I say this stuff all the time and I'm not sure it NEEDS to be done. What DOES need to be done sooner rather than later is to apply BT. I can see the damage from them. It's not bad but I want to avoid botrytis as much as possible so those pillars have got to go. Otherwise I've never had plants this healthy and it's been a real ahotty season. Boy those 10th planet's are all mice and green and healthy looking. I'm really looking forward to flowering these strains and see what they can do. I'm already greatly impressed with what I've experienced so far. UPDATE: Wasn't raining earlier then it Rained off and on but just a light steady rain that plants love but it's 3:30 now and it's pouring. Guess I won't be applying BT tonight. We need some sunshine but unfortunately I can't control the weather. Just sitting here thinking I was wondering about using Plant Doctor preventatively just due to the steady rain but I noticed mushrooms growing in my soil and since I haven't not9ced any type of fungal problem I'll revisit that idea another time. Polycarbonate roof or even some form clear plastic and a rough frame of pvc or extra lumber. Theoretically I believe I could move them all indoors for a little bit if need be but that would he a huge pain in the ass. Honestly I've got great drainage and my watering seems pretty good so I might be alright doing nothing. We shall see knock on wood.
8/19 Plants were soaked this A.M. I took a video and uploaded it (which takes forever). It's sunny though today and after the sun comes out after a period of rain the plants grow like crazy. Everything is flowering nicely. I think I can go to the end of October. I talked to a lady today that said she'd already harvested some of her peanut butter breath clones. It's my buddies mom and if you look back at one of my diaries NY mendo breath was done in September. These girls have a ways to go but the are explosively flowering which is good. It's easy to tell which strain is which. Pheno's vary but the flowers on the plants are easy to distinguish from one another. I've also never had plants stay this healthy green this long! Previously I'd have multiple pests, wpm and maybe septoria at this point. I think I've upped my game. Knock on wood. My worst problem now is worrying when to spray BT for the miner caterpillar problem. I have wasps, lady bugs and a shit ton of birds from the 3 bird feeders. I see them dart in and out of my cage. Chances are I'll spray BT tonight and take some pictures if it's nice out.
8/20 The sun is finally out. Bags are still heavy. Looks like it Rained again. I found caterpillar shit so I REALLY need to get that BT applied. I also saw minor damage to a budsite on a low hanging branch. Looks like those fucking earwigs bur I'm probably being paranoid. I also had to remove the rope that I was using to support "the big cheese" because with all this wind and rain it "rubbed" against the stem and caused an injury. I don't need that now anyway with the trellis up. Bids are developing rapidly and stacking up nicely. I have a couple plants that aren't as green as the others bit it may be do to all the rain we've been getting. I think I need to increase the volume of liquid i give my plants when I feed. Next feed I'll be doing at LEAST a quart. Due to my w8fes illness I haven't been able to spend as much time there as I should. No fungal stuff "YET". I have seen some leaves that show the plants have been over watered. Drainage is good though. I forgot to upload the video from this morning and it's uploading super slow so I'm gonna have to upload it tomorrow
8/21 Awesome. Went to town and left without going to my doctors appointment. Good job man. 👏 ANYWAY....My phone was dead when I went to town so I coukd only upload one video. I'll have to do the others later. I mixed up a batch of bt 1 tablespoon with half gallon of water (as that's what this hand mister holds. I went around the cage and sprayed every angle. Then I went to each individual plant and sprayed while spreaking the branches to make sure I got the interior. I used almost the entire half gallon so I'm hoping this will help. Bags were heavy but doesn't take them long to dry out. I'm wondering if the yellowing that is moving up (on the small purple punch and the one in the tote) is because they need more nutes, they're transitioning to flower and really stacking up or because they've been over watered with all this rain. Opinions are more than welcome. I'll check the girls tonight and if the are wet enough I'll feed and at a higher volume. If they aren't ill wait till they get their full water.
MY WIFE WAS HAVING AN "MEDICAL PROBLEM AND SO ON THE WAY TO THE DOCTORS I CHECKED THE PLANTS. THE 10TH PKAMETS WRRE DROOPING. I QUICKLY MIXED UP ENOUGH TO FEED EVERYTHING AT LEAST A GALLON AND THEN GAVE THE ONES THAT WERE THE WORST LIKE AN EXTRA HALF GALLON. JUST ENOUGH TILL WE GET OUT OF THE ER THEN I'LL GIVE THEM THE OTHER HALF OF WATER AND ILL FEED THEM. AT LEAST MY WIFE IS OK. UPDATE: Took my wife to the hospital. They did a shit ton of nothing which is par for the course. However, luckily for me (yeah right) I got back early enough to give the plants another half gallon of water each and then I fed increasing the volume to 2.5 pints (upping the big bloom to 3 tsps per gallon) but I ran out of feed on the last plant. I only mixed up two gallons and it was super dark so thar one container plant will need to be fed tomorrow I guess. This is masterofsmeagal signing off to fucking FINALLY get stoned!

Likes
7
Share


@Lazuli
Follow
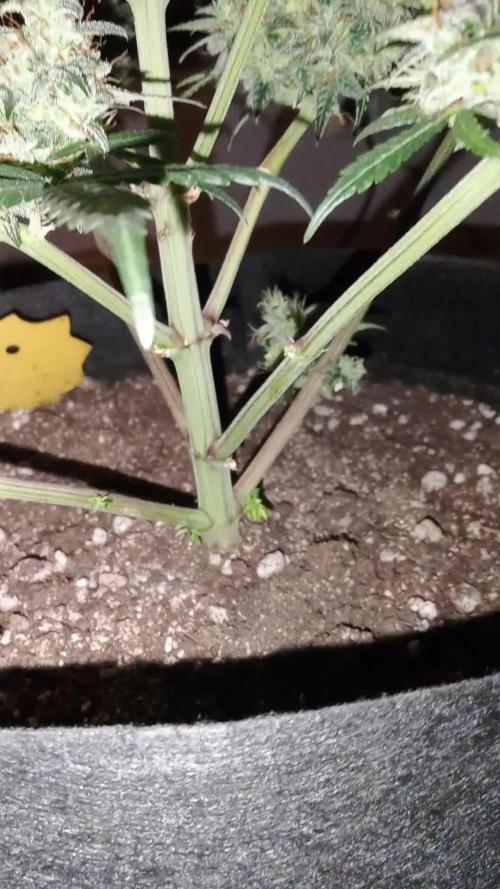
The flowers start to swell, next week might start the overdrive for the extra weight