Likes
Comments
Share
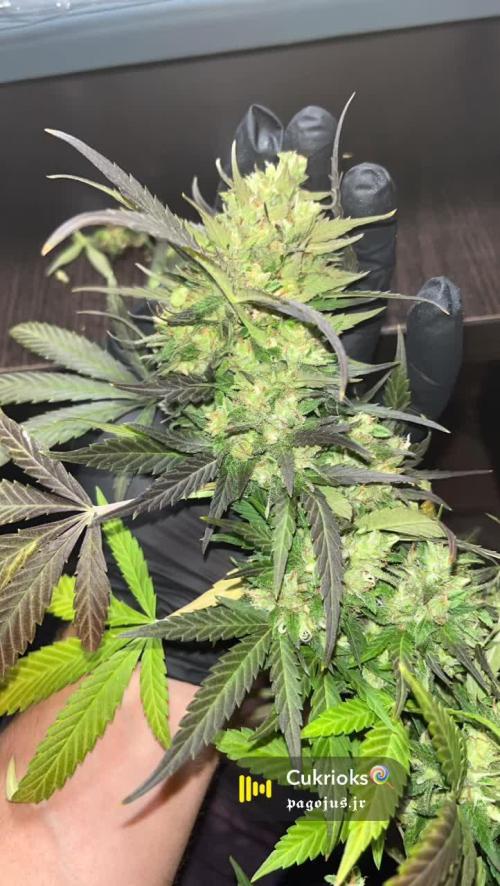
Trichomes, density, looks it’s all there but the smell which is late to the party. They still got a few weeks to go though so I’m not too worried.
Likes
21
Share
@Kekkonen
Follow
Seeds opened after 24h in a petri dish after which I placed them in coco pellets -> see week 1 👌
Likes
27
Share
1/20/2023- So much to do pre grow and over the next 16 days, absolute first order of business is that I have to take down my current Grow---TIMBER-- Then I have a list of things I have to get done in order to be ready to start this grow 1 Feb. With that said T - 2 days until start 48 hour Flush T - 2 days until Start 48 hours of Light T - 4 days until TIMBER!!! Items that need to be done before 1 Feb 2023 1. I need to clean the tent out 2. I need to clean the equipment- Proper Sanitization between grows in Hydro is a must!!! 3. I need to get the hole in the ceiling above my tent repaired- For my last grow I had a deep sink installed in my grow room, to make Hydroponics a little bit easier and have a water source in the same room. The seals on the pipes they were installing broke and leaked through the ceiling causing some damage all the way across my grow room, I was already weeks into my grow and couldn't risk them working above my tent and it would have been very awkward positon for them to be working in as well, so have to get this done quickly between chop and germination. 4. I have to install my new light- I was using a Vivosun 4000 and for this grow I am switching up to a Spider-farmer SF 7000. 1/20/23- For this upcoming grow I am working with M/F photo seeds so I ordered 4 Sex determination kits. I recieved my my 4 Sex determination testing kits from Rimrock Analytics today. I will be using these to test my plants at week 2 of Veg so that when/if I take clones I know I am taking them off females. As well as I don't want to accidently pollinate my tent during this grow I am looking for big beautiful buds not seeded buds. :-) 1/24/2023- Harvest of current grow- Started at 2:00pm and finshed wet trim and firt batch into the freeze dryer. 1/25/2023- Next batch into the freeze dryer and cleaning all my equipment for this Grow. T-1 Day until the workers are supposed to be here to fix the hole in the Grow Room. T-3 days until I instll my new Gorilla Grow Tent and my New Light Spider Farmer SE-7000 for this grow. T-7 Days until Start of Germination 1/26/2023- Harvest is done ran through the Freeze dryer and dry tim completed. 1/27/2023- Grow Room repairs completed. Hole is gone Letting the paint dry before I install the new tent. T-2 days until Install the New Gorilla Grow tent and the new Light T-3 days until I put the hydro equipment in the new tent T-5 days until Germination 1/29/2023- Day 0- Final Pre Germination activities Germination Start T-3 days The paint on the ceiling was dry and it was time to finish prepping for Germination. I got the following items knocked off my list. New 4X4 Gorilla Grow Tent is up and ready New Spider Farmer SE-7000 Light is installed- Thanks Moony Grows for the suggestion and for the Code that got me some money off and free shipping (Moonygrows)!! I turned the lights all the way up to max and set the timer to 18/6 0600-0000. I will keep an eye on the temperature and humidity without my plants and see how hot it gets with the new light. I put my Hydro system back together and put in 40 gallons of water into it, time to monitor for leaks the next few days. I Setup my cloning machine for Germination Days 3-11 1/30/2023 let me break down the situation, ROOM in the TENT.. Enough said.. No really I tried putting my exhaust system up in the new tent with my new light, The light is so big corner to corner that it really didn't give me enough room for the lights be be raised, with the exahust hanging the buckets my plants are Starting in are 2 and 1/2 feet off the ground, great for plenty of room for roots but not so great for upwards space for the plant to grow. In a 6' 11 tent with the exauhst in side and hanging that only gave me a little over 4 feet of grow room to play with. My last grow if you saw my diary, anyone could tell I was struggling to keep the buds off the lights. No good, Since space was such an issue I was running my carbon filter inside on the ground but It really needed to be up sucking the heat out not shooting the cool out. With that setup I was sucking air through the filter and pushing it out the tent at a bottom exhaust hole cold out. Wasn't doing me any good for my heat. I was hitting temps of up to 85 degrees. I bought a portable AC unit and have been running it in the grow room to try and keep temps below 85 and I have had to lower the power on my lights during grow also not ideal.. With that said a friend of mine MoonyGrows (Check out his diary) took the time to look at my issue send me a picture of my grow tent setup with detailed instructions on how to suck the air out from the top but putting my filter and fan on top of my tent so no room issue and I am sucking the air out from the top where the heat is instead of pushing the air out from the bottom where the cool is... THANK YOU MoonyGrows For taking the time to help me get this straightened out.. Now I have room and I have the exhausts working right and now my temps with everything at 100% are topping out at 80 this dropped the temp by 5 + degrees at 100% max. T-2 days until Start of Germination Prepped my seed tray with humidity dome Prepped my Rapid Rooter plugs. I Used RO water, and I added a few drops of Hydrogen peroxide to Oxygenate the water. I then PH balanced between 5.7-6.0 the same that they will be getting in the Cloning Machine and when they get to thier final grow pod. I perfere the 5.8x range and I hit 5.84 for these rapid rooters. If you want to see a complete video on the process HowWeedGrow has an amzing video that shows step by step how to do it and explains it better than I ever could including how to plant the seeds. Which I will cover when I get to that step on Wed. https://www.howweedgrow.com/how-germinate-weed-seeds-cannabis-rapid-rooters/ 1/31/2023 T-1 day until Germination Start All set and ready have my Rapid Rooter plugs ready to go have my seeds out.. Have my seed tray warming up tonight. Tomorrow morning right into the Rapid Rooter then strait into the tray. I will spray the dome to start the humidity in there. 2/1/2023 Germination Day!! Let the games begin! 0600am Put the seeds into the Root Riots. And then put the seeded Root Riots into their first home the Seed tray. I have them under the light 24/7. Sprayed the dome 7:30pm Sprayed the Dome to keep humidity going on the dome. 2/2/2023 Day 1 of Germination Sprayed the Dome in the morning Sprayed the Dome in the evening 2/3/2023 Day 2 of Germination Roots are starting to come out the bottom of the root riot plugs and the heads are slowly popping out of Number 4 just below the surface. Afternoon- Number 4 has popped up Evening- Number 3 has popped up as well. Happy Dance!! 2/4/2023 Day 3 - Germination Surprise Surprise Surprise- all 4 have now poked their heads up.. Happy day!! 100% Germination succeeded. Now major milestone to track is how many are female and how many are male. I will take look at the roots this afternoon/evening and see if they have enough root to go into the cloning machine for the next 7 days before they go into their Hydro Pods. Day 3 - Germination - Evening.. Roots looked good and they were tall enough to make it into the cloning machine. Now that they are all in the cloning machine I have switched the lighting to veg state 18 on 6 off. 2/5/2023 Day 4 - Germination - Morning All the Ladies (fingers crossed) looking great stretching nicely and look nice and green, Photo synthesis underway.... UPDATE!! After a very interesting POD cast on FSTS by Dr. Bruce Bugsbee from Utah University, I have shifted my lighting to 24 hours on through seedling and then I am going to shift to 20 hours on the rest of Veg. 2/6/2023 Day 5 - Germination While Checking on my conditions inside the new tent last night, I found that the Humidity was down to 39 Percent. I added an AquaOasis Cool Mist Humidifier, the reason I selected this humidifier is that I needed one that could be turned on and off utilizing my Inkbird Humidity Controller IHC200 that I have my Pro Breeze Dehumidifier currently running with. Root structures are starting to get there about 1/4 of an inch. 2/7/2023 Day 6 - Germination Everything seems on track more roots poking out of each today. They are each getting a little taller as well. Checked in the evening and number 3 was drooping the Root riot plug on the bottome was dry and the roots were not in the water yet. I raised the water just enough that the longest root that was sticking out is now hitting the water. 2/8/2023 Day 7 - Germination Everything looked good while checking in on them this morning number 3 is now full up and no droop again. 2/9/2023 Day 8 - Germination T-2 days until Plant into Forever Pods and we start week 1 of Veg .. :-) Surprising thing to me is that number 1 and 2 were later in popping then 3 and 4 but the roots are growing longer in 1 and 2. 2/10/2023 Day 9 - Germination Number 1 and Number 2 are definitely ready for transplant today.. Based on how they were yesterday and where they are today I am hoping by tomorrow 3 and 4 are ready. Today they look to me where 1 and 2 did yesterday.. I really hope 3 and 4 catch up by tomorrow since.. T-1 day until transplant to new/ final home for grow. Need the roots long enough to have some clay down in the basket to keep the root riot out of the water and only roots in the water.. 2/11/2023 Day 10 - Germination Today they got placed in thier forever Home, 7 days from Sprout and 7 days until Week 1 Start. PPM- 180 this is water out of the Tap Temp Water: 70.7 Temp Tent: 77 Humidity: 40% I have a humidifier going 24/7 to try and bring this up.. I also have Humidity Domes on each plant. 2/12/2023 Day 11 - Germination Sprayed the domes, all are looking good.. Nothing much to do at this phase but Keep monitoring the PH level in the system and making sure they have a comfortable home. T-6 days until Week 1 start 2/13/2023 Day 12 - Germination Sprayed the domes, They were looking a little yellow today so I moved the light down to assist. Nothing much to do at this phase but Keep monitoring the PH level in the system and making sure they have a comfortable home. T-5 days until Week 1 start 2/14/2023 Day 13 - Germination Sprayed the domes, They were looking a little Florissant yellow today, with what looks like slight burn on the tips, I talked with a fellow grower and we agreed that It was probably that I was drowning them, Yes you can drown you plants even in Hydro, but only early on.. :-) It usually happens with the water being too high, which soaks not only the roots but the medium (root Riot plug in this case). I lowered the water from touching the bottom of the pot to about 1" away. This will probably take 3-4 days to resolve. I will continue my daily monitoring. T-4 days until Week 1 start 2/15/2023 Day 14 - Germination Sprayed the domes, continue my daily monitoring they look a little darker green instead of lime green now that I lowered the water levels in the system, so I think that I might have resolved the issue but it will take a few days for recovery to happen. T-3 days until Week 1 start 2/16/2023 Day 15 - Germination I looked in on them this morning, 3 and 4 look like they are doing well and recovering nicely. Number 1 not so much it has brown spots on the leaves, this very well can still be a side effect of the overwatering but I decide to go ahead and add Nutes earlier than I was planning just incase. I was going to wait until Saturday but I think intervention is necessary now especially after drowning them early on. I added 1/2 what I am planning on adding for week 1 start. I also think I am going to adjust my chart to add 1/2 2 days after plant from now on. I don't think it would hurt it to have some Nutes to pull from. .25ml/Gal Calmag = 12.5ml 1ml/gal GH FloraMicro= 50ml 1ml/gal GH FloraGro = 50ml 1ml/gal GH FloraBloom = 50ml T-2 days until Week 1 start = I will drain the system and start it over on Saturday with Week 1 Nutes. 2/17/2023 Day 16- Germination I didn't even want to post today after looking in on them this morning, 3 of the 4 are now showing signs of dronwing.. Brown spots on the leaves, the water levels were still too high.. I drained about another inch out of the tanks.. Will see how quick they recover.. I start week 1 tomorrow and will have to ensure my water levels are at least 1" away from the basket on this round.
Likes
11
Share
La banana è un sweet chesse (che sono entrambe nel vaso airport) in particolare la Banana sono in carenza di magnesio. Ho aumentano top max vedendo di risolvere il problema. Le altre due piante sono nel vaso air pot Ercole.
Likes
48
Share
~ WEDDING CHEESECAKE FAST FLOWER by FastBuds ~ Well fam, here we go again with another epic strain from FastBuds Fast Flowering stable. After having such tremendous success growing their Gorilla Cookies Fast Flower outdoors last year, I've decided to run another of their fast flowering strains outdoors this year... Wedding Cheesecake Fast Flower! The best description of this awesome cultivar comes directly from my friends at FastBuds which is as follows: "A delight for the mind and body: Wedding Cheesecake FF (Fast-Flowering) is a delicious strain that offers XXL yields in a 7-8 weeks flowering cycle. This terpene powerhouse produces loads and loads of mouth-watering vanilla-creamy-cookie-scented terps with hints of citrus and cinnamon. In addition to its delicious aromas, this variety grows very well in both indoor and outdoor setups, yielding up to 650 g/m2 without extra maintenance, making it the ideal strain for beginners as it allows you to maximize yields while minimizing work. This super-fast feminized photoperiod version offers upbeat and energetic yet deeply relaxing effects that are perfect for consumers looking for a heavily focused, motivating, and creative high. It’s the ideal strain for those needing that extra energy boost to start a busy day on the right foot. Wedding Cheesecake FF boasts chunky, large-sized buds with a thick layer of silvery-white resin and bright orange hairs scattered all over: that just screams ‘quality’. The lime-green flowers sparkle with an array of hues ranging from dark to light green, to magenta and purple, and reek of a delicious aroma that’ll remind you of fresh store-bought cheesecake. This is an XXL hybrid that grows extremely tall in height, reaching up to 3m with one huge main cola and multiple long side branches that can withstand enormous yields of up to 650 g/m2 with ease. Wedding Cheesecake FF is extremely resilient to the elements and can be grown in almost every climate as long as you’ve got the space and basics covered, making her an excellent choice for those looking for large-scale harvests with a quick turnaround time without much effort." ________________________________________________________________________________________________________________________________________________________________________________________________________________________________________________________________________________________________________________________ The Setup: This is going to be an outdoor grow, but I have started the Wedding Cheesecake FF indoors as our weather is still too cold to put her outside (nighttime temp's dipping regularly into the 30's℉). The plan is simple... let her grow inside under a 19/5 light schedule until the nighttime temperatures stay above the mid 40's℉, at which point she'll be moved outside and transplanted into the soil which I have already setup and inoculated with beneficial microbes, and then let the fun begin!🤪💚 ________________________________________________________________________________________________________________________________________________________________________________________________________________________________________________________________________________________________________________________ Weekly Updates: 8/13- Week Two of flower is here for the FastBuds Wedding Cheesecake FF, and I must say how thoroughly impressed I am so far with this strain! It has withstood attacks by insects (leaf hoppers and Japanese Beatles), intense heat and humidity (110℉ heat indexes with 90+% RH) and multiple splits of two of her main branches at the trunk, and yet has grown into the 'Beast from the East' reaching over EIGHT feet in height and spreading her branches out to an enormous SIX foot diameter! Our weather has cooled off after last weeks tropical system passed and it's nice to have a much needed break from the heat and humidity! 8/15- I am continuing to water daily with 5-8 gallons of well water from the garden hose. Today, I top dressed the Wedding Cheesecake FF with 3 cups of Gaia Green 2-8-4 Power Bloom which I watered in with well water from the hose. I then applied 1/2 gallon of a nutrient mix I made up in 2 1/2g of well water consisting of: 1/4 cup Neptune's Harvest Seaweed(kelp) plant food and 2 1/2 tsp. of Plantonics Amino Bliss. While I was under the canopy I also removed a bunch of scraggly small, thin branches that were anywhere from 12" to 20" long and would never had amounted to anything worthwhile. 8/17- We had a couple of passing light rain showers today which didn't provide a lot of rain so I went ahead and watered the Wedding Cheesecake Fast Flower with approximately 5g of well water just to make sure that she didn't get thirsty. 8/19- Thunderstorms yesterday and today have taken care of my watering duties and all I really had to do today is to remove some yellowed and dead leaves throughout the canopy. There's the second week of flower on the books for the FastBuds Wedding Cheesecake Fast Flower and I anticipate that she'll really start to take off in the next week or two so hold on, this could be a wild ride!🤯 Thank you for checking out my diary, your positive comments and support make it all worthwhile! 💚Growers Love!💚😎🙏
Likes
12
Share
@TheNug
Follow
growing bushy as all hell, lifted lights to try get them to grow vertically more , we got some chubby plants right now lol
Likes
7
Share
@NOLOGIK
Follow
21/4 another beautiful genetics, all positive, except for a small malformation in the shape of the leaves with 5 or more points! loaded with tops full of glue, it's starting to brown its hairs! maximum 2 weeks and the cut
Likes
17
Share
@BB_US
Follow
She is doing amazing!! Topped her 4 days ago with no stress at all. Trying LST on her too.
Likes
61
Share
everyone is doing great :-) the growth explosion is insane. tomorrow i will top her and pull the net so slowly
Likes
12
Share
@Luke_Lee
Follow
-27.06.2024 The first week of the vegetative phase begins today. The little plants look quite good. The light is still 100 cm above the plants and is running at 30% (5% more than last week). The values measured with the Photone app are ppfd = 240-270 and DLi = 15.5 - 17.5. The temperature is 22.9 degrees and the humidity is 65%. -28.06.2024 The plants were watered properly for the first time today. About 500ml per plant. A little bit of mycorrhiza was added to the water.. -29.06.2024 Visual inspection, everything looks good. I put sticks in the soil as a precaution to give the plants some support. -30.06.2024 Today the soil felt quite dry so the plants got about 200ml of water (per plant). I also increased the light intensity slightly. Measured values with the Photone app: Ppfd = 300-320 DLi = 22.5-23.6 . -01.07.2024 Just a visual check, everything looks good so far -02.07.2024 visual check, the soil was dry again so each plant got 200ml of water. The distance to the lamp was reduced by 20cm and it now hangs 80cm above the plants. Measured values with the Photone app: PPfd = 360-370 DLi = 25.8-27 -03.07.2024 The last day of the first week in the vegetative phase. The soil was dry so each plant got 200ml of water.
Likes
85
Share
💩Holy Crap💩 That was so much fun , it's full on winter where I am and it kept me busy , and come on there's nothing like growing your own stuff. I had a blast as it's been at least over 10 years since my last indoor grow , and it was fun , I had used all of my old techniques and equipment and it worked out just fine , so I was glad I had a ruff idea of what to expect...... Final thoughts Gonna be honest about that grow , it should me just how far Genetics have come, 10 plus years ago before I stopped growing indoors , all we had was like lowrider auto and greenomatic auto and maybe few others but they were horrible...... but this auto produced quite well as expected it should with the size of my medium and my soil base and very little nutrients, which is what I had hoped for from the start , cause I didn't really know where to start in terms of Genetics as I have been out the game for awhile but I'm super glad with the results and some gratitude needs to be sent to CanukSeeds , they came through as it always starts and ends with elite Genetics👌 ........... I can't wait to start my next grow diary, so keep an eye out , there's gonna be more to come , I'm going to try some really interesting cultivars........ PS. Can anyone tell me this , back in the day like 2003-4-5-6 wasn't growdiaries.com just a private forum cause if memory serves me , I was among those lucky enough to find a community that did complete grow logs, fourm style, which is where I found my growmie and Mentor Franco Loga from Greenhouse seeds , RIP BUDDY 😃 CANT WAIT TO START MY NEXT GROW 👉I HAVE CREATED A PLACE FOR GROWMIES TO VISIT , SHOW OFF THERE GROWS , AND JUST HANG OUT .....👈 👉ALL YOU NEED IS TO JOIN THE GROWDIARIES DISCORD SERVER !!!!!!!!!!!👈 LINK IS 👉 https://discord.gg/zQmTHkbejs
Likes
Comments
Share
🥃 Blue Bourbon Smash • Height: 6.25” • Width: 10” • Training: Topped Monday – strong recovery • Notes: • Tight internodes • New tops emerging symmetrically Blue Bourbon Smash: Topped cleanly, strong V-split, ready for staking soon
Likes
58
Share
Hey everyone :-). On the 63rd day of flowering after the time change to 12/12 the harvest was carried out after 48 hours of darkness 😍. I love this black pheno 👍. After the harvest, everything was laid out on nets where it is allowed to dry at 62% for the next 8-14 days before fermenting with 62% boveda packs in glasses 😍. The entire system was cleaned immediately for the next round. I wish you all a lot of fun with the interim update and we'll see you at the end 😅👍. Stay healthy and let it grow 🍀 You can buy this Strain at : www.Zamnesia.com ☝️🏼☝️🏼☝️🏼☝️🏼☝️🏼☝️🏼 Strain Gelato clone from mother (Zamnesia ) ☝️ Genetics: Wedding Cake x Gelato x Gelato 33 👍 Vega lamp: 2 x Todogrow LED CXB3590 COB 55 W 1 x Sanlight S2W 62 W 💡 Flower lamp : 2 x Todogrow LED CXB3590 COB 55 W 1 x Sanlight S2W 62 W 💡 ☝️ Grow Aero System : Growtool 0.8 ☝️ Fertilizer: Canna Aqua Vega A + B , Canna Aqua Flores A + B , Rizotonic, Cannazym, CANNA Boost, Pk 13/14, Canna Cal / Mag, Canna Ph - Grow, Canna Ph-Bloom ☝️🌱 Water: Osmosis water mixed with normal water (24 hours stale that the chlorine evaporates) to 0.2 EG. Add Cal / Mag to 0.4 Ec Ph with ph- to 5.2 - 5.8 💦 💧
Likes
7
Share
@Naujas
Follow
Week 6 went pretty well, +30 during the day, +23 at night, a few yellowed leaves, next time I water her I will give her Espom salt so that she absorbs more magnesium, despite the high heat everything else looks good :) good luck to everyone.