


Processing
Likes
Comments
Share


@Ferenc
Follow
Week 10: 20/4 light schedule, 150 mp water per plant 2x, no fertilization anymore. Day 65: Next week Tueasday/beggining week 11/ we need to harvest because they will come from the council to check the house😂 Well, the previous one finished in 69 days, but I think they won't be properly ready by next week. I tried it and made me high anyways. I would give at least 2 weeks more to be done. Tomorrow I will check the trichomes with magnifying glass. They are beautiful stinky girls. Flowers are getting thicker and pistils are getting brownish. Day 66: I checked the trichomes with magnifying glass and it will be ready by next Tuesday. 7 days left with this day. They are beautiful just check in the video (Day 66).
Day 67: It is crazy the last 3 days was so hot here in London. Today was 38 degrees!!!!!! Poor plants even with ventilation it goes up to 30-31 degrees. Well, it is alright because direct ventilation goes on so they won't be cooked. 😓😛 Day 70: It is the last day when they receive water and they just get once and half of the daily intake. 2 days before harvest I will not water them. Harvest day is on Tuesday 30th of July when they are 72 days old. I have checked the trichomes all good they are matured nicely cloudy so now it is very strong. They are very stinky girls 😋 Day 71: No more water for them..... Tomorrow is harvest day!!!!!😋


Processing
Likes
7
Share


@Mrg7667
Follow
Lowered the lights a good 8-10inches just because i realized i could get them closer without burning! Going for around 6-7 inches above canopy getting the temp in the high 70s low 80s om top canopy. All pheno are getting very unique and super resinous! I have a slight lnat problem going to spray this week when i get paid

Likes
41
Share


@cherokee
Follow
Привет всем 👋😋 !
Ребята предлагаю всем желающим подписаться на мои социальные сети где я делаю еще больше контента о каннабисе.
Подписывайтесь пожалуйста буду рад всем 😜 !!!
👽 Instagram - https://www.instagram.com/jedi_genetics/?hl=ru
👻 YouTube - https://www.youtube.com/channel/UCRFN2LzgQ4gxDj-6CIIr82g
________________________________________________________________________________________________________________________________________
Наши цветы уже цветут во всю.
На этой неделе я сделал зачистку куста и удалил лишние ветки.

Processing
Likes
9
Share


@diamondtrichomes
Follow
Snuck in a few extra snaps for you this week. Getting excited over here! I love the white puff ball stage of flowering. Here soon the weight will be packing!
I’ve had all three strains in these photos thus far. I’m going to start keeping better track of what’s what now that they are almost halfway through flower. Cheers!

Likes
44
Share


@Cogollo_eu
Follow
**Encontrarás la traducción a español al final de la descripción**
From/Desde: 10/05/19 || To/Hasta: 16/05/19
From day/Desde día: 78 || To day/Hasta día: 84
You can find the Money Maker Diary here:
** Podéis encontrar el diario de las Money Maker aquí:**
https://growdiaries.com/diaries/25667-gorillamakingmoney-gorilla-vs-money-m
-----IMAGES & VIDEOS-----
5 - HomeMade Organic & Cheap CO2 generator (more info in week summary)
9, 10, 11 & 12: The bud on the right is a Gorilla one, the buds in the left or/and in the middle are Money Maker ones.
15 - Same Gorilla plant buds, one affected by CO2 in the roots and the other not.
-----WEEK SUMMARY-----
The smell is more sweet and intense every day, friends that came home turned them eyes into crystals when they see this little babys. The size isn't awesome, but the high ammount of buds full of crystals plus the strong sweet aroma makes them awesome. Buds are growing and fattenning very very well.
This week i added a boost of HomeMade CO2, i never measured the results of this invention so i can't give CO2 measurements. This method is widely used in home aquariums and there is where it comes from. For those interested i'm going to write here more detailed instructions. The 4 liters i've made will last for about 2 weeks.
---NEEDINGS---
- 250 ml Bottle
- 6~10 l Bottle
- 400 g Sugar / l water
- 1 Envelope of organic baker's yeast / l water (CHEMICAL WILL NOT WORK)
- 3 mid plastic tubes 40~50 cm
- 1 short plastic tube 5~6 cm
- 4 tube adapters
- Hot glue to seal adapters
The process of creating CO2 is simple, mix water, organic yeast and sugar in a bottle, and the sugar will free CO2 in the process of fermenting to alcohol due to the yeast.
1. Make a hole in the center of the big bottle cap, insert an adapter and secure it with hot glue
2. Make 3 holes in the small bottle cap and glue the other 3 adapters
3. Link both caps with one of the mid tubes and insert the other tubes on free adapters
4. Insert a short tube in the bottom of the small cap in the adapter that came from the big cap
5. Watch the Video!!
-----WATERING CALENDAR-----
Plants are beginning to drain the pots a bit faster so from now on i will raise the water ammount on each watering day 0.25 l.
11/05/19 - 1,5 l with All week nutrients -(Nirvana & Blombastic) also Big Bud half dosed @ PH6.4 & 2 E.C.
14/05/19 - 1,5 l with Bud Candy, Big Bud, Nirvana, B52, Bud Factor-X, Sensizym & Blombastic @ PH6.4 & 1.5 E.C.
*****ESPAÑOL*****
-----IMÁGENES Y VÍDEOS-----
5: Generador de CO2 casero, barato y orgánico (más info en el sumario semanal)
9, 10, 11 & 12: El cogollo que sale a la derecha es de una Gorila, el de la izquierda y/o el de en medio son de una Money Maker
15: Dos cogollos de la misma planta, uno afectado por CO2 en las raíces y el otro no
-----SUMARIO SEMANAL-----
El olor es más dulce e intenso día a día, los amigos que vienen a casa a verlas se quedan ojipláticos al verlas. El tamaño no es una maravilla, pero la gran cantidad de cogollos llenos de cristales añadido al aroma que entra por las fosas nasales las hacen increíbles. Los cogollos crecen y engordan de maravilla.
Esta semana he añadido un boost de CO2 casero, nunca he hecho mediciones de los resultados por lo que no puedo darlas. Este método es ampliamente usado en peceras caseras y de ahí saqué la idea. Para aquellos interesados dejo aquí instrucciones más detalladas. Con los 4 litros de agua que he preparado yo da para unas 2 semanas.
---NECESITAMOS---
- Botella de 250 ml
- Botella de 5 a 10 litros
- 400 g de azúcar por litro de agua
- 1 sobre de levadura de postre orgánica (LA QUÍMICA NO FUNCIONARÁ)
- 3 tubos de plástico de tamaño medio 40~50 cm
- 1 tubo de plástico de tamaño pequeño 5~6 cm
- 4 adaptadores para los tubos
- Cola caliente para pegar y sellar los adaptadores
El proceso de generar CO2 es simple, mezcla agua, levadura orgánica y azúcar en una botella, y el azúcar liberará CO2 en el proceso de fermentación a alcohol.
1. Haz un agujero en la tapa de la botella grande, inserta un adaptador y séllalo con cola caliente
2. Haz 3 agujeros en el tapón pequeño y haz lo mismo con los otros 3 adaptadores
3. Conecta los 2 tapones con uno de los tubos y conecta los otros 2 tubos a los adaptadores restantes
4. Conecta el tubo pequeño en la parte libre del adaptador del tapón pequeño que viene del tapón grande
5. Mira el vídeo
-----CALENDARIO DE RIEGO-----
Las platas comienzan a secar los tiestos un poco más rápido, asi que de ahora en adelante incrementaré 250 ml de agua adicionales en cada riego.
11/05/19 - 1,5 l con todos los nutrientes semanales -(Nirvana & Blombastic) BigBud mitad de dosis @ PH6,4 & 2 E.C.
14/05/19 - 1,5 l con Bud Candy, Big Bud, Nirvana, B52, Bud Factor-X, Sensizym y Blombastic @ PH6,4 & 1,5 E.C.


Likes
1
Share


@TheBulldozerSicily
Follow
Passaggio a fioritura, dopo aver completamente riempito i box, fin ora soddisfatto del risultato

Likes
34
Share


@ertaverd
Follow
Lots of wind and electric storms this week but they're still growing up, I did a defoliation and still watering with fish, roots and bio bloom from biobizz.
Mucho viento y tormentas eléctricas pero siguen creciendo bien. He hecho una defoliacion y sigo regando solo con biobizz. Cuando este en plena floracion le metere BloomBastic.

Likes
6
Share


@therealgrowmie
Follow
The Amnesia Haze girls are settling into their new home and making the most of the extra space. Moving them from the small tent to the main tent was definitely the right call—they had simply outgrown the original setup and were starting to compete for every inch of light.
The topping has done its job nicely. Instead of one dominant main stem, multiple tops are now pushing upward, creating a much bushier structure with plenty of future flowering sites. The plants are stretching steadily and showing strong vigor despite a few older leaves carrying some damage from earlier nutrient and environmental hiccups.
The canopy is beginning to fill out, and the side branches are catching up quickly. New growth looks healthy and vibrant, which is always a good sign that the plants have recovered well from both the topping and the transplant into the larger grow area.
There are still a few signs of stress visible on some of the older fan leaves, but that's old history at this point. The focus is on the fresh growth, and that growth is looking strong. It's always satisfying to see plants leave a rough patch behind and start thriving again.
The next goal is simple: maintain healthy growth, continue building structure, and prepare for the explosive stretch that the strain is known for. With the additional headroom and improved light coverage, these ladies should have everything they need to reach their full potential.
📊 Stats so far: 💧 Watering: When necessary
🌡️ Temp: 26–28°C
💦 Humidity: 80% RH
📈 VPD: ~0.64 kPa
💡 Light: ~500 PPFD

Likes
8
Share


@Cannabis_Sativa
Follow
the Germination process was very easy and had no problems to sprout in paper towel. After she first touched water it needed 5 day to get root and open shell with her tiny white baby leaf and next I put it in to the pot in coco coir it was already watered and i just put the cup on top next day she was fully green and strong stem with little hairs <3

Processing
Likes
6
Share


@Mr_nugs_lover_David
Follow
Looks so beautiful and smells even better, so in love with this strain, has surprised me a lot, I would love to grow her again, very nice plant, maybe not the best in yield but quality is assured. 🤤💎🌱



Likes
18
Share


@as_smas_ter
Follow
After upping the nutrients last week and starting to use bloombastic i noticed my ec in the run off starting to rise. Was feeding at 1.8 but getting 2.0 out of two plants and 2.2 from another. Some of the tips have burnt but is very minor. also the slower growing cheese plant had some tips clawing down. so for the next feed i dropped the nutrients completely and just gave 5ml of bloombastic per 10 litres in phd water it had ec of 0.5. plants seem fine and back on feeding intake being 1.5 and run off around the same. i think the sweet spot for these is around 1.5/1.6 ec. Buds are fattening up nicely but the blue cheese is no where near as frosty as the cheese and the cheese has so many buds growing on it its amazing me especially after snapping the top half around week 4 defiantly my favourite baby
Likes
6
Share


@Northern_Ent
Follow
July 5: Tropicana Cookies FF is very nicely symmetric and fast growing. She’s on schedule and doing great. One more week of veg and then I will start force flowering on July 11.
July 7: grew 3+ inches in two days.Lower leaves showing a deficiency that seems to be a lack of phosphorus. Added a 1:1 mix of Power Bloom and barley as a top dressing. About a week early for first flowering nutes but she’s asking for it.
July 10: still growing evenly after the final round of topping. I was going to start force flowering (12 h darkness every night for 20 days or so) in two days but I’ll let this wagon (paired with Lemon Cream Kush) veg for another week to get a bit bigger.

Processing
Likes
4
Share


Likes
36
Share


@starke
Follow
I don't know where to start and I must admit I'm completely overwhelmed by this beautiful beautiful plant ❤️❤️❤️ Aaaaaaaaaaaaaaaaaaaaaaaaaaah, I'm so happy 😍😍😍
She is a blessing!
Excuse the outburst, but she is magical ☀️ I applaud you guys at Humboldt for creating such a wonderful strain 🙌
Some details upfront, before I rave some more:
- 134 Days in total: 70 Days in Veg, 64 Days in Flower with 128W LED in a 60x60x160cm tent
- 7 Days Drying regularly, 9 Days Drying in the Fridge
- 432g - Wet weight with stems
- 103g of those for Fresh Harvest Infused Oil - 190ml Olive oil with 30mg/ml THC & CBD - approx. 20g dry (for dry weight calc.)
- 87g for the DrZiggy's Low And Slow Drying in the fridge - 20g dry
- 242g for regular Drying @50% RH and 22°C - 55g dry
- 30g dried sticky trim in the freezer
Summary of my growing experience with this strain:
She takes well to massive training and a little neglect in the beginning, meaning she recovers well, which is what I want 😊 I didn't experience any major deficiencies. She had a little nitrogen deficiency during the later veg phase, which she showed with lighter green leaves. I blame this on my long veg time and my pot size of only 11l. She consumed all her soil and nutes by the end of veg. I will keep that in mind for my next grow. Since I increased my nitrogen levels so close to flowering phase, I overdid it a little on the nitrogen which showed a little bit during later flowering phase with downwards clawing leaves. So I will be more careful with nitrogen especially while transitioning into Flower. I did not flush this plant and she smokes already beautifully mild after only a couple of days of curing. Drying her took 7 days in the tent and 9 days in the fridge. She crusted up with lots of stickiness while drying and gave off a good bit of scissor hash & kief when trimming. Smoking her is a great and different experience to me. It's my first time with a 1:1 strain and I can definitely notice the CBD content. She shows in a very well balanced body high with a slight and gentle knock on the THC door. The first couple of days I felt a craving for higher THC which settled down after only a couple of days. Very interesting and definitely worth growing. So you guessed right, I totally recommend growing this beauty. Especially if you are interested in exploring a 1:1 THC:CBD strain with all its magical medicinal values 🙏
Why I grew this strain:
Like @Experimentgreen on here, I grew this strain for my Mama ❤️ She is open minded to trying to solve some of her health issues with these beautiful plants and the magic they bring but she also likes to have a bit of fun, she doesn't mind. So a 1:1 strain was quite handy. She suffers from neuropathic pain, arthritis in her joints, restless legs and insomnia. All very relatable issues and perfectly suitable to be introduced to some good CBD and THC content. She already has a little tolerance, since she is treating her restless legs with gummi bears I made with a strength of 1.5mg/gummi bear. This small dose already helps her on a daily for her restless legs. Beautiful 😍
So with this special mission in mind, I wanted to process the plant with only the very best options and create Cannabis Oil (Capsules) for my Mom to take. I chose a method called "Fresh Harvest Infused Cannabis oil" by the wonderful member SweetSue over at 420magazine: https://www.420magazine.com/community/threads/fresh-harvest-infused-cannabis-oil.363371/ I hope it's ok to relink, no need to duplicate already existing and well researched content, right? I will not go into detail and def. recommend reading through the whole thread. I only document the short version here, but feel free to ask me, I'm happy to share my experience. The oil I made has 30mg/ml of THC and CBD. That's a good value.
I calculated the strength the following:
75g fresh Flower in 200ml Olive Oil - with 10% CBD&THC
85% extraction efficiency with the infusion method
85% * 10% THC&CBD = 0.0850
0.0850 * 75g = 6.375 gram of available THC & CBD
6.375gram * 1000 = 6375mg/THC
6375mg/CBD
6375mg/200ml = 31.875mg/ml CBD & THC
I created capsules with 3mg per capsule. We are currently trying to find the right dose for her. She started taking one capsule 60-90min before bed for 3 days now and will increase by 1 capsule tonight. We continue until a max dose of 15mg/day but always re-evaluate how she feels. She's documenting her experience quite cute. Very heartwarming and powerful. So far she sleeps better and she falls asleep faster, which she hadn't done in a long while. Onset is pretty precisely between 60 and 90 minutes. She has not had any restless legs so far. I'm excited for her and can't wait to see where this takes us.
I also made her a salve/creme she uses as a topical on her joints. When she uses it early enough, before the big pain hits, she feels it helps. Of course this is not a science study and everything is purely based on personal experience. I thought I share, in case anyone is interested, also I want to give back a little, since I consume so much knowledge from all over the internet, including here, so thanks 🙏


Likes
8
Share


@Squaregrouper
Follow
I use Botanicare products for part system along with Agri triple 19 food crop fertilizer that I use on edible crops and fruit trees

Likes
1
Share

@4hundert20
Follow
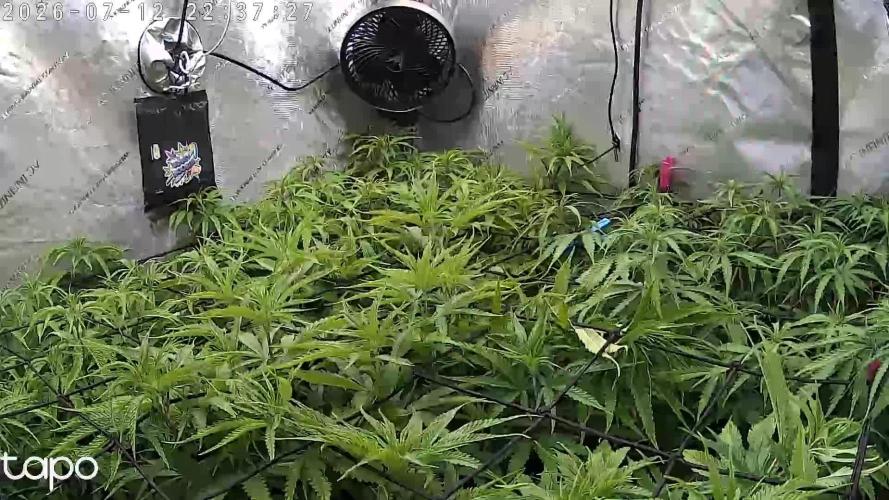
Okay der Teppich passt mir, werde nun die Blüte einleiten und mal schauen, wie sich der Stretch entwickelt.