


Likes
Comments
Share


@pifflestikkz
Follow
Day 65
Day 30 Flower
Seeing nice stretching and spacing on nodes are still kept tight, strong but small structure.
Nice hues coming through on the tops fans.
Minor lollipopping and defoliating done today.
Not much else to say,
Stay high my growmie ✌️🚀💚
Day 68
Day 33 F - Final lollipopping and defoliating today. She really is starting to develope. Node spacing is nice, bud sites forming, nice hues and glistening.
Applied feed today.
Small compact looking plant, but hoping to see them top shelf grade dense nuggets with this technique and strain 😍- we can hope

Likes
5
Share


@Mackdad4000
Follow
I chopped her way too early,she had so much untapped potential I will definitely be running this seed next round, beautiful flower when you break it down. Purple and silver and it’s bomb 💣 and tasty 😋.

Likes
4
Share

@_grower_rosinjuice
Follow
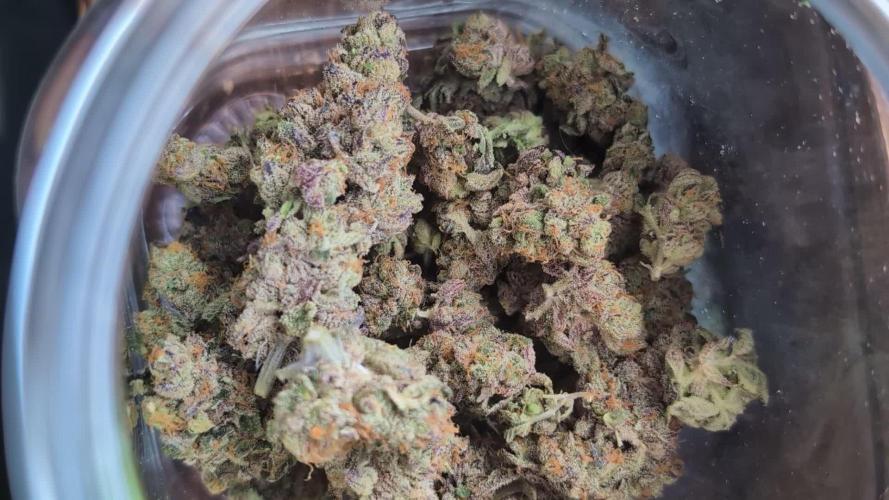
Smell likes Cherry with Gas🍒🍒🍒🍒⛽⛽⛽The cultivation of Arctic Cherry has been a complete success. The plants proved to be incredibly strong, stable, and resilient throughout the entire cycle in their 11L pots. The flower structure is impressive, with dense, rock-hard buds that show the elite quality of Perfect Tree genetics
Likes
31
Share


@McBubatz
Follow
Soweit alles gut, hab sie jetzt zum trocknen aufgehängt. 400g nass ist ordentlich und bis jetzt das beste Ergebnis was ich hatte.
Geschmack usw wird nachgereicht wenn sie ins Glas kommen.
Sehr nice, 80g trocken (natürlich/leider den Überschuss zur aktuellen gesetzliche erlaubten Menge fachgerecht entsorgt).
Buds sind super, richtig fett sogar nach dem Trocknen, auch ordentlich fest und super harzig. Geschmack geht momentan leicht tropische und süße Geschmack mit nem heftigen cheese ton. Is lecker aber nicht ganz was ich erwartet hab 😅. Kommt jetzt erst mal in Gläser zum aushärten, denke da wird sich auch am Geschmack noch was tun.

Likes
26
Share


@PedroAndHisPlants
Follow
Day 64 (First Grow, Flowering Phase):
Hey everyone!
We’re on day 64, and the flowering phase is in full swing. The buds are forming beautifully, and the plants have grown 5-10 cm above the SCROG net, creating a lush canopy. The humidity is steady at around 50% or lower, which is ideal for this stage.
To recap, we've been maintaining an even canopy with the SCROG net and our Timor shield mantis continues to keep pests at bay naturally. Our plants are thriving, thanks to the even light distribution and careful humidity control.
We're considering installing a second fan in a few weeks to improve airflow and potentially adding a second SCROG net to support the plants as they continue to stretch during flowering. This should help stabilize the plants and ensure they get the support they need as the buds get heavier.
Any tips or advice for the next steps? Let us know in the comments!

Likes
11
Share


@adam_pawloski87
Follow
Let’s go day 9 of flower!! This week went real well , all these lil babies just doin there thang , got a nice bit of stretch goin on an staying super healthy for week 2 of flower 🌺! Either sometime this week or next week we will do some Defoliation, clean up them legs lil bit lol! Hope you all enjoy an have an amazing productive Week! Peace love an positive vibes to all y’all Cheers 😶🌫️💨💨💨💨🤙🏻

Likes
21
Share


@BLAZED
Follow
Week 14 (2-6 t/m 8-6)
2-6
Temperatuur: 27.1 graden (licht aan) 20.5 graden (licht uit)
Luchtvochtigheid: 55% (hoogste) 45% (laagste)
Het gaat aardig goed. En wat zijn de shots met de lamp uit en flitser op mobiel aan super mooi!
Ik ben ook verliefd geworden op haar geur, ze ruikt zo lekker zoet-zuur! 😍Ik kan niet wachten om haar te testen. Ookal ben ik bang dat ze net wat te veel THC heeft dan ik normaal rook haha, maar dat zien we nog wel.
Watergift: 1000 ml, met 0.2 ml Silica Power per liter, 0.3 ml CalMag per liter en 1 gr Calcium PowderFeeding per liter. EC: 0.6 PH: 6.3
3-6
Temperatuur: 28.8 graden (licht aan) 21.8 graden (licht uit)
Luchtvochtigheid: 56% (hoogste) 41% (laagste)
Watergift: 1000 ml, met 0.2 ml Silica Power per liter, 0.3 ml CalMag per liter en 1 gr Calcium PowderFeeding per liter. EC: 0.6 PH: 6.3
4-6
Temperatuur: 29.5 graden (licht aan) 22.7 graden (licht uit)
Luchtvochtigheid: 55% (hoogste) 42% (laagste)
Watergift: 1000 ml, met 0.2 ml Silica Power per liter, 0.3 ml CalMag per liter en 1 gr Calcium, 0.6 gr Hybrids en 0.4 gr PK+ PowderFeeding per liter. EC: 1.7 PH: 6.2
5-6
Temperatuur: 29.5 graden (licht aan) 22.4 graden (licht uit)
Luchtvochtigheid: 55% (hoogste) 44% (laagste)
Watergift: 1000 ml, met 0.2 ml Silica Power per liter, 0.3 ml CalMag per liter en 1 gr Calcium PowderFeeding per liter. EC: 0.6 PH: 6.2
6-6
Temperatuur: 29.4 graden (licht aan) 21.8 graden (licht uit)
Luchtvochtigheid: 55% (hoogste) 43% (laagste)
Ik ga vanaf nu om de dag wat PK+ meegeven aangezien ze dat nodig heeft in de bloei, 0.4gr per liter wordt er aangeraden op het schema maar ik doe voorzichtig en geef haar 0.2gr per liter.
Watergift: 1000 ml, met 0.2 ml Silica Power per liter, 0.3 ml CalMag per liter en 1 gr Calcium en 0.2 gr PK+ PowderFeeding per liter. EC: 0.7 PH: 6.3
7-6
Temperatuur: 30.1 graden (licht aan) 23.1 graden (licht uit)
Luchtvochtigheid: 56% (hoogste) 45% (laagste)
Watergift: 1000 ml, met 0.2 ml Silica Power per liter, 0.3 ml CalMag per liter en 1 gr Calcium PowderFeeding per liter. EC: 0.6 PH: 6.3
8-6
Temperatuur: 31 graden (licht aan) 23.5 graden (licht uit)
Luchtvochtigheid: 58% (hoogste) 45% (laagste)
De toppen beginnen voller te worden! Nu nog ongeveer 3 weekjes te gaan. 😁
Watergift: 1000 ml, met 0.2 ml Silica Power per liter, 0.3 ml CalMag per liter en 1 gr Calcium en 0.2 gr PK+ PowderFeeding per liter. EC: 0.7 PH: 6.2

Likes
17
Share


@The_Doctor_Green
Follow
Buenas a todos! Esta semana la laughing budda empieza a hacerse sentir su olor cítrico afrutado, una delicia que ya quiero disfrutar, se siente como a naranja, los cogollos van aumentando en su tamaño según el breeder tiene tan solo 65 días de floracion este fenotipo, así que ya estamos a mitad de camino😅🚀🤞😁

Likes
199
Share


@CRiSPrGrow
Follow
Do you see that SWAMPMONSTER in the corner of the tent there ?? The Queen towers above the canopy and the rest of the plants lol. It's really interesting from using the Smart Proteins, i think how they work is that the plant is able to process them and compensate any kind of slight deficiency which means that each plant that gets the proteins is able to grow to it's maximum potential and at the same time grow to its **individual** potential... that's why each of these plants has so much "character", because if you look closely it's less a question of phenotype but more like "individual expression".... INTERESTING !!! Anyway that's about the visual... my main concern about these is how loud they f-ing smell !!! ITS PROBLEMATIC, so be conscious of that if you plant to grow these one day ! REALLY REALLY LOUD, honestly there should be an additional category on GD like "problematic" which is beyond the "strong smell" category. I have two large carbon filters on two 1330m3/h fans and it's a problem. Hope you understand how unusual that is for a plant in veg lol... I think the smart protein probably affects how strong the plants smell because all the plants seem more smelly than expected... TBH i'll fix the smell issue but hopefully it's a good sign and an indicator of the quality i can expect by harvest time? These also got two rounds of defoliation , and i flipped them to flower like 4 days ago. This was an exciting veg to me, but now is when it gets interesting, let's see how beautiful these flowers are !! Test genetics always have that little bit of mystery to them right? By the way, I'm often visiting this site, so drop me a message about whatever, especially if you have advice ! Thanks for following along with me, i appreciate it really ! ITS FLOWER TIME FOLKS LETS SEE! 🚀

Processing
Likes
10
Share


@CanadianFillmore
Follow
Week 3 flowering begins! Added B52 to the nute mix this week. Green Crack is looking healthy and she stretched a lot the last week.
Thanks for stopping by 👽🌳💚

Likes
10
Share


@Jalfax
Follow
➡️Bella ragazzi date le circostanze :
Vaso 2L
Crescita lenta
Mancanza di spazio nella grow.
Ho deciso di creare un monocima. Vedremo se riuscirò a creare qualcosa di buono 💪🏼
Likes
15
Share

@ohcibi
Follow
Due to issues with my ISP, I can't upload photos or videos right now. Like, I could upload slowly but then I always get errors from th website.
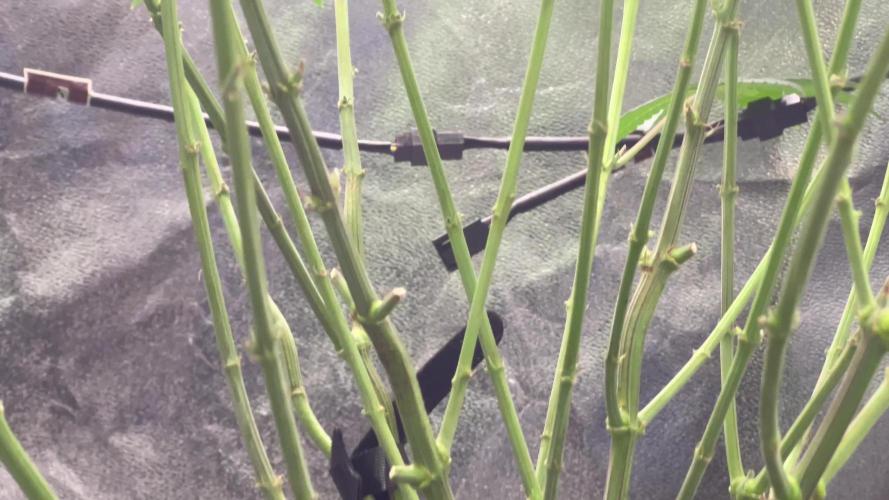
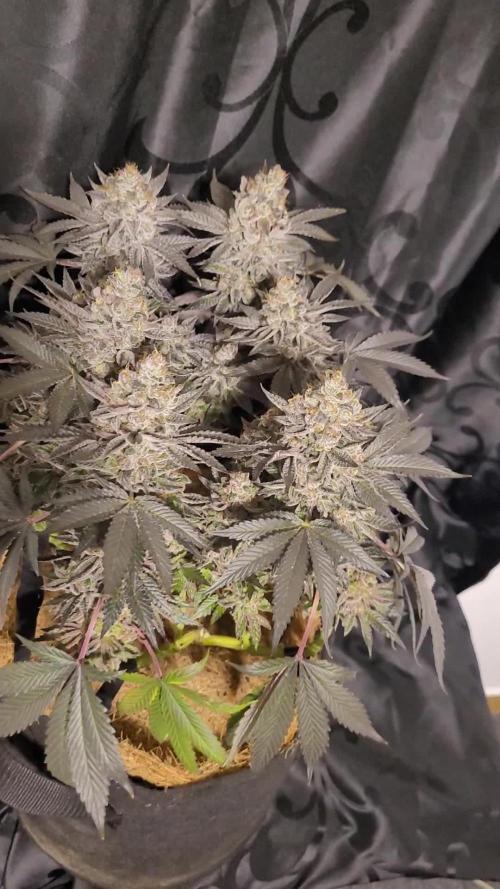
Grow is continueing to thrive. Both Ryu and Ken now have proper Buds growing at their tops and internodes are closing up as well. Kens biggest top bud is 3x4 centimeters. So I'm really looking forward to harvest within the next two weeks. I might be forced to harvest but more on that, when time arrives.
Update: I managed to upload my photos by some public WiFi. Enjoy friends!


Likes
15
Share


@SweetheartOG
Follow
Girls doing well but have run into some calcium deficiency which will hopefully be fixed soon.
Likes
28
Share


@TheHighentist
Follow
First week of flower👏
They got 2 hours extra darkness before flip. Not because of scientific evidence, but simply practical.
Still looking back to the first weeks of veg. WHAT A MESS and WHAT A MIRACLE 🙏
Coming into flower, they had two defoliation and the latest one was 7/10.
Last feed 8/10 Introducing Biobizz CalMag(0.5ml/l) + BioBloom(0.25ml/l)+Topmax(0.25ml/l)+Rootjuice(0.25ml/l)
Still 2ml/L Fishmix+BioHeaven(Fishmix will be switched out with BioGrow)
👽👉10/10 VPD is 1.2,-1.3. good airflow above and below canopy.
👽👉11/10 Mild signs of light stress. They will get used to the VPD. Can't wait to feed in a couple of days and see the reaction. Im sure they are really hungry!
👽👉12/10 Waterday** Introducing higher doses of bloom nutes. The Run off PH and EC are all within the limits
👽👉13/10 They lit up after some nutes. They look happy! Let the stretch begin
👽👉14/10 Already see fast growth. Just monitering factors, to make sure the climate is optimal and their are no symptoms.
👽👉15/10 Waterday* Thirsty ladies
👽👉16/10 Last day of week 1 of flower. Everything is going fine, Good airflow, None of the small symptoms has gotten worse, so overall happy ladies!
How ever one has a little stunned growth or maybe just a bit behind of going into stretch
Likes
9
Share


@HUMO_Cultiva
Follow
We start week 3 of bloom!! Goofiez 2 amor compound genetics it’s the champions!!

Likes
42
Share


@GODSGIFT_2005_JM
Follow
⛺️ MARSHYDRO
💡VIPARSPECTRA
🍼GREENHOUSE FEEDING BIO GROW
🌱 WEEDSEEDEXPRESS

Likes
37
Share


@Capo420
Follow
Will update throughout the harvest, drying, and curing.
Great grow!!! I honestly could not have asked for a better first time growing experience. A few little bumps along the road, but nothing these ladies couldn't handle.
Very citrus smell topped with a salvating creaminess. Will definitely keep this lady in mind for all future grows. Maybe at least one plant. I can't wait until I can try this girl. Thank you to Fast Buds for these awesome genetics and thank you to the Grow Diaries Cimmunity for all your help along the way.
Happy Growing
💚💪🌱😎🌱💪💚
Likes
150
Share


@RussianGrower
Follow
Hi, everybody. Today my plants 55 days. They look very good, cheerful. I had a problem with the lamp today. I don't know what's wrong with her after the photo shoot, but she did not turn on even after it cooled down, had to be replaced by a spare, though it has a slightly different spectrum. 😟
I found that the smell was very strong, air filtration fails, the stench goes through a little passive blowing and smells of the whole apartment. When my greenhouse is closed the smell is, but not strong, but when I work in it, it is necessary to ventilate the room for a long time. And for me this dangerously.
But, there is good news, the postman gave me a great fertilizer that will help me get a good and delicious harvest. 💪
Bubblelicious Auto - these plants show a very strong smell, for 4 days it has increased several times, the smell is very strong, but pleasant. The smell of skunk was felt better when you smell a flower, but everywhere smells very strong and sweet smell of Bubble. It is very very sweet, resembles sugar cane, very sweet candy.
Nevilles Haze Auto-very active, the vegetation period is very long. This plant requires a lot of time and patience, but I think it will reward me with a large harvest, I hope so. This plant practically does not smell, but there is a typical smell of Haze. If you want to harvest quickly, this plant will not suit you, be patient, well, I will tolerate.
In General, we will monitor their development. I hope everything will be fine, and my neighbors will not call the police, then I will have a lot of problems, but I'm not afraid of them, because the love of this plant is stronger.
Freedom of the cannabis industry 👍


Likes
19
Share


@ProfessorAutoflower
Follow
Week 8 and finally in flower. Grow is going great. No burning or drooping, she is standing at attention soaking up the rays. I Have been defoliating leaves over bud sites and pinching off new lower growth. Started using a bloom booster called Flower Fuel. Used once so far, not sure about results yet. She has a lot of bud sites so far and they are all at a pretty even level. She is stretching now because of flowering so the canopy is a little more uneven. There should be a lot mor bud sites to come up and this plant should have some nice buds.
Week 8 picture update - grow still growing great. Everything is praying to the lights! Also no problems with nutrients.
