


Likes
Comments
Share


@Aerogrower1104
Follow
Growing slowly but surely. I will update again in 2 weeks or 3 weeks. Not too much of a difference except for yellowing of some leaves. In two weeks hopefully trichomes will change color and I can switch to straight water with no nutrients.

Likes
27
Share


@GrowinHome
Follow
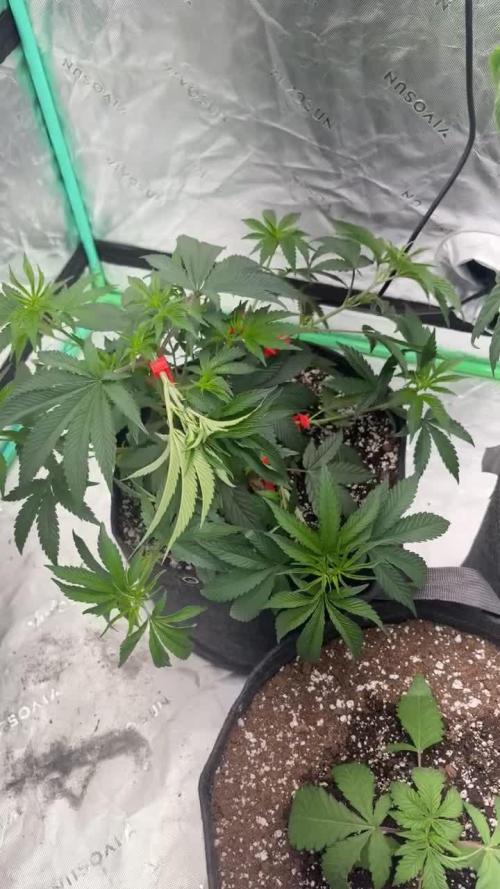
Today I changed the timer to 12/12.
Lets get to flowering!!!🎉
The plants really filled up the growing space nicely.
I'm really excited to see how much they will stretch in the first few weeks🤩


Likes
22
Share


@Chucky324
Follow
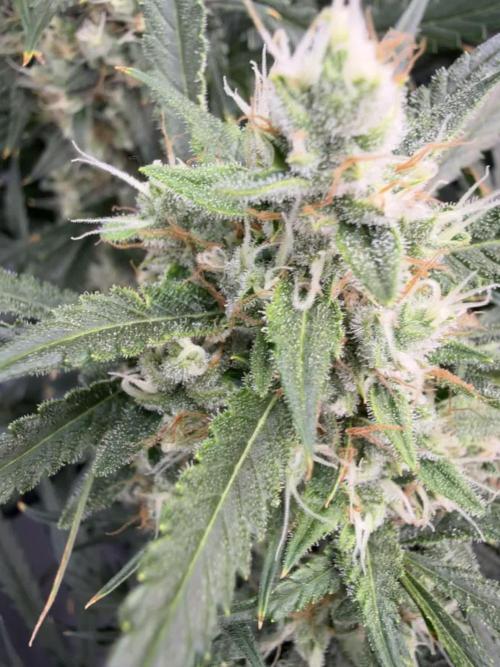
Hello. I'm starting my Dos Si Dos #33 diary here.
These clones have been growing in the veg tent all summer. I had stuff growing in the greenhouse all summer and it gets really hot in that cement room in the middle of summer, so I shut down that grow room till now. I got it up and running last week but I was a little embarrassed to make a diary starting last week because I had treated the clones badly and they looked rather leafless. They look much better this week, so I'll start.
I would like to start playing around with making feminized seeds. So, I need some extra clones to spray to make the feminized males. I've read about it, now it's time to try. Some of these clones I take will be turned to males next year.
I gave some clones to my friend Jerry for his summer crop. I was over to his house the first week in October, to take pictures of his plants. Some of the lower plants that were not getting sun anymore were just starting to show some powdery mildew on some of the big fan leaves, so he decided to cut them down. He did a real good job on growing them this year. I think he said he was going to cut the big bud off the ends of the branches and let the smaller buds fatten up, under cover, in the sun, on the deck.
This is the strongest plant I grow. It gets me pretty baked with 5 or 6 tokes. It grows on the taller side, so I'll make lots of tops to slow the growth down. And it tastes like fruity ice cream!!! Yummy!!!
The other plants in the room are Amnesia Lemon by Barney, Pink Kush the original clone I found 27 years ago, Nova OG by Anesia Seeds, Sweet Sensations by Sweet Seeds, The White (Whitey) by Dr Greenthumb.
I will put in next week more Fat Freddie's Cat cartoons and I have some more puzzles to finish off that puzzle book. Then when that's finished, I'll put in some Fabulous Furry Freak Brothers cartoons.
Man, the spiders are getting big around here. We've had 1 mm of rain in 3 months and it's very warm for this time of year, so they are getting big!!!
Keep Growing Straight. Chuck.



Likes
23
Share


@DeepRootsGrowTrees
Follow
MATARO BLUE by KANNABIA
Week #14 Overall
Week #13 Veg
This week she's doing really well dealing with the heat and elements it's still hot here and she starting to pre flower towards the end of the week hopefully the weather's going to cool down as she starts to flower. Stay Growing!!


Likes
3
Share


@Unculti_responsable
Follow
Esta semana hicimos la última poda de bajos y alicales , es una de las últimas podas q hacemos! Después de esto la vamos a pasas a 10 litros y ya la mandamos a florecer creo q esta más q lista para arrancar el proceso de floración


Likes
90
Share


@DreamIT
Follow
🍊🏵️ Red Mandarine x9 SoG X ViparSpectra XS1000🍊🏵️
🏵️8.6 ...
🏵️9.6 Last day before harvest, yeah !!!!! It is really gorgeous !!!
🏵️10.6 ...
🏵️11.6 ...
🏵️12.6 ...
🏵️13.6 ...
🏵️14.6 Latest photos of the plants still in pots, they are already hanging ready to be cleaned
_________________________________________________________________________________________
❓ Are you new to the world of the cultivation and don't know where to safely buy your seeds?
😮From SweetSeeds you can find award-winning, sweet, fast, fragrant, beautiful, and delicious genetics !!!
✅http: //bit.ly/SweetSeeds_
______________________________________________
👀 Are you looking for a good lamp to start with? 👀
🌞Viparspectra has something more than the others, take a look at their site.
⏩ Use "GDVIP" for an extra discount or "ViparDreamIT" for an extra 5 %% discount
👀 Search for it on Amazon
✅Amazon US: https://amzn.to/30xSTVq
✅Amazon Canada: https://amzn.to/38udUVe
✅Viparspectra UE: bit.ly/ViparspectraUE
👀 Watch my ViparSpectra XS1000 unboxing on YouTube, leave a like and write to the channel 🦄
✅http://bit.ly/UnboxingViparSpectraDreamIT
______________________________________________
📷🥇 Follow the best photos on Instagram 🥇📷
https://www.instagram.com/dreamit420/
🔻🔻Leave a comment with your opinion if you pass by here🔻🔻
🤟🦄💚 Thank you and enjoy the growth 💚🦄🤟
Likes
2
Share


@I_Identify_As_A_Dan
Follow
Day 56
At first I thought the purple stemming was genetics but from how small her leafs are at the top i think it was a deficiency.
This feed pushes plants hard and some just arent up for it,


Likes
35
Share


@ekara_en
Follow
-Defoliated this past week.
-Flowering looks good so far.
-Plants beginning to smell good again.


Likes
36
Share


@MadeInGermany
Follow
Info:
Unfortunately, I had to find out that my account is used for fake pages in social media.
I am only active here on growdiaries.
I am not on facebook instagram twitter etc All accounts except this one are fake.
Flowering day 58
since the time
change to 12/12 h.
Hi everyone :-) .
The lady will be harvested in the next 7-14 days ;-).
It smells very tasty and I'm really looking forward to it.
She will be flushed in the coming days.
Until then, have fun and stay healthy 🙏🏻
You can buy this Strain at :
https://originalsensible.com/original-sensible-seeds-zkittlez~20503
Type:
Zkittlez
☝️🏼
Genetics:
Afghan Kush Indica x Grandaddy Purple x Grapefruit hybrid
👍
Vega lamp:
2 x Todogrow Led
Quantum Board 100 W
💡
Bloom Lamp :
2 x Todogrow Led
Cxb 3590 COB 3500 K 205W
💡💡☝️🏼
Soil :
Canna Coco Professional +
☝️🏼
Fertilizer:
Green House Powder Feeding
☝️🏼🌱
Water:
Osmosis water mixed with normal water (24 hours stale that the chlorine evaporates) to 0.2 EC. Add Cal / Mag to 0.4 Ec Ph with Organic Ph - to 5.5 - 5.8 .

Likes
10
Share


@YAKDADDYDWC
Follow
I found seed foeming and bananas so i decided to cut my losses before it got out of hand im just glad they got to where the are now first time grow first time using dwc and i fucked this shit up for a first timer you beauty

Likes
11
Share

@Mrs_Larimar
Follow
2025-07-27
i started tis grow longer ago
as you may see in other diaries, from the same period
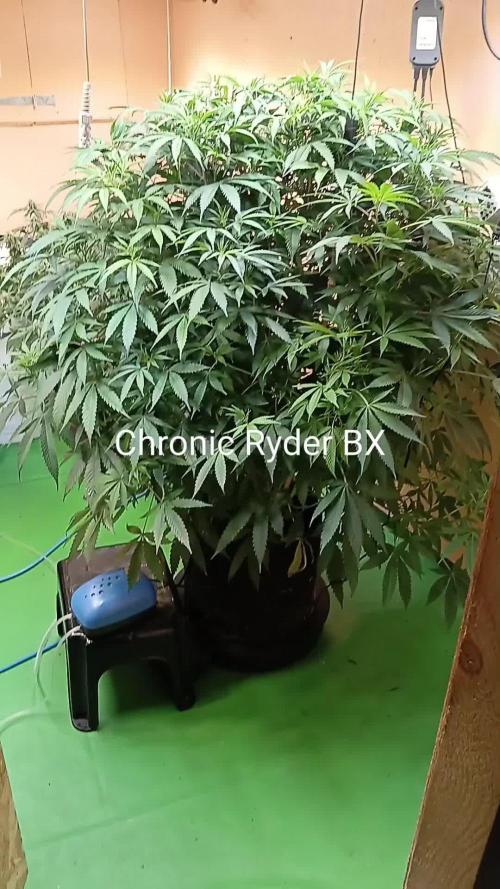
these ladies are mindblowing and deserve a Diary
LEGEND
The root idea for the strain name was the Father’s Choice to show respect to his father when he was testing his strain on his father’s farm. Finally, the strain got the name Chronic Ryder - the autoflowering version of the famous Chronic by Serious Seeds. Crossing with the Lowryder gave us the opportunity to get a stable and fast flowering hybrid.
GROWING
The compact and fast flowering variety grows well indoors and outdoors. A small height of 60 cm max allows for growing nice and fragrant bushes for 65 days from germination. Despite its compact size, the plants develop lots of sticky and big buds with a pretty apricot smell. The aroma is hardly noticed at first but it becomes stronger as the harvest approaches.
The short growing period is another strong point of the strain. That's why this is a good choice for countries with short summers - despite the bad weather you’ll get your guaranteed yield.
TASTE and EFFECT
Chronic Ryder is all about the taste - fruity and citrus tones complement one another, giving an unforgettable aftertaste. The effect is mild and doesn’t hit you like a hammer - the perfect choice for novice smokers. Thanks to balanced high and stone effects Chronic Ryder is a good daytime smoke that stimulates you for a long time.
CHARACTERISTICS
Autoflowering: Yes
Type: Feminized | Autoflowering
Room: Indoor | Outdoor | Greenhouse
Genotype: Hybrid
Genetics: Chronic x Lowryder
Finish time: 65-70 days from seed
Indoor:
Productivity: 400 g/m2
Height: 30 - 60 cm
Outdoor:
Productivity: 30-85 g/plant
Height: 60 - 100 cm
THC: High
Flavour: Citrus | fruity | apricot
Effect: Balanced high and stone | daytime | giggly


Likes
59
Share


@Le_Duc_Du_Bud
Follow
Hey les amis 👍✌️
On arrive a la fin et sa annonce des bonne chose, elle sont magnifiques, tellement Grasse c'est dingue, non mais sérieux Fast Buds vous êtes les meilleures ✌️👍
J'attaque mes semaines a l'eau actuelle,, 3l puis je réduirer pour le prochain.
Vous les trouvez belle hein ❤️
J'arrive sur la fin et a voir les photos que je vous poste, je pense que vous êtes d'accord avec moi elle est sublime ❤️🍁 regarde moi c'est Buds énorme
Likes
8
Share


@Kirsten
Follow
26.4.25:
The plants were watered with 3 ltrs of dechlorinated water PH'd to 6.3, containing the following nutrients:-
♡ 1/2 Tsp Sea K(elp) by Greenleaf nutrients
♡ 1/4 Tsp Ecothrive Biosys.
27.4.25:
I LST'd again by adjusting the tie downs.
For FastBuds Mystery seed auto #1 and RQS Northern Lights autoflower, this will probably be the last time I adjust the fabric ties, as they're now well in to flower.
Hulkberry was LST'd again today, She is looking absolutely beautiful 😍
Retied some branches down and added a couple of clips.
Keeping the canopy as even as possible.
29.4.25:
HulkBerry is looking great. Nice green colour, without being too dark.
The plant has taken well to the LST training.
It doesn't need adjusting much at the moment as the growth hasn't become crazy, just now.
I think next week we will be in to flower, she has 1 pistil on the lower branch. 😅
Nb: I have added this week a couple days earlier, as last week was a couple days late, trying to get back on schedule 😅
Thanks for checking my diary and hanging out 💚✌️🍃😊🌱
Likes
12
Share


@SwaggyP
Follow
Hallo, ich möchte mir aus ästhetischen Gründen kein Zelt holen und betrachte die Pflanze als „Zimmerpflanze“. Der Geruch stört mich und meinen Mitbewohner auch nicht von daher.
Das ist jetzt mein zweiter Grow mit der kleinen Sansi Growlight, welche ich vorher einfach für Zimmerpflanzen genutzt hatte.
Habe den Samen 48 Stunden in nassem Zewa keimen lassen und dann direkt ins Substrat eingetopft.
Likes
1
Share

@StoneyApple
Follow
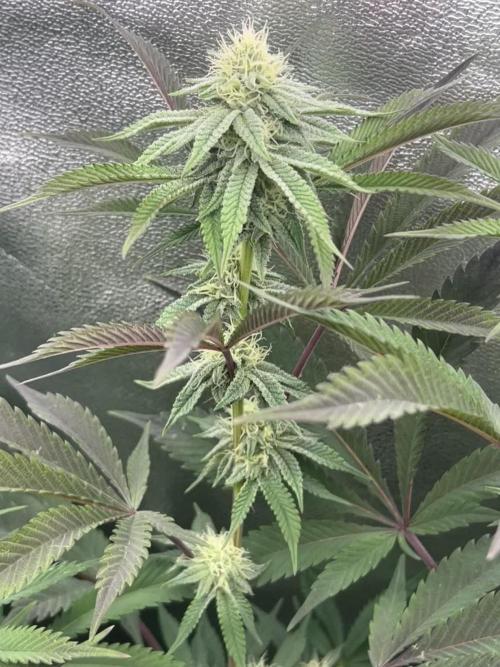
Day 28
The plant is looking strong and healthy.
Gave it a dose of compost tea earlier this week, and it responded well.
I will rise the temps again this week as the SBC drying is done.