Processing
Likes
Comments
Share


@Teamdirtbag2
Follow
They are all doing great.
I cleaned my resivor and forgot to turn the valve back on. In less than 24 hrs my boy starts wilting ( he is such a pussy ). Other than that things are good.
My light decided it was tired and wanted to quit working. It is 3 years old, but I barely used it. I have a spare, but anyway its time to shut it off. They are getting about 14 and 1/2 hours of sunlight. The longest day of the year was on Friday. Its almost like it knew. 😂🤣😂🤣
They should already be outside in the final pot..... but I'm behind. They should be 5 feet +.... but I'm behind. My boy is the tallest at 43 inches and the shortest girl is 36 inches. I will transplant into 25 gallon hard plastic pots.
This grow will be slightly different this year. Somehow I will make it happen. I'm thinking of cramming them into tomato cages, and seeing what happens. I'm not even sure if I'm going to top them. I am just going to play it out and decide later, or not decide. I'm sure it will have some ups and downs.


Likes
18
Share


@Grow4Releaf
Follow
Just feeding the botanicare pure blend pro grow now , her soil ppm has been pretty steady on the one lady.
he lighter color bigger girl has been super hungry . She's gonna be a monster the nodes swelled up to support some monster branches. Can't wait to see how they fill out.
Gotta water them later so I'll snap some photos of the stalk and limbs just to show how bulky they have gotten.
But they are looking great , been stupid easy so far just keeping the soul free of salt building up aswell as trying my best to not over fertilize .. (nitrogen is pretty high I've noticed the darker green on the other girls. Besides the smaller plant it's PH is low from the automatic watering thing im trying out)
Really trying to get more time so I could be alil more detailed. New growers ask about my water routine but it's hard for me to explain atm . Gonna work on it and see of I can do these any better.
If ur reading these and have any kind of input please comment and let me know. I'm always looking for constructive criticism/ feedback..
But I appreciate anyone's time checking my mess out lol.
Week 7 underway getting closer to seeing these girls finish !!

Likes
9
Share


@HUMO_Cultiva
Follow
Update day 10 of transition to bloom this Goofiez 2 it’s soy strong !!

Likes
11
Share


@goeser
Follow
I am not doing anything at all ,
this plant is just staying arround in my garden.
i just tried topping technic the first time and it worked well.
now i just have to hope that this plant will be a lady, then i think i will get a good harvest
in september/october.
Likes
14
Share

@all_about_420
Follow
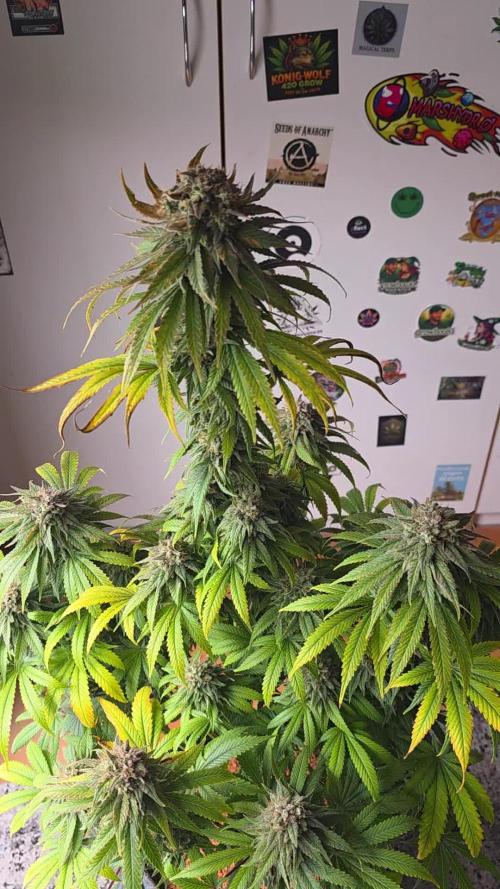
In der finalen Blütewoche der drei Amnesia Haze von Ganja Farmer zeigt sich die unterschiedliche Phänotyp-Ausprägung so richtig deutlich, was man an den Bildern der kleinen, mittleren und großen Pflanze sehen kann. Während die mittlere und die große Lady mit ihren violetten Nuancen bereits vollständig ausgebildet waren und die Ernte nach Plan erfolgte, habe ich die kleinste Pflanze noch drei Tage länger stehen lassen. Es war faszinierend zu beobachten, dass gerade der kompakteste Phänotyp die längste Reifezeit benötigte, um das volle Terpenprofil und die gewünschte Trichomreife zu erreichen. Die Nährstoffaufnahme wurde komplett eingestellt, um die Pflanzen vor der Ernte perfekt ausreifen zu lassen, während die Vorfreude auf das finale Ergebnis der Ernte und die Qualität der getrockneten Blüten nun im Vordergrund steht.

Processing
Likes
10
Share


@TrimQueen
Follow
This is the beggining of the fourth flowering week. Not hurry at all. Just moved out from my not so private apartment and this is the first 5 days of her inside of a wardrobe, which is fantastic showing those results. I have much time to wait and Im not hurry at all. Expecting to have at least 6 weeks more blooming.
07/04 - Total of 88 days old. Fed her today with 1/3 of 4-14-8 fert. She's showing good Healthy, like she wants more of everything (Light, fert, water, CO2). Intending to let her blooming 60 days more. (8 weeks).
Likes
17
Share


@HowtoBubatz
Follow
It’s week 5 of flowering, and things are looking fantastic!
The adjusted nutrients for the coco substrate have clearly made a difference, as both plants are thriving and continue to develop thick layers of trichomes. ✨
Interestingly, the non-LST plant is starting to show some unique color variations, which is surprising given that both are from the same strain.
This unexpected twist adds a bit of excitement, and I’m curious to see how it will develop over the next few weeks.
When it comes to scent, the differences are striking! The LST variant has a bold and distinct Lemon Haze aroma—zesty and citrusy 🍋💨
while the non-LST plant gives off a fruity-sweet smell that’s incredibly rich and inviting. 🍓🍭
Unfortunately, my camera broke this week, and now I’m dealing with some low-quality pictures. 📷😔
While it’s frustrating not to capture the plants in their full glory, I’ll do my best to document their progress as clearly as possible.
Overall, both plants are doing great, and I’m looking forward to seeing how they turn out in the final stretch! 💚
Likes
7
Share


@GrownyStark
Follow
I made a concoction of living soil using ingredients I could find of subcools formula. Theoretically all i need to add is ph balanced water. And a tea once I decide to flower. I'm waiting for some gadgets[ph and moisture meters]to come in before doing any extensive watering.


Likes
18
Share


@Pheno_Minds
Follow
📋 Die Golosa steht jetzt stabil in der dritten Blütewoche, insgesamt sind wir in Woche 6. Die Pflanze hat sich nach den Eingriffen gut gefangen und zeigt ein sattes, gesundes Grün. Die Struktur ist durch das Lollipopping und die Defoliation deutlich offener geworden, was für eine gute Belüftung der unteren Bereiche sorgt. Die Blütenansätze entwickeln sich gleichmäßig an den freigestellten Triebspitzen.
📏 Über die Woche gemessen steht die Pflanze bei 44 cm Höhe. Die Lichtperiode läuft konstant auf 12 Stunden am Tag. Die Umgebungswerte haben sich bei einer Durchschnittstemperatur von 28.08 °C und einer Luftfeuchtigkeit von 67 % eingependelt. Der VPD liegt stabil bei 1.26 kPa, bei einer durchschnittlichen CO2-Konzentration von 1177 ppm.
💧 In dieser Woche wurde zweimal gedüngt. Die Gießmenge lag insgesamt bei 5.5 L, im Schnitt also 2.75 L pro Vorgang. Dabei habe ich den pH-Wert auf durchschnittlich 6.35 eingestellt und den EC-Wert bei 1.45 mS/cm gehalten. Das Schema setzt sich aus Athena Blended Line Balance mit 2.25 ml/L, Athena Pro Bloom mit 4.5 ml/L und Athena Pro Core mit 2.7 ml/L zusammen. Zusätzlich gab es zwei Sondergaben von Athena Blended Line CaMg mit 0.5 ml/L. Die Wassertemperatur lag im Schnitt bei 21.4 °C.
✂️ Nach dem Lollipopping und der Defoliation sieht die Pflanze jetzt sehr aufgeräumt aus. Die Energie fließt nun gezielt in die oberen Blütenstände, was man an der Vitalität der Spitzen bereits gut erkennen kann.
📸 Die aktuelle Entwicklung sieht vielversprechend aus. Die Blattfarbe deutet auf eine gute Nährstoffversorgung hin, keine Anzeichen von Stress oder Mangel. In den nächsten Tagen werde ich das Höhenwachstum genau im Auge behalten, da sie jetzt den Stretch-Bereich der Blüte langsam hinter sich lässt und voll in die Blütenproduktion einsteigt.


Likes
6
Share

@ThatsmyGrow
Follow
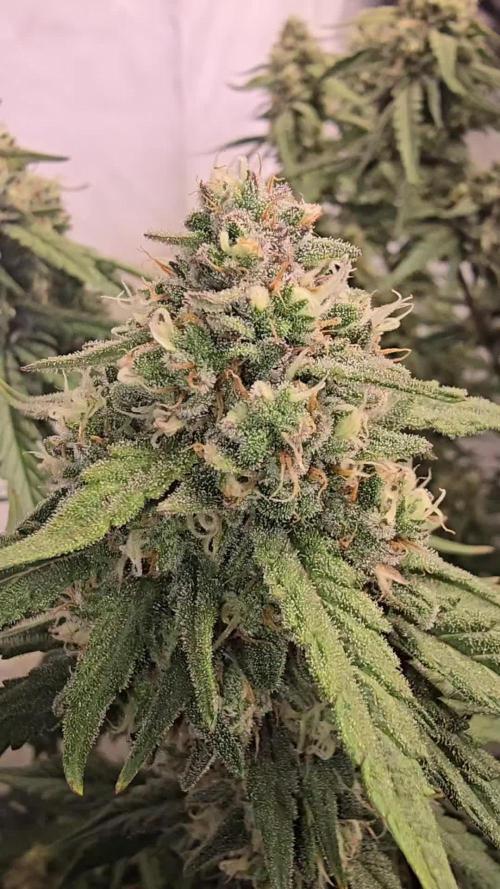
Noch 1 bis 2 wochen blüte noch, sie hat bis jetzt wunderbare Blüten entwickelt. Der Geruch is einzigartig ❤️


Likes
27
Share


@MrJones
Follow
OSS Cheese XXL
🔹⊱╮🔹╰⊰🔹 GROW Started 03.10.24 INFORMATION 🔹╰⊰´🔹⊱╮🔹
🌞Environment - Maintaining 80F and 65%Humidity
🌾Training - These ladies are Pruned and Defoliated and ready for flower.
⚱️2-Gallon 📊6.2 PH
💧 Feeding - Using Horti Grow 8-11-21, Bloom 5-15-26, Late Bloom 0-24-26, Cal 12-0-0
🌞Medic Grow Smart 8 760 Watts
🕷️ IPM - CannControl from Mammoth and Mosquito Bits as needed
🔹⊱╮🔹╰⊰🔹 GROW Started 03.10.24 INFORMATION 🔹╰⊰´🔹⊱╮🔹
🌞Environment - Maintaining 80F and 65%Humidity
🌾Training - The girls are recovering from last week's Pruning and Defoliation,
⚱️2-Gallon 📊6.2 PH
💧 Feeding - Using Horti Bloom and Horti Cal 12-0-0
🌞Medic Grow Smart 8 760 Watts
🕷️ IPM - CannControl from Mammoth and Mosquito Bits as needed
🔹⊱╮🔹╰⊰🔹 PLANT UPDATES 🔹╰⊰´🔹⊱╮🔹
📝 Notes - On 🗓️05.11.24, This week, we are on Auto-Pilot and just Fertigating as needed; the ladies are stacking up nicely, and the leaves have grown back not sure if it is the genetics or the new nutrients; I would like to see less and will evaluate if more defoliation will be needed.
📝Fertigation injects fertilizers into an irrigation system to supply dissolved nutrients to crops.
🗓️05.11.24 Just feeding daily, sometimes twice; today, fed with Hort-Bloom @ 2.7 GRMS Per Gal and Horti-Cal @ 2.5 GRMS Per Gal.
🗓️05.12.24 Just feeding daily, sometimes twice; today, fed with Hort-Bloom @ 2.7 GRMS Per Gal and Horti-Cal @ 2.5 GRMS Per Gal.
🗓️05.13.24 Just feeding daily, sometimes twice; today, fed with Hort-Bloom @ 2.7 GRMS Per Gal and Horti-Cal @ 2.5 GRMS Per Gal.
🗓️05.14.24 Just feeding daily, sometimes twice; today, fed with Hort-Bloom @ 2.7 GRMS Per Gal and Horti-Cal @ 2.5 GRMS Per Gal.
🗓️05.15.24 Just feeding daily, sometimes twice; today, fed with Hort-Bloom @ 2.7 GRMS Per Gal and Horti-Cal @ 2.5 GRMS Per Gal.
🗓️05.16.24 Just feeding daily, sometimes twice; today, fed with Hort-Bloom @ 2.7 GRMS Per Gal and Horti-Cal @ 2.5 GRMS Per Gal.
🗓️05.17.24 Just feeding daily, sometimes twice; today, fed with Hort-Bloom @ 2.7 GRMS Per Gal and Horti-Cal @ 2.5 GRMS Per Gal.
╰⊰🔹╰⊰´🔹⊱╮🔹╰⊰🔹╰⊰🔹STRAIN INFORMATION🔹⊱╮🔹╰⊰🔹╰⊰🔹╰⊰🔹⊱╮
Cheese XXL cannabis seeds are a unique blend of Afghan Kush x Super Skunk, producing the most pungent dank weed. Cheese XXL is the third commercially available edition released by Original Sensible using and developing these Afghan and Skunk genetics. The first release of these genetics was their Skunk Afghani. The second improved version was Stinkin' Bishop, which had an enhanced and more potent THC content and was more intense in terms of smell. The third and improved release on a similar theme is this Cheese XXL, which has a similar THC content but an enhanced heavier yield. The smoke is incredible, with an outstanding flavor of pungent skunk and spicy, extra strong mature cheese created by the dominant terpene myrcene with its earthy solid scent accompanied by caryophyllene and pinene, which combine to create a peppery acrid cheesy odor. THC levels are exceptionally high in this Cheese strain, and the effect is well-balanced, developing mental and body relaxation with a remarkable alleviation of stress and depression.
The intense solid aroma starts early in the flowering period; if you're growing Cheese XXL indoors, you'll need plenty of ventilation to disperse these babies' stinky "road kill" aroma! Cheese XXL is a cheese strain suited to indoor setups and thrives outdoors well. These feminized marijuana seeds are incredibly resistant to mold and disease and produce a substantial harvest that professional and amateur growers can quickly achieve. These Cheese weed seeds are outstanding. Break open the buds ready for use, and you'll see why the stench will make your eyes water!
Cheese XXL from Original Sensible Seeds is a great choice to break into the commercial market of growing cannabis, so if you're looking to buy something special with extreme yield, potency, and flavor, Cheese XXL cannabis seeds are simply the best choice.
Likes
14
Share


@SunshineBud
Follow
Was playing around with netting here, I never get the hang of it ;( Back on nutes this week, I really didn't do much measuring of the girls this week due to netting as well, but I did flip the lights on 1/12.
Likes
29
Share


@Hashdestroia
Follow
Overall i'm really happy with this strain. First i thought i wouldn't get a high yield but i'm pretty happy with it i got 250grams of top trimmed buds 2g of hashoil 2g of bubblehash and another 80grams of dry plant material for making bubblehash. Super potent strain with an amazing flavour, definitely nit the last time growing this strain.
Likes
16
Share


@ButterfliesLittleFarm
Follow
Hello Diary,
Cherry Pie has finished its vegetative cycle and is entering the flowering phase.
This week it grew an impressive 20 cm, lengthened and got a lot of new leaves and formed a nice shape.
The leaves are a nice green color and look healthy.
It is really developing very nicely which makes me super happy.
I can't believe how in just 21. days the plant reaches this stage of development.
That indoor is incredible, I am still impressed to this day.
The summer heat is still present which affects the temperature in the grow box,
this week the average was 29 degrees although sometimes the temperature rises to over 31 degrees.
But I don't notice that it is harming them, I make sure to water them regularly,
so that the soil does not remain too dry although that sometimes happens.
Every week, as the plants grow, I increase the amount of water when watering.
I continue to add Bio Grow Fertilisier and CalMg with each watering. pH I drop to 6.0 with Plagron's Lemon Kick.
At the end of the week, more precisely after taking photos for day 21., I increased the power of the led lights to 80%.
Here is a quick overview of the week:
10/08/2024 - Day 17.
Watering.
I prepared 8 liters of water, added Bio Grow Fertiliser and CalMg and with that amount I evenly watered all three plants on the farm.
13/08/2024 - Day 20.
Watering. I repeated the same procedure as the three days before.
14/08/2024 - Day 21.
Photographing and measuring the height of the plants. Official end of the vegetation phase.
Cherry Pie - Day 21. - 37 cm
That's all from me for this week, thanks to everyone for the comments and see you soon.

Likes
8
Share


@Sorelone
Follow
Diese Woche haben die Ladys einen schönen Wachstums Schub bekommen , sowie ihre ersten schönen Gesichter angefangen zu zeigen,
Habe noch einmal schon entlaubt und 2 scrog artige Netze installiert um die gesamte Fläche zu nutzen.
Frisches Futter gab es auch und sie entwickeln sich einfach wundervoll .
Wünsche euch eine wundervolle Woche growdiary Community
Likes
15
Share


@Messypies
Follow
Plain water feed started. Will feed for a week. Induce 48hrs of darkness then harvest. Buds look look to be around the perfect time for harvest. A little early vs the reccomended harvest date but overall happy with size and trichomes so see no reason not too.