
Likes
Comments
Share


@DrGreenfinger
Follow
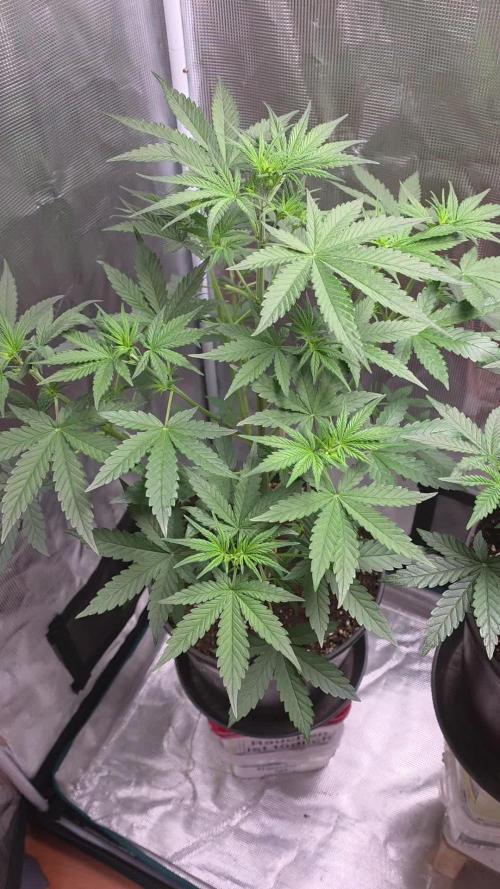
Moin liebe Growgemeinschaft!
Die dritte Woche beginnt. Leider musste ich aufgrund von einigen Umständen die kleinen auf Urlaub schicken 😉.
In ca zwei Wochen sollten sie aber wieder Zuhause sein denn ist auch etwas mehr Platz für die kleinen da.
Soweit entwickeln sie sich normal sind etwas gespargelt aber das ist noch in Ordnung für die Umstände.
Gegossen werden sie mit angepasstem Wasser auf PH 6. Werde die Milkyways die Tage in 11l Schuhe stecken, sollte noch nicht so schlimm sein da sie ja noch nicht den topf voll gewurzelt haben.


Likes
26
Share


@MiniBoxGrower
Follow
Like most beginners I am very impatient.
Therefore the following question can I be satisfied with growth so far ?
I haven't used any fertiliser so far because I put pre-fertilised soil in the pot when I repotted it.
It hasn't received much water yet either, I drowned a plant before, so I have become cautious.
I'm starting to think about training her, because I'm very limited in height.
5.5. 80ml
7.5. 100ml
11.5. 240m
Likes
15
Share


@Dunk_Junk
Follow
A bit more progress this week....
Top 2" of old soil/perlite mix scraped off and brand new peat compost applied.


Likes
2
Share


@Cn0te
Follow
Been in 12/12 for 1.5 weeks.
Wound up with 6 healthy looking females. 3 Girl Scout Cookie, 3 Lemon Sour Diesel. Still monitoring for male genetics, but so far so good.
Pistils weren't showing on the two I pulled, but weren't clearly male either. Grow room was getting crowded though, so I pulled the two that weren't clearly female.

Likes
10
Share


@cjaygrows
Follow
Buds are super frosty and sticky, smell like sour dog shit I couldn't ask for anything more my best grow yet

Likes
Comments
Share

@Dottgreenthumb
Follow
Le piante crescono a vista d occhi 😅
Dimmer 65 %
Run off 1.8
Ph 6.3
Processing
Likes
83
Share


@Grey_Wolf
Follow
Chance of a Lifetime
Greenhouse Seeds Wonder Pie
22nd May 2020
Week 3
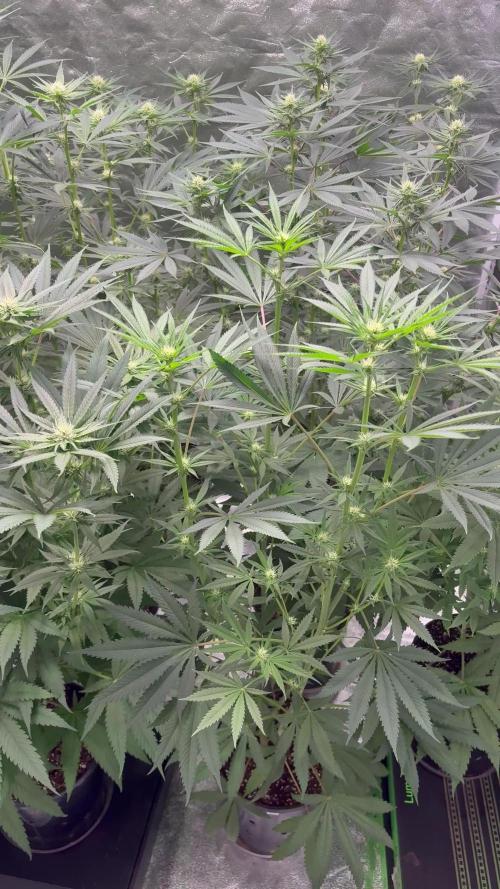
Hi Everyone welcome back to my GHS competition grow 😀 It's now been 3 weeks since they germinated and they are looking ok to me.
They all have slightly different characteristics about them such as leaf shape etc but are all roughly the same height.
On Wednesday (two days ago) I gave them all the second half of their Bio grow powdered feed , which will now take them thru until Flowering begins.
I also applied some diatomaceous earth to the soil surrounding each plant.
This has two uses one being as a source of silica and the second being a bug/pest deterrent.
Ive added a short little video clip of me mixing in the 2nd dose of bio feed. After I applied it I simply watered it in with aprox 500mls of Water per plant.
That is all for this weeks update , Thankyou all for taking the time to Read it and I shall hopefully see all you back here in 7 days.
Take care 👍👍

Likes
15
Share


@GYOweed
Follow
Did a little HST and filmed some Blurple Tent Action for my boy Ferenchy.

Likes
16
Share


Likes
8
Share


@TorvicKofran
Follow
ESPAÑOL:
Hola chicos !, espero que se encuentren muy bien. En esta semana hubo un notable crecimiento de las chicas, todo va super bien !, aun no comienzo a aplicar fertilizante de crecimiento, pretendo aplicarles ya en su primer transplante a maceta Airpot 10.8 litros que sera dentro de una semana para luego ponerlas a florecer, esta semana añadi 1 ml de cal-max de grotek para para aumentar ec a 0.4 ya que trae una pequeña dosis de nitrogeno para darles un empujoncito. esta semana tambien se incorporo la Cookies Usa en reemplazo de la Kryptonite que no sobrevivio y que por lo demas es una chica muy fuerte... saco sus hojas a la luz en un par de horas despues de ponerla en sustrato, maravilloso ! eso es todo por esta semana amigos !
INGLES:
Hi guys! I hope you are doing very well. In this week there was a remarkable growth of the girls, everything is going super well!, I have not yet started to apply growth fertilizer, I intend to apply them already in their first transplant to a 10.8 liter Airpot pot that will be within a week and then put them to flower, This week I added 1 ml of grotek cal-max to increase ec to 0.4 as it brings a small dose of nitrogen to give them a boost. This week Cookies Usa was also incorporated to replace the Kryptonite that did not survive and is otherwise a very strong girl ... I bring its leaves to light in a couple of hours after putting it on substrate, wonderful! that's it for this week folks!

Likes
22
Share


@valiotoro
Follow
I’m in love with the straw gorilla 😍🤩🍓
All the top buds ready✂️
The colors & the smell pouaaah out of this world !!
One more week for the lower buds and finito bye bye
Likes
563
Share


@Ju_Bps
Follow
Hello my friends 👨🌾👩🌾,
Week was good, babies 👶 continue to grow up.☺️
On the #3 on the same nodes, 2 leaves look strange, maybe burned?
Since I've make the treatment, I didn't found sign attack on my leaves.
💦 I give water each 2 or 3 days.
I had a rest of mix rqs grow tabs, so I've used to don't waste.
200 ml Water + Grow Tabs RQS + Rhyzo
200 ml Water + Cannazym + Rhyzo
250 ml Water + Grow Tabs + Rhyzo
250 ml water + Grow Tabs + Rhyzo
PH@6
Lamp @100%
I'll start Train and Topping next Week.
Bisous 💋😘, and see you next week.
Thanks community for follow, likes, comments, always a pleasure 👩🌾👨🌾❤️🌲
Mars Hydro - TS 1000
https://www.mars-hydro.com/ts-1000-led-grow-light
Mars Hydro - FC3000
https://www.mars-hydro.com/fc-3000-samsung-lm301b-led-grow-light
Mars Hydro - SP3000
https://www.mars-hydro.com/sp-3000-samsung-lm301b-greenhouse-led-grow-light
The High Chameleon - Bisous Au THC 💋💋🌲🌲😘😘
https://www.thehighchameleon.com/shop/bisous-au-thc-83
Likes
3
Share

@BLAZED
Follow
Week 15 (23-9 to 29-9)
23-9
Temps: 21.2 to 24.4 degrees
Humidity: 54% to 65%
Watering: Both 500 ml.
Dry Weight #1: 3.4 kg. #2: 4.1 kg.
24-9
Temps: 19.8 to 23.3 degrees
Humidity: 55% to 61%
25-9
Temps: 19.8 to 24.2 degrees
Humidity: 59% to 65%
Watering #1: 700 ml. #2: 500 ml.
Reinstalled the tubes of the autopots, The tubes connected directly to the AutoPots had some cloudy water in it.
I installed a valve between the autopot and the tubes so there is no room for water to stand still.
Dry Weight #1: 3.1 kg. #2: 3.5 kg.
26-9
Temps: 20.7 to 24.5 degrees
Humidity: 62% to 71%
Watering: Both 500 ml.
Dry Weight #1: 3.4 kg. #2: 3.5 kg.
27-9
Temps: 18.6 to 24.5 degrees
Humidity: 52% to 70%
Watering: Both 500 ml.
Decreased the light's intensity from 60% to 50%
Dry Weight #1: 3.5 kg. #2: 3.7 kg.
28-9
Temps: 19.2 to 23.6 degrees
Humidity: 52% to 68%
Watering: Both 500 ml.
Dry Weight #1: 3.8 kg. #2: 4.0 kg.
29-9
Temps: 18.9 to 23.2 degrees
Humidity: 56% to 63%


Likes
50
Share


@ThatoneAKguy
Follow
Fall is in the air even in my tent. The roots went dry for about 6 hours and that was long enough to make her angry. Her and her neighbors started using quite a bit more nutrients and between a little complacency and some personal chaos it was totally my fault. She’s still on track though and going to be a high yielding behemoth that would surprise me in she nears the 6oz mark. And the ROTATE BUTTON AND TEXT IS STILL NOT WORKING ON IOS.
Likes
98
Share


@OrganicNature420
Follow
Germination date 🌱 28/11/2021
Day 77 16/02/2022
Strain 🍁 Solfire Gardens Bahama Bussdown
(Runtz x Bahama Mama)
THC% • Unknown
💡 Mars Hydro FC-E6500
• Power draw 650W + 5%
• Max coverage 5 x 5
• LED 3978 pcs high quality chips
• Max Yield 2.5g / watt
• Noise level 0 DB
• Removable Driver & Light bars
• Daisy chain
• Fast cool system
https://marshydroled.co.uk/ 🇬🇧
PROMO CODE • (organicnature420) DISCOUNT
https://www.mars-hydro.com/ 🇺🇲
PROMO CODE • (ORG420) DISCOUNT 👍🏻
⛺ Mars Hydro 150 x 150 x 200cm
📤📥 AC infinity 6inch
💧 10lt dehumidifier
❄️ 3.1kw air con system
💉 Nutrients GreenBuzzLiquids 🇩🇪
⭐⭐⭐⭐⭐
Organic Grow Liquid • 1-4ml until 2wk flower
Organic Bloom Liquid • 2-4ml flower stage
Organic More PK • 2-4ml +wk3 of flower
Organic Calmag • 1-2ml/lt whole grow
Fast Plants Spray • first 2wks at night lights off
More Roots • 2-5ml veg +2wks flower
Fast Buds • 5ml 12days before flower until wk1
Humic Acid Plus • 2-5ml whole grow
Growzyme • 2-5ml whole grow
Big Fruits • 2-5ml flower stage
Clean Fruits • 5ml flush 1wk
Ph powder
Root Gel
Living Organics
https://greenbuzzliquids.com/
PROMO CODE • organicnature420 15% off ✌️🏼
🥥 Growing Media • Coco Coir
💡 80%
Notes 📝
Nutrients, light and genetics on 🔥❄️❄️❄️❄️❄️
✌️🏼 if your thinking of changing nutrient company's please think of GreenBuzzLiquids. They honestly are a game changer and you can thank me later 😉
Discount codes in bio for Mars and GreenBuzzLiquids 👍🏻

Likes
6
Share

@Ninjabuds
Follow
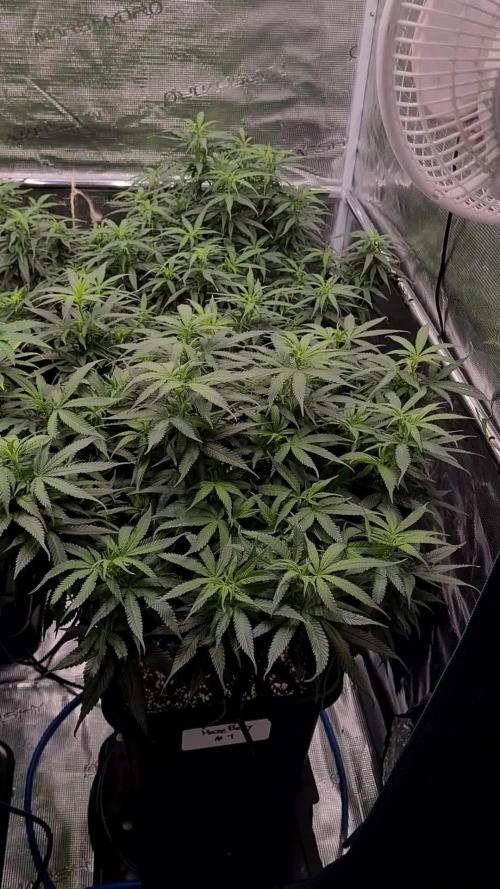
Warning to anyone that growing this strain. It is a huge plant be careful not to let it get to big before flipping to flower. Also this plant is a beast at stacking. Do not lollipop this strain let it grow and then around day 18 or so of flower anylize the plant and lollipop only the lowers that branch out. There will not be that many the plant is almost full stack
Week three of flower is off to an amazing start! At day 22, the ladies are looking incredibly healthy. They're praying like crazy, reaching for the light, and stacking nodes like it's their job. The buds are starting to plump up, and the trichome production is getting intense. I'm so excited to see how they develop over the next few weeks!


Likes
4
Share


@LoganatorDude
Follow
It’s been raining a lot this past couple weeks. The past 4 days I’ve been keeping her out of the rain, allowing her to dry up. Watching her do some last minute ripening. Lots of once clear sections have clouded up nicely. I’ve determined to chop her today, the last day of her life. Day 103 and 65 of those days were flowering.
The last two weeks consisted of foxtail development instead of bud density. She has completely foxtailed every bud. Hard to see on the plant, but once it’s chopped and trimmed, the bizarre structure will be revealed.
Smells good though. Smells like a cross between a green apple candy and the sweet subtleties of fresh fertile earth, with an undertone of a classic fresh cannabis smell. Light and refreshing on the nose.
