Likes
Comments
Share
@Kakui
Follow
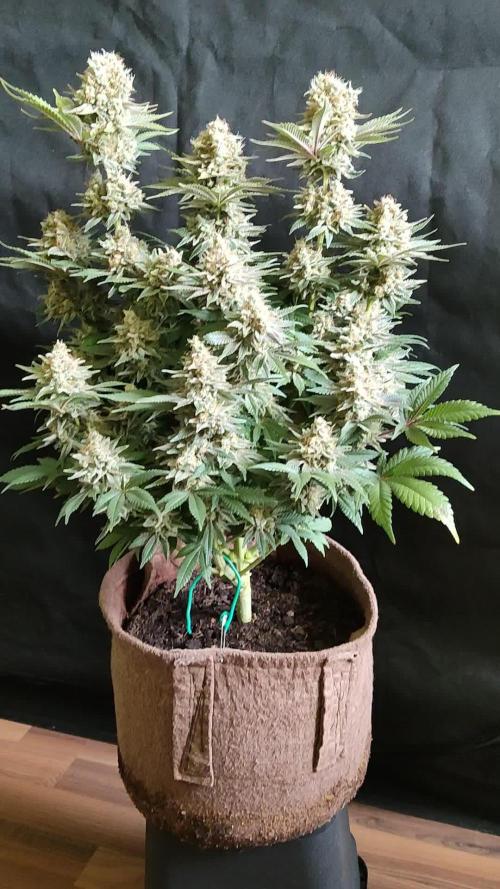
22 Enero(F55): Solo queda una semana para terminar el cultivo, en estos últimos días se está usando Fade de Athena Nutrients, para ayudar con la maduración y mejorar sabores y olores. La luz de los LED se bajó a un 50% y la temperatura del agua de riego también se disminuyó. Los olores están demasiado potentes, tuve que poner filtro de carbono. Los últimos 4 días se regará solo con agua de osmosis + Cleanse.
Likes
9
Share
Hey farmers, It's day 107 and I'm going to call it done, there's a few amber trichomes and she could probably go ANOTHER week but I need my flower tent. This plant went way overtime, and I made a lot of mistakes, but she smells great and one thing is for sure, I'll have a ton of weed in a few weeks. So, this week I flushed and next week I will harvest, the next update to this diary will be post dry, but before cure. As tradition, I'll have a sneaky taste before putting her in jars. For my next cycle I will be upgrading my lights to Mars Hydro FCE 3000, going from 150w to a whopping 300w. I'll probably get a 3x3 in the near future, too. As always, stay safe and happy farming!
Likes
68
Share
@cRypto666
Follow
Freunde der Sonne :) KURZE INFO DER LETZTE EINTRAG HIER IST IMMER DER AKTUELLLSTE NACH DATUM NACH UNTEN SOLLTEN UNTEN SCROLLEN UM ZU VORHIERIGEN EINTR'GE ZU GELANGEN : <3 WEEED wollte dir ein text drücken :) hab mich vertippt... aö ich bin heute eine Bewustseinsstufe beim Grown aufgestiegen ! Endlich kann man jetzt Täglich meine Real Talk oder Reaktion ViD/PIC anschauen. Absofort werde ich meinen GARTEN anderts wahr nehme wer rein schaut kann Exklusive Tipps für seinen Garten gebrauchen. Gerne bin ich für Fragen offen und ich helfe wenn ich kann fals nicht findet sich in der Gruppe immer jemand. DER GRUND IST DAMIT ICH NACHVOLLZIEHEN KANN WAS ICH FALSCH GEMACHT HABE BZW UM WISSEN ZU MANIFESTIRE UND GEWISSE GEDANKENVERBINDUNGEN GESACHFFEN SIND. IM GRUNDE MEIN GROWTAGBUCH ICH TEILE MEINE GEDANKEN MIT EUCH GLEICHGESINNTEN UND WÜNSCHE ALLEN EINE ERFOLGREICHEN GROW brO cRypto666 2 minutes ago cRypto666 <LIEBE> BRUDER ICH LADE DIE VIDEOS UND BILDER NOCH HOCH UND ICH BIN MIR EIGENTLICH SICHER ES KÖNNTE DIR GEFALLEN VIEL SPAß AUF QEEN SEED GIBTS WIRKLICH GUTE BLOGS MIT TOURTORIALS FÜR NEULINGE/ANFÄNGER . Konnte mir so mein Verständnis und Grundlage die fürs grown wichtig ist gut lernen und Aneignen ! WIRKLICH VIELE UND GUTE INFOS !! https://www.royalqueenseeds.de/blog-cannabis-anbau-c3 https://www.royalqueenseeds.de/blog-die-10-grossten-fehler-von-cannabiszuchtern-n86 es ist soweit heute beginnt Woche 1 ... BEVOR WIR STARTEN, WICHTIG WASCH DIR GRÜNDLICH DIE HÄNDE UND BENUTZE GUMMIHANDSCHUE BEIM ARBEITEN! SEHR WICHTIG! Ich freue mich das ich heute wieder das Gärtnern begonnen habe und eine Hällfte der Samen in der Erde sind. Kennt ihr das Gefühl der Vollkomenheit wenn man sich im Garten beschäftigt ? Für mich ist das Therapie und für euch? Ich spiele mit dem Gedanken anstatt Samen zu growen mir einfach eine Mutterpflanze Anschaffe um mir meine Stecklinge zu ziehen ! Dafür brauch ich aber noch ein anderes Zelt und eine Lampe. Die Mütterpflanze kann dann erst mal wachsen und ich kann nebenbei noch mal ein Durchgang mit Autos schaffen bevor die Steckis fertig sind. Wenn es soweit ist gebe ich euch bescheid wenn ich Samen und Setup bei mir stehen. So jetzt aufs eigentliche zurück. Ich habe heute erst mal mein Setup geprüft und so gut wie möglich desinfiziert. Es ist verdammt wichtig das nach jedem Durchgang sauber gemacht wird also zb Zeltwände, Boden, Topfe, Boxen, Wasserbehälter. Habe ich gemacht und habe meine ersten Samen in Anzucht Erde gesetzt, befeuchtet, markieren und in die Box. Wände und Deckel mit zersteuber befeuchten und ab unter die Lampe. WICHTIG MACH DIE ERDE NICHT SO NASS ! DAS GEFÄLLT IHNEN NICHT SONDERN HALTE SIE AM BESTEN FEUCHT IN DEM DU ABEND / MORGEN EIN BISCHEN WÄSSERST! ICH STELLE DIE LAMPE AUF CA 40 cm zum Boden ein bzw der Box. Ein gewisser abstand muss sein um die Fläche komplett zu Beleuchten. Da meine Lampe dimmbar ist muss sie nicht ganz oben hängeng sondern Kann näher an die Pflanzen ran und Stelle den Dimmer auf 20 %. Das reicht anfangs in dem Stadium völlig aus, muss aber dann später angepasst bzw hoch geschraubt werden! Lüfter I läuft 24/7 und sorgt für optimale Bedinungen! WICHTIG LAMPE 20/4 HELL/DUNKEL (REGLER STEHT AUF 20 % LICHTLEISTUNG) DANN HABEN WIR ES EIGENTLICH SCHON GESCHAFFT UND ALLES RICHTIG GEMACHT! Ich versuche schon so viel wie möglich von meiem Wissen an euch weiter zugeben bzw auf Papier zubringen, ist aber NICHT IMMER ZU 100% Möglich, da es einfach zu viele Informationen sind ! Bei fragen einfach fragen und die Comiunity hilft sicher !!! KOMMT ZEIT KOMMT RAT ... ich hab 2 Monate Infos eingeholt und Produkte verglichen ! Auf Queen Royal Seeds gibt es gute Anfänger Tipps sogar teilweise mit Video. Mir hat das sehr geholfen mein Grundwissen aufzubauen. BEVOR IHR DAS GÄRTNERN ANFANGEN KÖNNTE MACHT DIR GEDANKEN WO DEINEN GARTEN STEHEN KANN. #1 AM BESTEN IHR HABT EIN GARTENZIMMER DER NUR ZUM GÄRTNERN BENUTZT WIRD IST DIE BESTE LÖSUNG DA DU DEINE UMGEBUNG VIEL LEICHTER SAUBERHALTEN KANNST #2 DU KANNST DEIN GARTEN AUCH INS WOHN. BZW SCHLAFZIMMER STELLEN WENN DU KEINE MÖGLICHKEIT HAST EIN GARTENZIMMER ZU MACHEN. DAS IST NICHT DIE PERFEKTE UMGEBUNG ABER WENN DU ABLUFT RAUSLEITEN KANNST DANN MACH ES ! DU KANNST ES AUCH IN DEN RAUM STRÖMEN LASSEN MUSST DIR ABER BEWUST SEIN DAS ES EVTL DAS SCHIMMELN IM RAUM ANFÄNGT! IST MIR SCHON PASSIERT ! LEITE SIE WENN MÖGLICH AM BESTEN RAUS ! ACHTE DAS DARUF DAS DEINE LUFTFEUCHTIGKEIT UND TEMP KONSTANT BLEIBEN UND ES NICHT EINMAL ZU WARM UND EINEMAL ZU KALT... IHR WISST SCHON SORGE FÜR EINEN KONSTANTE UMGEBUNG IN DEINEM GARTEN. DIE WAHL DER SAMEN IST AUCH WICHTIG DA ES SORTEN GIBT DIE EINE WARME UMGEBUNG EINE KONSTANTE ODER EINE EHER KALTE UMGEBUNG. AM BESTEN IHR PASST EURE SAMEN EURER UMGEBUNG AN HEIST DU WOHNST IN EINEN LAND WO ES EHER WARM IST ALSO 25-30 ° C dann WÄHLE AUCH EINE PASSENDE SORTE AUS! MEHR GIBTS ERST MAL NICHT ! BIS ZUM NÄCHSTEN MAL!
Likes
76
Share
I've now topped the Gorilla Cookies FF; the weather will be good.
Likes
4
Share
@Xabii
Follow
The other plant in the setup had root rot and also infected this one, did a root wash and hope for the best. Values are average of the day. DATE - EC(us/cm) 20250419 1638 20250420 1874 20250421 1891 20250422 1868 20250423 1845 20250424 1749 20250425 1774 DATE - PH 20250419 5.81 20250420 6.34 20250421 6.21 20250422 6.11 20250423 6.11 20250424 6.12 20250425 6.09 DATE - ORP (mV) 20250419 93 20250420 -1 20250421 64 20250422 199 20250423 156 20250424 143 20250425 250 DATE - °C - RH% (Tent Temp/RH) 20250419 23.9 48 20250420 25.1 53 20250421 24.0 53 20250422 22.9 58 20250423 22.4 57 20250424 21.6 59 20250425 22.7 55 DATE - °C (Reservoir) 20250419 19.1 20250420 20.1 20250421 20.3 20250422 20.5 20250423 20.1 20250424 19.5 20250425 19.3 DATE - CF 20250419 16.38 20250420 18.74 20250421 18.91 20250422 18.68 20250423 18.45 20250424 17.49 20250425 17.74
Likes
14
Share
The Runtz auto girls are doing 😊. They have settled in and are fattening and stacking nicely. They are only about 16-18 inches total, but have some nice fat buds, should be some good weight. They are starting to develop some frost, but are very greasy to the touch 🤤 Trying to keep them in a sweet spot so they keep developing. RH around 55-58 % and Temps between 77-80 degrees. They are in week 8 now, and suggested harvest is about 70-75 days… Happy Gardening 🇨🇦👊❤️🌱
Likes
6
Share
@Simba732
Follow
Ms Purple is a strong girl! Shes taking on the nutes like a princess so I’m adding more of some and removing others going into her flowering. All glory to the most high 🤲🏾
Likes
99
Share
Shes kinda dark, cal/mag dropped to .5 gallon. I hit her with Game time and she burned a tad. But shes good. Only getting cal/mag and green sensation. Had to tie some of her branches up, sagging badly. She is freaking rocking! Now if the RH will go away. Darn rain!
Likes
25
Share
@Densko
Follow
End of week 8 for medusa 1/5. Plant is looking beautiful with the LST. I will reduce thd nutrients week by week from now, ensuring for a clean finish without flushing. I still feel the veg time for these genetics are too short for big yields. I reckon it will yield around 60 grams. 2/5 was topped and will yield more by the looks of the amount of shoots compared to 1/5. Check my other diaries for the entire experiment. Watering 3L every 2/3 days Smell is very strong now. It will probably be ready in 3 weeks time
Likes
11
Share
@Jayhaze
Follow
Started this week on 15th of March, being day 8. Got to meet Doc (nr1) that day and met Happy (nr2) on day 10. Unfortunately nr3 wont show up, I dug it up and saw that it's still in its shell. Placed the seed back in a paper towel. Doc and Happy went quite fast on day 11 and got quite a bit of sun this week. They are now, on day 16, tuesday 23th of March, about 4cm each. Will plant them in the bigger pots today.
Likes
3
Share
Likes
12
Share
@Bncgrower
Follow
Another successful grow! This strain has a wonderful aroma and generous, resinous buds. This will definitely always be my go-to strain. 💪🥦
Likes
14
Share
@BLAZED
Follow
Week 1 (31-1 to 6-2) As for my waterings, i give RO water, with 0.50 grams of Calcium, and 0.2 ml of Atami Rootbastic a liter. Growdiaries wont let me put my nutrients in grams so i'm forced to choose mililiters. 31-1 Watering: 20 ml. They are stretching quite a bit. I turned on the fan on the lowest setting for some air movement. 1-2 Watering: 20 ml. 2-2 Watering: 20 ml. 3-2 Watering: 20 ml. Heights: Kush#1: 9cm Kush#2: 7.5cm 4-2 Watering: 40 ml. I attached a wire to the Kush#1 for extra stability as it was a bit fragile in combination with the fan. 5-2 Watering: 20 ml. 6-2 Watering: 60 ml. Heights: Kush#1: 10cm Kush#2: 8.5cm
Likes
2
Share
🍃 Purple Haze Photo A — Week 4 | Preparing for Gravity-Fed Growth Every grow has one plant that quietly starts telling you a story before flowering even begins. Purple Haze A is becoming exactly that. Growing under the same Future of Grow LED, receiving the same PPFD, sharing the exact nutrient recipe, environmental conditions and care as every other plant inside the tent, she has decided to express herself in a completely different way. Instead of remaining compact, she has embraced her sativa heritage and is already showing the elegant structure Purple Haze is famous for. Longer internodes. Large healthy fan leaves. Fast vertical growth. Strong side branching. Exactly the characteristics we hoped to see. This diary is part of my ongoing 12/12 From Seed Challenge, documenting every step exactly as it happens. No shortcuts, no hidden techniques—just honest observations from a home grower enjoying the journey one day at a time. ⸻ 🌱 Week 4 Development This week was all about preparing for the next big milestone. Purple Haze continued building an exceptionally strong root system while producing vigorous new shoots across every node. The leaves are deep green, beautifully flat and reaching toward the light, showing excellent nutrient uptake and a very healthy metabolism. Stem thickness has increased noticeably, giving plenty of confidence that she’ll easily support future flower production. The spacing between branches also makes her an excellent candidate for training later, allowing light to penetrate naturally through the canopy. Sometimes you can already tell a plant has personality long before flowers appear. This one certainly does. ⸻ 🚿 Time for AutoPot This week also marks another exciting step. Purple Haze A will soon become one of the plants running on my AutoPot system. Since every plant in this project receives identical lighting, nutrients and environmental conditions, this creates a great opportunity to observe one important variable: Top watering versus gravity-fed irrigation. Rather than trying to prove one method is universally better, I simply enjoy comparing different growing styles under the same conditions and documenting the results honestly. That is one of the things I love most about this hobby. Every grow teaches something new. ⸻ 💧 What is an AutoPot? For anyone discovering these diaries for the first time, AutoPots are a completely passive irrigation system. There are: ❌ No pumps ❌ No electricity ❌ No timers Instead, everything works using gravity. A nutrient reservoir sits slightly higher than the pots, allowing the solution to flow naturally through the tubing. Inside each tray sits the heart of the system: The AquaValve The AquaValve is an ingenious little mechanical valve. When the tray becomes empty, the valve opens and allows fresh nutrient solution to flow in. Once the tray reaches the correct water level, the valve automatically closes. The plant then drinks exactly what it wants. Only after the tray is empty again does the cycle repeat. Because the substrate experiences a natural wet-dry rhythm while always having nutrients available when needed, roots tend to develop extremely well. Healthy roots often translate into healthier plants. At least, that has been my experience. ⸻ 🌿 Why I Enjoy Growing with AutoPots Every grower eventually finds methods that simply fit their style. For me, AutoPots offer several advantages: • Consistent moisture around the root zone • Reduced daily watering workload • Excellent oxygen availability inside the substrate • Stable nutrient delivery • Very vigorous vegetative growth Perhaps most importantly… They let me spend more time observing the plants instead of carrying watering cans every day. And honestly, watching the AquaValve quietly doing its job never gets old. ⸻ 📊 Week 4 Environment • Week 4 — Vegetation • Height: 25 cm • EC: 1.35 • pH: 6.1 • Temperature: 33°C Day / 25°C Night • RH: 63% • CO₂: 639 ppm • Light Schedule: 12/12 • Water consumption: approximately 1.1 L per plant every 24 hours ⸻ 🌿 Feeding Schedule This week the nutrition remained simple and balanced using the Plagron Terra line. • Terra Grow – 1.8 ml/L • Power Roots – 1 ml/L • Pure Zym – 1 ml/L • Sugar Royal – 1 ml/L • pH Plus – 0.03 ml/L • Lemon Kick – 0.03 ml/L The plant responded beautifully with rich green foliage, vigorous growth and absolutely no signs of nutrient stress. Exactly the kind of consistency every grower hopes for. ⸻ 💚 Final Thoughts Week 4 feels like the beginning of something special for Purple Haze A. She has developed into a vigorous, healthy young plant with beautiful structure, outstanding leaf health and plenty of energy heading toward the flowering stretch. Now the AutoPot system enters the picture, adding another interesting chapter to this diary. Whether gravity feeding produces bigger plants or simply makes life easier, we’ll discover together over the coming weeks. That’s the beauty of documenting everything honestly. Every plant becomes its own little experiment. ⸻ 🙏 Thank You A huge thank you to everyone following this journey and supporting home growing around the world. Special thanks to all the amazing companies helping make this project possible: 🌱 Zamnesia Seeds — for the incredible Purple Haze genetics. ? Plagron — for providing the complete Terra nutrient line and outstanding growing media. 💡 Future of Grow LED — for delivering consistent full-spectrum lighting throughout the entire grow. 🌿 GrowDiaries — for bringing together growers from every corner of the world and giving us a place to learn from one another. And finally… Thank you for taking the time to follow this adventure. Your comments, advice, questions and encouragement make these diaries far more enjoyable to create. Growers Love and see you next week, where Purple Haze A begins her AutoPot journey in earnest. 🌱💜
Likes
7
Share
the bud start to fat really fast and the trichomes production is over the top the smell is really sweet n creamy
Likes
51
Share
@Corwinism
Follow
WEEK 5 (03/28/2021 - 04/03/2021) Day 38: 03/28/2021 Plants had their first feeding today. It’s been about 3 or 4 weeks giving them tap water only. With my ppm dropping in the soil, I thought now would be a good time. Leaving out the Cal-Mag this feeding. Nutrient mix: 651ppm, 6.0 pH, 71℉ FF Big Bloom: 5ml/gallon (⅓ strength) = 15ml/3 gallons FF Grow Big: 5ml/gallon (⅓ strength) = 15ml/3 gallons ppm/ppm = runoff/soil JB#1 - 960ppm/309ppm, pH 6.9 JB#2 - 1290ppm/639ppm, pH 6.8 AP#1 - 1400ppm/749ppm, pH 6.8 AP#2 - 1190ppm/539ppm, pH 6.8 GC#1 - 1190ppm/539ppm, pH 7.0 GC#2 - 1350ppm/699ppm, pH 6.8 ------------------------------------------------------------------------------------------------------------------------------------------- Day 41: 03/31/2021 Plants watered around 5:30-6:00 p.m. ppm/ppm = runoff/soil JB#1 - 955ppm/653ppm, pH 6.8 JB#2 - 1070ppm/768ppm, pH 7.0 AP#1 - 1470ppm/1168ppm, pH 6.8 AP#2 - 1390ppm/1088ppm, pH 6.8 GC#1 - 1110ppm/808ppm, pH 7.0 GC#2 - 1160ppm/858ppm, pH 6.9 ------------------------------------------------------------------------------------------------------------------------------------------- Day 44: 04/03/2021 Plants watered between 5:30-6:30 p.m. Botanicare Hydroguard was used at half-strength to supplement the roots and as a preventative against rot. Tap water: 247ppm, pH 9.4, 70℉ Botanicare Hydroguard: 1ml/gallon = 3ml/3 gallons pH Down: 11.5ml Mixture: pH 5.6, 285ppm (+43ppm from pH solution) ppm/ppm = runoff/soil JB#1 - 858ppm/573ppm, pH 6.8 JB#2 - 857ppm/572ppm, pH 6.8 AP#1 - 984ppm/699ppm, pH 6.8 AP#2 - 1030ppm/745ppm, pH 6.9 GC#1 - 880ppm/595ppm, pH 7.0 GC#2 - 932ppm/647ppm, pH 6.9 ------------------------------------------------------------------------------------------------------------------------------------------- This week has been much more pleasant than the weeks prior. I believe my plants are finally getting acclimated to the medium and recovering from transplant shock. New growth is looking much healthier. Just as a preventative measure, I picked up some Botanicare Hydroguard to use in an attempt to supplement the roots and bring the pH of the soil down to where I want it. Personally, the pH remains just a tad too high for my liking this week. I would like it more in the range of 5.7-6.5 but I'll give it a week or so to see the reaction to the Hydroguard. I've continued with more LST on all but the Glookies #2. On this plant I simply did a topping. It was a risk, considering the plants isn't vibrantly healthy, but I need to maintain it's height. I also did a second topping to the American Pie #1. As can be observed from the photos, not all of the plants were shaped the same way. I got creative with the fabric pots and I decided to LST a few plants a little bit differently just to see which technique/style I liked the most. So far, I am digging the way the Jelly Bananen #1/#2 and American Pie #2 are shaping up. They are going to have a beautiful, wide canopy when they head into flower. I'm considering transplanting into 5 gallon fabric pots within the next week or two so I can flip them to flower two weeks later. My intuition is telling me this has been a pretty lengthy vegetative stage, thus far. I'm expecting all of my plants to double in size during the flowering stage, which should be anywhere between 65-70 days long. I made sure to select strains with similar flowering times (60-70 days). Thanks for stopping by this week. Please feel free to leave a comment or any tips/advice! Until next week! 🙏
Likes
2
Share
@Kirsten
Follow
16.2.25: I decided to check out the lower canopies of all plants to see if I need to get rid of any foliage. I did get rid of a few small branches and leaves. However, whilst I was doing this, I saw more garden pegs from my LST remaining. There were about 6 or more in Pink Mist alone. Additionally, on Watermelon, there were some left in, too. I'm so annoyed to see that because the plants are really stretching, and I could've potentially disrupted this by leaving the pegs in for all this time without realising it. 🤞 that I haven't compromised things too much. We'll see. I watered today with 2ltrs of dechlorinated water PH'd to 6.3 containing the following nutrients; ♡ .8g Green Leaf Nutrients PK booster ♡ .5g Ecothrive Biosys I ordered quite a few things for the garden. I got Greenleaf Nutrients Sea K(elp) and Mega Crop Parts A+B. To go with their PK Booster I got last month. I'm excited to try it all together. Next run, maybe just using these. We'll see how it goes. 18.2.25: The plants are going crazy for water! Everything is getting used right up so fast! Today, I decided to add some more Black Strap Molasses to add some carbs and other micronutrients. I'll add the jar with the label in the photos section above. I watered a very small amount to each plant. What I put in: ♡ Black strap molasses 150g ♡ 2g Sea K(elp) Greenleaf nutrients. I dissolved everything in 4ltrs of dechlorinated water PH'd to 6.4. 19.2.25: I received the majority of the garden purchases that I made. I'm still waiting for the Ecothrive Life Cycle. I wanted to top dress, but it's been delayed unfortunately. I am using my Greenleaf nutrients products which I bought on Amazon. I got the Mega Crop 2 part system Part A and Part B. I have the Sea K(elp), and the bud explosion PK booster. I really wanted to get some of their sweet candy asking read many positive reviews. Unfortunately, for me, this is unavailable to buy currently. So that's a little disappointing. I needed to do a good watering so when my nutes were delivered today, I got excited 🤗 I watered 2ltrs of dechlorinated water per plant, PH'd to 6.4, containing the following nutrients: ♡ 1g Mega Crop Part A ♡ 1g Mega Crop Part B ♡ .5g Sea K(elp). The plants drank this up within a few hours. I'm going to try and hold off on watering in hopes that my Ecothrive Life Cycle will arrive so I can top dress and water it in then. 20.2.25: My Ecothrive Life Cycle arrived yesterday, and the plants are ready for their top dress and a good watering in. I have some Biobizz Light Mix, Canna Coco,and perlite. I'm going to use this as a base to mix my amendments in. I'm going to fill my 5 gallon bucket with about 4.5 gallons of my top dress mix. I will distribute this across 6, 4-5 gallon pots. Then I will water in well with Greenleaf nutrients Mega Crop Parts A+B and Sea K(elp). I've made a crude attempt to video mixing my top dress. Don't listen to the audio. lol, my YouTube didn't stop playing whilst I recorded this 😂 So anyway, I added the following amendments to the above base mix of 4.5 gallons; ♡ 3 TBSP Ecothrive Life Cycle ♡ 3 TBSP Vitalink Bat Guano ♡ 3 TBSP Ecothrive Charge ♡ 1 TBSP RHS Mycorrhizal Fungi granules ♡ 6 TBSP Ground Cinnamon.
Likes
5
Share
@Ninjabuds
Follow
Man, that plant is really taking off. It's finally starting to look just like the good old Gas House Parent. I can almost smell it already. Can't wait to see how much bigger it gets! Well, another year has come and gone. Yesterday was New Year's Eve, and I want to wish all of you a happy and healthy 2025. May this year bring you all the things you've been wishing for. Let's make this the best year yet!
Likes
7
Share
@Mimi420
Follow
Day 14 Flower — girls looking sweet, stretch winding down 🌿 Day 14 of flower and the girls are loving it — canopy’s filling out and I think the big stretch is starting to settle. I topped up the pots with a bit more soil and did a light clean under the canopy — one more proper lollipop/clean and then I’m leaving them to do their thing. Did a few gentle supercrops where needed to tame the highest tops. Big worry right now — night humidity. My box lives in a cold, damp garage so I have to switch the inline exhaust off at night or temps drop too low. I’m running a 150W cabinet heater to hold nights around 17–20 °C, and two circulation fans (one under the net, one above) run 24/7, plus a small dehumidifier that’s not keeping up. With the exhaust off RH jumps to ~80–85% overnight which is a real risk for bud rot as the colas fatten. Feeding & training: pots got a top-up of soil, still on the same organic program. I cleaned the lower growth today and tucked what I could — after one last clean I’ll stop heavy training and let them bulk. If anyone’s run into the same cold-garage / high-night-RH issue — what worked for you? I’m thinking: better dehu (bigger mini unit) or routing a drain from my small unit outside the box, short timed bursts on the inline fan overnight to avoid full-on chilling, or a tiny heater + targeted air mixing to keep box temp up without frying the plants. Appreciate any real-world tips. Pics attached in my diary. #GrowDiaries #SCROG #Day14Flower #IndoorGrow #HelpNeeded