Likes
Comments
Share


@Lelex95
Follow
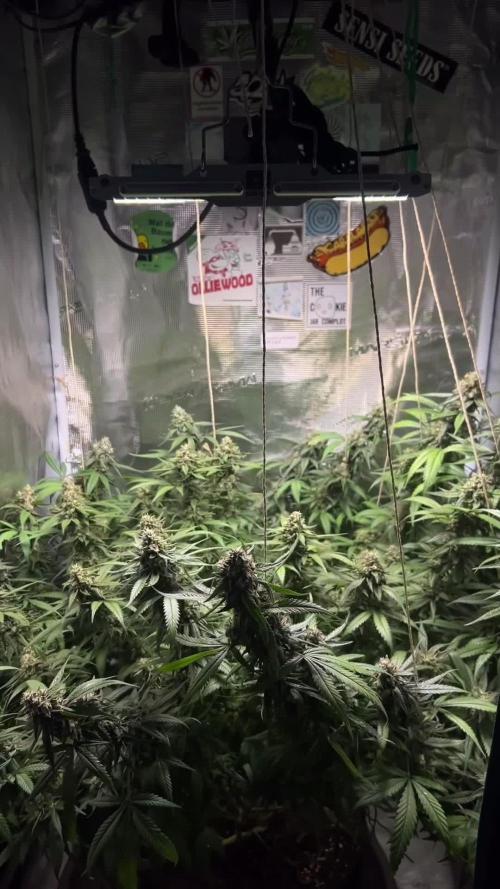
Changement de ph down l'EC monte beaucoup moins haut , pour arriver au bon ph avec plus d engrais .
Vus que mais graine ne sont pas partis en même temps. je suis obligé de déplacer les dernières au fur et a mesure . J'ai fait plusieurs erreurs de débutant au cours de cette culture ma lampe était trop proche en croissance ce qui à empêcher mes plants de grandir avec des étage très raprocher. un luxmètre sera de rigueur pour ma prochaine culture


Likes
229
Share


@OrganicNature420
Follow
Germination date 🌱 12/07/2021
Day 78 01/10/2021
Strain 🍁 SinCity seeds Frosted Biscotti
(Biscotti Sundae x Whitenightmare)
THC% • Unknown
💡 Mars Hydro FC4800
• Power draw 480W + 5%
• Max coverage 5 x 5
• LED 2070pcsSamsungLM30B1&Osram660nm
• Max Yield 2.5g / watt
• Noise level 0 DB
• Removable Driver +2m cable
• Daisy chain (multiple lights)
https://marshydroled.co.uk/products/mars-hydro-fc-4800-led-grow-light-samsunglm301b-commercial-greenhouse-medical-indoor-kit 🇬🇧
https://www.mars-hydro.com/buy-fc-4800-480w-4x4-energy-saving-full-spectrum-commercial-led-grow-light-mars-hydro-for-sale 🇺🇸
PROMO CODE • (ORG420) DISCOUNT 👍🏻 marshydroled.com
⛺ Mars Hydro 120 x 120 x 200cm
📤📥 AC infinity 6inch
💧 10lt dehumidifier
❄️ 3.1kw air con system
💉 Nutrients GreenBuzzLiquids
Organic Grow Liquid • 1-4ml until 2wk flower
Organic Bloom Liquid • 2-4ml flower stage
Organic More PK • 2-4ml +wk3 of flower
Organic Calmag • 1-2ml/lt whole grow
Fast Plants Spray • first 3days at night lights off
More Roots • 2-5ml veg +2wks flower
Fast Buds • 5ml +wk2 of veg until 1wk flower
Humic Acid Plus • 2-5ml whole grow
Growzyme • 2-5ml whole grow
Big Fruits • 2-5ml flower stage
Clean Fruits • 5ml flush 1wk
Ph powder
Root Gel
Living Organics
https://greenbuzzliquids.com/
PROMO CODE • organicnature420 15% off ✌️🏼
🥥 Growing Media • Coco Coir
Notes 📝
Frost machine ❄️❄️❄️❄️
Smell 👃🏼 is unreal
Discount codes in bio for Mars and GreenBuzzLiquids 👍🏻

Likes
13
Share

@ILSW_05
Follow
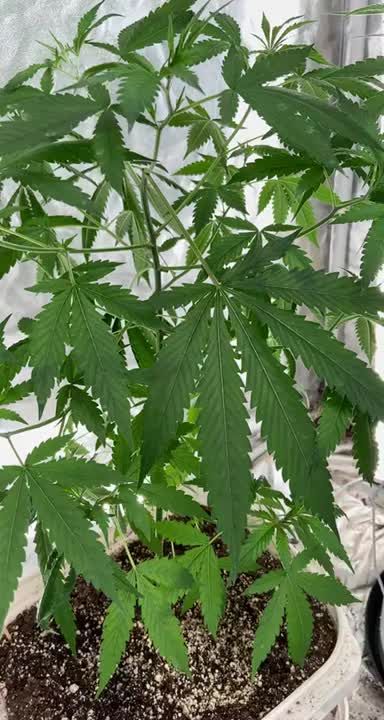
the sweet skunks are doing well
they’ve responded well to the toppings & the clones are rolling strong as well 💪🏼
hoping to get a lot more of these babies going
happy growing friends 🤙🏼

Likes
37
Share


@DogDoctorOfficial
Follow
🌱 Week 3: Mutant Magic—The Veggie Vibes Begin! 🌱
Hey Grow Fam! We’re officially cruising into Week 3 of veg with these Mentha de Croco mutants from @TerpyzGenetics, and WOW, they are stealing the show with their funky, unique traits. The diversity in their growth patterns, leaf shapes, and overall structure has me in awe every single day. It’s like watching a gallery of nature’s art come to life! 🌿✨
This week, I’m excited to share something extra special—a photo showcase capturing the magic up close, featuring some incredible macro shots of water drops and reflections. Plus, I’ve included a behind-the-scenes video to show you how these shots came to life, proving it’s all-natural and no digital effects! 🌟📸
Tent Life: Keeping It Steady
This week’s conditions remain rock-solid, giving these beauties the stable environment they need to thrive:
• Temperature: Holding steady to ensure smooth growth.
• Humidity: Keeping it nice and high to encourage lush, healthy foliage.
• Lighting: The Future of Grow (FOG) LED is still set at 200 PPFD, which is perfect for building strong, compact plants with tight node spacing.
Consistency is the name of the game here, and it’s paying off beautifully. 🌟
Nutrition: Feeding the Funky Mutants 🌿
The feeding schedule this week continues with the amazing Aptus Holland organic-mineral lineup. Here’s the mix that’s keeping these plants healthy, happy, and thriving:
• Regulator (0.15 ml/L): This is my go-to for fortifying cell walls and helping plants handle any environmental stress. It’s like a shield of armor for them!
• CalMag Boost (0.25 ml/L): Calcium and magnesium are crucial for strong stems and vibrant, green growth—an absolute must for mutants showing off their unique structures.
• All-in-One Liquid (1 ml/L): The backbone of the nutrition program, delivering a balanced diet of essential nutrients for steady, healthy development.
• Start Booster (0.25 ml/L): Packed with root-stimulating microbes and nutrients, this ensures the root systems stay strong and can support the impressive foliage growth above.
Why I Love Aptus Holland:
This organic-mineral line perfectly blends nature and science. It’s clean, efficient, and gives the plants exactly what they need without overloading or causing buildup. The results? Happy, resilient plants that thrive from root to tip. 🌱✨
Growth Highlights: The Funk Unfolds! 🌿
Each plant is starting to show off its unique traits, and I couldn’t be more excited. Mutant genetics like these are a grower’s dream, bringing surprises and individuality with every leaf that unfolds.
I’m noticing:
• Leaf Diversity: Wide blades, funky asymmetry, and new textures emerging.
• Steady Growth: Compact, strong plants with great structure—perfect for setting up the next stages of training and growth.
This week, I also took some time to capture the magic of these plants through photography. Using my trusty Sony and Nikon cameras, I snapped some macro shots featuring stunning water drops with beautiful reflections. These photos really showcase the intricate beauty of nature that’s so easy to overlook.
📸 Behind the Scenes: To top it off, I’ve included a video showing how these photos came to life. No tricks, no effects—just a little patience, the right light, and the magic of macro photography. It’s my way of sharing not just the plants’ journey but also the creativity and wonder that comes with it. 🌟
Grower Reflections & Tips 💡
💚 Observation is Key: Take time to really “read” your plants. Each one is unique, and mutants often need a little extra attention to their quirks.
🌱 Embrace Creativity: Whether it’s training techniques, feeding strategies, or photography, let your passion shine through—it’s all part of the journey.
💧 Steady Feeds, Happy Plants: The balance of Aptus Holland nutrients is keeping these plants perfectly happy without overfeeding. Light but consistent wins the race in these early stages!
Shoutouts & Grower’s Love 💚
A big thank you to:
• @Terpyz Genetics for these incredible, unique seeds.
• @Aptus Holland for the nutrition line that keeps these mutants thriving.
• @Future of Grow for the perfect lighting setup.
•
@Trolmaster for the best controls in the market.
• @Grow Diaries for providing a platform to share this journey with the grow fam.
• And YOU—the amazing community that makes this all worthwhile. Whether you’re a follower, a fellow grower, or just stopping by, your energy means the world!
Let’s keep celebrating these mutants and spreading positivity. Until next week… let’s grow, let’s grow, let’s grow! 🌱✨
Genetics - Mentha De Croco
https://terpyz.eu/products/menta-de-croco-fern-type?_pos=1&_sid=e9237cbcb&_ss=r
DogDoctorOfficial Discount Codes @ terpyz.eu - DOCTOR 15% off
Nutrition - @aptusholland
https://aptus-holland.com/
Led Power @ F.O.G. Future Of Grow
https://www.thefuturofgrow.com/en/online-store/BLACK-SERIES-600-p489093171
Controls @ TrolMaster
https://www.trolmaster.eu/tent-x
As always thank you all for stopping by, for the love and for it all , this journey of mine wold just not be the same without you guys, the love and support is very much appreciloved and i fell honored with you all in my life
With true love comes happiness Always believe in your self and always do things expecting nothing and with an open heart , be a giver and the universe will give back to you in ways you could not even imagine so
Growers Love To you All 💚


Likes
16
Share


@GreenMesa
Follow
Excelente comienzo de semana. Se aplicó un nuevo producto y en unas horas estaré subiendo un video de las plantas 👌😌😏 🇦🇷💪


Likes
48
Share


@AsNoriu
Follow
Day 29. Garden is just perfect. Will update more after first feed, monday - most likely !!!
Day 30. Its Jungle officially !!! ;)))
Size of some leaves impress and gives big hopes for me a lot ! Girls are super strong and healthy, thinking to do defoliation session at the end of the week.
First feed done ! Next watering they will get silica acid.
Day 31. Plan change in feed, they got Great White Mycorrhizar tea, next watering will be without aditives and then Silica acid. Girls are very healthy, so healthy that powdery mildew not far away ;))))) had to take down loads of leaves to improve air circulation. Heavy defoliation for most big girls, all bottoms cleaned from weak branches, HST to all toped plants too...
But size of leaves!!@!! All girls are very strong plants, really nice genetics from Zamnesia !
Happy Growing !

Likes
12
Share

@Vince_Van_Grogh
Follow
🌿😎.
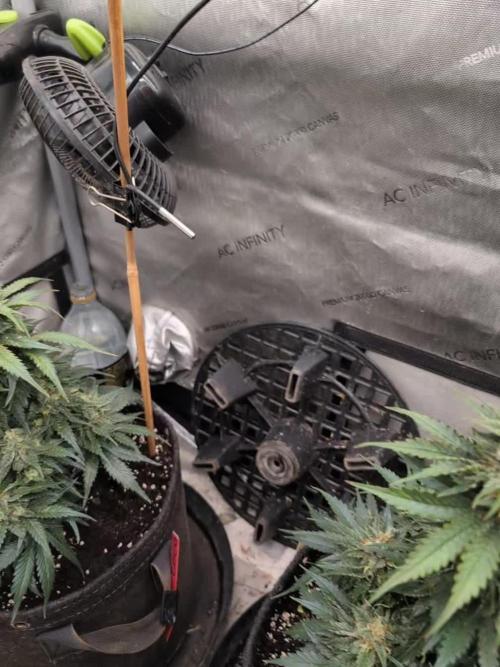
Day 50 01 Mar, Tues PM ♥️💛💚
Each got 2700 mL
1 CalMag, 0.5 Grow Big
1 Tiger Bloom, 1.5 Big Bloom
Day 53 05 Mar, Thurs AM♥️💛💚
Each got 2700 mL
Only put in Recharge.
Day 59 07 Mar, Sat PM♥️💛💚
Each got 280 mL
1.5 CalMag, 0.5 Grow Big
1.5 Tiger Bloom, 1.2 Big Bloom
Trying to water every 1.5 days at peak flower.
Everything is steady, heavy indica plants.
Buds look like they might get phhhaaaat!


Likes
17
Share


@HowtoBubatz
Follow
It’s the third week of flowering, and the plants are starting to show some exciting progress! 🌿
The buds have begun to build mass, and the first signs of trichome development are visible, giving them a light nice, frosty look. ✨
I did notice a few nutrient deficiencies on the leaves, likely due to underfeeding, as I’m using a medium with 50% coco.
To fix this, I adjusted the nutrient levels, and the plants seem to be responding well. 🌱
The plant that wasn’t trained with LST is about a week ahead in development compared to the LST version, showing more advanced bud growth.
Also, the smell is becoming more pronounced, with the first hints of that classic, sweet aroma filling the tent. 🍬🌿
I’m excited to see how things continue to unfold in the coming weeks! 😁✨
Likes
20
Share

@AsNoriu
Follow
They are runing well. More light would be better. Still doubt about defoliation. Thinking to make last heavy one on week 7 and start to flush at the end of it. Girls super healthy, i think i will easy beat 1g/w...
Fingers crossed ;)
Extra :
Made second round of defoliation. All looks great !
Plus some night footage before defoliation
If you ask where i found courage to make it again :
https://m.youtube.com/watch?v=m7j3GMgKEM0
Miami Mango conviced me again ;)
P.s. my plants where all time healthy, thats why i can try out such tricks. Anyway one plant no clearing, no lolitoping, no defoliation. We shall see the weight results, i have a competitor for her. On third week of flowering they both where the same. Time will tell ...
I rotate my plants everyday so they get even light and same feeding.
P.s.2 Plant in the midle is Choco Lopez auto, dont count her ;) i did all the same to her as to other photoperiod plants. She is the Beast ;)
P.s.3
24 hours after dofoliation they started to smell really hard... Citrus and berries aroma all the way .. No sign of stress and easy to see how healthy they are , still blooming ;)
P.s. 4
I always work with plants before watering them and when i harm them - i always water with ph water only. Soil is ritch enough and if damage will happen less feeding will reduse it ...

Processing
Likes
51
Share


@Silverback_Guerilla
Follow
2/12:
I moved the Platonium, both Sucrose Overdose, and the last Muscadine Wine into the dark.
The Velvet Sugah Bref, GG4, and Berry Bomb are the last plants from this diary, and they are just getting water and Liquidsoil. They are all in the closet now and getting blasted with extremely cold winter air and intense UVB for their last week.
2/13:
I harvested the Platonium, both Sucrose Overdose, and the last Muscadine Wine tonight. Sexy sexy bitches...ooh la la!
Not embarrassed to say that I got major wood while giving them a bath...😜

Likes
20
Share


@Robin87
Follow
Same as there big sister, 54th day of flower.. These plants haven’t had any work done what so ever, not one leaf has been removed from the start, no folding of leaves, literally just left to flourish in there “natural” environment, and I couldn’t be more happier with what’s inbetween the “mess”😂.. buds are swollen and ❄️, stinking of 🍋.

Likes
8
Share

@DogDoctorOfficial
Follow
💙 Project Blue Tent – Week 9
Pickle Lemon Haze F1 – Pheno A
🌿 When The Plants Make You Rearrange The Room
Hello everyone, and welcome back to another chapter of Project Blue Tent! 💙🌱
And...
what a week this has been.
If you've been following this project from the beginning, you already know that these four Blue Waffle F1 and Pickle Lemon Haze F1 plants have been growing with an incredible amount of energy.
This week, however, they finally made one thing very clear:
We were running out of room.
😂
The plants had stretched much more than I wanted.
The LEDs were getting too close.
The combination of the drainage system, pots, substrate and overall height of the plants was eating into our available vertical space.
So...
we adapted.
And Pickle Lemon Haze Pheno A was right there in the middle of it all.
Growing.
Stretching.
Flowering.
And apparently completely unconcerned about the fact that she was becoming too tall for her own room.
😂💙
So this week wasn't about sitting back and watching.
This week was about reorganizing the environment around these girls and giving them the space they need to continue the journey.
🌸 Week Nine – The Stretch Was Real
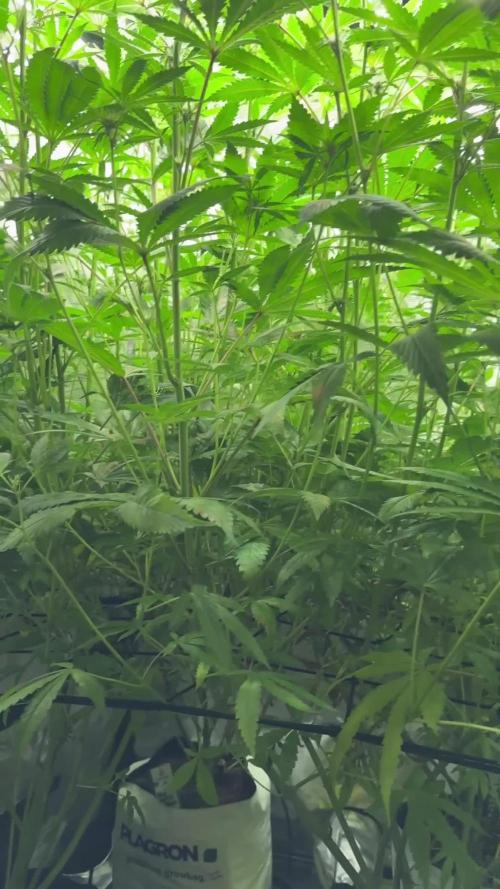
Pickle Lemon Haze Pheno A is now approximately 145 cm tall.
And that's the plant itself.
Add the pot.
Add the substrate.
Add the drainage system underneath everything.
Then look at where the LEDs were sitting...
Suddenly those 145 centimetres become a very serious number inside a tent.
😂
I knew we could see significant stretching after seven weeks of vegetation.
We discussed it last week.
The plants had already gained a considerable amount of height almost immediately after the flip.
But honestly?
They still managed to surprise me.
They didn't just stretch a little.
They stretched enough that we had to rethink the physical arrangement of the room.
And I think that's one of the most important lessons from this week.
Sometimes you don't solve a plant problem by changing the plant.
You solve it by changing the room.
💡 Making Room For The Canopy
The first major change was moving the carbon filter and extractor outside the tent and onto the top.
Previously, that equipment was taking up valuable vertical space inside the grow area.
By relocating it, we gained those precious centimetres back.
The airflow system now pulls air from inside the tent, through the carbon filter and extractor positioned above, and then exhausts it outside.
And that gave us something we desperately needed:
room above the plants.
Once the equipment was out of the way, we were able to raise the LEDs toward the top of the tent.
That immediately gave the canopy more breathing room.
And considering some of the tops had already started showing signs of getting too close to the lights...
this was very welcome.
🔥 A Few Tops Got Too Close
Before we made the changes, we did have a few leaves and tops showing some LED stress.
Nothing catastrophic.
Nothing that has changed the overall health of the plants.
But there were some burned areas where the canopy had simply gotten too close to the light.
The important thing is that we caught it.
We raised the LEDs.
We opened the canopy.
We created more space.
And now we're watching how the affected areas recover.
That's part of running a real grow.
You can calculate distances.
You can watch environmental numbers.
You can plan your canopy.
But eventually the plant gives you the final report.
And in this case, the report was:
"Doctor... the sun is a little too close."
😂☀️
Message received.
✂️ The Big Defoliation
Once we had created the additional vertical space, the next job was opening the plants.
And we went deep.
There was a significant amount of foliage removed from the room.
The plants had become incredibly dense, and at this stage that density needed to be managed.
The purpose wasn't to remove leaves simply because we had scissors in our hands.
The purpose was to reduce unnecessary congestion and expose the flowering structure we've spent so much time building.
More visibility.
More airflow.
More room around the flowering sites.
A cleaner canopy.
And a better-organized flowering room.
Pickle Lemon Haze Pheno A came through the process beautifully.
And when you look at her now...
you can actually see the architecture again.
The branches.
The flowering sites.
The SCROG.
The spacing.
Everything is much easier to read.
🌿 What Defoliation Is — And What It Isn't
I think this is worth explaining because we're showing quite a significant defoliation in the photographs.
Defoliation isn't about removing healthy leaves because healthy leaves are somehow undesirable.
They're not.
The leaves are doing important work.
What we're managing here is excessive foliage and congestion inside a very dense flowering room.
The plants had built an enormous amount of vegetative material.
Now we're transitioning toward a flowering structure.
So we're selectively reducing what we don't need in order to make the remaining architecture more functional.
And I'm not expecting the defoliation to magically create flowers.
That's not the point.
The point is simply to give the flowers and remaining canopy a better environment in which to develop.
Now we've done the work.
And now...
we leave the plants to respond.
🕸️ The Second SCROG Is In
The other major addition this week is the second SCROG net.
The first SCROG helped us build and distribute the canopy during vegetation.
It did its job beautifully.
But these girls have become much taller than originally anticipated.
And now we're thinking about the future weight of those flowering branches.
So the second net is primarily about support.
We're not trying to turn these plants back into a vegetative canopy.
We're preparing the structure to carry what is coming.
Because looking at these plants now...
I have a feeling some of those branches are going to appreciate having something underneath them later.
😂
It's always better to have support ready before you need it.
🌬️ Two Fans – Creating The Vortex
We also added another Zamnesia clip fan, this time underneath the canopy.
We now have one fan working higher in the room and another operating lower down.
The goal is to create more complete circulation through the growing space.
The lower fan pushes air through the lower portion of the plants while the upper airflow continues moving air through the canopy.
Together, this creates a kind of vortex-style circulation rather than having air movement concentrated in only one area.
That's particularly valuable now.
We've opened the canopy.
We've created more space.
Now we want air moving through that space.
Not just across the top.
Not just underneath.
Through the room.
And looking at the tent now...
I really like what we've created.
The room feels much more organized.
✂️ Clean Tools – Always
Another little detail I want to mention is the Zamnesia curved scissors.
I really like these.
For most of the larger defoliation work, I actually use my fingers.
If a leaf can be gently removed without cutting anything else, that's often my preferred method.
But there are always those little leaves, delicate areas and awkward positions where scissors are simply the better tool.
And whenever we're using scissors around the plants:
Clean.
Always.
Even if they're brand new, I still like to clean them.
It's such a small part of the process, but it's one of those habits that makes sense.
Clean hands.
Clean tools.
Gentle work.
And only remove what needs removing.
🌸 And Then There's That Broken Branch...
Now we need to talk about last week's little accident.
😂
Unfortunately...
the branch we broke while training last week did not survive.
We tried.
We supported it.
We gave it time.
But sometimes...
a branch is simply done.
And that's okay.
It happens.
I'm certainly not going to pretend otherwise.
The important thing is what happened to the rest of the plant.
And the answer is:
Absolutely nothing.
She carried on.
The plant didn't suddenly collapse.
She didn't stop developing.
She didn't lose her momentum.
She didn't let one branch decide the story of the entire plant.
She simply continued flowering.
And honestly?
That's one of the most reassuring things about growing.
Sometimes you make a mistake.
Sometimes the plant doesn't recover from that particular injury.
But that doesn't mean the whole plant is affected.
One branch didn't define Plant A.
The rest of her is doing beautifully.
💙 Pickle Lemon Haze A – Still Standing Strong
That's actually something I really like about this girl.
She's resilient.
She has been through topping.
Training.
SCROG.
Defoliation.
The flowering transition.
A broken branch.
And now another deep defoliation.
And she's still there looking healthy and vigorous.
If anything, the whole plant seems to have taken the attitude of:
"Fine. That branch is gone. I'll grow the rest."
😂🌱
And that's exactly what she's doing.
The canopy remains strong.
The flowering sites continue developing.
The remaining branches are healthy.
And the loss of that one branch hasn't changed the overall performance we're seeing.
So...
lesson learned.
We move on.
🌿 The Blue Tent Had To Grow Up
There's something funny about this week.
Last week, I was talking about managing the stretch.
This week, the plants basically said:
"You'd better manage it."
😂
So we did.
The room has changed considerably.
The carbon filter and extractor are now outside the tent.
The LEDs have been raised.
The canopy has been opened deeply.
The second SCROG has been installed.
The second fan is circulating air below the canopy.
And suddenly...
we have room again.
The plants are still tall.
They aren't magically becoming shorter.
But they now have somewhere to continue growing and flowering without immediately running into the ceiling.
That's a much better situation.
🌸 From Vegetative Structure To Flowering Structure
And this is the really exciting part.
All that vegetative growth wasn't wasted.
The seven weeks of vegetation gave us:
Strong branches.
A large root system.
A filled SCROG.
A broad canopy.
A lot of flowering sites.
Now we're transitioning from building the plant to watching that structure turn into flowers.
That's the part I really want to watch now.
We've done the major structural work.
We've made the room fit the plants.
We've made the canopy more manageable.
Now...
let them flower.
💧 Nutrition – They're Hungry Girls
The plants are also telling us something very clearly through their appetite.
They're hungry.
So the flowering recipe has moved slightly upward.
We're now running:
Plagron Hydro A — 2.2 ml/L
Plagron Hydro B — 2.2 ml/L
Plagron Hydro Roots — 1 ml/L
Plagron Power Buds — 1 ml/L
pH adjustment as required
This has brought the EC up to approximately 2.49 mS/cm.
It's still a measured change.
We're not suddenly throwing everything at the plants.
We're responding to what they're showing us.
They're growing rapidly.
They're flowering.
They're drinking.
And the foliage continues looking healthy.
So we move forward carefully and watch the response.
🌡️ Blue Tent – Current Conditions
The room remains stable despite all the physical changes we've made.
Current recorded conditions are approximately:
🌸 Flowering: Week 9
📏 Height: approximately 145 cm
💡 Light schedule: 12/12
☀️ Day temperature: 27°C
🌙 Night temperature: 27°C
💧 Relative humidity: 67%
⚗️ pH: 6.01
⚡ EC: approximately 2.49 mS/cm
🌡️ Solution temperature: 25.3°C
🌱 Substrate temperature: 24°C
💨 CO₂: approximately 666 ppm
? Pot size: 8 L
💦 Watering: approximately 1.6 L per plant / 24h
And I think the consistency is important.
We've changed the physical arrangement of the room quite significantly.
But we're keeping the growing environment as stable as possible.
The plants already have enough to adapt to.
They don't need us changing everything at once.
🌬️ Airflow Is Now A Major Part Of The Equation
With the plants this large and the flowering structure developing, airflow becomes increasingly important.
The deep defoliation has opened the plants.
The second fan gives us additional movement below the canopy.
The upper fan continues moving air higher in the room.
And moving the extraction equipment outside the tent gave us more usable space.
Everything is now working together.
That's what I want.
Not one single "magic" piece of equipment.
A room where the different systems complement each other.
Light.
Air.
Irrigation.
Nutrition.
Structure.
And observation.
🕸️ Supporting The Future Flowers
The second SCROG is probably going to become more important with every passing week.
Right now, it might look like another piece of equipment in the tent.
Later...
it could be the thing keeping those branches where we want them.
The plants have already developed a substantial framework.
Now the flowers are going to start adding weight.
So I'm very happy we installed the second net now rather than waiting until the branches were already carrying heavy flowers.
We're preparing the room for the next stage.
And that's really what this week has been about.
Preparation.
🔬 Same Room – Different Strain – Same Incredible Response
There's something fascinating about Pickle Lemon Haze Pheno A growing alongside the Blue Waffle F1 girls.
They're different genetics.
Different strains.
Different individual diaries.
And yet this week...
they look remarkably similar.
Same incredible stretch.
Same environmental conditions.
Same physical limitations.
Same need to reorganize the room.
Same deep defoliation.
Same second SCROG.
Same additional airflow.
Same nutrition increase.
And this is actually another beautiful part of the experiment.
We're watching genetics express themselves under a shared environment.
Sometimes the differences are obvious.
Sometimes...
the plants simply agree with each other.
😂💙
This week was one of those moments.
🌿 The Canopy After Everything
Looking at the room now, I have to say...
I love it.
The plants are tall.
Yes.
They are probably taller than I originally wanted.
😂
But they're healthy.
They're vigorous.
They're flowering.
And after the cleanup, the architecture is much easier to see.
There is something very satisfying about looking at the room after a major intervention and realizing:
Okay.
This works.
We made the space.
We created the support.
We improved the circulation.
We raised the lights.
And now the plants have somewhere to finish.
That's a good feeling.
🔭 Looking Ahead – Now We Let Them Work
This is where the next phase becomes much simpler.
We've done enough.
Now I want to watch.
I want to see the stretch finally slow down.
I want to watch the flowering sites develop.
I want to see how the plants respond to the deep defoliation.
I want to see how the remaining branches use the space.
I want to see how the second SCROG supports them.
And of course...
I want to see what Pickle Lemon Haze Pheno A ultimately becomes.
The broken branch is gone.
That's part of the story now.
But the plant is absolutely fine.
And that's the important part.
She's still here.
Still flowering.
Still growing.
Still shining.
💙 Final Thoughts – One Branch Less, Not One Bit Less Determined
What a week.
😂💙
Pickle Lemon Haze Pheno A has officially joined the "we need to rearrange the entire room because the plants got too tall" club.
At approximately 145 cm, she's certainly not small.
And once you add the pot, substrate and drainage system underneath her, we were getting dangerously close to our vertical limits.
So we adapted.
The carbon filter and extractor moved outside the tent.
The LEDs went higher.
The canopy received a deep cleanup.
A second SCROG was installed.
A second fan was added underneath the canopy.
The airflow was improved.
The room was reorganized.
And those few LED-stressed areas were addressed before they could become something more serious.
And then...
there's that branch.
Unfortunately, the broken branch from last week didn't make it.
It happens.
I'm disappointed, of course.
But I'm not worried.
Because look at her.
She's still growing.
Still flowering.
Still healthy.
Still vigorous.
And the rest of the plant hasn't missed a beat.
Sometimes growing teaches you humility.
You can train carefully.
You can plan.
You can prepare.
And occasionally...
snap.
😂
You learn.
You move forward.
And you keep growing.
That's exactly what Plant A has done.
And honestly, that's what I love about documenting a real grow.
Not everything is perfect.
Not every branch survives.
Not every plant stays the height you planned.
Not every week goes exactly according to the original design.
But that's the reality of cultivation.
You observe.
You adapt.
You make the room work for the plants.
And then you let them do what they know how to do.
Grow.
Flower.
Finish.
Pickle Lemon Haze Pheno A is still doing all three beautifully.
And now that we've finally given these girls a little more breathing room...
I'm very curious to see what happens next.
The room is ready.
The lights are higher.
The airflow is moving.
The second SCROG is in place.
The nutrition is supporting them.
And the flowering journey is really getting started now.
So let's forget about that one lost branch.
It had its chapter.
The rest of the plant has plenty more story left to tell.
💙🌸🌿
🙏 A Huge Thank You
A huge thank you once again to Zamnesia for making Project Blue Tent possible and for giving us the opportunity to explore these beautiful Pickle Lemon Haze F1 genetics individually.
Thank you to Plagron for the Hydro nutrient line supporting these incredibly hungry and vigorous plants as they move deeper into flowering.
A massive thank you to Zamnesia for the Phytonaut LED lighting, the curved scissors and the clip fans that continue playing such important roles inside this project.
Thank you to Mars Hydro for the automatic drip irrigation and drainage system that continues keeping these plants consistently supplied despite how quickly they're growing.
And thank you to GrowDiaries for giving growers a place to document these journeys, share the successes, share the mistakes, and hopefully learn something from both.
And finally...
thank you to everyone following Project Blue Tent.
This week was definitely one for the books.
The plants stretched.
We ran out of vertical space.
We moved equipment.
We raised the lights.
We opened the canopy.
We installed another SCROG.
We added another fan.
We lost one branch.
And somehow...
we ended the week looking at a room that I think looks absolutely beautiful.
😂💙
That's growing.
You don't always get the week you planned.
Sometimes you get the week the plants give you.
And this week, these girls gave us plenty.
Pickle Lemon Haze Pheno A is still standing.
Still healthy.
Still flowering.
Still vigorous.
And now...
she has a little more room to finish the journey.
Let's see what this beautiful girl does with it.
Until next week...
One branch may be gone, but Plant A is still here, still shining, and still ready to finish strong. 💙🌸🌿
Growers Love, happy growing, and take care everyone! 🌱💙
Processing
Likes
25
Share


@GreenHouseLab
Follow
Well the pictures speak for themselves, roots must be well established now. Pretty much doubled in size and great structure.
The smells are pronounced, should no carbon filtration be used surely the entire house would smell. Only means good things, looking fwd to see what this girl will bring to the table.

Likes
5
Share

@Ninjabuds
Follow
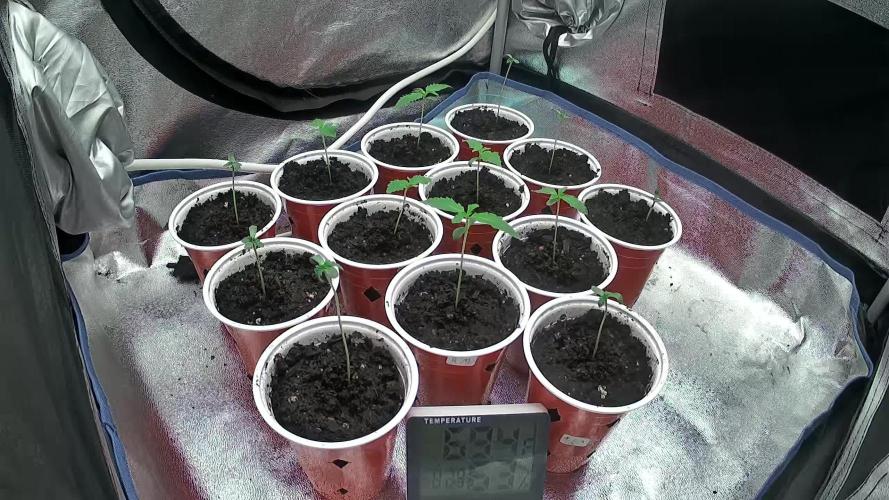
Rainbow Saltz is looking really strong, and it's definitely one of my bigger plants. The colors are so vibrant, and I love the unique look of it. Another great variety from lit Farms. I can't wait to see how it performs.
Last week was awesome! I finally got around to giving all my plants a little upgrade – I repotted them into some bigger homes. They're all looking so happy and healthy now, it's crazy. I can't wait to see how much they grow this year!

Likes
109
Share


@buddha61
Follow
Day 127 - Watered/fed today. About 180 oz of water given, with 1/2 tsp Bloom, 1/2 tsp Mag Pro per gallon. It is anticipated that this is the last feed, and will be given water only, the next 2-3 feeds before harvest, to flush/fade the girl (come on autumn colors!). I happened to be searching a couple buds and found my first 3 amber trichs on a calyx. The final countdown has begun!
Day 128 - Nothing to note, I was lucky to be around enough to get the photo.
Day 129 - I feel like there has been some new calyx development over the last few days, but I am still going with my plan to flush 2-3 times before a harvest. I feel like if I was properly set up, and honestly stocked with current flower, I could probably let this thing go another 3 weeks (rookie grower thoughts), but I am still looking to harvest in 10-12 days. Talking to a few different people, ran a few ideas past me, but I think I am going with my plan for this first grow. Someone mentioned one more big bloom feed before a flush, but I think I'm just ready to be done feeding. The idea of 24 hours of darkness before harvest to 'boost trichs' was brought to me by another person, and I am still unsure of my thoughts on that plan.
Day 130 - The 'flush' has begun. Today the plant was given 2 gallons of water, which is almost 50% more than was given with feed, as she had been getting 180oz or so of water. You can really tell the difference in the amount of runoff! Lets see how long she takes to really show a fade.
Day 131 - I got nothing for today. Snapped a pic and bolted out of the house.
Day 132 - Again, sadly, I got nothing for today. A picture and out the door.
Day 133 - 11 weeks of flower are down. She was watered today, with another 2 gallons of water only. I added a small amount of new Mother Earth Coco Peat to the pot, in my mind, just to ensure that she doesn't fade out too quickly. Probably a bit unnecessary and may not help, but I did it anyways :) I originally planned on chopping likely at the end of this weekend, but I might see if she can hold out 2 more water only feeds, and chop next Thurday-Friday, at the end of the 12th week. I keep checking a few buds with the loupe, and still can barely find any amber, but also don't see any clear trichs. Either way, I am going to be anxious for this last week to finish up, then the real test of waiting will come, hanging and curing!


Likes
2
Share