


Likes
Comments
Share


@Thaigrow420
Follow
Stretching upward beautifully, taking care of herself pretty much. Very easy to grow and hope I can get good buds from this upcoming harvest 😄

Likes
8
Share


@Kirsten
Follow
16.4.25:
I have retied the fabric ties again, as they're growing like crazy. Trying to open up the plant, to grow out as well as up. This will also create new colas.
At this stage, I'm trying not to over fertilise like I did with the last grow.
Focusing on Cal-Mag amino acids and Mega Crop Part A.
The medium is my custom super soil, which is already fertilised with Ecothrive dry amendments. So I could just add water. However, as we've already run into deficiency, that would be careless.
I find it easy to keep an eye on the plants and carefully inspect them daily to act quickly when issues arise.
Learning how to determine the issue is what I'm still learning, which is the hard part 😅
It's all fun though, and I'm really enjoying this grow with all the toppings and FIMs. So far so good!
23.4.25:
I hope everyone had a great 420!
Fastbuds Mystery seed #1 is doing well, she has stayed bushier relative to the RQS Northern Lights, also there has not been so much growth.
The bud sites are developing well and have tight internodal spacing.
I'm determining when to relax the LST as we are now in the beginning of week 3 flower. I do have height. However, I'd like to keep it reasonable. You never know when they will stop growing.
I'm not really adjusting any ties since the last time.
I have also noticed that there are signs of Nitrogen excess. Instead of Mega Crop Part A and Cal-Mag amino acids, I will use Bud explosion PK booster with the Cal-Mag. This will make the N5 the only Nitrogen being given.
It still may be too much, but will monitor closely to see the effect this change will make, if any.
Balancing the nutrients is very important for me to learn, and it's going to be an ongoing process.
I watered today with 3 litres of dechlorinated water PH'd to 6.4 with the following nutrients:
♡ 1/2 Tsp of Bud Explosion PK booster by Greenleaf nutrients
♡ 5ml Cal-Mag amino acids by Xpert Nutrients
23.4.25:
Plant seemed to be drinking heavily, so I watered again with 3 litres of dechlorinated water PH'd to 6.3 with;-
♡ 2.5ml Cal-Mag amino acids by Xpert Nutrients, and
♡ Ecothrive Biosys 1/8 tsp.
I removed the plant ties and retied the plant after watering.
Less ties are necessary as the plant has moulded and stayed in that structure.
Thanks for checking out my diary and hanging out
😃💚✌️🍃😊


Likes
22
Share


@Luv2Grow
Follow
Day 37 - Did a little defoliating, I’m really hoping it doesn’t stunt her too much. Guess time will tell!
Day 38 - Everything seems to be ok after defoliating a bit yesterday, just feeding and waiting on her to really start flowering!
Day 39 - No major changes with her, still growing like a weed.
Day 40 - Still looking good.
Day 41 - Just waiting on her to start
flowering. Pistils are popping but no budding yet.
Day 42 - Growing like a weed for sure! Really starting to stretch. Think she might be starting to flower finally. Hopefully, cause she’s gonna outgrow the tent if she keeps stretching!
Likes
4
Share

@Bear_Grows_Green
Follow
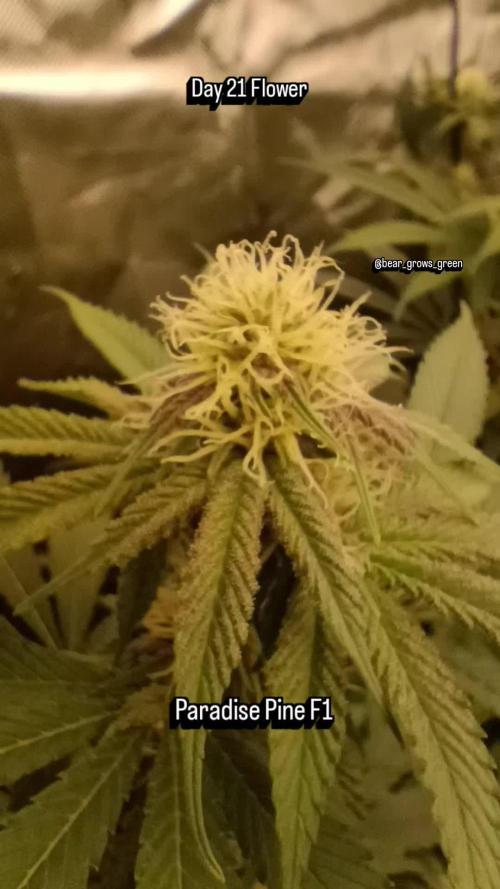
01/22 day 15 start of week 3. Everything going great. Tomorrow is a feed day. This week is a team week also.
01/23 supplemental feed day gave 10.5 gallons total
01/24 heavy defoliation should be done til harvest
01/27 got 7 gallons water 4 gallons compost tea tea instructions in videos
Likes
21
Share

@Purrple_Haze
Follow
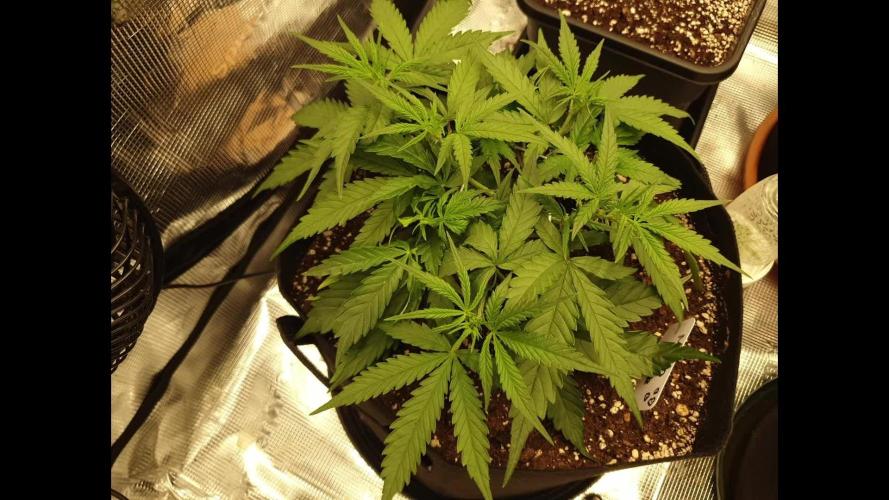
First Signs of Bloom! 🌸🚀
We’re now entering Week 5 since sprout, and my Auto Moon Rock by Divine Seeds has officially started her bloom journey! You can clearly see the first pistils emerging alongside vivid, toxic-green new growth. She’s staying compact but clearly packing power—this one has serious promise.
Earlier in the run, I applied some gentle LST following a topping—yes, despite Divine Seeds’ recommendation not to top autoflowers like this one. But I trusted my instinct and the plant’s vigor—and she hasn’t disappointed! 💪 She handled the stress like a champ and bounced back with balanced, bushy growth and strong branching. 🌿
This week’s routine included:
🔸 BioBizz Grow – 2 ml/L
🔸 BioBizz CalMag – 0.5 ml/L
🔸 BioBizz Bloom – 2 ml/L (new!)
🔸 BioBizz TopMax – 1 ml/L (new!)
🔸 Homebrewed Compost Tea for microbial support
🔸 Effective Microorganisms for root vitality
🔸 Dechlorinated tap water
🔸 pH: 6.4
🔸 EC: 1300 µS/cm
I also introduced a DIY CO₂ system (sugar, water, dry yeast)—and it’s bubbling away perfectly! I’m expecting even better growth now, especially as bloom ramps up. Once my CO₂ monitor arrives, I’ll start reporting ppm levels directly. 🌬️📈
📽️ Also up this week: a fresh Growlapse video!
Always satisfying to see how much change a few days can bring when you fast-forward. She’s reacting well to every bit of training, nutrients, and environment.
I have to say—Divine Seeds has bred a real gem here. Even though I went against the grain with topping, this cultivar showed resilience, structure, and strength. So far, I can highly recommend her to any grower who enjoys working closely with their plants.
Let’s see how she stretches in the coming days. I’m expecting great things! 🍃✨

Likes
29
Share


@CanadianFillmore
Follow
Greeting growfessors! Today the SLH was moved to the 4x4 flowering room and flipped to 12/12 light cycle. She did not dry out completely from last week's feeding, so I'll leave her as is for this week and start with th flowering nutes next week.
Thanks for looking! 👽🌳

Likes
13
Share


@Oyziphar
Follow
This week wasn't as bad as last week 😊 Nights were cold 😰, but not to much rain 😿 and a few hours of sun 😍
Temperatures in the greenhouse were medium : during the day 20°C 💀; min temp 3.5°C ; max temp 31,7°C 😤
Cookies Gelato has turned completely purple 👍👍👍
I defoliated the plants 😙 and had to remove budrot (especially in the Cookies Gelatoes)😨
I took the prettiest Cookies Gelato outside for a photo session in my garden 😍
Probably these will be the last pictures of the plans, before harvesting ! 👍😄


Likes
16
Share


@Ieiogrow94
Follow
Eccoci qui...
Settimana prossima si tagliaaaaa!!!!
Finalemente siamo arrivati alla fine con questa piccola mi sono divertito è stato bellissimo coltivarla outdoor, è venuta bassa ma molto molto compatta!!!
Grazie a tutti per il supporto

Likes
37
Share

@AsNoriu
Follow
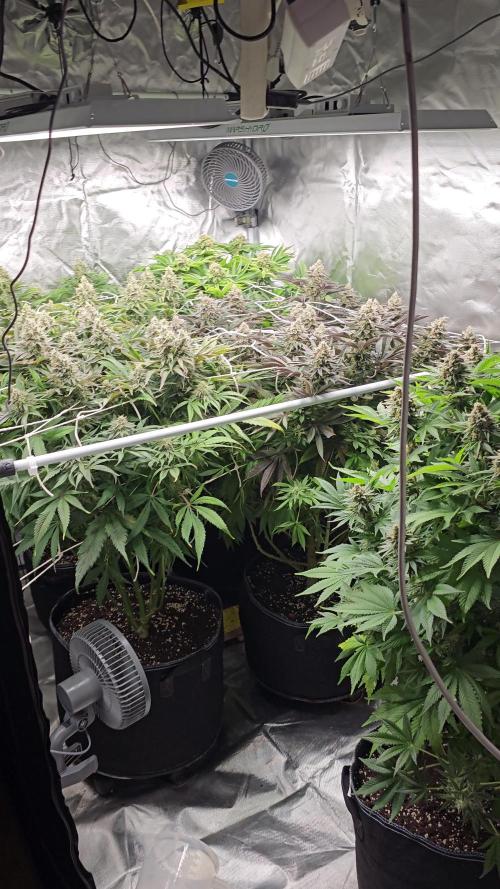
Day 137 since seed touched soil. Girl is on final stretch, took all nutes out last watering. Today gave 6.3 phed water for last time, maybe if few other girls will show signs of bulking, ill do one more watering.
Last week installed dehumidifier, so all environment is way better.
Want cheaper seeds on : https://fastbuds.com/ use code: ASNORIU
Happy Growing !!!
Likes
5
Share


@OttomanEmpire
Follow
24 June 2025
Feed them with seeds sprouts tea, alga grow, liquid seaweed and also top dress the soil.
⛑️⛑️⛑️ NEED HELP ⛑️⛑️⛑️
I have noticed my spot found by someone else. I can tell they visiting my girls. What would you do in this situation??
Please leave your opinion. Thanks

Processing
Likes
32
Share


@Ganjagrandaddy
Follow
Day 38: I am getting the big 50L fabric pots primed and set with the eco-thrive Living Organic Soil . I am a few days over the update so the photo/video is from day 36. I am in the process of rebuilding too so time has been a luxury.

Likes
4
Share


@DivinePineMan
Follow
I have my Electric Sky 180v2 now in instead of the cheap 40$ for 4 lights i bought on facebook. Which were growing but nothing like this thing has been doing the past week. Im still blown away by the light but back to the plants. Doimg great i took some clones. First time ever so hopefully they root. I been sprayin em 4 -6 times a day. My 3rd g6jetfuel i took out of my tent with es180v2 and put in closet by itself with the 40$ cheap leds. It hasnt grown a whole lot compared to the tent plants g61 and 2...i thought maybe it may of had a male or hermi part but honestly i dont think it did bc i cant find it now. But its still in there bc i decided to throw it on 12-12 in closet to find out sex forsure. Ive been foliar spraying in my tent 3 timez a day. And 2 times a week i get 2 little drops of fox farm grow bif in my 10oz spray bottle of water.
Likes
229
Share


@Crashoverite
Follow
Week 8
Hi everyone 😀
I am so delighted with this little grow. Finally upper growth slowed down and buds are getting structure and weight. Have adjusted nutrients and increased watering to approx. 2 liters every 2 days. The aroma inside this cabinet it's very strong. It's smells a little bit fruity. 2 kg active carbon filters doing the job perfectly and nothing is coming out.
Will update progress of this week every couple days.
12/09 Day 51
Buds on 2 most developed girls are getting frosty and gaining weight. Due to extreme fast flowering time on this strain decided to start applying final nutrient - Green Sensation from Plagron. Today only 0.5ml per liter but will increase to 1ml on next watering.
14/09 Day 53
Girls got so bushy again and decided to apply selective defoliation and tied some branches to netting. Not easy task if you have only frontal access and can't remove pots out 😅
17/09 day 56
Its the end of week 8
Everything is going well, buds and leaves are covered with lovely frost now. Thankfully have no major issues accept the humidity which can't be dropped below 50%.
Stay tuned for upcoming updates.
Peace and love ✌️

Likes
9
Share


@masterofsmeagol
Follow
6/8 Haven't had to water yet (besides the two tens and I should've held off). It's an overcast day. Perfect for the plants. I've noticed more off shoots of 3 pronged leaves so a few plants will reveg but thats fine. I'm happy with how things are going thus far. These are certainly very resilient strains. I've done some SLIGHT LSTing.
EDIT: IT'S BEEN A NICE DAY TODAY. A LITTLE OVERCAST BUT SUNNY AT TIMES. PERFECT WEATHER FOR THE GIRLS. THEY ARE LOVING IT OUT THERE!
6/9 And the girls are lookin' Fiiiiiine. In all seriousness everything is doing pretty good. Even that overwatered pink kush runt in the 10gal is coming out of its little funk. Some of my FIM's turned out amazing! With the reveg of some of these I'll definately have my hands full. Very grateful for smart pots and well draining soil! We've gotten some harsh rain but the girls all seem fine. It's the wind today that's a little worrisome. I may stop over later. I COULD put up tarps around the cage as wind blocks (and have before in the past) but it increases the humidity of an already extremely humid day. These girls are strong. I'm sure they'll be fine. I've found that the tarps typically hurt worse than they help.
6/10 56° at 9am. Shook the plants off. Medium wasn't soaked though. Luckily we had some wind. It's not raining now but it's going to have showers for half the day. Tomorrow is supposed to be in the 80's and sunshine so if that comes through things might workout alright. I still haven't had to water this year besides that one gallon on the tens. If I do something I'll update. I'm considering light stepping the two pink kush's in the 10's. I'll need to do more research.
6/11 BEAUTIFUL DAY! Windy too which helped dry the grow bags. Plants are growing at a rapid rate. I've yet to have to water. A few more days like this and I'll have too. It was in the 80's and is still 75 at 5:30. Bags still have heft to them and I can still feel moisture. They got tons of rain. I'll keep an eye on them. Thus far I'm pleasantly surprised (knock on wood).
6/12 Everything looked great this morning. It's a little overcast and 69° @ 8:45. I mixed water planning on watering but decided against it due to the weight I was feeling. My wife said it rained hard last night for a little while but the topsoil was dry. It did look disturbed though. Luke it got PELTED with rain. The medium looks dry but there is still some weight to the grow . I'll be back over later and I'll check things out. Overall plants have made a great transition even in this bi-polar weather extravaganza.
EDIT: WENT BACK OVER AT NOON AND EVERYTHING WAS LOOKING WONDERFUL. ITS 80° AND SUNNY WITH A STRONG WIND. THAT'S WHY I FIGURED THE PLANTS WOULD NEED TO BE WATERED. APPARENTLY THOSE THUNDERSTOTMS WITH SHEET RAIN HAVE KEPT THEM WATERED. AS PREDICTED THE TWO 10GAL POTS AT THE FRONT OF THE CAGE WERE A LITTLE LIGHT AND THE TOPSOIL WAS REAL DRY. MY MK ULTRA IN THE 30GAL LOOKED LIKE IT COULD USE SOME WATER AS WELL AND I FINALLY GAVE SOME TO THE 10TH PLANET IN THE FRONT ROW. BOTH THOSE PLANTS WERE BIGGER THAN THE REST AT TRANSPLANT AND IN A SLIGHTLY LARGER CONTAINER. THE FRONT ROW SEEMS TO DRY OUT FASTER FOR SOME REASON. I HAD 3 GALLONS MIXED UP TO START WATERING BUT AFTER CHECKING EVERYTHING ELSE I DECIDED TO GIVE THE FRONT ROW (THE ONLY ONES THAT WERE LIGHTER) A LITTLE WATER. I USED TWO GALLONS FOCUSING ON THE KUSH'S IN THE 2 10'S. THIS WAS MY WAY OF MEETING IT IN THE MIDDLE. IVE LOOKED AT PREVIOUS DIARIES AND I THINK I MADE THE RIGHT DECISION. NO RAIN IN THE FORECAST FOR A WHILE. I NEED TO REMIND MYSELF THAT PLANTS THIS SIZE USE MUCH LESS WATER THAN WHEN THE BAG IS ALL ROOTS.
6/13 It's windy as hell! I would've thought that the bags would be dried out by now! I went around and it seemed like they still had weight. It was also cold last night and is 63° and sunny at 11am. It's not getting any hotter. I DID water the two plants in the back row as they seemed a LITTLE lighter than the others. I split a gallon between those two and didnt water the rest. I figured I'll let tje wind dry them out some more. I know what they feel like when they are totally dry. I don't want to get to that point but it's easier to fix than over watering. I'll update later today.
EDIT: I FORGOT MY PHONE BUT I USED ANOTHER TO TAKE A VIDEO BYTCI CANT ADD IT. PLANTS STILL HAD SOME HEFT BUT WERE LIGHTER THAN EARLIER. I DECIDED TO WATER AFTER A PRETTY THOUROUGH ANALYSIS. I GAVE EACH PLANT A HALF GALLON EXCEPT THE 50GAL WHICH I ABSTAINED. WIND IS STILL HIGH. I even got on my laptop to try to add a video but it won't allow me to do it here EITHER. Come on grow diaries. Up your game.
6/14 GROW DIARIES STILL WONT ALLOW PICTURES OR VIDEOS. TRIED MY LAPTOP BUT STILL NO DICE. Weather has been sunny but in the 60's. I'm glad I watered. I can tell the plants liked it. Everything looks amazing 10th planet 2 in the second row is getting massive. I noticed something with the pink kush in the middle of the back.i originally FIMed it but I didn't think it took so I fimmed it again a little later on. Go8ng through the plants I found that there's a point that has like three tops on it but the thick stalk continues up and there are FOUR or FIVE more TOPS!!! I've never seen anything like this! I'm interested to see how this one turns out. Man I wanted to put some pictures up. Everything is doing so good. Maybe when I start a new week it will let me. I need to start low stress training and I need to put up trellises. Plants have also survived sustained high winds.
EDIT: WENT OVER AT 5PM AND WATERED THE TWO TENS WITH A HALF GALLON EACH. THE OTHERS "LOOK" REALLY DRY BUT I ADDED MORE SOIL TO THE BAGS A COUPLE DAYS AFTER TRANSPLANT (A WHILE AGO. DONT KNOW IF THAT HAS ANYTHING TO DO WITH IT. I ASSUME ITS THAT THE PLANTS HAVENT FULLY FILLED THE BAGS AND THUS TAKE LONGER TO DRY OUT. I PLAN TO CHECK WEATHER (NO RAIN UNLESS ITS CHANGED) AND WILL WATER EVERYTHING TOMORROW. STILL CANT ADD PHOTOS. PR9BABLY WONT BE ABLE TO START A NEWXWEEK EITHER TOMORROW. I HAVE A BUNCH OF GREAT PICS. OH AND IN ONE BAG I SAW WHAT LOOKED LIKE CORYLEDON LEAVES. I PULLED IT OUT AND IT WAS LIKE A TUBER. I DUG DOWN AT THE EDGE OF THE GROW BAGCWND WHETE THEY HAD BROKE SURFACE AND PULLED THEM OUT. ITS FUCKING BIRD SEED. I SAW THE BITCH THAT MOWS THE LAWN MOWING INTO MY CAGE. I'LL BE SPEAKING WITH HER. LUCKILY I KEEP A GOOD EYE ON KY PLANTS. PLANTS THAT WRRE SHOOTING OFF 3 PRONGED LEAVES SEEM TO BE REVERTING BACK. IF THERE WAS REVEG IT IS CERTAINLY NOT HURTIMG ANYTHING. CANT WAIT TO SHOW HOW THE GIRLS HAVE GROWN!


Likes
10
Share


@StickyFingah420
Follow
Extrema producción de tricomas de esta variedad! Gran parte de los frutos lo usaré para extraer rosin, su resina se ve ideal para este propósito.
Fragancia exquisita a ponche de fruta dulce, con notas ácidas y un fondo de especias.
Como mencioné anteriormente dejaré la parte de la reseña de efectos, sabores y sensaciones para cuando los cogollos estén secos y curados, por ahora solo puedo apreciar lo que mi vista y olfato me permiten captar.
Totalmente conforme por la calidad de estas flores y agradecido de los amigos de Sweet Seeds por la confianza.
Será hasta la cata entonces, buenos humos!


Likes
2
Share

@Jardineiro_Br
Follow
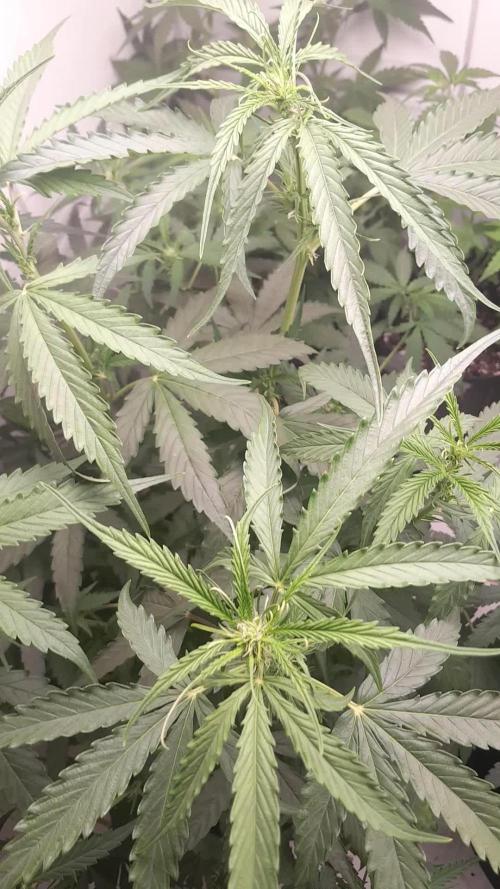
A Planta reagiu super bem ao LST desenvolveu muitos galhos que estao botando botões, galhos forte e.grossos para alimentar belas flores . Esta com uma boa altura devido a predominância sativa.
Likes
8
Share


@pzwags420
Follow
On day 1 I adjusted the PH of my reservoir down to 6.1. On day 2 I adjusted the PH of the reservoir from 6.3 to 6.1. On day 3 the buds are really starting to bulk up and are putting out side flower clusters already in week 5. I adjusted the PH to 6.1. The goal is to coast from 6.1-6.3 then back to 6.1-6.3 ect. On day 4 things look good I scoped out the trichs and found some to be filing up with cannabinoids :) maybe she will be done in 7-8 weeks like the breeder says. On day 5 my reservoir temp got into the 80's because when the reservoir gets depleted it lowers the water level below the thermostat and I'm getting into the colder months so the cold air temperatures are causing the heater to heat when not needed. My temporary fix is to place the heater diagonally when the water level gets low and then when the water level drops a little more I will fill my reservoir back up fully so to keep the heaters thermostat running correctly. On day 6 I did another defoliation to improve light penetration and airflow in the canopy. I installed a new "Nano aquarium heater" this will be able to heat my reservoir without being affected by the water level in my reservoir. I also changed out my reservoir and adjusted the PH to 6.1. On day 7 the girls are looking and smelling great! I adjusted my reservoirs PH from 6.6 to 6.1. My Nano aquarium heater seems to do the job nothing out of the ordinary that I could tell after a night in the low 30's.
Likes
4
Share


@Ogbangbang2981
Follow
my our door girl not filling out as I thought she would I really thought I'd get bigger and healthier plant on the outside instead I got the opposite lesson learned. The mist didn't do what I thought it would so had to pollinate with a Male pink kush plant seeds forming nicely . plant still lovely I'm in love with colors.
Processing
Likes
27
Share

@Ganjagrandaddy
Follow
Day 16: These ladies are now nearly.at the end of their stretch I think. They are all forming decent looking flowers now and have sent a few mains skyward to mark their territory
Wedding cake is an impressive girl . She is full of mains to develop and also has a lot of secondaries below decks on each of her main 4-way branches. She has trained out fairly well and is holding her shape well. Flowers are looking as they should and plentiful too. Her stems are nice and strong for the upcoming beast she will become.
Ghost O.g is still an odd looking girl but is fighting for some good mains to be in the running now. she hasnt stretched too much in general but her lowers have certainly entered the race. She is a very chunky classy too.
GG#4 has begun to get over my drowning of her roots with too high water levels in the tank. She hasnt held back too much really as she is the tallest of her group. In typical Gorilla strain style she still has skinny limbs but a few good heads forming flowers too now. Overall , things are doing ok and my error has given them a hurdle to overcome . Have fun being with your loved ones Growmies , catch you all next week