


Likes
Comments
Share


@Roberts
Follow
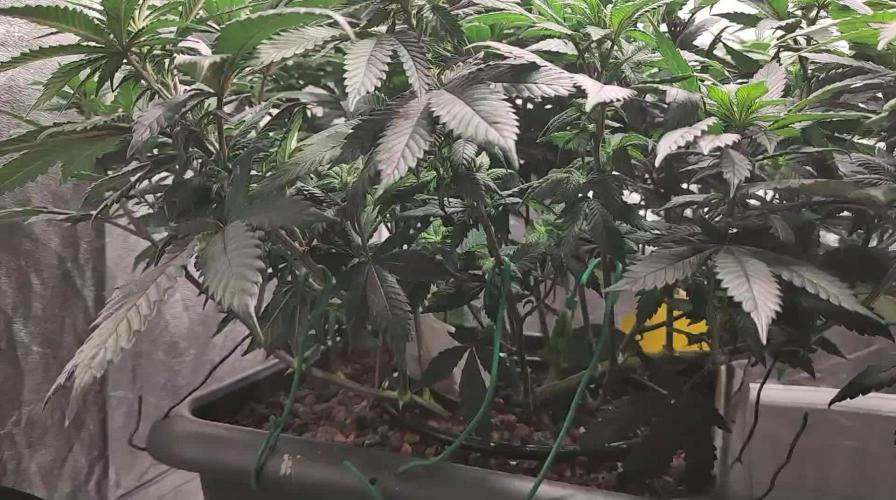
Critical x Animal Cookies is doing good now after the too much nutrition at start. It stunned her pretty good. She has been making good progress under the Hortibloom Solux 350 considering. I just switched light times today to 12/12. She got some training all around, and is ready to go. Thank you Hortibloom, and Ripper Seeds. 🌱👍🏻🌱
Thank you grow diaries community for the 👇likes👇, follows, comments, and subscriptions on my YouTube channel👇. ❄️🌱🍻
Happy Growing 🌱🌱🌱
https://youtube.com/channel/UCAhN7yRzWLpcaRHhMIQ7X4g



Likes
9
Share


@TrickzCutz
Follow
Servus Moin!
Die Devils Cookies machen sich super. Sie müssen nur noch knapp 5 Wochen ausharren bis es in die 2L Töpfe geht.
Likes
9
Share


@Cultivate
Follow
Week 3 of flower stinking dank!😂
Some heavy heavy defoliation slight lollipoping to increase that light power hoping for just nice bud development but we will see!
Thanks guys!

Likes
11
Share


@Jacks_Pot
Follow
The Pineapple Chunks are growing really good. I'm very impressed.
I guess maximum another week of 18/6 and then it will be time to switch.
I've topped them between the 5th and 6th node, giving me 8 shoots/plant to scrog.
Next week the scrog screen will be installed.
The cobs were lowered to 43 cm (16.9 inch) with 148 watt on day 23. DLI was 30.4 (469 PPFD)
On day 27 the power was raised to 168 watt at a distance of 47 cm (18.5 inch) from the plants.
DLI was 34.4 (531 PPFD) This height & wattage gives a larger coverage.
The thermostat of the heating mat is set at 20°C (68 °F)
I gave them ph adjusted tapwater with Plagron nutrients once this week.
Rest of the week was ph adjusted tapwater (ec 0.45 – ph 6) every other day.
Twice a week I spray them with a CannaCure solution (60 ml CannaCure + 450 ml tapwater ph 6.1)
Temperatures stayed between 22.4 – 26.2 °C (72.3 – 79.1 °F) and humidity levels between 46 – 79 %
To be continued...
Do you want to grow this strain?
👉 https://www.barneysfarm.us/pineapple-chunk-weed-strain-15 👈
Likes
3
Share


@WeedStockBR
Follow
I was too busy in last weeks and forgot to take some photos to growDiaries but this is the last video before start the flowering time.
This girl have been growing health and beautiful.


Likes
1
Share



Likes
35
Share


@Master_weeda
Follow
Bonjour à tous les padawans et les maîtres jedis
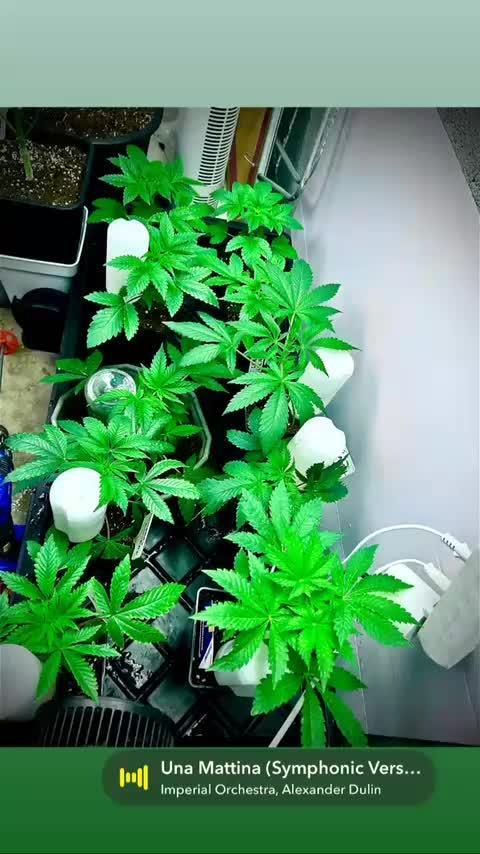
Pour cette semaine je prévoit de pratiquer comme technique spéciale le LST et juste un arrosage.
Pour cela comme à mon habitude j'attend le cinquième noeud ou que je juge la plante robuste.
Je profite que cette semaine qui va être relativement calme pour faire un LST appliqué et vous faire un rappel de ce qui est pour moi la meilleure technique pour arroser une autofloraison et la façon dont je pratique le LST.
En suivant ces quelques simples conseils vous obtiendrez un résultat optimal tout au long de votre culture :
Le cannabis est une plante qui n’aime pas recevoir un léger arrosage en continu. Il est impératif de l’arroser en grosse quantité, puis d’attendre que la terre soit bien sèche avant d’arroser à nouveau!
Pour calculer la quantité d’eau nécessaire à chaque plante, suivez cette règle :
Le volume d’eau à donner lors de chaque arrosage doit représenter au moins environ un quart du volume du pot !!
Exemples :
pour un pot d’1L, donnez 0,25L d’eau à chaque arrosage pour un pot de 4L, donnez 1L d’eau à chaque arrosage pour un pot de 12L, donnez 3L d’eau à chaque arrosage pour un pot de 30L, donnez 7,5L d’eau à chaque arrosage !etc…
Pour donner un tel volume d’eau, il est souvent nécessaire d’arroser en deux (voir trois) fois, lentement et uniformément sur toute la surface. Disposez de bonnes coupelles sous les pots, celles ci se rempliront d’eau qui remontera dans le pot par capillarité en moins d’une journée. Il est également très important d’utiliser un bon terreau de qualité, avec une bonne capacité de rétention d’eau mais qui assure également un bon drainage (celui ci doit contenir de la perlite, et/ou de la coco, etc..)
Il vous faut alors maintenant attendre quelques jours en sous-pesant régulièrement les pot avec vos bras. Quand ils seront redevenus très légers, vous pourrez arroser à nouveau !!
En effet, comme l’eau pèse beaucoup plus lourd que la terre, un pot gorgé d’eau pèse plusieurs fois le poids d’un pot d’une plante prête à être arrosée. Avec un peu d’entraînement, vous apprendrez donc très rapidement à sous-peser vos pots pour savoir quand une plante a soif.
C’est une technique à la fois très facile et très efficace, et qui peut être appliquée à toutes les plantes en pots !
En arrosant de cette façon, en général vous devrez arroser vos plantes tous les 3 à 6 jours.
Pour cette semaine 3 au jour 17 ma plante fais 12 centimètres et son cinquième noeud apparaît je décide donc de pratiquer un LST sur ma plante.
Pour ce j'utilise du fil de fer galvanisé que je plante directement dans le substrat en faisant attention de ne pas endommagé les racines car n'oublions pas que ce qui pousse dessus pousse aussi dessous.
Jour 17 je pulvérise du une solution composé d'une cuillère à café de savon noir mou dilué dans un litre d'eau en prévention d'éventuels nuisibles.
Je corrige mon LST suivant la pousse de ma plante ...
Pour ma par c'est la manière dont je procède. Comme promis petit rapel de:
Quand commencer à appliquer la technique LST
De nombreux cultivateurs commencent la manipulation dés que les plantes possèdent entre 3 et 6 nœuds ou une paire de feuilles. Durant cette première étape de la croissance, le tronc encore flexible est pliable sans risque qu’il ne se casse, même si au fur et à mesure du développement de la plante il sera de plus en plus difficile de le plier. Nous pouvons continuer à guider la croissance des branches durant toute la culture, même durant la floraison, ce qui pour cette étape représente un grand avantage face à la taille, qui n’est pas du tout recommandé une fois que la formation des têtes commence, cela stressera en effet la plante, ce qui aura pour effet de retarder la récolte.
Comment appliquer la technique de guidage LST
Si nous sommes prudents, la flexibilité naturelle des fibres du cannabis permet de plier leur tronc et branches avec une relative facilitée, même durant la floraison des plantes.
En utilisant une corde fine, nous pouvons accrocher la pointe de la plante à la base du pot par exemple ou à un tuteur que nous aurons planté dans le substrat. Nous plierons le tronc avec précaution et nous le fixerons avec la corde, à partir de là, nous pouvons augmenter progressivement la tension de la corde, chaque jour un peu plus, jusqu’à obtenir la position souhaitée. Soyez attentif à la réaction de la plante, essayez de ne pas appliquer trop de pression sur la corde et rappelez-vous que la flexibilité des branches peut varier d’une plante à l’autre.
Pour obtenir de meilleurs résultats, il suffit de suivre quelques règles simples. Pour commencer, nous devons choisir une corde fine mais pas trop pour ne pas blesser les troncs au fur et à mesure qu’ils grandissent et qu’ils deviennent plus gros.
Nous pouvons utiliser des crochets en plastique souple ou de n’importe quelle autre matière flexible pour éviter d’endommager les plantes. Spécialement en intérieur, utiliser des cordons en plastique de couleur (voir les diaries de @Silky) est très pratique pour voir facilement les accroches et faciliter le travail au milieu du réseau formés par les cordes, les tuteurs, les mailles ou les supports que nous aurons dans la culture. Bien entendu, en culture extérieure et surtout en guerilla nous ferons juste le contraire et nous utiliserons des matériaux de couleur qui n’attirent pas l’attention pour que notre jardin reste discret.
Pour stresser les plantes au minimum, la mieux est de réaliser ces manipulations le soir ou juste après que les lampes en intérieur s’éteignent, ce qui leur permettra de se remettre durant la nuit. Normalement, le jour suivant nous pourrons observer comme les pointes des branches que nous avons pliées se dressent de nouveau vers le haut à la recherche d’une source de lumière.
Que la force soit avec vous


Likes
26
Share


@mi_auto_grower
Follow
This raspberry diesel smells like fruit punch so much just imagine the most fruit punch smelling drink you like and picture this plant smelling just like that the sour kosher has the sour diesel smell and the lemon chem 18 smells like lemon/sprite so much


Likes
4
Share


@eldruida_lamota
Follow
Que hay familia, vamos con la tercera semana de crecimiento de estas Runtz de Zamnesia.
Se germinaron las 5 semillas de Runtz y en 48 horas 100% ratio , 7 días en tierra.
Por supuesto vamos a utilizar la tierra de plagron lightmix que siempre utilizo, y como este proyecto es para concurso voy a ceñirme a los productos de plagron. controlando siempre el Ph, que ahora mismo lo dejamos en 6.
Seleccioné de las 5 plantas, 3 , que creo que son los mejores ejemplares que por el momento están creciendo bien y tener tienen un buen color, se ven bien sanas. También realicé su respectivo trasplante a maceta definitiva.
Vamos viendo cómo progresan. Hasta aquí todo, buenos humos 💨💨💨.
Likes
56
Share


@Ganjagrandaddy
Follow
Day 14: all well so far with only the #3 Gorilla looking a little odd still, like she has lost a limb!.
They look as though they have been settling in well with no colour issues or signs of burn from the soil mix. Not a lot to report yet as such early days. catch you next time.


Likes
57
Share

@Roberts
Follow
Pablo Escobar has grow a lot in the last week. I did top her a few days ago, and removed the first node branches. I left the 2nd, 3rd, 4th node branches. She did experience a ph fluctuation, which lead to a few spots. It gas been corrected, but she is likely due for new solution. As the whole grow room is due soon. She has gotten a lot stronger since the over stretch in the beginning. Nothing more to report. Thank you Spider Farmer, and Divine Seeds. 🤜🏻🤛🏻🌱🌱🌱
Thank you grow diaries community for the 👇likes👇, follows, comments, and subscriptions on my YouTube channel👇.
❄️🌱🍻 Happy Growing 🌱🌱🌱
https://youtube.com/channel/UCAhN7yRzWLpcaRHhMIQ7X4g

Likes
25
Share


@crystal_garden_0
Follow
Great week, all seeds germinated and plants looking good . Transplanting in the next few days to 5 gallon pots.
Likes
12
Share


@DoDrugs420
Follow
Hypno Seeds knows what rules the world, so we created a strain to let everyone have their chance to try some Juicy Pussy Auto. An autoflowering cannabis cultivar that’s absolutely dripping in trichomes, potency, and flavor. It’s a Sativa-dominant strain due to its Thai Stick cross and is balanced out with some special Indica strains to give it its mellow, yet arousing effects and massive juicy yields of big hard nugs. Take a sip and enjoy!
Tech Specs
THC 19%-24%
CBD 0.50%
Flavor Orange Creamsicle, Pungent, Sweet
Type 35% Indica / 65% Sativa
Flowering 9 Weeks
Height 120-160 Cm
Effect Calming, Creative, Extra Sensual, Pleasant, Relaxation
Genetics Thai Stick X Indica Strains
---------------------------------------------------------------------------------------------------------------
Grow Sponsored by MARSHYDRO
HIGH EFFICIENCY WHITE LED LIGHT: Newest SMD LED technology provide highest PAR/LUMEN output(743umol@18"), designed to replace a single-ended 250watt HPS; MARS HYDRO TS 1000W Plants Growing lamp makes you get 30% higher yield compare OLD blurple led lights, Max 2.0g yield per wattage (power draw)
LOW ENERGY CONSUMPTION GROW LIGHTING : Consuming only 150W with 342 LEDS! It saves up to 50% energy than other led grow lights. Perfect for 2.5x2.5ft,Max coverage 3x3ft. Over 90% light energy can be absorbed by plants; higher intensity and more even coverage in a MARS HYDRO grow tent, reflective area, or by crossing over using multiple TS1000
SUNLIKE FULL SPECTRUM LED INDOOR GROWING: 660-665nm Red IR/3200-4200Knm/5200-6800Knm, infinite close to natural light, best for all plants all stages growing, rapid plant response from seed to flower and increase yield & crop quality
HIGH REFLECTIVE & NOISE FREE-Fanless LED GROW SYSTEM design will make your growing life easy and quiet, quickly heat dispersing material aluminum reducing light lost to aisles and walls, increase the light intensity up to 20%, allowing your plants receive more energy and without burning your plants for maximum headroom
Get your own at https://www.amazon.de/dp/B07ZVFBR34

Likes
8
Share
@all_about_420
Follow
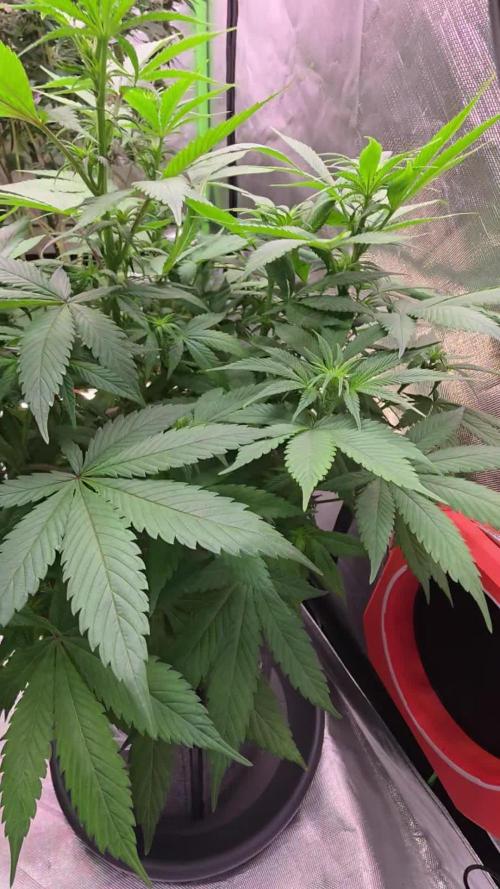
Das schnelle Mädchen legt in der zweiten Blütewoche einen ordentlichen Sprint hin. Der hormonelle Umschwung nach dem Lichtwechsel ist in vollem Gange: Die Internodien strecken sich deutlich und die Spitzen hellen charakteristisch auf, während sich die ersten feinen Blütenansätze (Pre-Flower) formieren. Die Umstellung auf das volle Programm von Advanced Nutrients trägt sichtlich Früchte. Die grüne Perle zeigt keinerlei Mängel, strotzt vor Energie und baut dank des vorausgegangenen Trainings ein wunderbar gleichmäßiges, stabiles Gerüst auf, um die zukünftige Last der Buds problemlos zu tragen. Die Fast Buds Genetik beweist hier absolute Performance.
Die Blattfarbe und die Vitalität sind wirklich perfekt getroffen. Halten wir den Ball flach und beobachten nächste Woche, wie sich die ersten echten Bud-Strukturen ausbilden!
Likes
14
Share


@JamieKnolliver
Follow
Grüßt euch Freunde,
Langsam kommen wir ans Ende der 5 Woche!
Habe in dieser Woche keinen Bio grow zugeführt und eine Verbesserung festgestellt.
Dafür wurde top Max angehoben und Bio Bloom.
Fahre im weiteren Verlauf nun wieder nach Düngeschema fort.
Viele der Blätter verfärben sich rötlich und die Blattspitzen der sugarleafs sind lila.
Hoffe dass, das dann später auch im Produkt sichtbar ist.
Sind also noch einige Wochen zu gehen,
Bis dahin euch allen eine gute Woche !💚
Likes
5
Share


@GERGrowDesigns
Follow
Welcome to Veg Week 3 of Fast Buds Purple Haze Auto
I'm excited to share my grow journey with you from my
FastBuds Project . It's going to be an incredible ride, full of learning, growing, and connecting with fellow growers from all around the world!
For this Project , I’ve chosen the Feminized Auto Purple Haze:
Here’s what I’m working with:
• 🌱 Tent: 120x60x80
• 🧑🌾 Breeder Company: Fast buds
• 💧 Humidity Range: 60
• ⏳ Flowering Time: 8 Weeks
• Strain Info: 23%THC
• 🌡️ Temperature: 26
• 🍵 Pot Size: 0.1
• Nutrient Brand: Hy-Pro
• ⚡ Lights : 600W x 2
A huge thank you to Fast Buds for allowing me to try my Best with this amazing collection from Automatic and Photo Strains they managed to Sponsore . Big thanks for supporting the grower community worldwide! Your genetics and passion speak for themselves!
I would truly appreciate every bit of feedback, help, questions, or discussions – and of course, your likes and interactions mean the world to me as I try to stand out in this exciting competition!
Let’s grow together – and don’t forget to stop by again to see the latest updates!
Happy growing!
Stay lifted and stay curious!
Peace & Buds!
Likes
15
Share


@RDWCGrowing
Follow
2/1/2024- Pre-Germination Activities Day 1
I have 21 weeks until final photo is do.. I took 3 seeds out of cold storage and will let them get to room temp for the next 48 hours before I go with Glass of water for germination. I have 3 beans because I will start from the very beginning helping ensure I present the best Pheno. This is going to be a fun one.. I am a few days away from being able to clear my tent out for this run.. I have a breeding run in right now and the Seeds are a few days away from being mature enough for me to take down the girls.
Once I get them down I will need to get my tent cleaned up and turned over right away. This is going to be close, I will have to time them to the water and into the tray at the right time.. because I will need to get lighting on them right away.. I have my 2X2 and my light ready incase I need to hold them in the cloning machine if the others are not done in the next few days.. Glad I have options that can stretch me out for a week or 2 to give me a little more time.
2/2/2024- Pre-Germination Activities Day 2
I checked on my breeding run to see how close the seeds are and if the tent is ready for me to clear and clean but alas I am still going to need a few days. I setup the emergency 2X2 and that should give me 2-3 weeks. The plan is to still wait one more day to allow the beans to warm up to room temp and then drop them in Water sometime tomorrow.
Form my Emergency 2X2 I have the following:
4" inline fan and carbon filter
Fan
VS-2000 light
2/3/2024- Germination Activities Day 0 - Dropped the Beans in.. Today is 0 day.. Go.. Go .. Go..
2/4/2024- Germination Activities Day 0-1 - Checked in on them this morning and no tap roots yet.. covered them back up and back in to the closet they went. I setup the Root Riots and the Seed tray for them. I Ensured my water that I was soaking the root riots in was PHed to 5.8 and I used RO water.
Afternoon Update: Checked on my Breeders and they are done. I started to harvest them, I took down the one I had reversed with STS and I took down the Black African Magic- All but one bud, I wanted to get some pics of that one today.
I was only able to get 2lbs into the Cannatrol because I had to be very careful to keep the bud from the plant that was treated with the STS separated from the other seeded bud that was pollenated from the plant I reversed.
Cannatrol could have held an additional 2oz of wet but not today. Ideally I need 1 more Cannatrol so I can take an entire Tent, but will figure that out. I put an additional 1.5lbs into the freezer to wait it's turn into the Cannatrol, I would have left it on the plant and taken it in 4 days when the dry cycle gets done but wasn't sure how much 2.2 lbs was equivalent to chopped and wet trimmed.
2/5/2024- Germination Activities Day 0-2 - Checked in on them this morning and 2 of them have very small tap roots out.. one still doesn't going to give them some more time. I will check in on them this evening and see if they are more open if so I will transfer the ones that are ready to their medium and seed tray.
2/6/2024- Planting Day TRUE Germination Day 0- Checked in on them this morning and all 3 of them have tap roots out. I broke the bottom of the tap root for #1 which was the biggest.. pretty sad.. I hope she survives.. I tried to be careful it just snapped off when I was trying to get it in the root riot right. Other than that all three are now in their in-between home in the 2X2 while if finish clearing and cleaning out their forever homes.
2/7/2024- Germination Day 1- Checked in on them and no surprise no sprouts yet. Sprayed the dome to moist it and light spray to the tops of the Root Riots.
2/8/2024- Germination Day 2- #3 is popped and it looks like #2 will be popped by this evening.. I got my second Cannatrol today so now I can take down the rest of the tent and get it into the dry/cure.
2/9/2024- Germination Day 3- #2 is popped as well.. so I have #2 and #3 up and still waiting to see on #1 but that might be a loss since I accidently broke off some of the Tap root when transplanting.
2/10/2024- Germination Day 4- #1 has Popped... We have ignition on all 3.. YAY!! I finished clean up and install of RDWC system, this time was unique the back left buckets 3 inch pipe wasn't seated correctly so I had to clean up about 12 gallons of water all of the floor. I also had two leaks coming from one of the Waterfall return junctions, this is why I do a full pressure test before I put anything in. I will continue to monitor it through tomorrow to ensure that I am good to go and then I will finish setting up the baskets and prepping the water to be ready for the ladies planting day!!!
2/11/2024- Germination Day 5- #1 Of course is going to be my trouble plant.. No matter what If she lives through planting in the system and making it, I think I might not cull her at all regardless, she has been such a problem, makes me wonder if she will be super worth it towards the end.. We will see as we go through this grow, but #1 has a piece of the shell on the leaves,
Other than that I set up a new thing I have been doing since last grow converting my Baskets into Sure plants so I can see exactly where the water is when I plant them and ensure I have the water up high enough that they are able to access it and grow but not too high were they are drowning.
2/12/2024- Germination Day 6- Everything seems to be going good.. will just keep them moist and let the roots grow for a few more days before I transplant to forever home.
2/13/2024 - Germination Day 7- Just keeping them Moist.
2/14/2024 - Germination Day 8 - Planting day.. they are now in the system.. :-)I had to fill the water to the bottom of the basket where I could see water on the bottom rocks and just coming up where I had created my whole/ sure plant.
2/15/2024 - Germination Day 9- Top fed just a little to keep them moist and encourage root growth towards the water. I ensured the PH is right at 5.98-6.02 range.
2/16/2024 - Germination Day 10- Top fed just a little to keep them moist and encourage root growth towards the water.