
Likes
Comments
Share


@GreenAutoConsumo
Follow
Como ya he dicho, siempre ofrece resultados increíbles, la he cultivado tanto en interior como en exterior y siempre sale increíble


Processing
Likes
10
Share


@Canadian_Steelheader
Follow
Well it’s been a rough ride with this WW girl, She was veging on the side for quite a while and not in the best of conditions. Transferred her to CoCo and things went terrible. pH was good and nutes were good, but her roots weren’t the best of shape. She wasn’t growing and all her stems and main branch were turning purple, I thought not again, I foliar sprayed for a few days with epsom salt which helped a little, but I decided to Put her back to soil. I nurtured her back to health and I was able to do a little fimming and she responded very nicely after that. She now has a few friends beside her in the tent, which is my grow 3 & 4. Two Purple Kush and a northern light. Hopefully if all goes well I’ll be flipping the switch in 3 or 4 weeks. The new additions just finished their 2nd week of veg. Wish me luck, I certainly need it !

Likes
45
Share

@World_Breeders
Follow
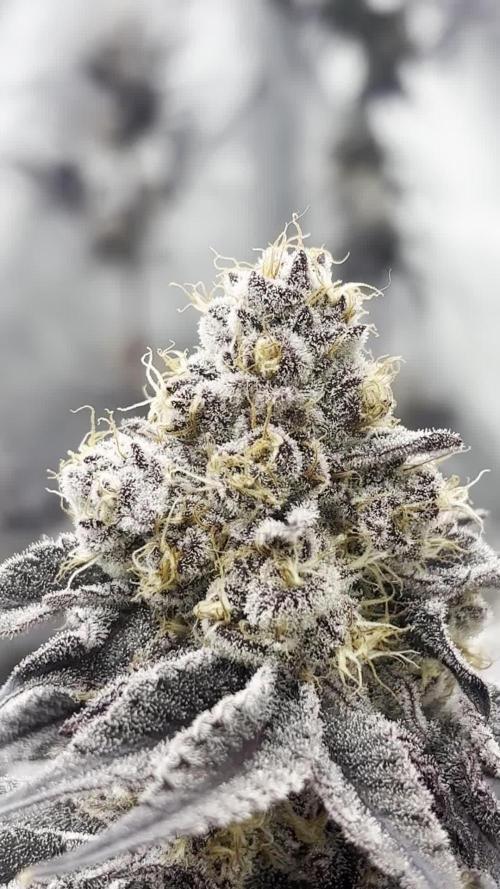
Another great week for Hokuzan. The buds are noticeably thicker now, and resin production has gone into overdrive. Trichomes are covering nearly every surface, giving the flowers and sugar leaves an incredible frosted look.
More pistils are starting to turn orange while fresh white ones continue to appear, showing that the flowers are still developing and packing on weight. The calyxes are swelling nicely, and the buds are becoming denser with each passing day.
The aroma is getting stronger and more complex, filling the grow space with a rich terpene profile that becomes more noticeable every time the tent is opened. Plant health remains excellent, with strong structure, vibrant colors, and impressive resin coverage across the entire canopy.
The next stage will be all about ripening, resin maturation, and bringing out the full potential of this cultivar as harvest gets closer.
Genetics: Hokuzan (World Breeders)
🌍 Breeder: Hidden Group Genetics


Likes
6
Share

@kevxyn
Follow
Let’s go 🔥🔥🔥
Lampe auf 12/12 bei 60% 💡
Der Wassertank ist wieder am Start! 🌊 Sie scheint es jetzt viel besser zu vertragen. Gegossen wird nur noch ganz dezent, um die Living Soil im oberen Bereich leicht feucht zu halten. Ab und zu gibt’s ein bisschen Komposttee – alles andere holt sie sich direkt aus der Erde. 🌱
Blüte seit dem 5.11 am Start und bisher läuft alles nach Plan 😎🍁
Likes
21
Share


@Jays_Not_Here_Man
Follow
A-Day 53 (into week 8) B&C-Day 49 (end of week 7)
A - She is stacking well, and feeling greasy! The smell is coming on stronger everyday, frost is just starting to build up. There is a distinct transition as the leaves go through veg to early flower to late flower. Uniform all around, not very tall, but she is hardy and thiccc!
B- Full flower now, so many tops! She has shown to be a slower flower developer than A, but the flowers she are developing are almost completely uniform all across the 🌱! I assume because there are so many they will be a little slower. I put her ties back on, and the middle shoots exploded with new stretch and growth, so she is still in that stretch/flower stage.
C- what can I say, patience is a virtue. She is looking lush and vigorous. With this being a slightly longer to finish auto strain, she has had time to recover from a) being a runt, B) having slow growth, c) having almost no training and lighter nutrient feeds her whole existence. This is also my control for Topping, she was not, A and B were. This strain is clearly hardy and able to withstand multiple techniques, we’ll see what the end the result is compared to her sisters.
All three plants received a full nutrient feed x2 this week. That was: 3 gallons dechlorinated water mixed with 12 ml Micro, 12 ml Bud, 20 ml Grow, and 6 ml Sensi Extra CalMag, PH’d to 6.2. And another very low feeding of 1/3 that mixture mixed into 3 gallons of water. Ive heard many growers who instead of just watering, they will do a much lower strength of nutrients included in their watering, and ultimately never not feed their plants nutrients until flush. Thoughts?


Likes
Comments
Share


@LokalGrenz
Follow
The bottom watering worked for the week I think as away happy with results think I might just bottom water regularly and feed the tea from top every other changing
2/8
I did a good clean up and some pining Monday 2/10 I will filp to flower I also added power bloom today 2/8


Likes
5
Share


@midEastern
Follow
move to larger 6L pot
using neem oil (1%) to foliar spray on the lady every 3 days.
it wont the bugs reproduce there.
very effective,organic,safe and un-harming the plant since it leaves oily protection layer - only during veg and bloom 1st week
https://www.ebay.com/itm/Khadi-Pure-Natural-Neem-Oil-For-Skin-And-Hair-100-Ml/143613469479?hash=item217007a327:g:DGoAAOSw6GteyhfJ
additionaly,there is an organic bio pestisize store near and i got a few lady bugs for cheap.they constantly eat all pests
intense LST here to control height and nodes

Likes
15
Share


@Messypies
Follow
Auto cinderella jack - Amazing week of growth. There are new nodes exploding from everywhere and its not showing signs of slowing down. They are currently loving the organic nutes and have started showing signs of flowering.
Auto critical cheese - this plant has shot up recently. It was planted a week later that the ACJ but is growing some seriously fat fan leaves. Should be a nice yeilder.
Peanut butter cookies - this girl is looking pretty sorry for herself. I am intentionally trying to keep her as small as possible so that I can get the autos out before flipping into flower but she is gonna be a beast. Will transplant into a final pot in the next day or so.


Likes
3
Share

@Bread_n_Buds
Follow
Our Zamnesia Critical Cheese Automatic has a distinct, predominantly sativa appearance. What a plant guys, I cleaned the ugly flowers very very well and I can really say that I am very happy with this plant. Swollen buds, well aligned and looks super healthy, can't wait to smoke this.
Techniques chosen: Here, we applied LST to a plant with short internodal spacing; it's not ideal, but we wanted to give it a try.
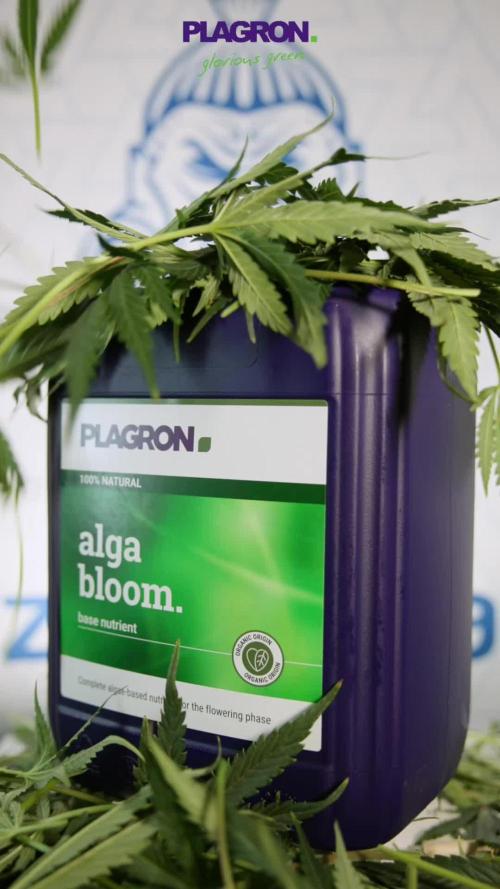
We're 100% organic and 1000% Plagron, as always.
The soil we've chosen is the recently released Plagron Bio LightMix, which will allow us to start flowering more smoothly and reliably, without the sudden changes that liquid fertilizers can cause. A week is more than enough, so don't overdo it.
We're in the final flowering stage and things are starting to get serious, so we're adding our legendary bloom booster Green Sensation and starting the late flowering phase.
- Green Sensation 1 ml/l
- Pure Zym 1 ml/l
- Silic Rock 1 ml/l
- CalMag Pro 1 ml/l
- Sugar Royal 1 ml/l
- Power Buds 1 ml/l
- Alga Bloom 0 ml/l Just booster and soon in flush
Choose your preferred style and calculate your results on the website:
www.plagron.com
Z - https://www.zamnesia.io/it/531-growshop
A great strain, not tall but very bushy! Give it a try!
Z - https://www.zamnesia.io/en/3334-zamnesia-seeds-critical-cheese-automatic-feminized.html
Z - Not content with what they already had in their hands, the expert breeders at Zamnesia Seeds wanted to embark on a journey into the world of autoflowering genetics, aiming to improve upon a great British classic... the Cheese cannabis strain. They crossed Critical with a high-quality Cheese specimen, enriched with a significant amount of Ruderalis. The result is an extremely potent, therapeutic, and easy-to-grow autoflowering version. This new, improved strain has been named Critical Cheese Automatic.
Critical Cheese Automatic embodies everything that made the original Cheese so famous, acclaimed, and loved around the world. We're, of course, talking about the Skunky flavors and pungent aromas this strain releases, not to mention the overwhelming effects it induces. Lovers of the original Cheese will surely appreciate this feminized reincarnation. Smoking Critical Cheese Automatic produces exceptionally potent sensations for an autoflowering strain. Its effects are quite strong and highly physical, both in intensity and duration. With these properties (or "body") in mind, it's no wonder many medical users are the first to want to get their hands on this "skunky" plant. Those suffering from chronic pain, inflammation, stress, anxiety, and migraines (to name just a few of the ailments it can alleviate) will notice their symptoms diminish, if not disappear completely, thanks to the potency of this strain. With this autoflowering "upgrade" of the Cheese strain, even novice growers can achieve excellent results. It's a vigorous plant, incredibly easy to grow, and requires little maintenance.
Commercial growers looking to generate income will appreciate Critical Cheese Automatic primarily for its life cycle: from germination to harvest in just 10 weeks. When grown properly, it can produce yields of 120-150g per plant. In addition to its excellent yields, Critical Cheese Automatic reaches a rather compact size (1 m), making it highly suitable for any type of grow. That said, Critical Cheese Automatic only thrives when grown outdoors in warm climates (like those of Spain or Italy).
So, in conclusion, whether you're a beginner, veteran, or commercial grower, Critical Cheese Automatic offers great satisfaction to everyone.
You know it, but I recommend it: here you'll find so many beautiful things, basically "all the best that nature has to offer."
Z - www.zamnesia.com
Z - www.zamnesia.com
Music //
www.radionula.com
+ Feng Shui Music
Processing
Likes
17
Share


@Totogrowuk
Follow
Well once again I’m blown away with the genetics from Fastbuds. I only wish I had more room for them to really grow. I’m growing Fastbuds Smoothie outside and hoping that’s going to thrive in lots of space.
Anyway the Cali Snow is smelling divine and really stacking up nicely. The grapefruit continues to fatten up and smells just like over ripe grapefruit. Very acidic almost gassy. The grapefruit is a lot small so yield might be down but quality over quantity win some for me. 👊✌️🏻💚
Likes
18
Share


@Silverback_Guerilla
Follow
10/23:
Fed today with one, signal, sweet & sticky, silica, beastie bloomz, and a little ca/mg.
10/27:
Fed today with one, signal, sweet & sticky, silica, beastie bloomz, kangaroots, and humic acid.
Lowered the lights to no more than a foot from any cola..most are 7-9" away.

Likes
2
Share


@homegrow_pro
Follow
Last week of flowering. I would have to use a scrog to spread her further. I decided against that option becuase i like to keep the plant available at all times. Scrogging hinders this. So im keeping her down with some lines. Look at the stem. If it looks like this in veg, you know this lady is going to be huge!
Likes
62
Share


@Santica_Garden
Follow
So apart from the really low yields.... Which I expected from 80% Indica dominant strains just not that low considering how dense the Budz were. But I can say my growing skills have been consistently improving and it is showing with each grow.
With these ladies I should have definitely put them in a 12Litre pot or smaller and still would have gotten the same results if not better. So I lesson learnt for future grows..... To take into consideration the size pots I'm using on the strains I'm running! 👍🏾
But in all very great smoke, even more excited for the next rows that I have coming with the improvements I will be making. 👍🏾🌱💚
Another thing I will say is that I will be putting more effort into how I document my harvest for you guys.... More pictures, better videos showing off the Budz.... Not many pictures because I done smoked it all 😅😅🔥🔥🔥 but still I want to do better for you guys, I want to give people the best view/review of the strains that I run... The information will help someone that decides they might want to run this strain in the future!
Any questions guys just ask away 👊🏾😎

Likes
80
Share


@Qlimax
Follow
d14 -slow growing flower exploded :)
d15-flowers growing rly fast i can just wach nothing to do yet :)
d17-*fiming* one plant(smallet) with smallest pot for some tests
d18- spoten first pistils alredy.... pre flowering i guess
d20-flowers looking good growing fast :D
d20- started with some LST
d21- Changed MH to HPS and 20h light to 22h light.
d21-This week was nice,didnt do any big changes plants growing nicely onley 1 flower growing complety diffrent then others...all have 4new stems every way this onley have onley 2.....then all have 1 main cola on top this one looks like will have 2 main colas...(4 or 6 now when i FIM it ..will see if i even fim it curecly )
Thats all!
Was fun and i cant wait for harvest day!!!!
Likes
49
Share


@Roberts
Follow
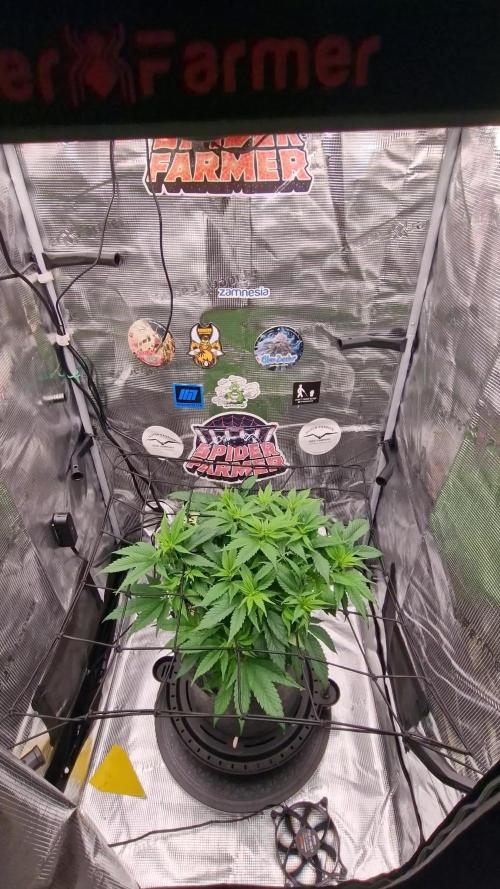
Rsv11 has been growing good. She was neem oil treated 4 days ago and again today. I have seen evidence of a pest, but not seen the pest itself. So I am unsure what exactly it is. If the neem oil works, I should be free of the pest after today. She has been growing good. Once I get these pest gone, and she recovers. It will he time for flowering. Thank you Spider Farmer, and Terpyz Mutant Genetics. 🤜🏻🤛🏻🌱🌱🌱
Thank you grow diaries community for the 👇likes👇, follows, comments, and subscriptions on my YouTube channel👇.
❄️🌱🍻 Happy Growing 🌱🌱🌱
https://youtube.com/channel/UCAhN7yRzWLpcaRHhMIQ7X4g

Likes
24
Share


@MrHightimes
Follow
Man,
I whipped these girls into shape!
They got an amazing lolipoping~! its hard to sacrifice some of those branches but they look so much better for it and i hope it better allocates the plants resources!
Did a big defoliation that really changed the way they look!
Likes
33
Share


@ganjaman24
Follow
She showed minor discoloration so I added very very little nute from GHE line of course AFTER checking and adjusting ph level first :)

Likes
10
Share


@woolygrower8280
Follow
bit of nutrients 1/2 recommend does
starting to get weird spots at the end of some leaves having a hard time identifying what it is any help would be nice
