
Likes
Comments
Share


@GorkedOut
Follow
I was told to never judge a strain purely off it's THC percentage. To smell a plant, and what your nose picks out is generally the strain that will jive the best with the endocannabinoid system in your body. This strain exemplifies that. It's only around 17% but the high is amazing. An under-rated strain for sure.
Very easy strain to grow. Although the same strain, one looked pretty different and was much frostier despite getting the exact same treatment from seed to chop.

Likes
15
Share


@the_big_pink_place
Follow
01/03/22 Watered plants 2L of nutrient water each , assessed plants to determine what LST I'm doing, looks like these plants have potential to be monsters. Let's hope I don't fuck it up now. 01/01/22 Topped and defoliation was done, didn't water that day even though they needed it I wanted to give them a day or two from the stress they went through, watching to make sure they didn't wilt. Its paying of not listening to my ocd mind thinking I need to do something everyday, I didn't even want to top them, but they where looking very kushy type of plant. And I have trellis going in later two tiers. 01/08/22 Did a full water threw tested run off , it's sitting 800ppm above what I'm feeding, next watering straight 6.0ph water. Lights at 💯%


Likes
52
Share


@jmsky
Follow
In veg, it responded well as I learned about how to best train it. In flower, the smell was insane... after the first smell my eyes rolled back. Sweet floral orange citrus with a hint of chemical cleaner smell that comes together to smell like a tropical sunscreen.
When I was trimming the tester, my friend was walking by and stopped in his tracks, "whoa which one is that!?" - this one is loud! The smell is super strong even after drying, and really translates into the smoke. This was the star of the show, and made the best smoke. 10/10 would grow again.
One small issue was that this plant was by far the most susceptible to powdery mildew. It started on this plant, and any time it popped up in the tent, this plant had some. I had to stay on the Dr Zymes and trimming any affected leaves, but it was worth it.
Overall I ended up with just under 40g, but I smoked a bunch while trimming and took a sample cut, so really it was 7-10g more... this one was chopped on day 64. The buds were fat and firm and the trichomes looked ready, with a good mix - probably 5% clear 85% cloudy 10% amber.
I trimmed this plant 2nd and was getting better at it, ended up with some really nice looking nugs... so of course I took a ton of pics!


Likes
52
Share


@DogDoctorOfficial
Follow
Let's realign our cosmic compass and embark on a harvest report for our magnificent Cosmos F1, a pure CBD strain that has taken us on an extraordinary journey. Brace yourself for cosmic revelations and interstellar delights!
After an impressive 11 weeks from seed and 7 weeks of flowering, the time has come to witness the cosmic culmination of our efforts. I carefully hung the entire Cosmos F1 plant to dry, allowing the cosmic energy to infuse every inch of this botanical marvel. It's a sight to behold, with majestic branches reaching for the cosmos, reminiscent of a cosmic dancer frozen in time.
As our cosmic queen gracefully dries, her vibrant hues continue to amaze. The shades of green, intertwined with delicate hints of purple and gold, are a testament to her genetic splendor. It's as if she has absorbed the cosmic essence of the universe, transforming it into a visually stunning spectacle.
Now, let's talk about the cosmic power of CBD. Our pure CBD strain holds the key to a transformative experience. With minimal psychoactive effects, this cosmic treasure offers a realm of therapeutic benefits. It's like a cosmic massage for the mind and body, soothing and relaxing, allowing us to explore the depths of cosmic tranquility.
The decision to hang the entire plant for drying is a testament to our dedication to preserving the cosmic integrity of our harvest. By allowing the branches to hang freely, we encourage a slow and controlled drying process, ensuring that the cosmic essence remains intact. It's a ritual that honors the plant's journey, preserving its cosmic magic for us to enjoy.
As we eagerly await the cosmic transformation, let us express our gratitude to the celestial forces that have guided us on this cosmic odyssey. The cosmos has aligned to bring us the extraordinary Cosmos F1, a gift from the cosmic garden gods themselves. We extend our heartfelt appreciation to the cosmic harmony orchestrated by @James and Royal Queen Seeds.
In the coming days, our dried cosmic buds will be ready for the next stage of our journey. From cosmic concoctions to cosmic culinary delights, the possibilities are infinite. Imagine infusing the cosmic power of CBD into soothing teas, cosmic creams, or cosmic confections. The universe is our canvas, and with our cosmic harvest, we can create cosmic masterpieces.
As we bid farewell to our Cosmos F1, let us cherish the cosmic memories we've shared. The vibrant colors, the pure CBD power, and the cosmic connection we've established with the universe. May our future endeavors be as cosmic and awe-inspiring as this one.
Until we meet again, my cosmic friends, lets keep exploring the cosmic wonders, nurturing our cosmic gardens, and let the cosmic energy guide our cosmic creations. May our harvest be abundant, our cosmic experiences be enlightening, and our cosmic journey be filled with celestial blessings.
As always thank you all for stopping by and for supporting me on this journey, i am super passion about growing and fell blessed to have you all with me on

Likes
2
Share

@eldruida_lamota
Follow
Vamos familia, actualizamos la quinta semana de vida de estas Lemon Mandarín de FastBuds.
La temperatura que estuvo entre los 24-26 grados y humedad dentro de los rangos correctos.
Todavía estamos en el ciclo 16 horas luz, 8 oscuridad, estiraron bien y ensancharon bastante también, el color es verde sano.
Se nota que los nutrientes de la marca Agrobeta hacen sus funciones.
También realicé una poda de bajos que yo si las veo necesarias para explotar después la flor.
- os dejo por aquí un CÓDIGO: Eldruida ,descuento para la tienda de MARS HYDRO.
https://www.mars-hydro.com
Hasta aquí todo, Buenos humos 💨💨💨

Likes
14
Share


@Lol_You_Looked
Follow
May 22nd - pH 6.1, PPM 1310, 2.6 EC, 85/75f, 47% humidity - late water change, around midnight, probably will add more CALiMAGic when I go to check the water later today (the 23rd), just very scared to have it turn cloudy af on me again and ruin the whole thing lol.
May 23rd - pH 6.2, PPM 1650, 3.7 EC, 78/70f, 44% humidity - increased the amount of CALiMAGic, Micro, and Purpinator in the bucket, nutrients list updated to reflect, noticing some clawing, its either wind burn or nitrogen toxicity I'd guess. update: can't be wind burn, they're not going fast enough. don't really know what is up with those few clawing leaves just hope more don't happen.
May 24th - Unable to get data this day.
May 25th - pH 4.0(??) -> 6.2, PPM 2080, 4.2 EC, 82/69f, 47% humidity - Didn't get info yesterday, woke up before work to adjust plant and found it super low in pH? Pen stopped being calibrated so I pH'd to 6.0ish before I left and then recalibrated the pen when I got home and pH'd to 6.2. PPM is climbing, but the water level is going down too, will add more water tomorrow.
May 26th - pH 6.0 -> 6.4, PPM 2100, 4.2 EC, 81/68f, 46% humidity - pH'd up to 6.2-6.5 range, noticed little rust spots.
May 27th - Unable to get data this day.
May 28th - pH 6.6 -> 6.1, PPM 2180, 4.4 EC, 81/72f, 38% humidity - pH'd down into range. Did some defoliation today, took a lot from the lower and middle 'cause 360° light. Added less than half a gallon of tap water.

Likes
5
Share


@OnlyTomatoes
Follow
[ Introduction ]
Welcome to my first ever grow journal! I have been growing medically for the past couple years, documenting some of my grows on my Facebook and Instagram (@OnlyTomatoes) pages, as well as several cannabis cultivation subreddits. I've found that I do a lot of things differently than other growers, so I'd like to share a full cycle publicly in case I have the answers to somebody's questions.
[ Updates ]
Day 4 - Lights have been lowered to 18 inches off canopy, dimmed to 25%. They've recovered from both their transplant and their topping, new growth looks almost perfect. I'm going to keep the accidental sunflowers for a few more days and see if there's any significant difference between plants. They all received a foliar spray of neem, kelp, and a bit of calmag before lights off yesterday. I expect to be able to remove the remaining damaged leaves by the end of this week.
Day 7 - Lights increased to 30%, C02 increased to 800ppm, getting ready for week 2 of veg. Fed today, fairly low EC (<1.5) blend of Silica, Calcium, Kelp, Molasses, and Tribus Grow in a mixture of R/O and tap water. Very little runoff at 1gal per pot. Will most likely foliar again before lights off with a light fish hydrolysate mixture to help with any nitrogen issues. Any dead or dying leaves you see are from pre-transplant, I'm just waiting a few days longer for the existing rootballs' ph levels to swing back to a healthy range before removing all that unsightly growth. I'm really not sure when I'm going to remove the sunflowers growing in some of the pots, I've seen no negative effects yet. I could flip group 1 into flower if I wanted, the canopy is level and beautiful, however group 2 will take a while longer to fill a canopy.
[ Grow Details ]
Plant Count: 64 (Clones)
Mother Age: 17 Months
Strain: Gelat.OG (Phenotype 5)
Breeder: Seedsman
Hunter: OnlyTomatoes
Veg Time: 3-5 Weeks
Flower Time: 65 Days
Training: Multiple Toppings
Final Pot Size: 5 gal (Fabric)
[ Room Details ]
Room Size: 21'x9'x11' (190sqft, 2100cuft)
Canopy Size: 10'x9' and 5'x9' (135sqft)
Lighting: Grower's Choice ROI-E720 x6 (dimmed to 25% power during veg)
Cooling: Cooper&Hunter 36k BTU Minisplit
Dehumidification: Quest 225
Equipment Controllers: TrolMaster (Lighting, Cooling, and Dehumidification controls), AutoPilot (C02 Controls)
Watering System: Manually controlled drip irrigation, x2 1gph drip emitters per pot
[ Pre-Veg ]
These poor clones have lived an abused life during 2021, sitting around in solo cups for over 2 months waiting for a new home. Normally I would never allow pre-veg plants to have such obvious deficiencies, but constant hand watering led to some poor nutrient decisions on my part. They've been in their final pots for a few days now and were topped on day 0 of veg. I plan on lowering the lights to 18"-24" within canopy around day 3, I'm just allowing some extra time for the roots to really dig in. I've found that a batch of dirt that was used had sunflower seeds in it, possibly winter food storage from an outside rodent, so I'm debating how long I will let these sunflower seedlings grow alongside my plants. They do make a good cover crop with amazing root systems, I just don't think that really applies in pots of this size where plants can choke each other out.

Likes
21
Share


@Esmoki_La_Cabrona
Follow
Today is day 22, beginning of week 2 of veg. Looking good after topping yesterday. New growth already. Finding it hard to figure out LST, but making progress as soon as I see a leave that is shading another. Practice is helping toward perfection. I fed her today according to General Hydroponics Flora Series low/weak feed schedule. Did not use calmag because I realized there is already a lot of cal and mag in my tap water. I will be buying a 5 stage water filter reservoir so I will resume using it then. Currently only able to use tap water that is filtered through a Brita pitcher. Turned exhaust fan back on after initial 24 hours of balminess to promote growth and rh is back to normal parameters.
August 18 update - It is summer in the northern hemisphere and guess who just got over covid? This plant mom. Ugh. Updates are dry this week because I was as sick as a dog. A couple of days ago I noticed purple stems on the fan leaves and the fact that the new growth was such a bright contrast compared to the older fan leaves. After a confirmatory TDS reading on the Apera meter regarding my suspicion of nutrient lockout, I flushed Kaboom 4 times to get her readings back to normal parameters. Today, day 28, (happy first month Kaboom) she is looking a lot better, photos and details in the next week :)


Likes
12
Share


@HIAZ_urbanbudfarmer
Follow
Saturday 16-11-24 , Flowering day # 53 week 8. Harvest day!
Cut branches off plants & hung the 2 front plants off the light.
Put scrog net back in with a large flyscreen laying on top, & spread branches from the back plant over it. This allows complete air flow around the buds. Running a single oscillating fan beneath pointing to the bottom.
Temperature is around 24°C & RH is 55%


Likes
19
Share


@Joeycrack9
Follow
Lemon Mandarin (topped)
Papaya Sherbet
Gorilla Melon
Lemonpaya
Orange Sherbet
Likes
7
Share


@PureMello
Follow
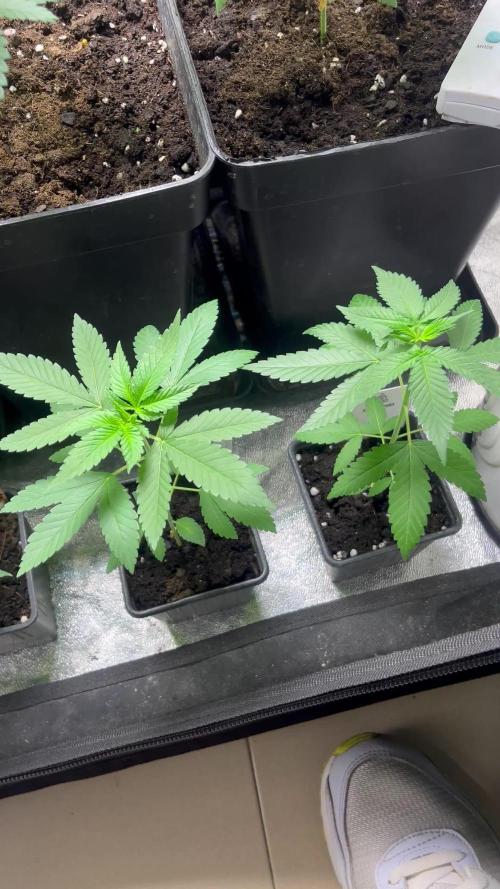
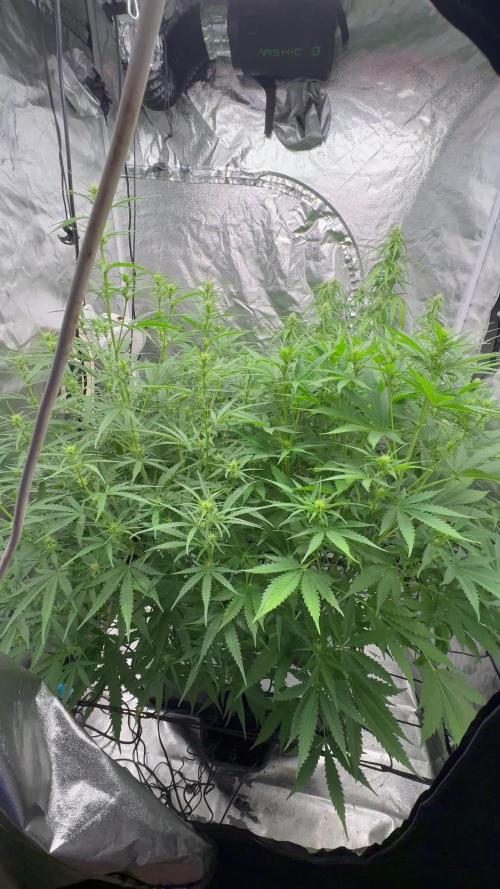
The smell is crazy when the tent is opened and only growing stronger every day. I've definitely learned I caused them to grow so tall. The tallest one is 3ft and that's because I kept the light too far from them. Gonna keep note of that for Season#2 because they are so tall now.
The buds seem to be getting thicker and I'm happy for that, I realized I'm impatient and also tainted by the internet with my expectations of them.
I'm seeing frost a lot more now, which is cool. Plus, some of them are starting to see different traits and that's exciting because they kind of all look exactly the same and they aren't.


Likes
2
Share


@FourTwenty_Plants
Follow
Soooo I chopped the cripple a week before and got 40G dry out of it. Im excited how much the bigger one will yield cause shes looking better and better with every day passing.
Likes
6
Share


Likes
10
Share


@Zeravlab
Follow
1/29/24 - Beginning of week. Looked good, was planning on letting it go another week but within a day the top leaves started turning yellow all over and I started seeing amber, just a few but spread out all over the plant, so last minute decision to harvest on 1/31/24.

Likes
16
Share


@DreamIT
Follow
Sponsored by:
🎭ZAMNESIA SEEDS🎭-💡VIPARSPECTRA💡-💐GREEN BUZZ NUTRIENTS💐-🛠️WEDRYER🛠️
28/7 I took a clone and leave it a week of greenery before moving it to bloom, yeah
2/8 it has recovered very well from the cut and grows luxuriantly. soon she comes into bloom too
__________________________________________
Personal advertising (contains affiliate links)
__________________________________________
🦄Zamnesia boasts the most complete and accurate site where you can find everything related to cannabis and the "psychedelic" world. Autoflowering, feminized seeds, mushrooms, salvia divinorum, afrodisiacim of everything, and more! ( no affiliate link)
✅https://bit.ly/Zamnesiaseeds
__________________________________________
Did you know that Green Buzz Nutrients fertilizers are 100% vegan? A complete line of products ready to give the best to each of your plants! Visit the site and see my journals to see how they work 🦄
🤯 And with the code "dreami t" you will immediately receive a 15% discount on your purchases
✅https: //bit.ly/GreenBuzzLiquidsPro
__________________________________________
👀 Are you looking for a good lamp to start with? 👀
🌞Viparspectra has something more than the others, take a look at their site.
⏩ Use "GDVIP" for an extra discount or "DREAMIT3" for an extra 5 %% discount
👀 Search for it on Amazon
✅Amazon USA: https://amzn.to/30xSTVq
✅Amazon Canada: https://amzn.to/38udUVe
✅Viparspectra UE: bit.ly/ViparspectraUE
✅Viparspectra USA: bit.ly/ViparspectraUS
______________________________________________
🌈 Tired of blowing on your weed hoping it dries quickly? Check out the Wedryer website! You will find a well-made accessory that will help your weed dry in just 8-10 days without the annoying risk of finding mold or other annoyances! (no affiliate links)
✅https: //bit.ly/Wedryer_
______________________________________________
📷🥇Follow the best photos on Instagram 🥇📷
https://www.instagram.com/dreamit420/
Backup
https://www.instagram.com/dreamit4200/
🔻🔻Leave a comment with your opinion if you pass by here🔻🔻
🤟🦄💚 Thank you and good growth 💚🦄🤟

Likes
501
Share


@PurpleWorship
Follow
Week 1 went off perfectly, purples babies reaching WEEK 2!
😍 PRESENTATION OF THE LADIES 😍
------------------------------------------
The four plants are the same genetic. But they already have a different look, and I would introduce them to you :)
1) The Ugly - She have terrible first leaves. But she isn't late compared to the other. So I still believe in my Ugly!
2) The fatties - 2 of them grew wide leaves. It's just about leaves shape for now.
3) The solar panel - This one grew less wide but longer leaves.
Regarding the Ugly, I must say that for the 4 seeds, I had to manually remove the shell when they sprouted.
They all had their shell on after sprouting, and I don't like that. Probably a bit old seeds?
For now, they share the same needs, and seems all happy.
But this might change. I may even not be abble to recognize them, except if I cheat on them by putting labels on their pots ^^
💧 WATERING 💧
------------------
Luckily, the weather is offering some rains, and I been abble to put the ladies out under the rain during day 7 and 8.
Not that long, they still got watered on Day 8, some hours after the rain. With feeding for the first time!
🍗 FEEDING 🍗
------------------
First feeding. Used Fish-mix at 0.8ml/L. I plan to have a second watering in the week, but without nutrients. That's why I written 0.4ml/L in diary settings.
If you know me, you also know that I like Fish-mix, but that I'm also effraid of it ^^ As foliar later during veg, it's an awesome products, easy to see that plants love it.
But it seems verry powerfull, and need to be used carefully when given to plant. My rule is to limit to 50% of recommended dose. For now.
Anyway, Fishmix right after a rain must turn on every form of life in soil I believe 😀 Even life coming from rain.
🏡 GROWING CONDITIONS 🏡
-----------------------------------
Starting an indoor session on the end of summer seems a good choice for me:
- Some rains that provide me better water
- I can put the ladies out if verry sunny, to save electricity/money
- Perfect temps in the grow room. My house is always windows open. The growroom lightup in the end of the afternoon, when the day get cooler
- Plants will flowering indoor during winter. I need heat during winter, so thanks grow room :D And cold air mean verry dry air! So reaching low humidity on the end of flowering will be verry easy!
Pests : Nothing to report for now. I'm expecting a visit of my good old friends the thrips in 2-3 weeks 😎
Grow tent & Light (XS2000 ViparSpectra) : Something I notice just now: I'm abble to close the grow tent without air-extraction. I never been abble to do that in the past.
This light is waaaay more efficient, and produce way less heat, because I couldn't keep tent close with my previous Mars Hydro TSW2000.
Don't be effraid, I still renew the air in tent multiple times a day ;)
💜💜💜💜💜💜💜💜💜💜💜💜💜💜💜💜💜💜💜💜💜💜💜💜💜💜💜💜💜💜💜💜💜
Thanks for reading guys :) Thanks for crossing your fingers last week, as you can see.... it worked!
PS : Improved my skill with my new camera. But except more and more better ones as I practice ^^
💜💜💜💜💜💜💜💜💜💜💜💜💜💜💜💜💜💜💜💜💜💜💜💜💜💜💜💜💜💜💜💜💜
Update Day 13: Plants watered with PH 6.2 water. Look at that Hugly... She really have a problem 😅 I'll try my best with her 🙌
Likes
2
Share

@Satax
Follow
The week went well, the plants are growing nicely. Everyone has started to develop properly, just a slight calcium deficiency on the Green Poison on the top right, otherwise I intervene as little as possible since everything seems to be going smoothly.
Bit of pintch on the top off some on.
