
Likes
Comments
Share


@jaydee702
Follow
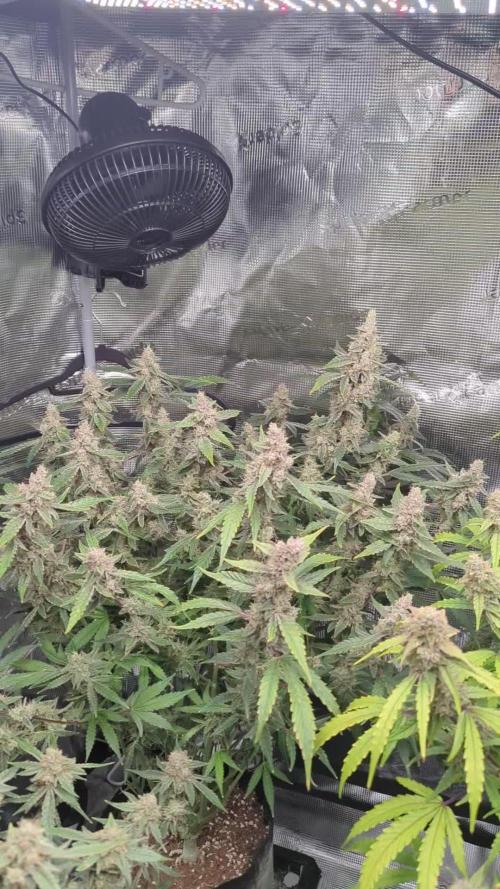
Girls are doing Great thay have reached the trellis now to fill it all in through the second week then ill let it finish stretching after week 2 is done and floweras are visible on top so far this is my best Grow ever

Likes
5
Share


@Mr_nugs_lover_David
Follow
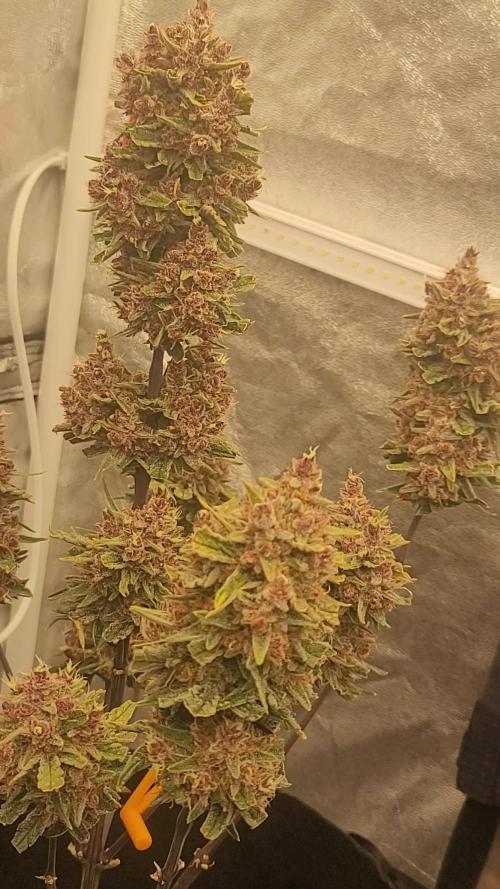
I just cleaned the roots and I'm waiting until it's dry to chop her down, I love the smell and the compact nuggets that she has,it's just a very nice genetic to grow.

Likes
55
Share


@Natrona
Follow
Blue Cheese F1 automatic
Week 6 2/9-15
The Cheese gals are in full flower, the buds are puffing out and stacking. I even see some lower buds connecting to the upper buds and some pistils are turning brown. There is some smell when I open the tent. The F1 genetics are reflected in that these 2 plants are almost identical.
I don’t see much difference in their growth so far using the different mediums. Soil and soil/coco blend. Maybe harvest will show a difference in yield from each one. Time will tell.
On 2/13 I did major defoliation on my Cheese gals.
I removed all large fan leaves and any leaves shading bud sites. Initially, I thought this would be my last defoliation, however I have heard that 1) they continue to grow new leaves until day 20 of flower and 2) there must be enough foliage on the plant to photosynthesize energy. Well, I hope I left enough leaves for energy to keep bulking up the buds. Stretching has slowed down. Both girls grew only an inch and now 17 inches. This is only the end of flower week 2.
Controller is set to flower. I add 2 gallons of water to the T700 humidifier daily to keep the VPD in line.
2/9 & 11 4 gal fed 2 liter each nutrients added at ½ of recommended amount. Making 4 gallons since I have 2 pots of carrots and a Dill in the back.
Bloom Juice 45ml
Plant Juice 75 ml
Royal Rush 15 ml
Power bud 15ml
Green sensation 7.5ml
Recharge 2.5ml/gal
4 ml
Cal Mag
5
Ppm 333
Ph 7.02
Temp 66
2/13 5 gal
Bloom Juice 60ml
Plant Juice 60 ml
Royal Rush 20 ml
Power bud 20ml
Green sensation 10ml
Recharge 2.5ml/gal
4 ml
Cal Mag
25
Ppm 538
Ph 6.6
Temp 66
Your likes and comments are appreciated. Thanks for stopping by.
Growers love 💚🌿
💫Natrona💫

Likes
26
Share

@Joni2017
Follow
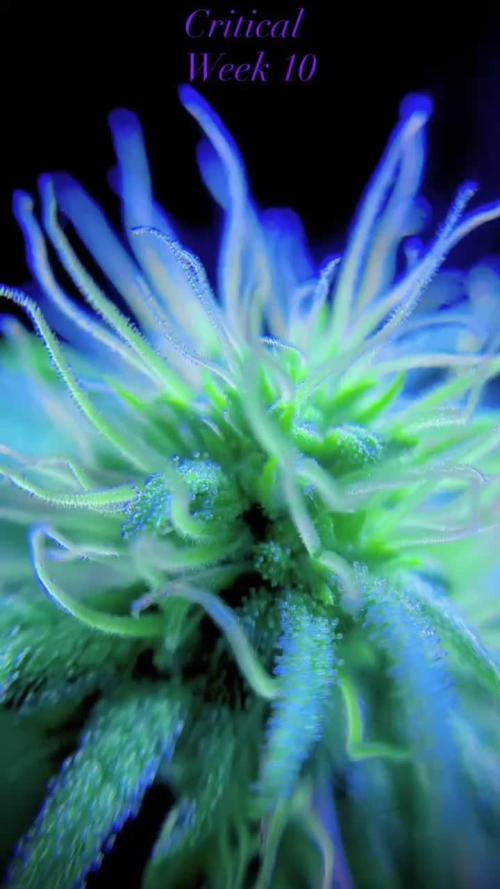
Hello again, GrowDiaries family! 😎
We’ve officially entered Week 10 (4th week of flowering) and the Critical is truly showing her full potential. This week has been all about environmental management and keeping the plant’s metabolism at its peak despite the winter chill.
📏 Precision Measurements & Training
-Height: Steady at 37 cm. Vertical growth has stopped as she focuses all her energy on flower production.
-Canopy Management: The LST has done a great job. The canopy is perfectly flat, ensuring that every "pompom" gets the same light intensity.
-Visual Check: I’ve taken the plant out of the tent for some photos under white light to show the real progress of the trichomes without the LED distortion.
🌡️ Environment & Climate Challenges
-Temperature: We’ve faced some tricky nights at 12°C, reaching 27°C during the day.
-The Strategy: To prevent the plant from stalling due to the cold nights, I’ve started watering with lukewarm water. This keeps the root zone active and ensures nutrients are still being absorbed effectively.
-Humidity (RH): Stable at 40-45%, ideal for keeping the developing buds safe and dry.
💧 Watering & Organic Pest Control
-Nutrient Strategy: Still going strong with the full Biobizz schedule (Bio-Grow 1ml, Bio-Bloom 2ml, and Top-Max 1ml) in 1L of water. She is responding beautifully with no signs of overfeeding.
-The Cinnamon Trick: 🛡️ I noticed some fungus gnats last week, so I applied a generous layer of ground cinnamon on the soil surface. It’s an old-school, 100% organic remedy that acts as a natural fungicide. Result: The gnats are completely gone!
🌿 Flower & Resin Evolution
-The sugar has arrived! ❄️ Resin is now heavily coating the sugar leaves and the buds are thickening up fast. The white pistils are abundant and healthy. The aroma is becoming much more complex and penetrating!
Thanks for the comments and for following this grow! Happy growing to all.😉👍
Likes
18
Share

@For2itous
Follow
She's about done another week or so and she will be. Super sweet fruit smell like a jam or fruit filling for a dessert 😋 super dense frosty nugs rn can't wait for this one gonna be a tasty one. Happy growing 🌴


Likes
Comments
Share


Likes
8
Share


@Papastroumf
Follow
Day 66 : The lady seems to be stabilized with the burns , so i started some juices to her water in order to help her with fattening. Hope to wake her a bit and produce some terpenes.
Edit Day 70 : I increased again juices to 3ml / L. Also added 1ml / L CalMag. She started to turn purple.

Likes
4
Share


@UrbanBoer
Follow
Talk about a mission accomplished, dam you Lamby… you had me excited at one point when I thought you were an auto, but to my shock, you are a regular, you just have a long ass flowering window… at least unlike her sisters within the 4th cycle, she did not reveg she just focused on flower, the buds are bulky and firm, scent is amazing, you would mistake her for a cheese strain. I should not be disappointed by the plant’s size! Because I planted her during winter, and all outdoor or greenhouse(unless you have a GH that is climate controlled), do not grow as big as the would during spring or summer season, and due to this factor, I only got 59g of wet bud. But I have faith the other ladies will produce a higher yields.
Last I smoke this strain was earlier late summer or early Autumn, and from smoking to growing now harvest, I wish I am blown out the water with this strain, it’s time to conduct that questionnaire. Or even better go to an established cannabis club, and get them to samples bud, and ask for a review.
Likes
9
Share

@FPVGROWCZ
Follow
Ahoj. Holky krásné kynou a voní neskutečně.
Po dalším týdnu bude následovat proplach a snad už kosábo.
U Crystalky každej den čekuju trichomy. Už je tam dost mléčných, pár jantarů.
Zkittlez voní opravdu jak ten sáček bonbónů.
Ta má zatím všude jen čiré trychomy.
Potřebuji aby už dojely abych mohl zvýšit vlhkost pro LemPayu 😅
Zdar všem a ať to roste 🥦


Likes
10
Share


@3lementa1
Follow
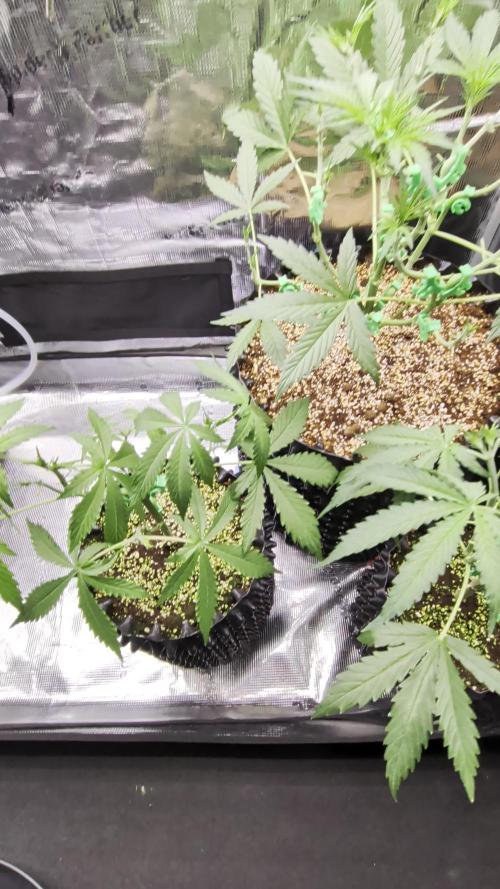
I was still seeing strange things happen in the leaves but runoff pH was staying at around 6.5. One plant toppled over and started growing up from a bent stalk like an herb. I started looking for a new reflector so that I could mount my light horizontally instead of vertically to save space and ideally find a way to get the plants closer to the light without burning them. I started looking into MH bulbs as well as I figured at this point I clearly hadn't provided the light they needed. If I wanted them to thrive I needed to set them up properly for the last few weeks of veg. I transplanted this week into slightly bigger coco pots but in retrospect I feel I should have gone up to 3 gallon pots at this point.
Processing
Likes
9
Share


@YetiGrowth
Follow
Fixed all my calmag issues from last week thanx to your help. Turned out the plants where underfed with only 400ml water per feeding, so i increased the water and nutrient levels and included calmag. Smangies Bloomboss is a custom nutrient i have created for my autoflower. The plants seem to love the nutrients and i have been achieving some nice dense bud growth using this formula. Would you recommend organic autoflower nutrients?
Likes
12
Share


@Zer0xKira
Follow
Everything is going smoothly she is growing strong and healthy. Not much to say I've just kept to my schedule of changing water weekly.
Took some pictures with my camera instead of phone for this week
Likes
5
Share


@MadeInGermany
Follow
Sehr lecker und wunderschön.
Bin froh sie gesavet zu haben.
Kann ich jedem empfehlen
Processing
Likes
10
Share


@UrbanFog
Follow
Plants continued to mature this week and all the buds are getting fat they will have there last nutrient feed this week in prep for flushing and harvest next week.
The Lemon Zkittles looks and smells amazing looks amazing. Nearly all the plants look and smell the small, good genetics and breading.
The Cxx is again a very stable genetics and flowered and smells exactly as the last grow did. Good genetics.
The Peyote Cookies and Shishkaberry also grew well and similar, good genetics.
Afghan Kush amazing buds and very earthy smell.classic
The gorilla cookies had a rather large variation in pheno types but all look amazing and each will be a pleasure to smoke.


Likes
6
Share


@colla69
Follow
Coming to the finish line.
Not sure if the plant really got better after the lockout, it is running without nitrogen so yellowing/losing leafs is to be expected anyway.
Planning to chop in exactly 10 days.


Likes
1
Share

@Growfather2
Follow
Hello everyone,
The 3 Afghan skunk plants are doing well 2 of them are growing fast and will put the one in the 10 gallon airpot (39 liter) into flower next week.
The other 2 plants need to be transplanted to the 10 gallon airpot and will need to sit in it for at least two weeks before switching into flower.
Thanks for stopping by and have a great day.
Best regards,
Growfather
Likes
22
Share


@Robbaus
Follow
E voilà! Dopo 120 giorni e ben 7 ore consecutive di pulizia oggi finalmente ho raccolto. Aspetto di pesarla tra due settimane ma ad occhio è stata la volta migliore di sempre, non ho mai riempito 6 livelli della rete per l'essiccazione e non ci ho messo mai 7 ore a pulirla tutta. Bene. Le più scarse sono state sicuramente le due Peyote Critical, mentre la Blue sunset Shebert e le due Tropicanna Banana molto abbondanti. Non vedo l'ora di pesare 🤩😍🤩😍🤩😍🤩🍀🍀🍀🍀🍀