


Likes
Comments
Share



Likes
19
Share


@Mo_Powers
Follow
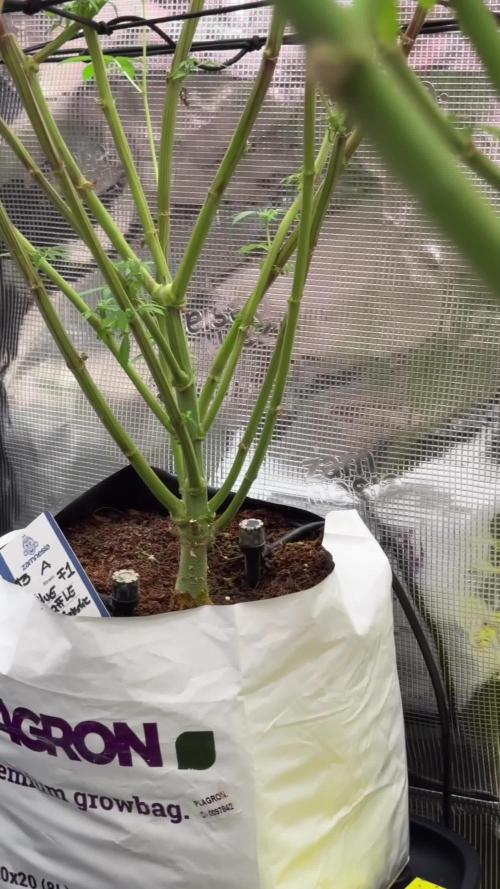
the white widow plant is now to big for the greenhouse. let´s the how it will perform on the outside now. i just let it grow. only nutrient and no training or something.

Likes
12
Share

@DogDoctorOfficial
Follow
💙 Project Blue Tent – Week 11
💙 Blue Waffle F1 – Pheno A
🌸 The Frost Is Coming... And She's Looking Incredible
Hello everyone, and welcome back to another chapter inside Project Blue Tent! 💙🌱
And honestly...
I'm not even sure where to start this week.
Because...
LOOK AT HER. 😂💙🌸
After everything we've done over the previous weeks, we're finally reaching that beautiful stage where the plants don't need us to constantly interfere.
They just need us to watch.
And what we're watching right now?
Absolutely amazing.
The bud formation is developing beautifully.
The frost levels across the tent are going absolutely crazy.
The structure we built is doing exactly what we wanted.
The second SCROG is supporting the flowering branches.
The airflow is working beautifully.
The irrigation and drainage systems are running flawlessly.
And now we've introduced a second LumiFlora under-canopy light to help illuminate the lower portions of this enormous flowering structure.
So yes...
there was a little bit of tinkering this week.
😂
But mostly?
We stood there staring at the plants.
Because sometimes...
that's the best job in the grow room.
🌿 PHENO A – THE WORK IS NOW SPEAKING FOR ITSELF
Blue Waffle F1 Pheno A is still sitting at approximately 145 cm.
And at this point, her height almost isn't the interesting part anymore.
Because now we're watching what all that structure is turning into.
Weeks of vegetation.
Training.
SCROG.
Stretch management.
Defoliation.
Canopy organization.
A second SCROG.
Additional airflow.
Raised lighting.
And now...
flowers.
Lots of them.
And the development we're seeing is making me extremely happy.
The plant has moved from:
"How are we going to control all of this?"
to:
"Okay...
now let's see what all of this becomes."
😂💙
That's a very good transition.
🌸 BUD FORMATION – OUT OF THIS WORLD
This week, the thing that really catches my eye is the bud formation.
The flowering sites are developing beautifully throughout the plant.
And the amount of frost we're seeing now?
Oh my God.
😂
The whole tent is starting to look like somebody has been throwing powdered sugar around in there.
The flowers are getting increasingly covered in trichomes, and the close-up photographs are really starting to show what these girls are capable of.
This is the stage where all those weeks of structural work become incredibly rewarding.
We spent so much time talking about branches.
Canopy.
Spacing.
Stretch.
Support.
Light penetration.
Airflow.
And now?
The flowers are taking over the conversation.
Exactly as we hoped.
🌿 THE DEFOILATION – NOW WE SEE WHY WE DID IT
One of the things I really appreciate about this stage is being able to look back at the previous weeks.
When we performed the major defoliation, the plants looked dramatically different.
We removed a significant amount of foliage.
And at the time, the goal wasn't to make the plants look pretty.
It was to make the flowering structure more functional.
We wanted better visibility.
Better airflow.
Less unnecessary congestion.
More access to the flowering sites.
And a canopy that would be easier to manage as the flowers developed.
Now?
We're seeing the result.
The plant has recovered beautifully.
The remaining foliage is working.
The flowering sites are clearly visible.
The branches are supported.
And the flowers are developing exactly where we wanted them.
This is one of my favorite parts of cultivation.
You make a decision weeks earlier...
then you wait.
And eventually the plant gives you the answer.
And right now?
I'm very happy with the answer.
💡 TWO LUMIFLORA LIGHTS – LET'S LIGHT UP THE LOWER CANOPY
And this week we decided to take the under-canopy experiment one step further.
We brought a second LumiFlora into the game.
The first 150W full-spectrum LumiFlora was already helping us provide supplemental light underneath the canopy.
But looking at the size and density of these plants...
it simply felt like we could do more.
The lower portions of the plants are naturally receiving less direct light from the main fixtures above.
And with this much vertical structure, that becomes even more noticeable.
So instead of trying to solve everything by removing more foliage, we're exploring another option:
Give the lower canopy more light.
And now we have two LumiFlora fixtures working underneath the plants.
Both are 150W full-spectrum fixtures, with additional emphasis toward the red portion of the spectrum.
The idea is simple:
The main LEDs handle the upper canopy.
The LumiFlora fixtures supplement the lower canopy.
And the plant gets a more complete lighting environment from top to bottom.
We're not trying to replace the main lights.
We're complementing them.
And now...
we watch.
🌸
Because that's the whole point of the experiment.
We introduce something.
We observe.
We document.
And then we let the plants tell us what they think.
💡 THE UNDER-CANOPY LIGHTING DESIGN
And because we're apparently incapable of doing anything in a boring way...
😂
we decided not to simply place the two LED bars side by side.
The LumiFlora bars are quite long, approximately 1.20 metres each, with a central section of around one metre.
So instead of following the traditional side-by-side arrangement, we played around with the positioning.
We've arranged them diagonally across the lower portion of the tent, running from corner to corner.
And honestly?
I really like the way it looks.
It gives the lower canopy a much more interesting distribution of supplemental light rather than concentrating everything into one central area.
And visually...
it looks pretty damn cool too.
😂💡🌸
Sometimes the functional solution can also look beautiful.
🌿 LIGHT FROM ABOVE. LIGHT FROM BELOW.
This is becoming one of the most interesting parts of the Blue Tent experiment.
We're now looking at the plant as a three-dimensional structure.
The main fixtures are providing the primary lighting from above.
But the plant isn't flat.
It has height.
Branches.
Layers.
Lower flowering sites.
Interior flowering sites.
And all those areas don't necessarily receive the same amount of light from above.
So we're experimenting with supplemental lighting underneath.
The goal isn't to make some huge claim about what the lights will accomplish.
The goal is to see.
Will the lower flowering sites respond?
Will the additional light help us maintain development deeper into the canopy?
Will we see differences as flowering progresses?
That's what makes this fun.
We don't need to know the answer before we run the experiment.
We're here to find out.
🌸 FROST EVERYWHERE
And I have to say this again...
THE FROST.
😂💙
Oh my God.
The whole tent is getting ridiculously frosty.
The close-up photographs are becoming almost ridiculous.
The sugar is showing up everywhere.
The flowers.
The sugar leaves.
The surrounding structures.
Everything is starting to sparkle.
And this is one of those moments where you can finally see the genetics expressing themselves visually.
We're not talking about potential anymore.
We're looking at actual flowers developing in front of us.
And Blue Waffle F1 Pheno A is putting on quite a show.
🌿 THE SECOND SCROG IS DOING ITS JOB
The second SCROG continues to be one of those decisions I'm extremely happy we made.
When we installed it, the plants were already getting too tall.
The original SCROG had done its job beautifully during the vegetative phase.
But with all the stretch that followed, we needed another layer of support.
Now we're seeing why.
The flowering branches are developing more weight.
The structure is substantial.
And the second net is helping keep everything organized and supported.
We're not constantly moving branches anymore.
We're not trying to reshape the plant.
We're simply allowing the support structure to do its job.
And that's exactly how I want it.
The plant built the branches.
We built the support.
Now the flowers build the weight.
Everyone has a job.
😂💙
🌬️ AIRFLOW – STILL SPOTLESS
The airflow situation is also working beautifully.
The upper airflow continues circulating through the canopy.
The additional lower fan keeps air moving underneath.
The canopy was opened through the previous defoliation.
And now the lower portion of the tent also has the supplemental lighting system.
So we've got light and air working together throughout the structure.
That's important.
Adding more equipment underneath the canopy only makes sense if we're still maintaining good environmental movement down there.
And right now?
I'm extremely happy with how everything is working.
No stagnant feeling.
No obvious problem areas.
Just good continuous circulation through the room.
🌬️ THE EXTRACTION SYSTEM – STILL GIVING US SPACE
Moving the carbon filter and extractor outside the tent a few weeks ago was another one of those decisions that keeps paying dividends.
It gave us valuable vertical space.
That allowed us to raise the main LEDs.
That reduced the pressure we had on the tallest tops.
And now we're able to maintain this enormous flowering structure without constantly fighting the ceiling.
Sometimes the biggest improvements aren't made to the plant.
They're made to the room around the plant.
And this was definitely one of those changes.
💧 IRRIGATION – ABSOLUTELY SPOTLESS
And I have to give a little love to the irrigation system this week.
Because honestly...
I have absolutely nothing to complain about.
😂💙
It's working flawlessly.
The plants are receiving their water consistently.
The system is keeping up with their demand.
And the drainage system is performing just as well.
No drama.
No problems.
No complaints.
Just doing its job.
And when you have a flowering room this large and this thirsty, that consistency is incredibly important.
The plants can concentrate on growing.
We can concentrate on observing.
And the irrigation system can quietly do its job in the background.
That's exactly how I like it.
💧🌿
⚗️ THE EC MYSTERY
Now...
there is one little thing that caught my attention this week.
And I honestly don't have a definitive explanation for it.
😂
We didn't intentionally change the reservoir recipe.
The nutrient mix remained the same.
We're still using:
PLAGRON Hydro A — 2.2 ml/L
PLAGRON Hydro B — 2.2 ml/L
PLAGRON Hydro Roots — 1 ml/L
PLAGRON Power Buds — 1 ml/L
And yet...
the EC came out slightly lower this time.
Current recorded EC:
2.24 mS/cm.
Last week we were around 2.49 mS/cm.
Why?
Honestly...
I don't know.
😂
My first thought is that the rainwater may simply have been a little softer this time.
But that's only a possibility.
I don't want to invent an explanation when I don't actually know.
The important thing is that the plants are looking fantastic.
They're healthy.
They're developing beautifully.
The foliage looks good.
The flowers are progressing.
So for now?
We're simply recording the observation.
No panic.
No unnecessary correction.
Just:
"Interesting."
😂
And we continue watching.
🌱 SOMETIMES THE PLANTS MATTER MORE THAN THE NUMBER
This is another reason I like documenting all the environmental data.
Numbers are incredibly useful.
But they're only one part of the story.
You can have a number that looks slightly different from last week and still have plants that are absolutely thriving.
And that's exactly what we're seeing here.
The EC is a little lower.
The plants?
Beautiful.
The flowers?
Amazing.
The frost?
Absolutely insane.
The irrigation?
Perfect.
The drainage?
Perfect.
So we're not going to chase the number simply because it changed.
We're going to observe the entire system.
And right now...
the system looks fantastic.
🌸 CURRENT GROW CONDITIONS
🌸 Flowering: Week 11
📏 Height: approximately 145 cm
💡 Light schedule: 12/12
☀️ Day temperature: 28°C
🌙 Night temperature: 27°C
💧 Relative humidity: 63%
⚗️ pH: 6.01
⚡ EC: approximately 2.24 mS/cm
🌡️ Solution temperature: 24.9°C
🌱 Substrate temperature: 24°C
🌬️ CO₂: approximately 666 ppm
💦 Watering: approximately 1.6 L per plant / 24h
? Pot size: 8 L
CURRENT NUTRIENT RECIPE
PLAGRON Hydro A — 2.2 ml/L
PLAGRON Hydro B — 2.2 ml/L
PLAGRON Hydro Roots — 1 ml/L
PLAGRON Power Buds — 1 ml/L
PLAGRON pH Plus — 0.03 ml/L
PLAGRON pH Minus — 0.03 ml/L
💡 LumiFlora Under-Canopy Lighting:
2 × 150W Full Spectrum
🌸 THE FLOWERS ARE NOW THE MAIN STORY
This is probably the biggest change from where we were a few weeks ago.
Earlier, the main story was:
Stretch.
Height.
Canopy management.
Defoliation.
LED clearance.
Support.
Airflow.
Now?
The flowers are the story.
And they're telling a beautiful one.
The branches are loaded with developing flowers.
The structure is holding beautifully.
The frost is increasing.
And the whole room has that feeling of:
"Something special is happening here."
😂💙🌸
That's the feeling I love most.
Not knowing exactly how the final result will look.
But seeing enough clues to know that we're heading somewhere very interesting.
🔬 THE F1 UNIFORMITY CONTINUES TO AMAZE ME
And once again, I have to mention something that keeps catching my attention.
These F1 genetics are looking incredibly uniform.
The four girls are sharing the same room.
Same environmental conditions.
Same irrigation.
Same nutrition.
Same lighting philosophy.
Same structural work.
And they're responding with an almost uncanny similarity.
There are individual differences, of course.
That's exactly why we're keeping separate diaries.
But when I look across the room now...
it's almost like looking at different expressions of the same idea.
And honestly?
That's fascinating.
Maybe the biggest differences will reveal themselves later.
Maybe they'll become more obvious as the flowers mature.
Maybe the similarities will continue all the way to harvest.
That's what we're here to discover.
🌸 THE QUIET PART OF THE GROW IS GETTING LOUD
This is funny because technically...
we're doing less.
But visually?
The plants are becoming more impressive every week.
😂
We're not training.
We're not performing major defoliation.
We're not rearranging the room.
We're not fighting stretch.
We're not solving emergencies.
We're simply maintaining the environment.
And yet...
the flowers are getting bigger.
The frost is increasing.
The structure is becoming more impressive.
And every photograph seems to show more development than the previous one.
This is the reward for all the work that came before.
🌿 FROM BUILDING THE PLANT TO WATCHING THE PLANT FINISH
We spent weeks building this plant.
Now we're watching it finish.
The vegetative period created the framework.
The SCROG organized it.
The stretch tested it.
The defoliation opened it.
The second SCROG supported it.
The raised LEDs gave it room.
The additional airflow keeps it breathing.
The irrigation keeps it supplied.
The nutrition keeps it moving.
And now the LumiFlora lights are helping us explore the lower canopy.
At this point...
there's very little I want to change.
I want to let the plant show us what all of that work was worth.
🌸 WHAT I'M WATCHING NOW
The questions are becoming much more exciting.
How much larger will these flowers become?
How much more frost will develop?
How will the lower canopy respond to the two LumiFlora fixtures?
Will the additional supplemental light make a visible difference as flowering progresses?
How much weight will the second SCROG eventually need to support?
And perhaps the biggest question of all...
what are these beautiful F1 girls going to look like when they finally reach maturity?
I have absolutely no idea.
And I love that.
😂💙
🙏 FINAL THOUGHTS – THIS IS WHY WE GROW
If I had to describe this week in one sentence, it would probably be:
"We didn't do much... and everything looks amazing."
😂💙
And honestly?
I'll take that.
The plants are healthy.
The bud formation is incredible.
The frost levels are getting ridiculous.
The second SCROG is working beautifully.
The airflow is performing exactly as planned.
The irrigation is spotless.
The drainage is spotless.
The main lighting is doing its job.
And now we've added a second LumiFlora to complement the first and give the lower canopy even more supplemental light.
We even changed the positioning of those long LED bars into a more interesting corner-to-corner arrangement.
And I have to say...
I really like it.
It looks good.
It distributes the light in a way that makes sense for this huge lower canopy.
And it gives us another part of the experiment to watch.
As for the slightly lower EC?
We don't know exactly why.
Maybe the rainwater was softer.
Maybe there was another small variable.
Maybe it's simply one of those little differences that happen in a real system.
The important thing is that the plants are showing us no reason to panic.
So we're not going to chase numbers.
We're going to observe.
And right now...
what we're observing is absolutely beautiful.
Blue Waffle F1 Pheno A is standing there at approximately 145 cm, covered in flowers and increasingly covered in frost.
The structure is strong.
The canopy is organized.
The support is ready.
The lower lighting is installed.
The irrigation is flawless.
The drainage is flawless.
And the whole room is beginning to look like something very special.
💙🌸🌿
We've done the hard work.
Now we get to enjoy the show.
Let's see what the next few weeks bring.
Because if the frost continues at this rate...
Oh boy.
😂💙
We're going to have some very interesting photographs coming.
Until next week...
Keep watching.
Keep observing.
Keep the environment stable.
And let these beautiful girls do what they do best.
Grow.
Flower.
Frost up.
And shine.
💙🌸🌿
🙏 A HUGE THANK YOU
A huge thank you once again to Zamnesia for making Project Blue Tent possible and for giving us the opportunity to explore these beautiful Blue Waffle F1 genetics phenotype by phenotype.
Thank you to PLAGRON for the Hydro nutrient line supporting these girls through this incredible flowering journey.
A massive thank you to Mars Hydro for the automatic irrigation and drainage system that continues working absolutely flawlessly and keeping these thirsty girls supplied.
Thank you to Zamnesia for the Phytonaut LED lighting, the curved scissors and the clip fans that have all become such important parts of this project.
And a huge thank you to LumiFlora for providing the 150W full-spectrum under-canopy lighting that we're now using in pairs to explore supplemental lighting throughout the lower canopy.
I'm really excited to see what this experiment brings.
And of course...
thank you to GrowDiaries for giving us the platform to document all of this.
The successes.
The mistakes.
The unexpected moments.
The experiments.
The lessons.
And now...
the frost.
😂💙🌸
Most importantly, thank you to everyone following Project Blue Tent.
We're getting deeper into flowering now.
The plants are looking incredible.
The frost is everywhere.
The flowers are stacking beautifully.
The systems are working.
And we're finally at the stage where we can sit back a little and enjoy the work we've spent so many weeks building.
Four girls.
One room.
Same environment.
Incredible F1 uniformity.
Two LumiFlora under-canopy lights.
One very frosty future.
Let's see what comes next.
💙🌸🌿
Until next week...
More frost.
More flowers.
More observation.
And hopefully...
even more reasons to stand in front of the tent and say:
"Oh my God..." 😂💙
Growers Love, happy growing, and take care everyone! 🌱💙
Likes
70
Share


@Insaniac_0
Follow
Notes for flower week 9 (12/15-12/21, days 56 to 62)
Watering Days.
All feeds with nutes use either a whole ratio, or combination, of "Veg Mix" and "Bloom Mix"concentrates. These are/will be DILUTED in water until a total ppm of add-in is reached using a (Total Dissolved Solids) TDS Meter measured in PPM (parts per million). The "Veg Mix" concentrate will eventually be added-in larger, then smaller, ratios while the "Bloom Mix" concentrate will eventually replace the "Veg Mix" concentrate entirely. The ppm and ratios will be listed when I feed. Veg mix recipe is on week 3. Bloom Mix recipe is on week 5.
Day 128/58 (last feed was day 124/54)
Tested and Calibrated my ph pens. Fed 3 gallons of de-chlorinated tap (starting with 251ppm) mixed with 402ppm of 100% Bloom Mix Concentrate. Due to this soil showing a possible calcium deficit, I am still using 1ml per gallon add-in to test on all plants using this soil, so I added 3.0ml of CaliMagic (General Hydroponics 1-0-0) and then I ph balanced before feeding. The ph on this feed was balanced to 7.0 (7.13 last feed). I used knitting needles to help both aerate the soil and create new water pathways for the roots. (a practice I am making a new feeding standard for all my plants) I got ~20 cups of runoff (~27 cups last feed). Higher runoff volume was expected with the feed volume increase as well as previous knitting needle aeration. Runoff was tested at 6.15ph and 1800ppm (6.21ph and 2100ppm last feed). Top soil tested at 6.4,6.48,6.39,6.42 for an avg of 6.42 (6.42 avg after last feed)- next feed will be 6.8 to 7.0 ph as I'm still liking where the ph is finally at. I dont see any issues with the feed's data other than the possible calcium deficit Next Feed should be 2.5 gallons of de-chlorinated tap water ph balanced to 6.8 in +4 days (132/62). I expect I will run 400ppm and 2.5ml of CaliMagic (General Hydroponics 1-0-0) again, but no more HP2. I expect to start flushing her out with lower nute levels from that next feed point.
Day 132/62 (last feed was day 128/58)
Tested and Calibrated my ph pens. Fed 3 gallons of de-chlorinated tap (starting with 277ppm) mixed with 397ppm of 100% Bloom Mix Concentrate. Due to this soil showing a possible calcium deficit, I am still using 1ml per gallon add-in to test on all plants using this soil, so I added 3.0ml of CaliMagic (General Hydroponics 1-0-0) and then I ph balanced before feeding. The ph on this feed was balanced to 6.8 (7.0 last feed). I used knitting needles to help both aerate the soil and create new water pathways for the roots. I got ~17 cups of runoff (~20 cups last feed). Runoff was tested at 6.0ph and 1710ppm (6.15ph and 1800ppm last feed). Top soil tested at 6.42,6.45,6.34,6.33 for an avg of 6.385 (6.42 avg after last feed)- next feed will be 6.8 to 7.0 ph as I'm still liking where the ph is finally at. I dont see any issues with the feed's data other than the possible calcium deficit Next Feed should be 2.5 gallons of de-chlorinated tap water ph balanced to 6.8 in +4 days (136/66). I expect I will run 400ppm and 2.5ml of CaliMagic (General Hydroponics 1-0-0) again. Im flushing with these lower ppm feeds through harvest.


Likes
20
Share


@Ghostknife78
Follow
Adding SLF 100 and Calmag to feeding. Although everything seems good, I'm going from tap to RO to have maximum control over my PPMs or TDS. Buds are really developing nice and she is still stretching. I appreciate any suggestions. ( Running CalMag, Photosynthesis Plus, and SLF 100)

Likes
11
Share


@Jays_Not_Here_Man
Follow
This beauty is on autopilot at the moment. I’ve been watching the temps and doing what I can when I am home. It’s been soooo hot. My tent has been getting to 84 degrees regularly, I’m hoping that it won’t stress her out. I will be ordering a T8 in-line fan from AC infinity to accommodate the summer temps and RH and ensure good air circulation. Couple
Of weeks still to go, she is a 9-10 week strain , but she is definitely proving to be worth the extra time. Her colas are getting nice and fat, and should be a good producer for me.


Likes
32
Share


@Hambone
Follow
10/16
So the girls are doing well. They have been watered twice now and #2 is a bit smaller. They are absolutely exploding veg wise and raising the light was necessary as #2 was much to short, will be updating with transplant soon!
10/18
Ok so transplant happened today. They were growing so quick we needed to move them as soon as they were water ready! They got transplanted into 5g fabric style pots. Did 2/3 Fox Farms "ocean forest" and 1/3 perlite mix. Used same nute mix for watering on the transplant, will change that up soon. See pics and video for more info!
10/22
There seems to be a nitrogen lockout. I'm guessing it was the unneeded cal mag add. Learned our lesson! Upped our grow big and giving the first water in big pots. Other than that they are growing amazing!
Likes
15
Share


@Stick
Follow
Bud sites started to appear everywhere, plants are looking healthy and are still stretching a bit. I've decided to add x2 infrared strips to the lighting setup, in order to improve the spectrum for blooming and trigger the emerson effect (infrared 15 mins before full darkness). I did notice in the past that infrared before darkness helps a lot and speed up the whole flowering process. I started to add some "Organic Bloom" to my soup. Various phenotypes are showing their traits, some plants are true sativas, others are more hybrids. I'm going to bet that the most sativas will take a few more weeks to finish. Stay tuned!

Likes
1
Share


@SkeletonBloom
Follow
Second week,
The leaves are wider, and the plant is taller than last week, I'm going to start the apical cut.
The odor is kinda mild but more intense.
EC 1.5 PH 5.8
Floraflex 6ml
Louder Powder Grow A & B
Likes
41
Share


@Mrs_Larimar
Follow
2024-07-02
OUTDOOR
The Outdoor lady is a Queen, she grows very beautiful
despite the weather, we had aweek with very warm and sunny , now we are back to
cold, humid and rainy
it looks like she dont catres.
INDOOR
the lady stretches and shows alot of Colas with sweet Flowers, i havent counted the colas
iam feeding the indootr Pland additionally to the topdressing with insectfrass
iam watching her, because it looks like she dont needs alot of feedings and is fine
Divine Seeds developed Opium as a new champion strain, unprecedently powerful and loaded with unbelievable quantities of resin. Certainly, no average genetic base could be behind such brilliant parameters! Several Afghani Indica landraces, recognized as most potent and resinous, were bred together with a mighty Brazilian Sativa which Opium inherits its bright berry taste from. Then a great deal of work followed aiming for the highest THC level and endurability as well as a branchy structure that would provide maximal yields. Now we can proudly title Opium the best Indica you could dream of growing!
Indoors these plants mostly stay mid-height (1.5 m), reaching up to 2.0 m out of doors. Depending on your height limitations, Opium flourishes universally in grow boxes, balconies, green houses and terraces. Due to its Afghani parentage, this strain can stand hot weather if provided enough water and some shadow. Responds well to any training techniques: ScroG and SoG, LST, topping and FIM, supercropping. The start of blooming is marked with a rush of growth, when plants stretch almost 1.4x. Expect heavy colas that often require additional supports. Whilst ripening, Opium gives off a pungent earthy stench with fruity and berry undertones, also a bit of pine. Ready for outdoor harvesting in October.
The stoning psychedelic impact of Opium is like being hypnotized (unless you’ve had too much, then it feels more like a blackout). Stone-lovers will appreciate every minute with Opium: its spicy taste immerses your mind into daydreaming, while the body rests flat. Recreation with this psychedelic Indica means silent tripping from one insight to another. Mighty enough to kill chronical pains, Opium is also medically efficient against insomnia, nausea, appetite disorders, muscle spasms, headaches, irritation, fatigue, panic attacks, epilepsy. Best consumed at night time, the effects keep going for up to 4 hours.

Likes
86
Share


@Cannabrown
Follow
My Peach has once again taken an gigantic step towards her flowering stage. The constant training is a success, has made for a healthy looking growth. She is now probably in her last week of vegetation, going to be a good one.
Description
Peach Puree CBD is a high-CBD, sativa-dominant medicinal marijuana strain. It was bred by back-crossing the product of a Sweet Diesel x The Orange (California).
Peach Puree got its name from the delightfully delicious taste of sweet, ripe peaches which also includes notes of creamy lemon. It is a plant that is a breeze to grow requiring no special skills or considerations. Its vigour is also reflected in the proliferation of of dense, sticky buds. Its aroma of citrus and peach is further complemented by the dazzling purple display as leaves turn colour towards the end of flowering.
The THC:CBD ratio is 1:2 with THC levels measured at 5% as opposed to the CBD measurement of 10%. The effect of Peach Puree CBD is extremely gentle yet upifting and it can be used at any time of day for those seeking medicinal relief from cancer, AIDS, insomnia, anxiety, gastro-intestinal problems, epilepsy, muscle tension and more besides.
Characteristics
Breeder/Brand
G13 Labs
Genetics
(Sweet Diesel x The Orange) BX
Pack Size
5 Seeds
Variety
Mostly Sativa
Flowering Type
Photoperiod
Sex
Feminised
THC Content
5%
CBD Content
10%
Grows
Indoors, Outdoors
Medical Conditions
Anxiety, Cancer, Epilepsy, Gastrointestinal Disorder, HIV / AIDS, Insomnia, Muscle Spasm
Medicinal Properties
Yes
Taste / Flavour
Citrus, Lemon, Peach
Effect
Uplifting

Likes
45
Share


@Mosquito_Haarlem
Follow
Heerlijke harde volle toppen en voor het eerst dat ik harsdruppels zie.
Een heerlijke strain om te growen.
De plant wordt in zijn geheel opgehangen en ik zal het droge gewicht wegen.
Likes
3
Share


@drewnagy0510
Follow
Really love this strand has had no defects very strong Green leaf topped it once and let it grow back to three nodes then topped it again for both sides to have four notes piece one week away from flower

Likes
57
Share


@LockDownGrow
Follow
ok so everything has gone fantastic , no nutrient burns at all , and have been slowly creeping up the base nutrients , i have stopped the cal mag and now adding house and gardens bud XL at full strength these girls are now in full swing of flower and i bought a new ph stick this week ,
i have found when PHing the feed bucket that its best too have air stones in the bucket , add all nuts and then ph but do not use the feed that day as if you check the next day the ph is off again so i left it 24 hours after i add more ph down , and it seems too make the measurements alot easier and stable , i have bent down the main stems " without damaging them onto my netting too A keep the canopy all the same high so my lighting is covering all plants at the same distance and also it allowed the side stems too reach up too ,
i also was sponsored another new led light by kingbo this week so have added another 600watt led too the grow , so now have two 600's and one 900watt , and temps are still fine sitting at 24c lights on and 19-20 off , so am pleased with that , this lady is by far the bushyist plant with the most branches she also didn't stretch much and is packed with bud sites ,
Likes
15
Share


@Xpie77
Follow
De planten zijn naar hun nieuwe huis gegaan. Eerste week 12/12. De planten kregen wel wat root max schimmels en wat melasse en zeewiervoer
Info van Zamnesia!! Green Crack F1 Hybrid Automatic: Zamnesia Seeds heeft een nauwkeurig afgestemd genetisch profiel; een combinatie van Skunk #1 en Afghani.
Het resultaat van deze kruising: een betrouwbare soort die moeiteloos te kweken is en aanzienlijke opbrengsten oplevert! GREEN CRACK F1 HYBRIDE AUTOMATISCH KWEKEN Of je deze soort nu in een kweektent, kas of buiten wilt kweken, je zult versteld staan van haar aanpassingsvermogen. En dat is niet alles! De F1 Hybrid-genen in Green Crack F1 Automatic zorgen bovendien voor unieke stabiliteit, betrouwbaarheid en uniformiteit.
Elk zaadje dat je ontkiemt, heeft het potentieel om vergelijkbare resultaten te produceren. Green Crack F1 Automatic wordt tussen de 60 en 90 cm hoog. Met ongeveer elf weken vanaf ontkieming tot oogst is Green Crack F1 Automatic niet de snelste soort. Desondanks zorgen die bonusweken voor een betere plant die uitstekende oogsten zal opleveren.
Na een kweek met weinig onderhoud kun je opbrengsten verwachten van ongeveer 450–550g/m² (binnen) of rond de 50–200g/plant (buiten).
Echt indrukwekkend voor een plant van dit formaat. AROMA'S, SMAKEN EN EFFECTEN VAN GREEN CRACK F1 HYBRID AUTOMATIC De invloed van zijn voorouders komt duidelijk tot uiting in het aroma en de smaak van Green Crack F1 Automatic. Geniet van intense, skunky smaken gemengd met een beetje GREEN CRACK F1 AUTOMATIC (ZAMNESIA SEEDS) FEMINIZED
PRODUCTINFORMATIE Merk Zamnesia Seeds Parents Skunk #1 x Afghani Genetics Sativa dominante autoflower Bloeiwijze Autoflowering Bloeitijd 11-12 weken van zaad tot oogst THC 21% CBD Lage hoogte (binnen) 90cm Hoogte (buiten) 90cm Opbrengst binnen tot 550g/m² Opbrengst buiten tot 200g/plant
Link naar de winkel: https://www.zamnesia.nl/10677-zamnesia-seeds-green-crack- f1-automatisch.html
Likes
2
Share

@Spanish_dre_Grows
Follow
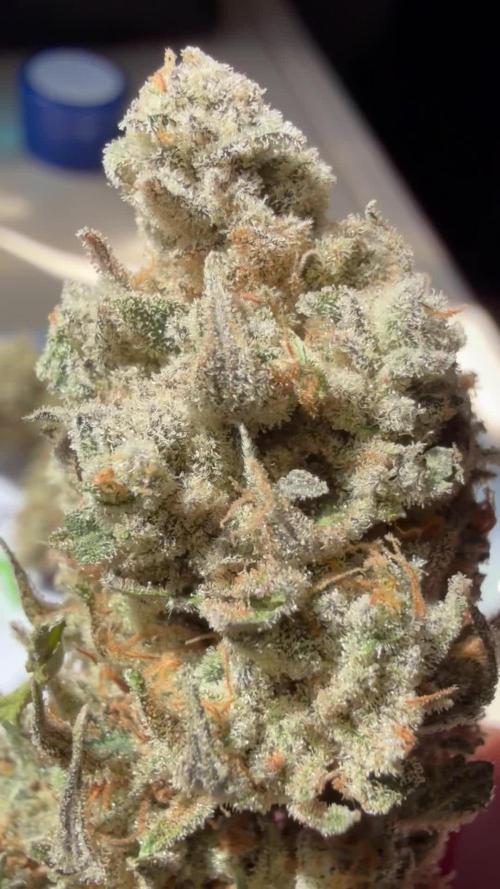
So not very big plant and smaller colas and nugs but there very soft and covered in trichomes very euphoric and terps are very funky gassy and citrus !!
Processing
Likes
4
Share


@ReelEyezEnt
Follow
she is still going strong another 3 weeks and she might be ready
Having some issue fugus bugs trying to dry them out, Ill keep you all posted


Likes
16
Share


@osmrducks
Follow
Day 50: Girls are looking great! 💪 A couple of them are a little further along than the others. Pistils are starting to change colors. PPM's going in are higher than runoff PPM. No change in the PH. In at 6.5 and out at 6.5.... Still have some rust spots. Still thinking that I need to dial in my light distance/intensity.
Day 51: Got one girl that the issue of rust spots is not going away. Not getting worse, but just will not leave. Other than that they are still bulking up and looking beautiful. Can't wait to start checking the tric's! Using AN Big Bud for a couple feeds and MOAB for a couple of feeds. Have been feeding every water as my output PPM's are less than what is going in. Will keep this cycle until needed to flush or an issue occurs..
Day 52: No new updates. They still look basically the same as 5 minutes ago when I checked em!! 😂😂
Day 53: Went ahead and ran 2 gallons of PH'd water through them. This rust spot issue is driving me crazy!!! Will just use PH'd water for a day or 2 and hope that it stops!
Day 54: Well, no new spots that I see. Probably too early to tell, but I feel better about it :)
Day 55: No new updates today. Watered with Recharge.
Day 56: The girls look wonderful and smell the same. Gave them a good defoliation today as they were extremely bushy! Thanks, B for the pointers!! 👊
