


Likes
Comments
Share


@Sativ_420
Follow
Vienen creciendo muy bien. Se nota la diferencia de tamaño entre las que están en 30L y las que están en 50(tienen la tierra por la mitad en maceta de 100. Espero en unos días poder transplantarlas también

Likes
14
Share


@SkunkyDog
Follow
Hallo zusammen 🤙.
Sie wachsen sehr schön.
Sie erhalten 25 Prozent Rabatt in unserem Shop
Mindestbestellwert beträgt 75 Euro
https://greenbuzzliquids.com/en/shop/
Code: GD42025

Likes
38
Share


@Cariboo_OG
Follow
Utopia Haze is a rare heavily sativa dominant hybrid (90% sativa/10% indica) strain created through back crossing Brazilian Sativa strains. This tasty little bud took home 1st Place for Best Sativa in the 2008 High Times’ Cannabis Cup and for good reason – with its potent 18-22% average THC level and long lasting cerebral effects, Utopia Haze is one powerhouse smoke. The Utopia Haze high comes on soon after you finish your first toke, hitting you with a strong cerebral lift that infuses you with a sense of hazy relaxation.
Type: Feminised/Photoperiod
Cultivation: Indoor/Outdoor
Flowering Time (days): 70-75
Indoor Yield (g): Up to 650
Feminised Outdoor Harvest Month: October
Feminised Outdoor Harvest Month Week: 3rd-4th week
Aroma: Citrus, Woody, Pungent, Mint
Effect: Cerebral Lift, Hazy Relaxation, Sleepy
Welcome Everyone to the Final Entry of my Utopia Haze Grow !
There is so much to discuss ! I have been extremely busy as of late trying to get this Harvest together, but i am happy to have it here for you now !
I Seriously under estimated the amount of time, help from others, and my own necessary skills to pull this off.. and i still kind of screwed it up lol !
But its worth noting i have never actually done this before and trying to document it during....was extremely hard.
It is next to impossible to work an iPhone with rubber gloves on !
First I want to discuss everything step by step so before you jump straight into the comments on how the end product is so small in "quantity"
Rest assured i am happy with its"quality"...and thats all that matters to me because Life is a journey not a destination! and i have learned so much from this grow that I couldn't be any happy even if i messed some things up :)
But at the very least I hope you read through this entry in its entirety with an open mind and focus more on the process, rather than just the outcome!
I ran out of Ice & i was only able to wash three times..(normally I've heard you should go sometimes 5-6 washes)
Preparation is Key & things will be much better next round :)
Photos 1-22
These are pretty self explanatory but for those of you just tuning in now.. this is what happens to a very happy plant when you don't have the necessary tools to monitor key components of growing cannabis.. Ph, as well as EC levels play a very key role in the outcome of your grow lol that being said I was just able to save this plant by purchasing both tools but that doesn't mean the plant didn't suffer because of the prior events.. This was a Huge reason behind me choosing to turn this harvest into what i would consider
"Solventless Hash Rosin" from "Ice water extracted Bubble hash".
Pictures 23
The idea here is the process of using "fresh Frozen Cannabis" this has been discussed many a time online on such sites as instagram and here on grow diaries as well.. I personally have Never tried the process so i decided to try it out and make a judgement for myself..
Video 24
The Cannabis has now been in the freezer for 72 hours making it very well frozen.. as you can tell i struggled getting it all into the 25u Screen Wash Bag. One thing of note i would do differently is i will de-stem my next batch as i also believe this played a part in the amount of plant matter that escaped through the sieves.
Photo/Video's 25-28
The idea here is "ice water Seiving" & especially with the bags that I am using here that are only have screen material on the bottom portion of the bag it is very important to have spaces in-between the screens to allow the water to pass directly through the screens into the bottom bucket with the least amount of resistance.. because the hash is so extremely temperature dependant if it gets warm on the side of the bag.. it will stick there and not make it to the bottom to become use able product..
29
You do not need to use as much Ice as i used here lol... the idea is to keep everything very cold..i certainly achieved that but at the sacrifice of using so much that i ended up grinding product and producing "contaminants" but in the end they are just plant matter that i would be smoking when i rolled up my joint either way so.. I'm not super disappointed..
But it should be noted that what you want to achieve here is a Layering effect where you have the wash bag between two small layers of ice while the "water current" washes the Trichomes away allowing them to be separated by the screens setup below :)
Before Starting the machine you should allow some time (i.e.;10-12minutes pre soak to allow the product to become saturated) before the first cycle.
By video 32 I have just ran out of ice lol..
Video 33-34
Here I have a tip for you.. to separate the screens that you sieve through.. cut 5 gallon buckets to stretch them across nice and tight.. it'll make scooping your Bubble that much easier ! i learned this from the many "Frenchy" videos I have watched :)
Picture 35
Here in lays the problem for most people.. drying your hash without loosing vast amounts of "Terpenes" whilst also stay ever vigilant against mold !
Thanks to all those videos I've watched on youtube.. id like to think this was one of my most successful parts of this process..
Things to Note; Terpenes start to seriously evaporate at temperatures 68F or 20C
you need to stay as cold as possible whilst bringing the Relative Humidity in the space down into the 40-30% to stay away from that nasty mold !
I used my cold storage room in the basement.. with a dehumidifier running to keep the space at 45% RH & staying at a constant 15c.
All while spreading the hash as thin as possible across parchment paper, on top of the white screens with a fan moving air across both sides of the paper.
Pictures 36-38
These are some macros i took in the middle of my drying session I fell in love with the colour.
Yes i know the black spots are plant material but they will get caught when i bag the hash & squish the oil out.
Thing to Note; at this stage it is important to ensure you 'micro plane" the hash down as fine as you can whilst staying weary of the temperature... any "chunks" will hold pockets of moisture.. that lead to potential problems..ie; mold ...
Picture/Video 39-41
Successfully planed bubble hash ready to be bagged and Squished !
Picture 42
Ive decided to follow Pedro.. from Pedros Grow Room and double bag to be on the safe side so i don't have any blow outs.
So thats One 25u bag inside one 160u bag ! :)
Pictures 43
This is almost 3 grams of the bubble hash from above, already melting in the bag.. this is where i ran into trouble again lol things started getting to warm in the house and i was only able to get one of the three squish's i did on video :( things started getting sticky.
Picture 44
This is basically just a photo of the equipment I'm using; 3x5 LowTemp Cage in the frame I built myself, with a 20Ton bottle jack.
Something to note here is this is an older Lowtemp model with only a single heating zone which is which i have it closed here heating Both sides of the press :)
As well as the importance of having adequate pressure on your plates.. my rig is very overkill for the size of hash bags..lol
Video 45
Here is the lovely press video.. its didn't quite work the way i wanted either lol my directional folding wasn't quite tight enough for a big "drip" :)
&the Press was set to 65°c
Photo's 46-50 are pretty self explanatory :) I had a blow out.. but still managed to pull an 80% return from the hash once squished...& yes it tasted amazing :)
Was it worth it in the end... that could be debated.. for some..i understand..its not your thing, but for those of us that are interested in making our own concentrates.. free from Solvents...
I wouldn't make it any other way :)
If even ONE of you reading this diary finds it helpful to reference for ANYTHING.....even if its "what not to do" ill consider it a success !
Thanks again for tagging along on this garden adventure.. its been one heck of a journey !
Much Love from B.C. Canada,
Until Next time,
Cariboo

Likes
Comments
Share


@Robom069
Follow
Day 75/76
everything is going to grow together so the compounds the way they should and i dont get bugs or overstimulated effects
so it should be a pretty good harvest in 2 months

Likes
19
Share


@MaxGrowCanada
Follow
Switched to GH flora 3 part.
Playing around with flood times.
The are taking up water at an exponential rate. Started with 3, 3 minute floods, up to 6, 4 minute floods and they're still drying up the puddles within an hour.
Plant 1 is ahead of plant 2 by a day but it is half the size🤷♂️
Topped day 16. Not obvious in the photos as I had hoped but they bounced back within minutes
Thank to evryone who gave their input, every little bit helps🙌
After all your suggestions, I've, backed off the light, backed off the flood time and count. We will see if these girls perk up a little more👍
Day 17 I noticed progression of what I believe to be a calcium deficiency? That's on me, forgot the calmag originally🤦♂️ another thing I decided to look into was the twisting of the leaves as the plant 1 is also starting to show. Could my ph be alot higher than I think? 4 gal res I added a couple ml of phosphoric acid at the start and about 1ml a day since(I didnt prep my cube as well as I should of) seems like alot to me. The system would rise from 5.3 to 6.3 throughout the day. A flood cycle doesnt seem to affect the ph, more over time. I am constantly stirring the mix and no my meter is not yet calibrated. I have ordered what I need but I'm considering calibrating with the chemicals I have and doing a res change. Good news is, they do seem a little more lifelike after implementing all your suggestions.
Okay drained and rinsed my res, ro water into the tank was holding 6.97ph, good enough for the girls I go out with🤷♂️ gonna mix up a batch, do a top feed to waste, and see what happens. It has been nearly 24h since my last flood.
Also, struggling with lows of 30% humidity sometimes. Dont know if that plays a role here.
Okay something was off.. I did a top feed to waste with fresh 5.3 nutes and the runoff came out at 7.5.. so I did it again...and again...maybe a half doesnt times to each block with no change. I started to reuse the runoff as I wrote off the batch at this point. I then switched to a pump and did recirc feed to each block aprox 20 litres at a time, stopping to rebalance. Literally 100s of litres later I am stable at 5.5....going to drain rinse and refill.
The interesting part is that what ever was saturated in those blocks is non conductive, the ec didnt change the entire time🤷♂️
Spent the next couple days recovering.
Looking better now.
Sardine catcher installed.
Likes
86
Share


@CANNASIM
Follow
------GENERAL COMMENT------
Everything going well, the AK47 is much more vigorous than the BB, let's consider that she was more stressed.
So i'm putting up the week timelapse, is a pain to do it but i found the result very interesting will try to put up one weekly. This week was a busy one, opted to a defoliation to be able to even the bud spots introducing a cage, and doing some LST, training to the cage to make a more flat pre flower spots in that way the flowering will be easier to control. So the plants grew in hight but was trained to be more bushy.
We have a week to go or something about that then i will switch to 12-12.
------GG.AK47 COMMENT------
Vigorous growth, she was trained to even the canopy, with many bud spots.

Likes
16
Share


@osmrducks
Follow
Day 8: Woke up and checked on the ladies, they were bone dry. Hit em with 70 ml of AN Coco Grow diluted in my mix.
Day 9: Got the new lights in today and hooked up. Girls are looking pretty good I think. Still letting em dry out a little. Gonna add a shot of Great White on next water. No nutes will be in this shot.
Day 10: Still looking good. Had to stack some loose Coco around a couple as they had a good stretch going and were leaning pretty good. Also noticed a couple of brown spots on the leaves. I am led to believe after asking questions and researching, it is more than likely nute burn? No more nutes for these girls for a while. I also got a humidifier to raise humidity as it was pretty low.
Day 11: These girls almost double in size every day! They would probably be a little bigger if I hadn't of tried to give em a drink of nutes earlier on! Lesson learned!! Not bad for 6 days out of the ground regardless though, I think. Got a humidifier in the tent and it stays around 50% now. Other than last night it got up to 73%. I need to get that fixed.
Day 12: Nothing new to update other than they look healthy. Think I am gonna let them dry out a touch more before watering.
Day 13: Gave the girls 1 cup of ph 6.0 water this morning. Thermostat battery went out and lucky my girl caught it in time. Temp got to 86° for a couple of hours. Opened the tent for an hour to get the temp back down. Humidity has been hovering around 50% for the most part. Minor fluctuations here and there. Girls are looking good for 8 days out of the earth though!! 💪
Day 14: Looking like they need another drink, dry down to around 1" deep. Gave em 2.25 cups with super diluted Coco Grow and a touch of Great White. 😳 They are doing great! 👍 Looking forward to see what week 3 has in store! Going to build a support to add my 2 CREE lights back in along with the Mars lights.

Likes
14
Share


@BLAZED
Follow
Week 11 (26-9 to 2-10)
26-9
Temperature: 26.5 degrees (lights on) 19.8 degrees (lights off)
Humidity: 70% (highest) 50% (lowest)
Watering: None.
27-9
Temperature: 26.4 degrees (lights on) 20.2 degrees (lights off)
Humidity: 82% (highest) 56% (lowest)
Watering: 1500 ml. PH 6.4 EC: 1.7 (with Hybrids & PK+)
28-9
Temperature: 26.2 degrees (lights on) 21.2 degrees (lights off)
Humidity: 74% (highest) 57% (lowest)
Watering: 1100 ml. PH 6.5 EC: 0.6 (without Hybrids & PK+)
29-9
Temperature: 26.8 degrees (lights on) 21.2 degrees (lights off)
Humidity: 92% (highest) 59% (lowest)
Watering: 800 ml with Hybrids & PK+ and 1000 ml without Hybrids & PK+
PH 6.4 EC: 0.6/1.7
30-9
Temperature: 28.6 degrees (lights on) 21.1 degrees (lights off)
Humidity: 81% (highest) 56% (lowest)
Watering: None.
I set the light to 85% strength, with a distance of 30 cm (highest tops) LUX: 20.400 / 26.200
1-10
Temperature: 28.4 degrees (lights on) 19.9 degrees (lights off)
Humidity: 77% (highest) 55% (lowest)
Watering: 1000 ml. PH 6.5 EC: 0.6 (without Hybrids & PK+)
2-10
Temperature: 28.7 degrees (lights on) 20.5 degrees (lights off)
Humidity: 88% (highest) 60% (lowest)
Watering: 1000 ml. PH 6.5 EC: 0.6 (without Hybrids & PK+)

Likes
38
Share


@trelorny
Follow
Day 43, 22.05.2024
- Gave a round of drinks to the ladies - they were thirsty!
- installed a De-Humidifier: I've had some trouble to bring down humidity during night time. It was stuck at around 68% and I do not want to give mold a chance - especially in the later flower which is about to come
- the buds are getting darker
- also found a fan leave which shows a yellow color. I understood that this is quite normal at this stage as the plant begins to suck the Energy of the lower leaves which it does not really need anymore. I guess tomorrow I will remove the leave in question and be done with it.
Day 44, 23.05.2024
- Hacked the De-Humidifier to connect it to my already installed VPD Controller: When the humidity rises above a special threshold (depending on the temperature) from now on the Tube Vent, the Intake Fan and the De-Humidifier will lower the humidity. Bye bye never ending Tube Vent running an hello snappy reaction to rising moisture!
Day 45, 24.05.2024
- Realized: This 30€ De-Humidifier is useless :). Deinstalled it and will send it back where it came from
- although it would be time for a drink the soil is not dry enough yet. So I decided to postpone until this evening or even tomorrow
- Decided to give water with nutrients today
- right after watering I recognized brown tips on two leaves. According to my research it could be a) nutrient burn b) light burn or c) Zinc deficiency or of course d) nothing at all and to be ignored :). I will wait for 1-2 more days and see how it evolves. "No panic" I guess...
Day 46, 25.05.2024
No action today.
Day 47, 26.05.2024
- time for another round of drinks! I will cut down the ration to 50% (1.5ml/L BioGrow, 1.5ml /LBioBloom, 0.5ml/L Top Max) though to hopefully counter the slight burn on the tips of some leaves. If it recovers well I will possibly continue giving full bloom fertilizer, but only half grow fertilizer. Each gets 600ml (15% of pot volume)
- Removed 2 bigger leaves from the bottom, that we're getting yellow
- bought a pocket microscope to start checking on trichomes. I know: a little early in the game, but it is a bit tricky to get a good look so I guess starting early does not hurt
Day 48, 27.05.2024
No action today.
Day 49, 28.05.2024
- Gave 600ml water each plus a little shortened nutrition: full bloom & top max fertilizer, but only 1/3 of grow.
- removed a single leaf that looks weird (all yellow, see picture). It is the only leave of that kind, the others look more or less okay.
This concludes week 7. 3-4 weeks more to come.

Likes
19
Share


@CookiesAndCake
Follow
This girl was a high effort high reward type of girl for sure. She was struggling with nutrients which is why towards the end all of the leaves were just yellow and crispy. I didn't manage to find the right balance of nutrients for her BUT the yield and end product definitely did not suffer. This strain's smell alone is 100% worth growing!

Processing
Likes
6
Share


@Race91
Follow
Great week for Growth. 3” added to my highest branches and all my tops. I’m anticipating week 1 of bloom will be either next week or first week of September so today 8/20/20 I started a flush with water all day no nutes no additives and going all day tomorrow then to the bud igniter and Sensi coco bloom until I see pistils.
Likes
3
Share


@ghost8782
Follow
i over fed her big time this is my 1st grow DO NOT defoliate lol i did it twice in veg and stunted her big time tricombes look nice i got about 3 weeks till done she smells great and is frosty dence buds so far

Likes
7
Share


@HegauHillsFarmers_D23
Follow
Seit Ende letzter Woche wurde das Licht auf 12/12 h umgestellt 💡
Die RP43 ist in dieser Woche nochmal ein Stück in die Höhe gegangen und hat sich insgesamt gut entwickelt. 🌿🌱
Auch die Vorblüte ist an Blütetag 7 das erste mal erschienen. 👀
Sie ist bis jetzt gut in die Blüte gerutscht🌱
Likes
Comments
Share

@Eojburnner420
Follow
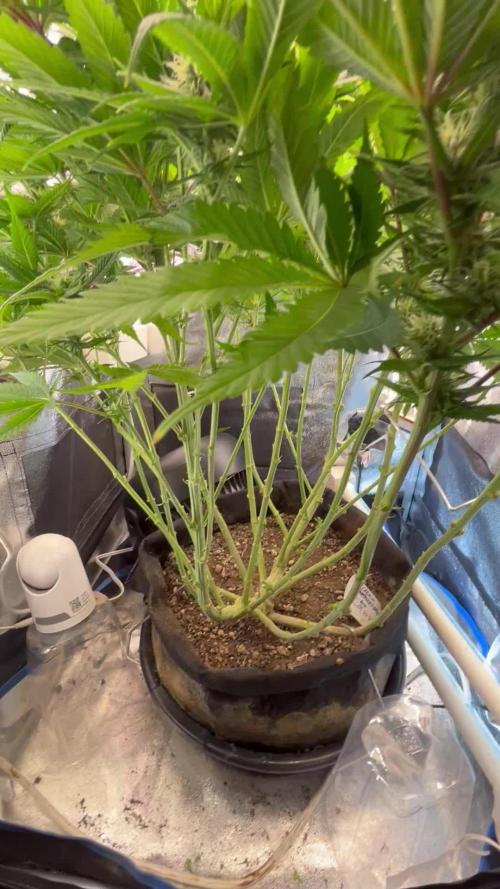
I’m very pleased with my second grow in soil, I’m still learning getting better every run.
Likes
83
Share


@TheUk420Show
Follow
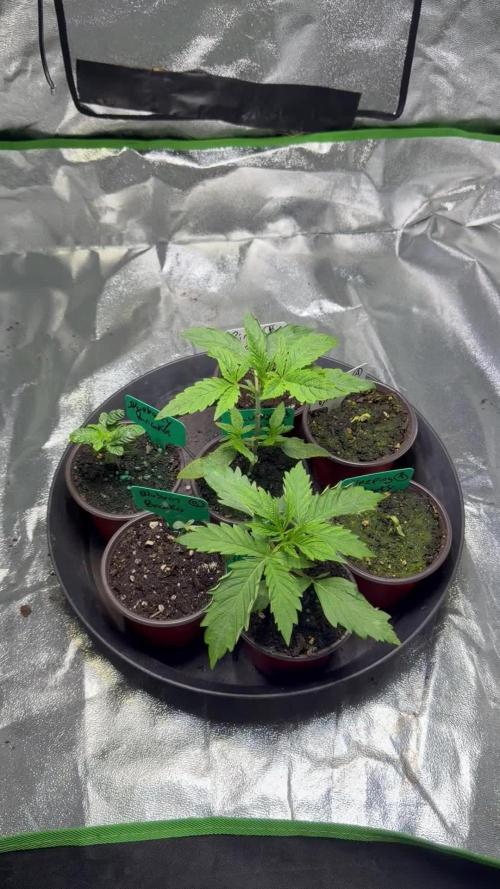
Hi guys so coming into to the final stretch now start of week number 8 the black dog has been on flush for 3 days it will be cropped in two days. Other plants that are on flush are 2 of the queens one purple one not. the large plants ie super crit and the super crit silver haze are both on flush since yesterday so they have the 9th week to go yet first harvest will be the black dog :)





Likes
5
Share

@RakonGrow
Follow
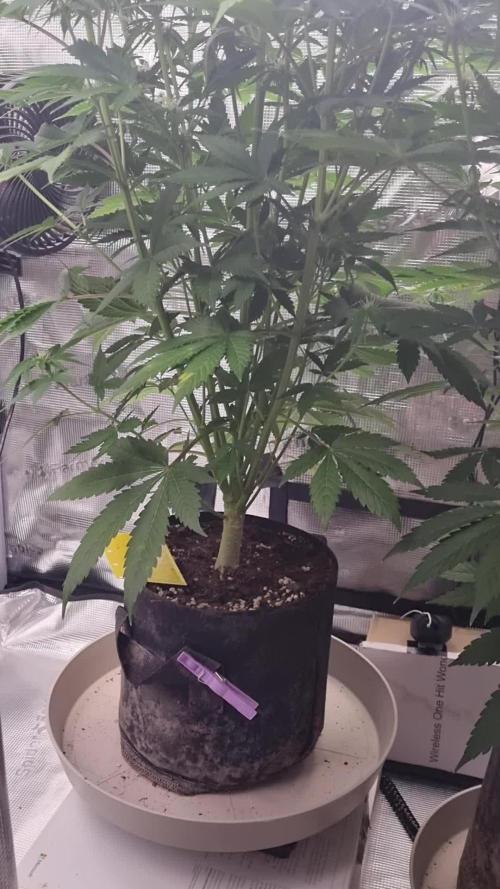
data online : rakongrow.lima.zone/growme-godfeather-og-f1-auto-017.html
day 61 : defoliation 122g
day 58: more flower :))
Likes
5
Share


@CanarianGrow92
Follow
First week of flowering for the girls.
We started with some master bloom from Xpert nutrients and continue with master root also from xpert nutrients.
We placed a net above the poants to guide some of the taller branches and create a more equal canopy.
We defoliated some lower leaves and for the rest it looks quite good, some plants showed a little sign of overfeeding so we lower the dosis this week.
Likes
6
Share


@wheedtobeus420
Follow
Little lady born on 2/21/2020. Really happy to watch her grow. I haven’t been able to grow out this strain before so I’m stoked on it. She’s on day 8 and showing her beautiful self. Let’s see what this journey has for us. Thanks for awesome genetics !!!!

Likes
8
Share

@DogDoctorOfficial
Follow
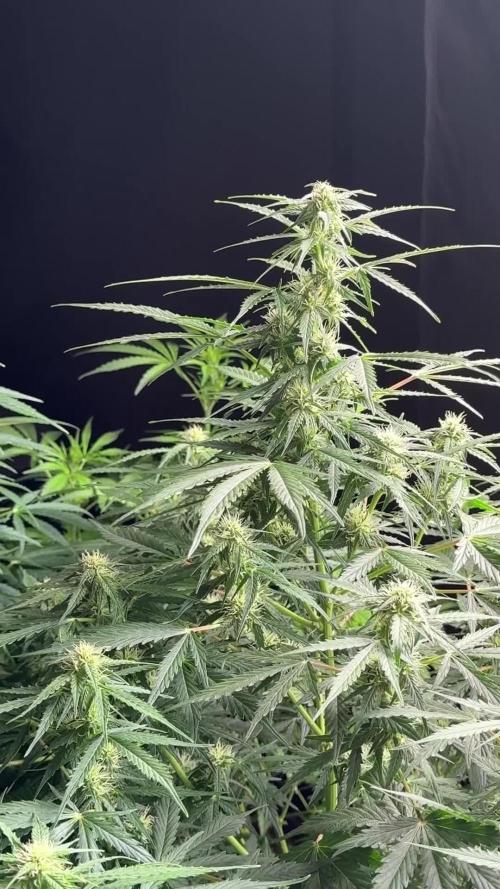
🌱 Sour Diesel — Week 10 From Seed (Week 5 Flower)
The comeback story.
⸻
🔁 Quick Recap — The “Unhappy Girl” That Didn’t Quit
This Sour Diesel started as the most challenged plant in the room.
Slow growth, stress signals early on, and clearly behind her sisters.
But plants don’t quit — they adapt.
She stayed smaller (~60 cm), but instead of stretching for size, she focused on recovery and survival. And now, in Week 5 of flower, we’re seeing something special:
👉 A full metabolic comeback
👉 Active water uptake (~1.2L/day)
👉 Healthy flower development despite early setbacks
This is why we document everything — not just perfection, but resilience.
🔬 Macro World — What We’re Really Seeing
This week, we zoom in — literally.
Macro photography shows us what the eye misses:
✨ Trichomes (The Frost Begins)
• Tiny resin glands forming on sugar leaves and calyxes
• At this stage: mostly clear → early cloudy
• Function:
• UV protection
• Pest defense
• Secondary metabolite production (terpenes, cannabinoids)
👉 This is the plant saying: “I’m protecting my flowers now.”
⸻
🌸 Calyxes (The Core of the Flower)
• The actual reproductive structure
• Each calyx = potential seed site (if pollinated)
• Now stacking and swelling slowly
👉 This is where your final yield is built.
⸻
🌿 Pistils / White Hairs
• These are stigmas, part of the female reproductive system
• Their job:
• Catch pollen
• Signal reproductive maturity
At Week 5:
• Still mostly white → plant is actively building, not finishing
• Upright and fresh → healthy hormonal signaling
👉 White pistils = growth mode
👉 Dark/orange pistils = maturity progression
⸻
🌡️ Environment & Feeding (Dialed In)
You kept it consistent — and that’s why she bounced back:
• 🌡️ Temp: 28°C
• 💧 RH: 60–65%
• ⚗️ pH: ~6.0
• ⚡ EC: 2.4
• 🌬️ CO₂: ~1000 ppm
• 🚰 Water intake: ~1.2L/day
👉 That water uptake is key — it tells us:
roots are active → metabolism is running → recovery is real
⸻
📸 Plant Structure & Expression
• Smaller frame, but balanced structure
• Bud sites forming across the plant
• No wasted energy — everything is focused
👉 She didn’t win the height race…
👉 But she’s still in the quality game
⸻
🧠 What This Plant Teaches
Not every plant is a monster.
Some are:
• Stressed early
• Slower to adapt
• Smaller in size
But with stability and patience:
👉 They recover
👉 They produce
👉 They surprise you
This is grower discipline — not chasing perfection, but supporting the process.
⸻
🎒 Official Introduction — Mr. Baggy
He’s been around… now it’s official.
Mr. Baggy is part of the team.
From garden runs to studio sessions — always present.
A reminder that even in serious work…
👉 we keep it human
👉 we keep it fun
👉 we keep it ours
⸻
🔮 What to Expect Next Week (Week 6 Flower)
• Calyx swelling will accelerate
• Trichome production will increase visibly
• Pistils may begin slight color change in some areas
• Aroma profile will start developing deeper layers
⚠️ Key focus:
• Watch EC → avoid pushing too hard now
• Maintain airflow (density is coming)
• Stay consistent — no big changes
⸻
🤝 Gratitude
From grower to growers:
Big love to:
• The GrowDiaries community
• Everyone following — OGs & new
• Supporters, challengers, silent watchers
And to the people behind the tools:
• Plagron
• Zamnesia
• The lights above us
⸻
🌱 Closing
She started as the weakest in the room.
Now she’s a reminder:
👉 Growth isn’t always fast
👉 Progress isn’t always big
👉 But resilience… always shows
📡 DELETED @ 1K Please stay tuned.we never quit https://www.youtube.com/@TheDogDoctorOfficialNEW
🙏 Thank you for your patience and continued support.
FOR DISCOUNT CODES AND MORE JUST FOLLOW THE LINK https://website.beacons.ai/dogdoctorofficial
📲 Don’t forget to Subscribe and follow me on Instagram and YouTube @DogDoctorOfficial for exclusive content, real-time updates, and behind-the-scenes magic. We’ve got so much more coming, including transplanting and all the amazing techniques that go along with it. You won’t want to miss it.
GrowDiaries Journal: https://growdiaries.com/grower/dogdoctorofficial
Instagram: https://www.instagram.com/dogdoctorofficial/
YouTube: https://www.youtube.com/@dogdoctorofficial Deleted by Youtube
Vimeo : https://vimeo.com/dogdoctorofficial Under construction stay tuned ⸻
Explore the Gear that Powers My Grow
If you’re curious about the tech I’m using, check out these links:
🔆 Lighting & Environmental Control
• Future of Grow — Advanced LED lighting technology
https://www.futureofgrow.com/
DISCOUNT CODE: DOG20
• Lumiflora — Under-canopy LED lighting
https://lumiflorade.com/
• TrollMaster — Environmental controllers and automation gear (past collaboration)
⸻
Genetics
• Zamnesia Seeds — Genetics used in this project
https://www.zamnesia.com/
⸻
🌱 Soil, Substrates, Boosters & Root Support
• Plagron — Substrates, bio mixes, and supportive products
https://plagron.com/en/
⸻
🎒 Storage, Curing & Preservation
• Grove Bags — Curing and storage solutions
https://grovebags.com/
⸻
📸 Photography Equipment & Tools
(Not sponsors, but part of my creative toolkit)
• Sony A6700
• Sony full-frame macro lens + few more
• Stacking photography workflow - learning
• iPhone (for behind-the-scenes shots)
We’ve got much more coming as we move through the grow cycles. Trust me, you won’t want to miss the next steps, let’s push the boundaries of indoor horticulture together!
As always, this is shared for educational purposes, aiming to spread understanding and appreciation for this plant. Let’s celebrate it responsibly and continue to learn and grow together.
With true love comes happiness. Always believe in yourself, and always do things expecting nothing and with an open heart. Be a giver, and the universe will give back in ways you could never imagine.
💚 Growers love to all 💚
📸 P.S. – The Eye Behind the Lens
All photos in this diary (for now — except for the ones showing the camera, which I took with an iPhone) are taken with a Sony A6700 paired with a Sony full-frame macro lens and a few more.
Photography is part of the story — it’s how we share the fine textures, the glow, and the quiet details that words can’t always capture.
I’ve also started experimenting with photo stacking — a technique where multiple images, each taken at a slightly different focus point, are layered together to create one perfectly sharp image from front to back.
It’s not digital enhancement or AI; it’s pure photography — a way to reveal the plant’s beauty in microscopic depth, from trichome to petal.
You’ll even see a few shots of "ghost me" capturing the shots — camera, lens, setup — because every grow deserves not just to be cultivated, but documented like art.
FOR DISCOUNT CODES AND MORE JUST FOLLOW THE LINK https://website.beacons.ai/dogdoctorofficial
NEW DISCORD - Official Server Invite Link : https://discord.gg/ksjAkA5T74
