


Likes
Comments
Share


@AfroBlooming420
Follow
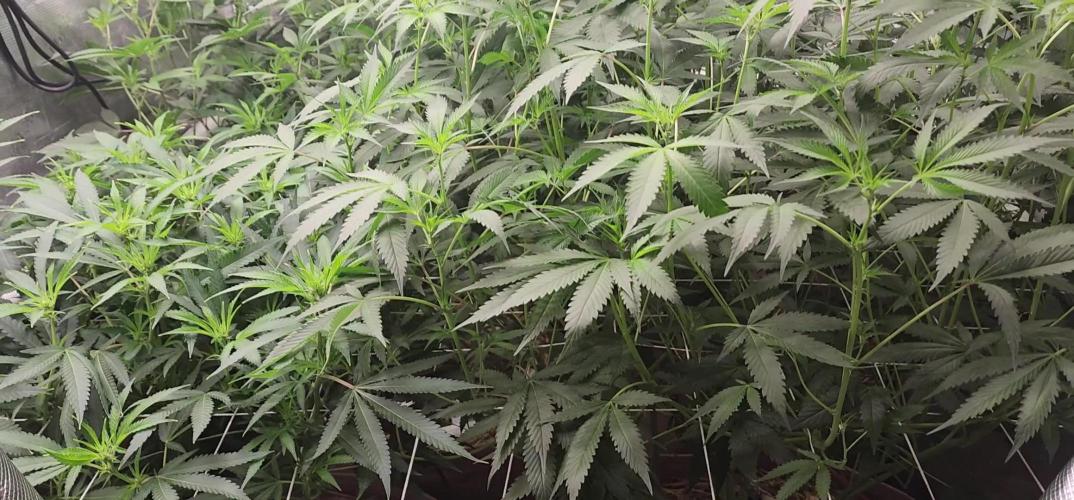
Week 3 = The Clown Show. I definitely transplanted too early into 14l pots. I also should have only started two seeds because this tiny tent is crowded now. I kinda freaked out when I saw what looked like nutrient deficiencies (calcium, potassium, I don't know) AND nutrient burn? I was so damn confused. I also realized not ph'ing was a dumb idea and quickly went out and bought a ph meter. I assumed since the tap water here is drinkable and not chlorinated, it's fine. But turns out it all comes from underground aquifers that are made of bedrock and every mineral that increases ph. I'm using lemon juice as my ph-down now and have figured that out pretty well. 1ml of it gets the water down to 6.0-6.3.
Anyway, I spent the weekend in YouTube University trying to figure out what mistakes I made. More experienced growers, please feel free to comment with tips. Just don't be an asshole.

Likes
2
Share


@vooodi
Follow
В конце этой недели я снял урожай, но сделал это вынуждено.
Верхние бутоны начали вянуть (1 фото), в отличии от остального растения, здесь я заподозрил неладное... Я насильно раздвинул верхний цветок и получил психологическую травму 😢
Так как самые верха уже были размером с кулак и очень плотные,- внутри они не проветривались, там скопилась влага и завелась плесень 😭😭😭
Это выглядело ужасно!!! Настолько, что я даже не стал делать фото.
Почти все прекрасные верха пошли на выброс. Слава джа, что я заметил это не слишком поздно и плесень была только в самых плотных шишках на самом верху растения.
Я самым тщательным образом осмотрел каждую срезанную шишку, порезал на части чтобы рассмотреть все изнутри.
И в результате пришлось выкинуть 83 гр самых смолянистых цветов, самых кайфовых 😓
Еще я не подумал о том, что мелко порубленные шишки, без стеблей, высохнут быстрей чем обычно.
Итого я получил 115 гр сухих (пересушенных) цветов.
После харва разрезал корневую из любопытства, оцените и вы на фото.
Друзья, учитесь на моем опыте - следите за обдувом растения!
И если у вас крупные и плотные соцветия - не бойтесь их тревожить и тщательно осматривайте шишки внутри, вплоть до стебля.
Ну и в финале из этого растения родился ганджа-жук, защитник кустов от всевозможных вредителей 👽 (видео)
Likes
Comments
Share

@Ensign420
Follow
|»» LOG DISCLAIMER: Not intended as a grow guide. Grow log entries are usually posted 3 weeks later and are for my learning reference. ««|
Introduction - Week 15 Summary -
Ensign's log, stardate 17711.1,
Been a great week in the garden!
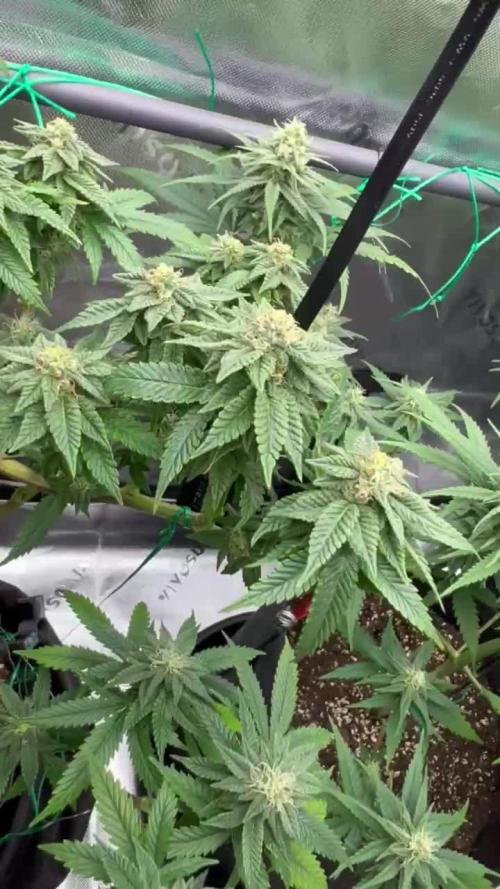
Wow the 4x4 tent is thriving and the canopy is full of tops! By the end of the week, all phenos have begun to show signs of flowering! Growth has continued to stretch so added the second scrog frame and netting. By the end of the week, the canopy has stretched through the second layer and looking green and healthy!
In the veg tent, been tending to solo cup waterings as needed. Also up-potted Chill Out OG into a 3-gal pot (with BluMat watering). Took more veg cuttings and now have them in Coco Coins rooting and looking healthy!
Onwards to next week!
[START OF WEEK 15]
==========================================================
---------- [ 3x3 VEG TENT - GR7 / GR3 ] ----------
TKO #2 - WEEK 07 - Full Veg
Gorilla Goat #1 - WEEK 07 - Full Veg
Chill Out OG #3 - WEEK 04 - Full Veg
Chill Out OG #2 - WEEK 00 - Transplant
---------- [ 4x4 MAIN TENT - GR30 ] ----------
Chill Out OG #2 - WEEK 15 - Full Bloom Wk1
TKO #2-2 - WEEK 09 - Full Bloom Wk1
Heady OG BX1 #1 - WEEK 11 - Full Bloom Wk1
02/09/26 → 02/15/26 [WEEK 15]
This Week's Estimated Goals
----------------------------------------------------------------------------------------------
DLI: ~13 mol/m²/d
PPFD: ~300 μmol/m²/s
VPD: ~1.2 kPa
This Week's Meter Readings & Averages
----------------------------------------------------------------------------------------------
Light On/Off: 16:00 - 10:00 | Wattage: ~386.3W [LV05]
Distance From Canopy: ~[22”, 13”, 13”]
Plant Height: ~[30”, 39”, 39”]
Max Plant Height: ~52” [Lamp-to-Soil Distance]
DLI: ~16.80 mol/m²/d
PPFD: ~389 μmol/m²/s
VPD: ~0.89 kPa
Soil %: ~[47.9, 47.1, 43.3, 53.0, 48.3, 63.4, 47.1, 61.9, 48.6, 72.3]
==========================================================
Day 01 - Monday - 02/09/26 - Total Days: 096
-----------------------------------
Daily Averages ~[+01:00]
- Temps: 81.1°F [27.3°C]
- Humidity: 74.4%
- VPD: 0.92 kPa
- Soil %: [48, 47, 44, 51, 49, 66, 48, 65, 50, 75]
-----------------------------------
- [22:14]: Night check on the 4x4 tent.
--- Garden is full of tops and the canopy is getting taller!
--- Chill Out OG #2 is getting taller, but is staying shorter than Heady OG BX1 #1 and TKO #2.
--- The under canopy is looking clean and all pots are clean and no signs of flooding.
- [22:17]: Checked on the BluMat soil moisture sensors:
------ Chill Out OG #2 » 46mbars
------ Heady OG BX1 #1 » 42mbars
------ TKO #2 » 49mbars
--------- Watering Range: [Too Wet] ~25mbars «| [Ideal Target] ~40-80mbars |» ~125mbars [Too Dry]
--------- BluMat Max Values: [10mbars «||» 750mbars]
- [22:24]: Checked the Ecowitt soil moisture sensor data:
------------------ [ 3x3 VEG TENT – GR7 / GR3 ] ----------------
------ 45% - [CH01 » M1 » VBL – TKO #2]
------ 46% - [CH02 » M2 » VBR – Gorilla Goat #1]
------ 44% - [CH03 » M3 » VFL – Chill Out OG #3]
------ 51% - [CH04 » M4 » VFR – Dry Soil]
----------------- [ 4x4 MAIN TENT – GR30 ] ---------------
------ 49% - [CH05 » P1 » FLT – Chill Out OG #2]
------ 66% - [CH06 » P1 » FLB – Chill Out OG #2]
------ 47% - [CH07 » P2 » BLT – TKO #2-2]
------ 64% - [CH08 » P2 » BLB – TKO #2-2]
------ 51% - [CH09 » P3 » FRT – Heady OG BX1 #1]
------ 75% - [CH10 » P3 » FRB – Heady OG BX1 #1]
--------- Veg: ~38%-45% | Flower: ~45%-55%
--------- General: ~30% [Dry] «| ~45-60% [Moist] |» ~70% [Wet]
- [22:27]: Checked the 3x3 veg tent.
--- Wow the veg garden is blowing up with growth!
--- All mothers and clones are perky and getting tall! Definitely need to top soon, but not today!
--- A Chill Out OG #2 clones needs watering!
- [22:33]: Here is the starting initial watering range:
------ Chill Out OG #2 » 267.3g → 301.0g
--------- General Weight Range: [Dry] ~275g «| [Dryback] ~300g |» ~325g-400g [Wet]
--- Been 2 days since the last watering.
--- Took the starting weight before watering,
------ Chill Out OG #2 » 289.2g
--- While on a scale,
--- Evenly misted the top of the cup with RO water.
--- Did not spray the top growth.
--- Misted 10-20 sprays. Waited a moment, then misted again.
--- Repeated this process until the cup weighted at least 300g.
--- There was no runoff.
- [22:44]: Took the saturated weight after watering,
------ Chill Out OG #2 » 390.7g
--- Updated the wet weight and watering date.
--- Placed the cup back into the tent.
--- All veg clones in the propagation tray look great and no need to water!
- [22:53]: Checked the humidifiers.
--- Tanks are still full and no leaks found.
Day 02 - Tuesday - 02/10/26 - Total Days: 097
-----------------------------------
Daily Averages ~[+01:00]
- Temps: 81.0°F [27.2°C]
- Humidity: 76.9%
- VPD: 0.83 kPa
- Soil %: [50, 47, 44, 51, 49, 64, 47, 63, 50, 74]
-----------------------------------
- [21:06]: Night check on the 4x4 tent.
--- Ca-Caw! Wow the garden soaring upwards with healthy tops!
--- Heady OG and TKO are stretching up at equal heights and are almost tall enough to begin the second level or netting. Nice!
--- Chill Out OG is chilling and staying squat, but looking perking!
- [21:12]: Checked on the BluMat soil moisture sensors:
------ Chill Out OG #2 » 48mbars
------ Heady OG BX1 #1 » 44mbars
------ TKO #2 » 56mbars
--------- Watering Range: [Too Wet] ~25mbars «| [Ideal Target] ~40-80mbars |» ~125mbars [Too Dry]
--------- BluMat Max Values: [10mbars «||» 750mbars]
- [21:16]: Checked the Ecowitt soil moisture sensor data:
------------------ [ 3x3 VEG TENT – GR7 / GR3 ] ----------------
------ 47% - [CH01 » M1 » VBL – TKO #2]
------ 49% - [CH02 » M2 » VBR – Gorilla Goat #1]
------ 43% - [CH03 » M3 » VFL – Chill Out OG #3]
------ 51% - [CH04 » M4 » VFR – Dry Soil]
----------------- [ 4x4 MAIN TENT – GR30 ] ---------------
------ 48% - [CH05 » P1 » FLT – Chill Out OG #2]
------ 64% - [CH06 » P1 » FLB – Chill Out OG #2]
------ 47% - [CH07 » P2 » BLT – TKO #2-2]
------ 63% - [CH08 » P2 » BLB – TKO #2-2]
------ 51% - [CH09 » P3 » FRT – Heady OG BX1 #1]
------ 74% - [CH10 » P3 » FRB – Heady OG BX1 #1]
--------- Veg: ~38%-45% | Flower: ~45%-55%
--------- General: ~30% [Dry] «| ~45-60% [Moist] |» ~70% [Wet]
- [21:21]: Checked the 3x3 veg tent.
--- Woah! The veg garden is stretching upwards and has reached the grow light!
--- Time to top!
--- Also going to take more Gorilla Goat clones. Not too sure on the current one in the tray, so cutting a couple more just in case.
- [21:33]: Filled a measuring cup with 2 cups of RO water.
------ Added 1/8tsp of Horticultural Aloe
--- Mixed the solution and poured it straight into a clear solo cup.
--- Made sure the PVC tube on the rig had the correct names marked.
--- Placed the rig into the cup just above the aloe water.
--- Okay! Time to take the cuttings!
--- Using a pair of clean trimmers,
- [22:05]: Topped and defoliated each mother plant.
--- Removed a decent amount of growth (a good 7-8 inches of top growth).
--- Mulched the trimmings.
- [22:07]: Also cut several Gorilla Goat #1 clonal cuttings.
--- Made sure to trim most of the branches leaving a top node or two.
--- Did not cut any leaf fingers and made sure to cut the tip of the stalk (about 45-degree) before placing each cutting into the cup of aloe solution.
- [22:09]: Placed the cup into the veg tent.
--- Have the cup resting on top of the drip tray (front left pot).
--- Okay! Let the soaking begin!
- [22:10]: Decided to cull the Gorilla Goat #1-2 clone in the propagation tray.
--- Mulched the entire cup.
- [22:18]: Checked the humidifiers.
--- Tanks are still full and no leaks found.
Day 03 - Wednesday - 02/11/26 - Total Days: 098
-----------------------------------
Daily Averages ~[+01:00]
- Temps: 81.7°F [27.6°C]
- Humidity: 76.9%
- VPD: 0.85 kPa
- Soil %: [47, 47, 43, 50, 48, 64, 47, 62, 50, 74]
-----------------------------------
- [16:09]: Evening check on the 3x3 veg tent.
--- Veg garden is looking nice and clean!
--- The growth is still recovering from the topping, but all mothers and clones look great!
- [16:22]: Okay! Time to transplant Chill Out OG #2 into a 3-gal pot!
--- The 3-gallon pot has been already pre-amended and prepped for a fresh transplant.
--- Will also be installing the BluMat watering carrot before connecting it to the water source loop.
- [16:46]: Took a 3-gallon pot out of the veg tent and set it on a drip tray.
------ Removed the drip tray and Ecowitt soil sensor.
--- Loosened the soil and made a hole in the center of the pot.
------ Set a clear cup into the center of the pot.
--- Tucked the sides of the cup in snug with the surrounding soil.
--- Gently removed the clear cup from the fabric pot leaving a perfect hole.
------ Sprinkled 1/16tsp of Great White
------ Sprinkled 1/32tsp of Beauveria Bassiana Plus
- [17:06]: Dusted the sides of the hole.
--- Also sprinkled a bit around the top soil.
--- Great! Time to transplant!
--- Chill Out OG #2 weighed 291.2g and was watered 2 days ago.
--- To loosen and unstick the rootball from the cup, I gently squeezed the sides before pressing the bottom upwards.
- [17:14]: Once fully loosened, I simply Vulcan-gripped the base of the plant before flipping her upside down.
--- Ooo yea! Nice pearly white roots!
--- She’s more than ready for a larger pot!
--- Did not break up the rootball.
- [17:16]: Gently set her straight into the pre-inoculated hole.
--- Pressed and evened out the top soil.
- [17:22]: Using fresh BuildASoil Organic Straw Mulch,
--- Covered the top soil with straw.
- [17:35]: Then using a fully filled 5" BluMat watering carrot (pre-soaked and set to gold for gravity feed) along with a 5" drip ring,
--- Placed the drip ring around the base of the plant.
--- Then gently inserted the BluMat carrot into the soil near the drip ring's fill tube before connecting it with a 3mm connector.
- [17:58]: Also set the Ecowitt soil sensor back.
--- Placed the fabric pot back into the Veg tent.
--- Shut off all flow-valves and made sure the (8mm) water source loop had no water pressure.
--- Then cut the tubing and installed an RO valve-rig (with 3mm T-fitting).
- [18:12]: Finally connected the watering carrot's 3mm fill tube to the valve-rig before turning all flow-valves back on.
--- Ca-Caw! Done with the transplant!
--- The soil moisture was pretty wet so decided to not water.
--- Will continue to check and will water if needed.
- [18:20]: Decided to also cull the extra Heady OG BX1 clones.
--- Mulched the trimmings and soil.
- [18:54]: Checked the Ecowitt soil moisture sensor data:
------------------ [ 3x3 VEG TENT – GR7 / GR3 ] ----------------
------ 52% - [CH01 » M1 » VBL – TKO #2]
------ 50% - [CH02 » M2 » VBR – Gorilla Goat #1]
------ 43% - [CH03 » M3 » VFL – Chill Out OG #3]
------ 56% - [CH04 » M4 » VFR – Chill Out OG #2]
----------------- [ 4x4 MAIN TENT – GR30 ] ---------------
------ 48% - [CH05 » P1 » FLT – Chill Out OG #2]
------ 64% - [CH06 » P1 » FLB – Chill Out OG #2]
------ 47% - [CH07 » P2 » BLT – TKO #2-2]
------ 62% - [CH08 » P2 » BLB – TKO #2-2]
------ 51% - [CH09 » P3 » FRT – Heady OG BX1 #1]
------ 74% - [CH10 » P3 » FRB – Heady OG BX1 #1]
--------- Veg: ~38%-45% | Flower: ~45%-55%
--------- General: ~30% [Dry] «| ~45-60% [Moist] |» ~70% [Wet]
--- Also updated the soil sensor names a bit.
- [19:07]: Checked the 4x4 tent.
--- Ooo yea! The garden is thriving and the canopy is still stretching upwards!
--- All phenos are looking great and will need to set the second scrog frame layer soon. Nice!
--- Not too sure if Chill Out OG will make it to the second netting, but she’s looking healthy and perky so not a big deal.
--- Stoked that the under canopy is clean and looking healthy!
- [19:17]: Checked on the BluMat soil moisture sensors:
------ Chill Out OG #2 » 51mbars
------ Heady OG BX1 #1 » 46mbars
------ TKO #2 » 53mbars
--------- Watering Range: [Too Wet] ~25mbars «| [Ideal Target] ~40-80mbars |» ~125mbars [Too Dry]
--------- BluMat Max Values: [10mbars «||» 750mbars]
--- All veg clones and cuttings are looking great!
--- Need to change the Gorilla Goat cutting’s aloe water out. Also a couple clones need watering.
--- Filled a clear cup with fresh RO water (1.5cups).
- [20:21]: Gently lifted the PVC rig out of the cup of aloe water and set it gently into the RO cup.
--- Going to let these soak for another day before transplanting into Coco Coins for rooting.
--- Two clones need watering!
- [20:34]: Here are the starting initial watering ranges:
------ TKO #2-1 » 290.7g → 340.5g
------ Gorilla Goat #1-1 » 279.9g → 340.6g
--------- General Weight Range: [Dry] ~275g «| [Dryback] ~300g |» ~325g-400g [Wet]
--- Both cups were last watered 8 days ago.
--- Took the starting weight of both clones before watering,
------ TKO #2-1 » 289.8g
------ Gorilla Goat #1-1 » 295.6g
--- While on a scale,
--- Evenly misted the top of both cups with RO water.
--- Did not spray the top growth.
--- Misted 10-20 sprays. Waited a moment, then misted again.
--- Repeated this process until both cups weighted at least 300g.
--- There was no runoff.
- [21:06]: Took the saturated weight of both cups after watering,
------ TKO #2-1 » 355.5g
------ Gorilla Goat #1-1 » 355.4g
--- Updated the wet weight and watering dates for both cups.
--- Placed both cups back into the tent.
- [21:36]: Checked the humidifiers.
--- Tanks are still full and no leaks found.
Day 04 - Thursday - 02/12/26 - Total Days: 099
-----------------------------------
Daily Averages ~[+01:00]
- Temps: 81.5°F [27.5°C]
- Humidity: 75.3%
- VPD: 0.91 kPa
- Soil %: [49, 48, 43, 56, 47, 63, 46, 62, 50, 73]
-----------------------------------
- [16:01]: Evening check on the 3x3 veg tent.
--- Veg garden is looking incredible and growth is recovering nicely!
--- Also veg clones and cuttings are looking good!
- [17:03]: Okay! Time to start the rooting process!
--- Filled a measuring cup with 1.5 cups of RO water.
------ Added a pinch of Quillaja Saponaria Extract [60]
------ Added 1/64tsp of Horticultural Aloe
------ Added 1/32tsp of Mycrobe Complete
--- Mixed the solution thoroughly.
- [17:04]: Dropped 2 Coco Coins into the measuring cup.
--- The coins immediately started to expand.
------ [» ~5 MINUTES LATER «]
--- Placed each fully saturated Coco Coin into half-cut solo cups.
- [17:25]: Using a squeeze bottle filled with Clonex,
--- Gently filled each pre-made hole with Clonex rooting gel.
- [17:38]: Time to plant the cuttings!
--- Using a pair of clean trimmers, made a final 45° cut.
--- Also stripped and scrapped some of the stem’s outer membrane.
--- To help with planting, gave each Coco Coin a squeeze to loosen the coco.
--- Made sure to insert each stem straight and snug with the tip about a 1/4 inch from the bottom of the Coco Coin.
--- Also secured the stem by pinching and pressing in the top of the Coco Coin.
--- Once each cutting was planted,
- [18:11]: Placed each Coco Coin into the propagation dome’s tray.
--- Made sure to keep each cutting properly tagged.
--- Did not spray the top growth with any water, but did fill the bottom of the tray with RO water.
--- As far as PPFD,
--- At the lowest light intensity (and raised ~14 above the tray), the PPFD is around 42 μmol/m²/s which gives a DLI of 2.72 mol/m²/d under an 18/6 light cycle
- [18:18]: Decide to cull TKO #2-2 along with the spare Gorilla Goat cutting.
--- Going to mulch the trimmings, but going to add something more to the mulch pot.
- [18:23]: Since I also make and drink my own F1 kombucha (helps to maintain healthy gut bacteria along with a great way to lose weight), I have a decent amount of spare scobys.
--- Placed a few spare scoby pellicles into a plastic bin.
--- Using scissors, chopped up the scoby pellicles into smaller chunks and added the soil and trimmings from the culled clone and cutting.
--- Set the container aside. Will top dress the mulch bin in the main tent later.
--- Might move the mulch bit to the front of the tent for the next cycle and am thinking about turning it into a potential worm bin.
--- Anyways!
- [18:41]: Checked the Ecowitt soil moisture sensor data:
------------------ [ 3x3 VEG TENT – GR7 / GR3 ] ----------------
------ 49% - [CH01 » M1 » VBL – TKO #2]
------ 45% - [CH02 » M2 » VBR – Gorilla Goat #1]
------ 43% - [CH03 » M3 » VFL – Chill Out OG #3]
------ 55% - [CH04 » M4 » VFR – Dry Soil]
----------------- [ 4x4 MAIN TENT – GR30 ] ---------------
------ 47% - [CH05 » P1 » FLT – Chill Out OG #2]
------ 63% - [CH06 » P1 » FLB – Chill Out OG #2]
------ 46% - [CH07 » P2 » BLT – TKO #2-2]
------ 62% - [CH08 » P2 » BLB – TKO #2-2]
------ 50% - [CH09 » P3 » FRT – Heady OG BX1 #1]
------ 72% - [CH10 » P3 » FRB – Heady OG BX1 #1]
--------- Veg: ~38%-45% | Flower: ~45%-55%
--------- General: ~30% [Dry] «| ~45-60% [Moist] |» ~70% [Wet]
- [19:05]: Checked the 4x4 tent.
--- Ca-Caw! Let’s go ladies! Wow the garden is looking incredible!
--- Growth is ramping up and the canopy is definitely in full stretch!
--- The under canopy is looking clean and pots all look great!
- [19:09]: Nice! All phenos are showing clear signs of bud crowning!
--- Chill Out OG seems to be further along than the rest of the cultivars, flower has officially begun!
--- Heady OG and TKO has slight signs of crowning, but will continue to stretch for a few more days. I think.
--- Anyways!
- [19:17]: Quickly checked on the RO reservoir and auto-watering system.
--- Reservoir looked good and no leaks detected.
- [20:14]: Took the kombucha top dressing from earlier and spread the mix top of the mulch bin (in the back right of the tent).
--- Spread the top dressing out evenly. Since kombucha is naturally and acidic ferment, going to let the top dressing dry out a bit (smells great too).
--- Will continue to add leaves and trimming on top after defoliation and toppings.
- [20:21]: Okay time to build the second scrog frame layer and re-string the second level of netting!
--- Prepped and built the PVC scrog frame outside of the tent.
--- Using mason string, restrung the netting and double-looping each screw.
--- Once the frame was fully assembled and re-strung,
- [22:21]: Placed the PVC riser poles and installed the second scrog frame into the 4x4 tent.
--- The first scrog layer is currently about 18.5" from the top soil.
--- The second scrog layer is currently about 35" from the top soil.
--- Done!
- [22:59]: Checked the humidifiers.
--- Tanks are still full and no leaks found.
Day 05 - Friday - 02/13/26 - Total Days: 100
-----------------------------------
Daily Averages ~[+01:00]
- Temps: 82.2°F [27.9°C]
- Humidity: 75.7%
- VPD: 0.91 kPa
- Soil %: [46, 47, 43, 55, 47, 63, 46, 61, 48, 71]
-----------------------------------
- [21:16]: Night check on the 4x4 tent.
--- Wow the garden is raging with growth!
--- The second layer is almost pretty much already full!
--- Chill Out OG is chilling in between the netting and looking healthy with signs of bud crowning starting to swell up!
--- Both Heady OG and TKO are also continuing to stretch with slight signs of crowning. Nice!
--- Let’s go my girls!
- [21:24]: Checked the Ecowitt soil moisture sensor data:
------------------ [ 3x3 VEG TENT – GR7 / GR3 ] ----------------
------ 46% - [CH01 » M1 » VBL – TKO #2]
------ 50% - [CH02 » M2 » VBR – Gorilla Goat #1]
------ 43% - [CH03 » M3 » VFL – Chill Out OG #3]
------ 55% - [CH04 » M4 » VFR – Chill Out OG #2]
----------------- [ 4x4 MAIN TENT – GR30 ] ---------------
------ 47% - [CH05 » P1 » FLT – Chill Out OG #2]
------ 62% - [CH06 » P1 » FLB – Chill Out OG #2]
------ 46% - [CH07 » P2 » BLT – TKO #2-2]
------ 60% - [CH08 » P2 » BLB – TKO #2-2]
------ 48% - [CH09 » P3 » FRT – Heady OG BX1 #1]
------ 71% - [CH10 » P3 » FRB – Heady OG BX1 #1]
--------- Veg: ~38%-45% | Flower: ~45%-55%
--------- General: ~30% [Dry] «| ~45-60% [Moist] |» ~70% [Wet]
- [21:26]: Checked the 3x3 veg tent.
--- The veg garden is looking nice and perky with healthy growth!
--- A Garlic Budder clone needs watering. Let’s go Ensign!
- [21:37]: Here is the starting initial watering range:
------ Garlic Budder OG#1-1 » 299.1g → 340.6g
--------- General Weight Range: [Dry] ~275g «| [Dryback] ~300g |» ~325g-400g [Wet]
--- Been 8 days since the last watering.
--- Took the starting weight before watering,
------ Garlic Budder OG#1-1 » 298.5g
--- While on a scale,
--- Evenly misted the top of the cup with RO water.
--- Did not spray the top growth.
--- Misted 10-20 sprays. Waited a moment, then misted again.
--- Repeated this process until the cup weighted at least 300g.
--- There was no runoff.
- [21:43]: Took the saturated weight after watering,
------ Garlic Budder OG#1-1 » 355.6g
--- Updated the wet weight and watering date.
--- Placed the cup back into the tent.
--- Gorilla Goat cuttings are looking great in the propagation tray! No need to spray or water. Great!
- [22:04]: Checked the humidifiers.
--- Tanks are still full and no leaks found.
Day 06 - Saturday - 02/14/26 - Total Days: 101
-----------------------------------
Daily Averages ~[+01:00]
- Temps: 80.9°F [27.2°C]
- Humidity: 75.7%
- VPD: 0.88 kPa
- Soil %: [48, 47, 43, 54, 48, 62, 47, 60, 47, 70]
-----------------------------------
- [19:01]: Night check on the 4x4 tent.
--- Ooo yea! The garden is looking healthy and looking great!
--- Ca-Caw! Heady OG is still raging upwards and stretching through the netting
- [17:14]: Checked the Ecowitt soil moisture sensor data:
------------------ [ 3x3 VEG TENT – GR7 / GR3 ] ----------------
------ 52% - [CH01 » M1 » VBL – TKO #2]
------ 50% - [CH02 » M2 » VBR – Gorilla Goat #1]
------ 43% - [CH03 » M3 » VFL – Chill Out OG #3]
------ 54% - [CH04 » M4 » VFR – Chill Out OG #2]
----------------- [ 4x4 MAIN TENT – GR30 ] ---------------
------ 46% - [CH05 » P1 » FLT – Chill Out OG #2]
------ 61% - [CH06 » P1 » FLB – Chill Out OG #2]
------ 46% - [CH07 » P2 » BLT – TKO #2-2]
------ 60% - [CH08 » P2 » BLB – TKO #2-2]
------ 47% - [CH09 » P3 » FRT – Heady OG BX1 #1]
------ 70% - [CH10 » P3 » FRB – Heady OG BX1 #1]
--------- Veg: ~38%-45% | Flower: ~45%-55%
--------- General: ~30% [Dry] «| ~45-60% [Moist] |» ~70% [Wet]
- [19:18]: Checked the 3x3 veg tent.
--- Veg garden is looking great and growth is healthy and green!
--- A Garlic Budder clone needs watering!
- [19:25]: Here is the starting initial watering range:
------ Garlic Budder OG#1-2 » 279.2g → 340.3g
--------- General Weight Range: [Dry] ~275g «| [Dryback] ~300g |» ~325g-400g [Wet]
--- Been 9 days since the last watering.
--- Took the starting weight before watering,
------ Garlic Budder OG#1-2 » 297.3g
--- While on a scale,
--- Evenly misted the top of the cup with RO water.
--- Did not spray the top growth.
--- Misted 10-20 sprays. Waited a moment, then misted again.
--- Repeated this process until the cup weighted at least 300g.
--- There was no runoff.
- [19:40]: Took the saturated weight after watering,
------ Garlic Budder OG#1-2 » 355.5g
--- Updated the wet weight and watering date.
--- Placed the cup back into the tent.
- [20:01]: Checked the humidifiers.
--- Tanks are still full and no leaks found.
Day 07 - Sunday - 02/15/26 - Total Days: 102
-----------------------------------
Daily Averages ~[+01:00]
- Temps: 80.8°F [27.1°C]
- Humidity: 76.2%
- VPD: 0.85 kPa
- Soil %: [47, 47, 43, 54, 50, 62, 49, 60, 45, 69]
-----------------------------------
- [19:04]: Night check on the 4x4 tent.
--- Ooo yea! Let’s grow my ladies!!
--- The canopy is packed with bud top crowns and the mid canopy (in between the netting) is getting really dense!
--- Plan to do a deep defoliation soon, but going to let everything grow and stretch upwards for now.
--- Grow strong my girls!
- [19:11]: Checked on the BluMat soil moisture sensors:
------ Chill Out OG #2 » 38mbars
------ Heady OG BX1 #1 » 93mbars
------ TKO #2 » 43mbars
--------- Watering Range: [Too Wet] ~25mbars «| [Ideal Target] ~40-80mbars |» ~125mbars [Too Dry]
--------- BluMat Max Values: [10mbars «||» 750mbars]
- [19:14]: Decided to make a slight adjustment to Heady OG’s watering carrot.
--- Using the provided allen key, increased the water moisture by turning the BluMat’s tension cap slightly counter-clockwise.
- [19:18]: Checked the Ecowitt soil moisture sensor data:
------------------ [ 3x3 VEG TENT – GR7 / GR3 ] ----------------
------ 44% - [CH01 » M1 » VBL – TKO #2]
------ 47% - [CH02 » M2 » VBR – Gorilla Goat #1]
------ 43% - [CH03 » M3 » VFL – Chill Out OG #3]
------ 54% - [CH04 » M4 » VFR – Chill Out OG #2]
----------------- [ 4x4 MAIN TENT – GR30 ] ---------------
------ 51% - [CH05 » P1 » FLT – Chill Out OG #2]
------ 63% - [CH06 » P1 » FLB – Chill Out OG #2]
------ 50% - [CH07 » P2 » BLT – TKO #2-2]
------ 60% - [CH08 » P2 » BLB – TKO #2-2]
------ 45% - [CH09 » P3 » FRT – Heady OG BX1 #1]
------ 69% - [CH10 » P3 » FRB – Heady OG BX1 #1]
--------- Veg: ~38%-45% | Flower: ~45%-55%
--------- General: ~30% [Dry] «| ~45-60% [Moist] |» ~70% [Wet]
- [19:22]: Checked the 3x3 veg tent.
--- Veg garden is looking great and all top growth is green and perky!
--- Clones are also looking good and don’t need watering. Nice!
--- Gorilla Goat cutting in the propagation tray look green and healthy!
--- Easy night in the veg garden!
- [20:15]: Checked the humidifiers.
--- Tanks are still full and no leaks found.
--- Another grow week done!
--- The main tent has begun to flower and the stretch has started to slow down for the most part. Almost time for a top dressing!
--- Probably need to defoliate again soon. Just stoked that growth is all around healthier than ever!
--- As for the veg garden, there’s work to be done and plan to overhaul the veg garden to be able to better preserve my current (and future) genetics.
--- Anyways, onwards to next week Ensign!
[END OF WEEK 15]



Likes
2
Share


@AustinRon
Follow
X-Factor Auto Fem - Week 9 - Flower
SFVOG X (Humboldt Snow x Sour Diesel) X Unknown Ruderalis
SnowG Auto F6
Weeks Summary:
- LightIntensity: [ , µMol/m2/s]
- LightDistance: [12, in]
- TempDayAverage: [ 82, °F]
- RHDayAverage: [68 , %]
- VPDDayAverage: [1.1 , kPa]
_____________________________________________
#1 Seed Wet @
25 Jun 2024
#2 Germination:
#3 Nominal BOLT:
16 Jul 2024
#4a Earliest Harvest Date: 18 Sep 2024
#4b Latest Harvest Date: 28 Sep 2024
Start of Week: [Tue Aug 27, 2024 XF 2Q24 64:V:9:1]
End of Week: [Mon Sep.
2, 2024 XF 2Q24 70:V:9:7]
Week 9
__
Tue Aug 27, 2024
XF 2Q24 64:F:9:1
400 ml: CalMag Fuel, Resin Bloom: [0.125, ml, gal]
- SLF-100
- PSP
__
Wed Aug 28, 2024
XF 2Q24 65:F:9:2
__
Thu Aug 29, 2024
XF 2Q24 66:F:9:3
# Last EC 2.4
__
Fri Aug 30, 2024
XF 2Q24 67:F:9:4
__
Sat Aug 31, 2024
XF 2Q24 68:F:9:5
__
Sun Sep 1, 2024
XF 2Q24 69:F:9:6
__
Mon Sep 2, 2024
XF 2Q24 70:F:9:7
YES WE NEED WATER -
- [x] 600 ml

Likes
92
Share


@DogDoctorOfficial
Follow
🌸 Week 3 Flower – Growing Strong, Tall, and Vibrant! 🌱
Hey Grow Fam! It’s already Week 3 in flower, and I’m thrilled to bring you this update because these plants are doing phenomenally well! Some are stretching up so tall that I might have to get creative in the coming weeks! Fruit production is well underway, and it’s absolutely amazing to watch the canopy fill out as these girls reach their potential.
Aptus Holland Pack Unboxing & New Additions
This week kicked off with a big arrival: the Aptus Holland nutrient pack! 🙌 I couldn’t wait to share the unboxing with you all; there’s a video up where I go through all the goodies, so check it out if you haven’t yet! Between the photos and videos, you’ll be able to see just how well these nutrients are already feeding these green beauties. Having a blast sharing more content lately—I’m in the zone with editing and creating, so get ready for even more shares!
🌡️ Environmental Control and Fine-Tuning the Reservoir pH
Temps this week have been holding around 27.2°C with RH at 65.2% and CO2 at 800 ppm, creating a VPD of 1.26 for ideal flower development. The lighting intensity is at 833 PPFD, and the solution in the reservoir is fine-tuned to a pH of 6.22, EC of 475, with a temp of 21.8°C.
Let’s talk pH in the reservoir: it’s a dynamic process, and I’m constantly adjusting it to keep everything at the right level. The pH tends to rise throughout the week, and each day, I work it back down, fine-tuning it to keep those plants happy and balanced. Managing pH is truly a hands-on job, and it’s worth every moment. I love staying on top of it for optimal nutrient uptake—it’s all about consistent effort and keeping that perfect range dialed in.
Leaf Maintenance & Selective Defoliation
These leaves are HUGE and gorgeous, creating a lush canopy that’s nearly too perfect! I’ve been taking a few leaves here and there, focusing on leaves that may be blocking light from reaching lower parts of the plant. Selective defoliation at this stage is key because it opens up airflow and allows light to penetrate deep, boosting energy distribution across the whole plant.
Big, healthy leaves mean we’re getting excellent photosynthesis, but a gentle, strategic defoliation can guide that energy toward those developing buds. Leaf removal is all about balance, giving the plant space to breathe and thrive while still maximizing growth in flower!
🌐 TrolMaster + App – Real-Time Precision
Huge shoutout to the TrolMaster system and the app—keeping everything in sync and at peak performance is honestly effortless with this ecosystem. The app provides a full overview of each environmental parameter, allowing me to make real-time adjustments as needed and track trends over time. The precision here is unbeatable, giving me complete control over temps, humidity, CO2, and VPD, ensuring my girls are in a controlled paradise 24/7.
What I love most is how the app records everything automatically, so I always know exactly where things stand without having to keep separate records. If you haven’t tried TrolMaster yet, it’s a total game-changer for any grow setup!
💥 Shoutouts & Gratitude
Massive shoutout to TrolMaster and Aptus Holland for powering this grow with tech and nutrition that’s second to none. And, of course, gratitude to Pro-Mix for the superb growing medium and to the seed banks behind the genetics. We’re running strong thanks to each of you.
And to the whole community—thank you, everyone, from new friends to seasoned followers, lovers to haters. Your energy, whatever form it comes in, is all part of this journey, and I’m so grateful for it all. Special shoutout this week to my brother Daggadna—head over to IG and give him a follow! And if you’re loving the journey, remember to like, comment, and subscribe—it really helps the channel grow and reach others who may also dig this content!
Discount Codes so you can save big on your next check out 💚💚💚
Kannabia - DOGDOCTOR 30% off
SeedsmanSeeds - DOGDOCTOR 10% off
CannaKan- DOGDOCTOR 15% off
terpyz.eu - DOCTOR 15% off
The Neutralizer - PORKIT5-DOG 15% off
As always thank you all for stopping by, for the love and for it all , this journey of mine wold just not be the same without you guys, the love and support is very much appreciated and i fell honored and so joyful with you all in my life 🙏
With true love comes happiness 💚🙏 Always believe in your self and always do things expecting nothing and with an open heart , be a giver and the universe will give back to you in ways you could not even imagine so 💚
Friendly reminder all you see here is pure research and for educational purposes only
Growers Love to you all 💚💚💚


Likes
4
Share

@DogDoctorOfficial
Follow
💙 Project Blue Tent – Week 5
Blue Waffle F1 – Pheno B (Folder 13B)
Hello everyone, and welcome back to another chapter of Project Blue Tent.
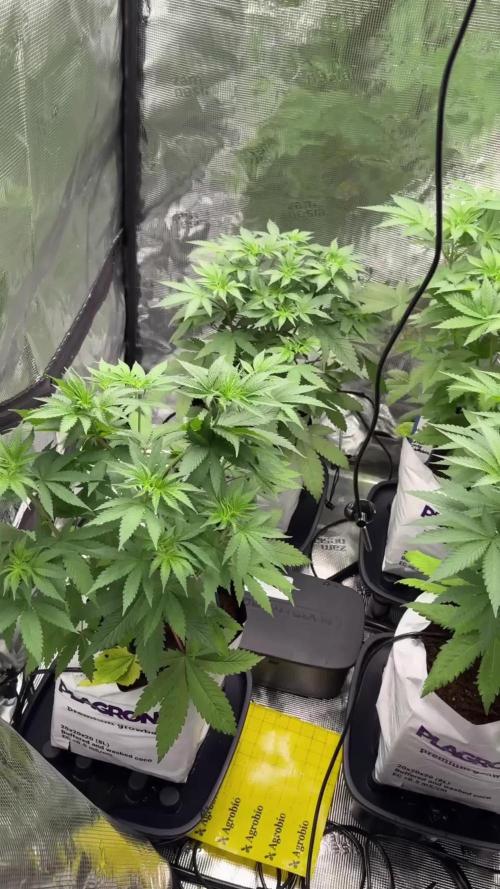
For anyone discovering these diaries for the first time, this project follows four individual Blue Waffle F1 plants from Zamnesia from seed to harvest. Every plant grows inside the exact same environment, under the same lighting, receives the same nutrition and follows the same schedule.
The only variable...
The genetics.
Watching each phenotype develop its own personality while removing as many environmental variables as possible is exactly what makes this project so fascinating.
Today we're checking in with Plant B.
🌱 Week Five – Finding Her Rhythm
If last week was about recovery after topping, this week was all about momentum.
Plant B responded beautifully to the cut, quickly redirecting her energy into the new leading shoots while the lower branches accelerated their own growth.
She's still carrying that compact structure I mentioned previously, but she's beginning to spread out much more naturally now. The canopy is becoming wider, the internodal spacing remains wonderfully tight, and every branch seems determined to compete for the top.
One thing that continues to impress me is how symmetrical she is becoming.
She almost looks like she planned every branch herself.
The stem has thickened considerably over the past week, giving me confidence that she'll comfortably support the heavy flowers later in the grow.
🌡️ Blue Tent Environment
Consistency continues to be the biggest priority inside the Blue Tent.
This week's average conditions were:
• 🌡️ Day Temperature: 30°C
• 🌙 Night Temperature: 25°C
• 💧 Relative Humidity: 58%
• ⚗️ pH: 5.8
• ⚡ EC: 1.92 mS/cm
• 💨 CO₂: 450 ppm
• 💡 Light Schedule: 18/6
• 💧 Irrigation: 1.2 litres per plant per day
Although daytime temperatures climbed slightly this week, the plants continued growing vigorously with no signs of stress, demonstrating just how resilient healthy plants become when the root zone remains stable.
🥥 Feeding & Irrigation
One of the biggest differences between this project and my previous organic soil grows is the irrigation strategy.
Because coco doesn't store nutrients the same way soil does, the plants are fed little and often rather than receiving larger irrigations every few days.
Each plant now receives approximately 1.2 litres of nutrient solution every day through the automatic Mars Hydro drip irrigation system.
A drip irrigation system slowly delivers nutrient solution directly onto the growing medium through small emitters positioned at each plant. Rather than watering by hand, every irrigation is delivered evenly and consistently, ensuring every plant receives exactly the same amount.
Once the nutrient solution has travelled through the coco, the excess runoff drains away through the automatic drainage system beneath each grow bag.
This is just as important as the irrigation itself.
Removing runoff prevents old nutrient solution from accumulating around the roots, helping maintain a healthier and more stable root environment while dramatically reducing the daily workload.
As someone who has spent years hand-watering plants, I genuinely appreciate how much time this system saves while improving consistency at the same time.
The current feeding schedule is:
• Plagron Hydro A — 1.9 ml/L
• Plagron Hydro B — 1.9 ml/L
• Plagron Hydro Roots — 1 ml/L
The slight increase from last week continues producing exactly the response I was hoping for, with richer colour and strong, healthy new growth.
🕸️ Preparing the SCROG
This week also marked another exciting milestone.
The SCROG net officially entered the grow.
SCROG stands for Screen Of Green.
Rather than allowing each branch to grow vertically on its own, a horizontal net is placed above the canopy. As branches grow through the openings they're gently guided sideways, encouraging the plant to spread across the entire growing area.
Instead of producing one dominant cola, the plant develops dozens of equally exposed flowering sites.
The result is a flatter canopy, more efficient light distribution and, hopefully, a much larger overall harvest.
At this stage the net isn't there to hold flowers.
It's there to guide the architecture of the plant.
Over the coming weeks I'll continue weaving each branch through the net one square at a time, allowing the canopy to fill naturally before flowering begins.
Watching this process unfold is honestly one of my favourite parts of growing.
🌿 Blue Waffle F1 – Plant B
Plant B continues living up to the personality she's been developing since the beginning.
Calm.
Balanced.
Methodical.
She isn't trying to be the tallest plant in the tent.Instead she's quietly building an incredibly organised structure that should become a fantastic SCROG candidate over the next few weeks.
Sometimes the plants that grow the slowest early on end up delivering the biggest surprises later.
I'm very curious to see whether she's one of them.
👀 Looking Ahead
Next week should be all about training.
With the SCROG now installed and both new leaders growing strongly after topping, the real canopy shaping begins.
From here onwards the objective changes completely.
We're no longer trying to grow taller plants.
We're trying to grow wider ones.
Every branch will now be guided with one simple goal...
To create an even canopy capable of making the absolute most of every photon produced by the Zamnesia Phytonaut LED.
The adventure is becoming even more exciting.
💙 Thank You
A huge thank you goes to Zamnesia for making Project Blue Tent possible, from these incredible Blue Waffle F1 genetics to the complete ecosystem surrounding this grow.
A heartfelt thank you to Plagron for providing the Premium Coco Growbags together with the Hydro nutrient line that continues making my transition into coco both enjoyable and educational.
A special thank you to Mars Hydro for the automatic drip irrigation and drainage system that has become an essential part of this project. Although this isn't a sponsored product, it's one of those pieces of equipment that simply works. It has brought consistency, cleanliness and peace of mind to the grow room while allowing me to spend more time with the plants and less time managing runoff.
Thank you to GrowDiaries for giving growers from all around the world a place to document their journeys, learn from one another and build such an incredible community.
And finally...
Thank you to every single person reading these updates.
Whether you've been here since the first seed cracked, recently discovered Project Blue Tent, leave comments every week, quietly follow along, or simply enjoy the photographs, every visit, every conversation, every question and every word of encouragement helps make this journey even more rewarding.
I hope you're all having an amazing week, and I can't wait to share the next chapter of this adventure with you.
Until then...
Growers Love, happy growing, and I'll see you all next week. 🌱💙
Likes
14
Share

@HazeLiebhaber
Follow
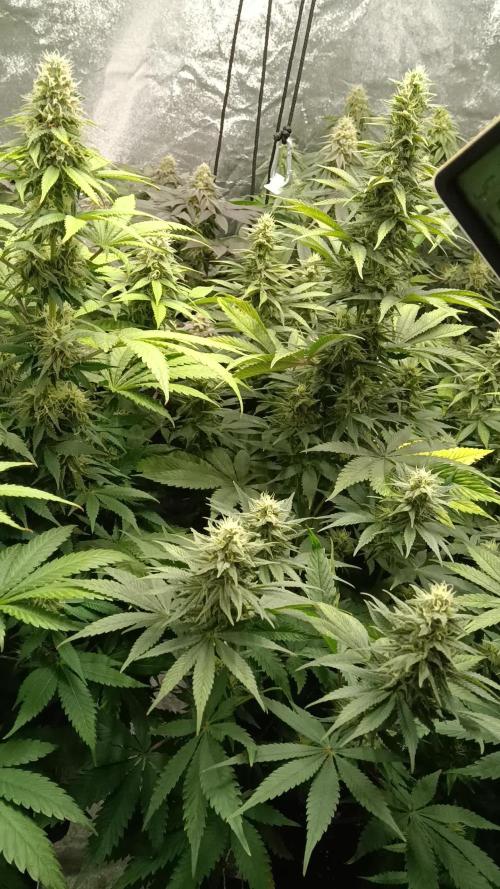
Die Lemon Orange und die Grapefuel Gelato haben bereits ordentlich an Blütenmasse zugelegt und auch so einige Orange-braune Pistillen entwickelt. Die beiden werden wohl als erstes fertig. KISS und Amnesia fangen gerade damit an, an Blütenmasse zuzulegen. Denke die beiden werden mind. eine Woche länger brauchen, um fertig zu werden, als die anderen beiden.
Die Pflanzen im Video: vorne-links Amnesia, hinten-links Lemon Orange, hinten-rechts Grapefuel Gelato, vorne-rechts KISS.



Likes
36
Share


@nonick123
Follow
Día 108 (16/09) Tras el flush las plantas muestran tímidamente nuevos pistilos blancos! 😍
Hoy no es necesario regar!
Día 109 (17/09) Me he encontrado a OnionOG #1 y a Purple Punsh completamente sedientas! Con las hojas caídas!
Riego con 1,25 litros de H2O a cada una de ellas (el resto no necesitan riego)
Día 110 (18/09) Riego con 500 ml H2O
Las plantas con el bloqueo empiezan a mostrar nuevos pistilos, sobre todo en las partes inferiores
Día 111 (19/09) Riego con 250 / 500 ml H2O
Se vuelven a formar pistilos blancos en todas las plantas que han sufrido el bloqueo! 😍💥
OnionOG #1 va como un cohete formando y apilando flores 💪 🚀 😍
Día 112 (20/09) Día lluvioso. Riego ligero 250 ml H2O
Día 113 (21/09) Otro día lluvioso. Riego ligero con 250 ml
Día 114 (22/09) Detecto algunas moscas blancas apoderándose de las plantas y decido hacer una aplicación foliar de piretrinas (Spruzit a 15 ml / l)
Riego con 1 Litro de Té Floración de Lurpe Solutions. Preparación: 24 horas con bomba de aire (oxigenación) con ingredientes:
Healthy Harvest 8 ml/L + Insect Frass 16 ml/L + Kelp Hidrolizado 0,3 g/L
💦Nutrients by Lurpe Solutions - www.lurpenaturalsolutions.com
🌱Substrate PRO-MIX HP BACILLUS + MYCORRHIZAE - www.pthorticulture.com/en/products/pro-mix-hp-biostimulant-plus-mycorrhizae
Likes
28
Share


@WEED_SPACE
Follow
September 8 will be considered a day for the first time, Day 1
and I’m desire to call names Auto acid is “Tiwa” and Auto Kong 4 is “Ratree”
🍀🍀🍀🍀🍀🍀🍀🍀🍀🍀🍀🍀

Likes
4
Share

@HeavyHittah
Follow
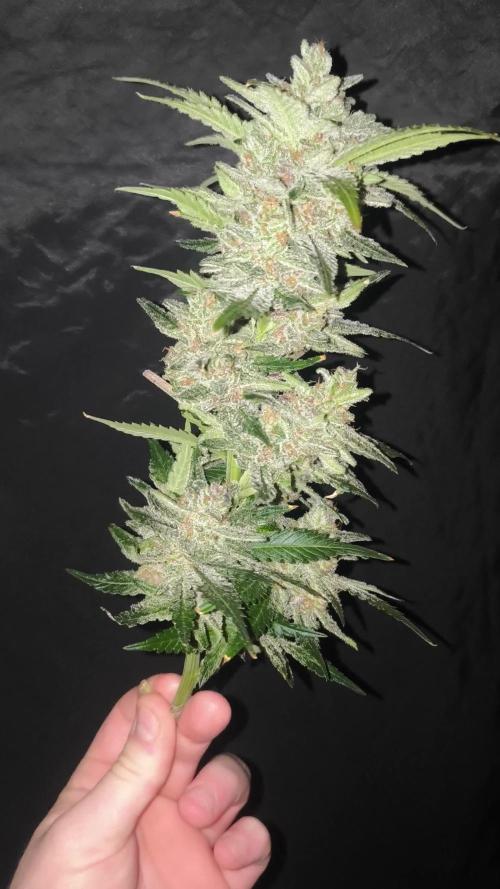
Real easy plant to grow. A dream for LST she takes it very well and will give you a uniform plant. Some real nice looking buds with hints of purple. They are dense too. After a week curing it is a very nice indica with white ash, a relaxing strain that packs a punch.
The yield is average but the buds are high quality. Autos just seem to get better each year.
Next up I will be trying the new and improved Banana purple punch RF3. I also have a strawberry gorilla seed I will use. Going for 4 big XXL yielders next.
I am happy with the yield in total this run but I can improve that.
Final result :
Gorilla Z 130gram
Frostbanger 142 gram total : 272g
300 watts used = 0.91 gram per watt.
Great results
I recommend frostbanger to anyone it's finished in 65 to 70 days grows just like a feminised and it's very easy to train. 10/10 auto genetics.
Likes
3
Share


@Trinidad
Follow
02.07.25. Day 46
These ladies have gone out of control. Not much time. Had to make airport runs. Family staying over at my house. I have been trying to keep things as discreet as possible so I have them locked up in the loft with highs of 34°C or 93°F. I changed out reservoir today with 3 liters of water in each pot.


Likes
1
Share


@MindFlowers68
Follow
Some of the plants showing more signs of yellowing from watering issues and ph issues. Luckily I was able to get a nice strong batch of Boogie Brew compost tea made and gave them all a nice soak and bath with it. Within two days all but one of the plants bounced back. Now that the plants are able to fend for themselves a little better was a good opportunity to try to harden them off the ones going outside to the elements outside. I did so by placing on a shaded part of my deck for a few hours. I was also able to get my tent inside ready and they were moved from the small cool grows tent to my 4x8 tent with my big lights. I adjusted the light to be around 500 PPFD at canopy.
Likes
35
Share

@PEAKYPLANTERS
Follow
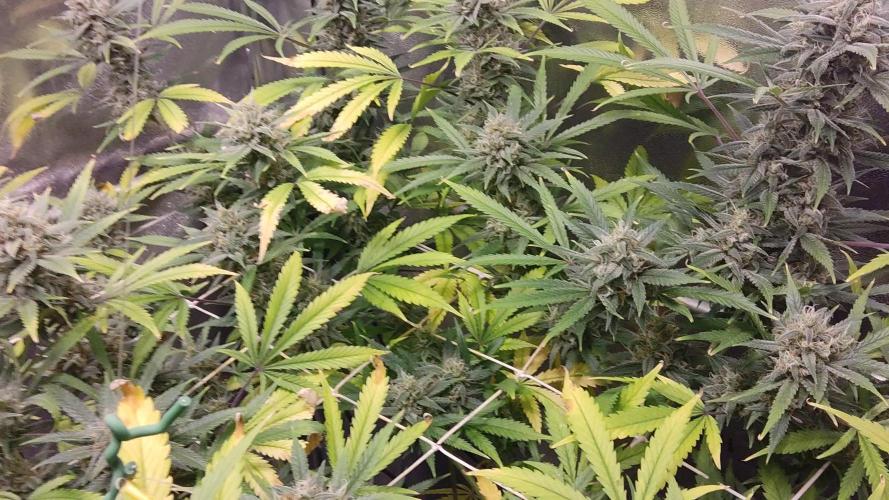
Sorry for the delay, gentlemen, we've had some pretty hectic days, but the boss is back!

Likes
9
Share

@birdmountain
Follow
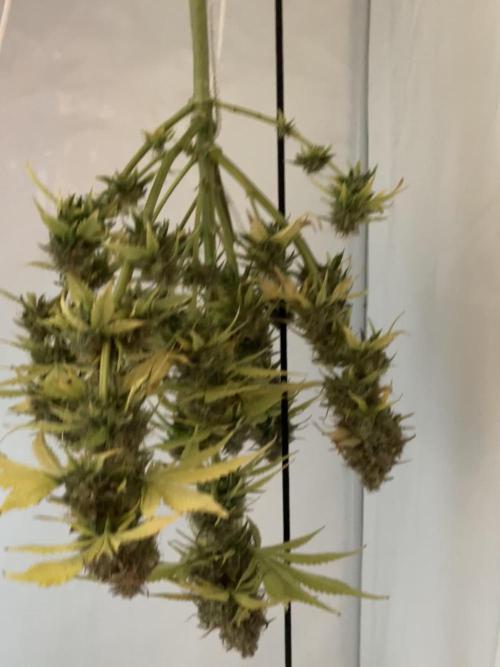
Der zu betreibende Aufwand um noch mehr aus der Pflanze herauszuholen hätte sich nicht mehr gelohnt. So stand sie noch 36 Stunden im Dunkeln bevor sie geerntet wurde. Sie hängt nun in der Growbox und wird langsam trocknen und ich noch gegen ende des Monats enen Rauchbericht abgeben können.
Likes
81
Share


@m0use
Follow
SPONSORED DIARY===SPONSORED DIARY===SPONSORED DIARY
This is my diary entry into the Dynomyco Show Us What You Got Contest!
#DynomycoShowUsWhatYouGot!
@DynomycoShowUsWhatYouGot!
Big Shoutout to @Dynomyco for picking me in their contest. Happy to be involved and as a user of Dynomyco I am curious to see this side by side with my own eyes. I will be honest I am a little skeptical it will show any major differences. but we will see what happens. Some disclaimers, I am still using LABS serum I made as well as MIIM Miicrobial Mass. These are also beneficial to the root mass however they are bacteria based and not fungal or mycorrhizae like Dynomyco.
https://growdiaries.com/giveaways/DYNOMYCO_Show_Us_What_You_Got
I was going to use my own clones I made from the g13 labs grows I just finished but released I had used a Dynomyco in the medium when I was rooting them for a extra strong start. So to fix this little error I went out and purchased two Cherry Pie clones from a local grey market dispensary. I joked Dynomyco will cover the cost and yet to hear back from them lol.
I have inoculated one clones rootball and the transplant medium with Dynomyco, the other clone and its medium got no Dynomyco. The Dynomyco Clone is on the left in photos, it's also the only pot with a mini glass thermometer. I did this exact thing in my Dr Seeds Granddaddy Purple Diary vs 60day wonder. I don't expect it to count as an entry but more of a 2nd side by side on two different strains. GDP vs 60DW. Hopefully I will get some stickers in my package and can label the pots as such. I used my own personal stash of Dynomyco as I have not been shipped the contest materials yet but the clones where good to go an I wanted to get this beast on the way.
The plants will be grown outdoors and transplanted at min 2 times max 3 times.
Nursery pot to 1Gal, "this weekly entry"
1Gal to 2Gal, "3-4 weeks away"
and finally 2Gal to 3Gal maybe. "6-8 weeks away"
This week 1 entry is the first transplant from nursery pot to 1Gal, I have sheltered them inside for the first few days as we got heavy rainfalls and I did not what that to be to much of a shock for them, they are in my Spider Farmer tent under 24/0 lighting with the SF1000 @60%, they should be good to make their way outside tomorrow if the weathers good. I have noticed I have a lot of outside light interference on my balcony with all the safety lights in the surrounding areas buildings. I am going to try and LST these plants to keep them low and below my balconies wall to avoid excess light pollution. about 3 feet high.
Likes
13
Share


@Drawer
Follow
A sad week, I found bud rot and had to take my plants out and do a big check and remove all dense underdeveloped growth.
It will be a pretty big hit on the yield I guess but the most important thing is learning and that I did.
The bud rot could spread due to my RH being 65/70 at nights and it used to be +80 before, + bad airflow.
I got new fans in the tent and my dehumidifier was ordered already but its not in yet.
On the other side, the plants are looking pretty damn good, they smell amazing
and 3 of the 4 plants is getting a very dense nug structure.

Likes
5
Share


@Terpio1500
Follow
Week 2
I got Pistils showing
Gelato Cake.
Check out my other Dairies (The New & Jungle Verde)
Nutrients (floraflex) are in Grams/gal*
Light: HLG
Follow my IG @therealterpio for more updates & content!
Likes
4
Share

@hyperborean
Follow
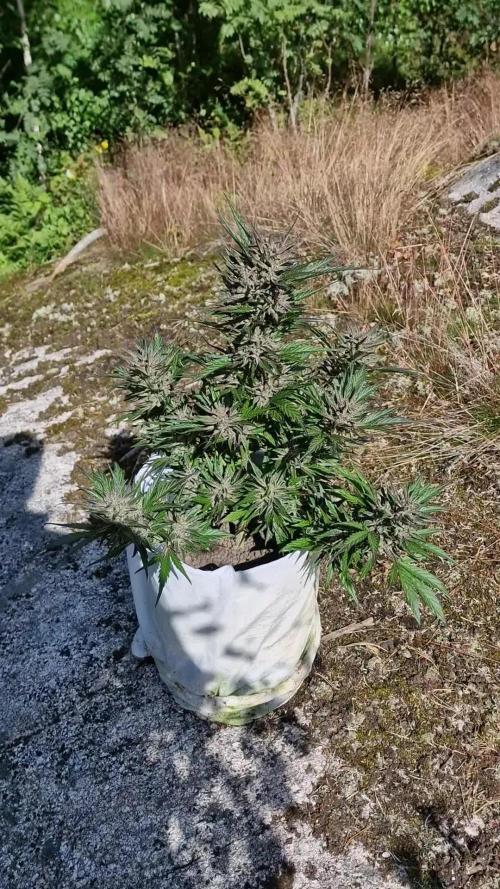
Pictures and update day 85.
Smaller lafanta harvested today. I picked bigger leafs of and will her let dry before trimming more. Only very slight mold, could've kept it for a week more, but I decided to take it down for balanced cannabinoid profile hopefully.
Lots of resin, but leafy. Not much limonene, mostly myrcene scent what I get from her.
Bigger plant will stay for another week atleast.
Thanks for being here and happy growing to you.
