


Likes
Comments
Share


@dfgh95
Follow
This week I planted two of them, Juana and María. I used a plastic glass of aprox 350ml, hoping my new babies will grow normally this time. I used a bit of mycorrhizae fungi powder and watered them with the soution described above.
I'm germinating another seed and it will be ready at the end of this week.
Well that seed didn't pop up so a friend gifted me another runtz seed and a critical pruple from Geaseeds. The critical already poped up and Tomorrow 27/06 she will be in her new home, right next to Juana and Maria. The last Runtz is still germinating.,they don't germinate at the same rate, that's strange, is the first time I see that in the same genetics.


Likes
9
Share


@CrazyRussian
Follow
Another week just passed. I have reduced the main flowering nutrient by 1ml, because I’ve introduced Plagron Green Sensation as an additional flowering nutrient. This thing increases your yield incredibly! If you start looking at bud formations starting this week, you will notice significant changes.


Likes
4
Share


@musashi_miyamoto
Follow
D1 is a bit more hybridy than D2 (and/or just stronger). No tiredness from D2
D1 tastes amazing in vape, better than D2 but something about D2’s smoke is nice - the geranium undertones. Bottom line D2 is perfect day smoke
After curing 3 weeks: D1 lemony and sweet, really good flavor profile
D2: earthy-floral (ocimene), woody-pine, def most unique odor profile
Flavors:
D1: lemon (w grinder), apple (top note), sweet (top note)
D2: berry (?), flowers (geraniums), tropical (?), pine; spices (not sure which)

Processing
Likes
20
Share


@Divs_darkroom
Follow
She is doing great. Starting to put on her bulk. Today I have her a tea that I brewed for 24 hours. It consisted of be-1 pellets, be-2 humics, worm castings and grokashi. She has been praying to the light and loving life.

Likes
27
Share


@LockDownGrow
Follow
This lady is just about ready too come down , I will get her down tomorrow
Smell is strong and she is frostie as hell ,
She has been in darkness for 3 days now so she will be chopped down on day 6 of week 11 :)
Processing
Likes
6
Share


@Jack_Greenstalk
Follow
sour 76 stopped stretching at 22, 23 and 24 inches. yeti number 4 stopped at 32 inches, while yeti 3 stretches another few inches as sour "tower" begins stacking and starting to trich up
Likes
4
Share

@Ninjabuds
Follow
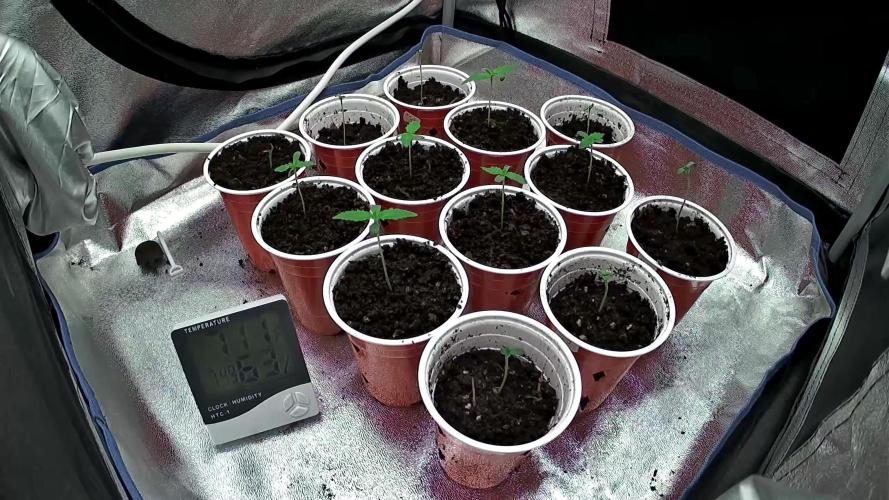
Lit Marker is my new houseplant, and they're slowly but surely growing into a little ray of sunshine! I love watching the leaves unfurl, it's like witnessing a brand new life. I’ve heard that Lit Markers thrive with a little morning sun and some gentle misting on their leaves. I’m still learning about them, so wish me luck on this plant-tending journey!

Likes
3
Share

@GoodTimesOrganics
Follow
Hi liebe Community! 💚
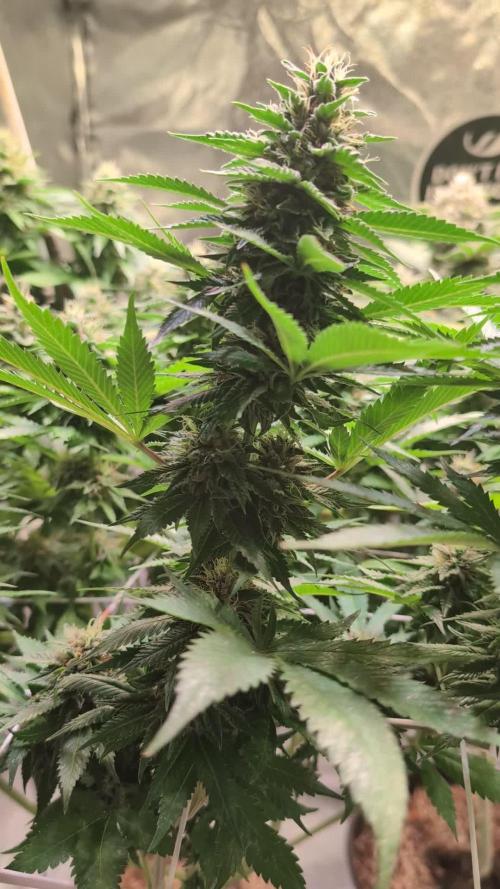
Allmählich beginnt die letzte Blütephase unserer ersten Eigenkreation und der Geruch entwickelt sich aktuell sehr stark.
Bis jetzt zeichnet sich ein süßess, zitroniges Aroma ab mit einem Hauch von Karamell.
Leider gab es einen Thripsbefall, welcher jetzt gerade erst wieder am abklingen ist.
Likes
19
Share


@HisHope
Follow
6/21 Week 9
Tricones at 50% clear 50% milky
She is building so fast we have had to trellis her branches (bamboo and jute) to keep them from snapping even with the SI in her cells.
Continuing PK for now hold CocoTek where it is as she is going into her last week of nuets
We do not want to start that flush until we are satisfied its time and at the rate she is building it aint today and may not be till the end of the week.
We still think this a 300 gram dry plant at least, she seems to be putting on several grams a day of flower so every day is a weeks worth of CBD.
6/23
Pics later
Trics at 75% milky 25% clear want more mature before taking away all her nuets
Removing PK she is slowing down greatly only waiting on the trics to flush
Reduced Lights on to 18 hours
Plant and grower
6/24
Reducing lights on to 16 hours
Showing off her buds and trics a little
6/25
Light hours were reduced for heat (its hot this week) nothing else. Off during heat of the day.
Begin Flush this evening trics are 80+% milky plan on using an agent for the first flush just water thereafter.
6/26
Day 2 of flush no major def yet
6/27
Ok the deficiency fairy showed up last night, seeing mostly CA which does not surprise at all, and Mag.
Still she is managing to build a bit of bud.
Likes
2
Share


@pzwags420
Follow
week 3 i defoliated and increase nutes to week 3 strength. Liking the growth I'm getting from these phenos especially #1. At the end of week 3 Pheno # 1 is deff growing the best but I will flower out other 2 as well. Stem rub giving same smell on all 3 phenos. I cant describe smell of it yet but it is different then anything else I have now or have run in the past.
Likes
31
Share


@Flauros
Follow
Пережил дефицит Кал-мага и засол почвы почти весь цикл. Справился с этой проблемой, дал не плохой урожай и приятный накур. Реально пахнет конфетами.
Likes
15
Share


@Chubbs
Follow
420Fastbuds
FBT2313/Week2
Weekly update for these 2. I started seeing some rust spots so I decided to add a little General Hydroponics Calimagic at 0.25tsp/gal to my feed. So far seems to stop. I also decided to start a very light dose of nutes General Hydroponics 3 part flora series at the same 0.25tsp/gal to every other feed to see how they'll respond. All in all Happy Growing.
Processing
Likes
32
Share


Likes
25
Share

@wolfvb
Follow
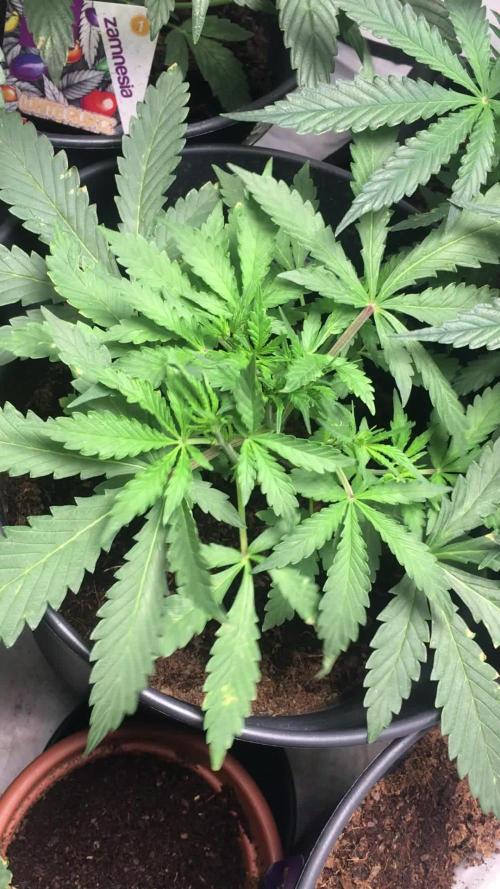
She responded very well to the toping and now we are going strong into week 4, been a smooth ride so far. Even through the cold days
16.01.26
Smooth week so far

Likes
21
Share

@Theia
Follow
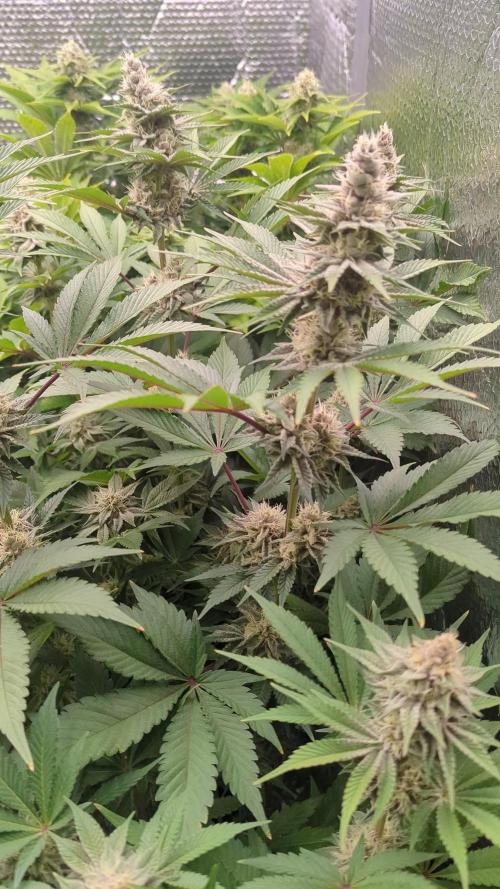
The Tropicana Cherry hasn’t suffered from any of the issues the three Triple Cheese in the room have. I’m guessing it’s something to do with those hybrid properties. It’s bred from Cookies, which was developed under high-power LEDs, while the Triple Cheese line is so old it might not be as stable under this kind of intensity. That’s my stoner thought, anyway. It’s also possible the Tropicana Cherry just has a more aggressive rhizosphere!
Who knows. You can see the anthocyanin influence deepening in the calyxes and sugar leaves and I think she looks stunning. The smell is sweet and fruity. This plant in particular is making some serious frost; I’ll never know if it’s the UVB unless I run two rooms with a control, but that’s not happening so I’ll just keep going with it. Beyond the protein stimulation, it’s also pretty good at killing bugs and pathogens.
The calyxes are swelling and starting to tower on top of each other. They look like they might burst—really chunky and still a way to go. o/
I’ve spent quite a lot on the environment this run. We’ve had horrid weather in the UK and high RH is a daily fight. I maintain a steady 1.1 kPa lights-off and ramp to a target of around 1.35 kPa for lights-on.
The main thing I learned this week is about immobile nutrients. Calcium being immobile is actually quite easy to spot when you’re watching for it. Since I have that Calcium Benchmark to look back on I have plans for the next run to make a source of CaSO4 available in the form of ground Gypsum mixed into my 40% amendments mix. Since I'm using the Biotabs water-only method having that slow-release Calcium should help prevent those rusty spots from showing up when I drive them hard.
There is more I’m sure but I can’t remember right now... lol
Grow well.


Likes
371
Share


@love_2_grow
Follow
D43.
The first day in the first week of flower, and everything is great in the tent.
The girls both look healthy, vibrant, and strong.
I transplanted the clones into small pots, and they are now waiting to go to new homes as I won't keep any of them due to lack of space.
------------------------------
D45.
All is well in the tent, and the girls are already stretching after flipping. I moved the fans to get them out of the way. Space is always an issue. #JustSmallTentProblems
I am still dialing in the drip system, so it's working correctly before I go on vacation.
I also removed the mushroom growkit from the tent as no mushrooms have grown so far. I'll wet it again and see what happens.
------------------------------
D47.
The girls are looking fantastic. They are vibrant and healthy, and pray hard with their leaves toward the light. They have already stretched a fair bit, and the branches are also fattening up.
I did medium defoliation below the scrog by removing most leaves and branches that won't make it up to the light. I left a few shorter branches to see if they'll make it up into the light.
Finally, I gave them a fulvic foliar spray just before lights out. As we're heading into flower, I suspect this was their last foliar feed. Though I might do one preventative IPM foliar spray. I haven't had any problems so far, but just in case. Easier to prevent a problem, than to solve the problem.
------------------------------
D49.
The end of the first week of flower, and the girls are just rocking the tent.
However, I need to address the RH, as it is a bit high for flower.
Yesterday, the entire tent was without power for five hours, so there was no light or exhaust. Fortunately, one of the circulation fans has a built-in battery and at least kept moving the air around.
------------------------------

Likes
35
Share


@Eryan
Follow
Day 15 - Watered again today. Plant grew quite a decent amount and the stem has finally begun to thicken. Will need a bigger humidifier for sure, and then one that can automatically keep humidity at a certain %
Day 16 - Growth is definitely starting to take off. Stem is finally getting thick enough to where LST seemed to be a good idea to start. Smell is getting stronger, but still can only be sensed when holding the plant to your face. Will probably need to plant into the final container in a week. Going to also add another light (105 W) by the end of the week.
Day 18 - Watered, got new humidifier. Just using that for now in the whole room, since it gets too dry in here anyways with the heating.
Day 19 - Transplanted to what should be the final container today. Was a good time to transplant too, the roots were beginning to bunch up at the bottom of the previous container. Using Atami Bio-Growmix as the soil now. Accidentally damaged one leaf during the transplant. Stopped with LST for today to let the plant recover a bit from the transplant. Then will resume it tomorrow. Might be trying out SCROG...but first will read more about it. Also thinking of FIMing soon...but also going to read a little more and let the plant recover more from the transplant first.
Have another lamp now, the 105W. However, didn't realize that it has a low kelvin value. So getting a couple of new higher kelvin lamps soon. Will just use the 105W in combination with a 125W during flowering.
Smell is increasing, but not noticeable outside the tent.
Day 20 - FIMmed today. Not sure if it was a great idea, the part taken off seemed to have possible beginnings of flowers inside. Not certain though, so yeah...will see what happens 😅. The third set of fan leaves turns out to be 7 leafed, so she went straight from 3 leafed for the second set to the 7 leafed. Is that a good thing...?
Also resumed LST.
Day 21 - Seems like the plant might be recovering from the FIMing. Temperatures got way too low last night though, at 60 degrees. Since two 125W lamps (5500K) are being used now, the temperatures are getting a bit warmer, from 78 to 80 degrees. So it's important that the night temperatures don't get that low again. Was thinking of eventually doing three 125W lamps with the 105W for blooming phase, but that will probably be too warm even with an extraction fan (the 105W, being older, produces more heat than the 125W). Not yet sure what will end up being done for the blooming phase lighting.
Tomorrow is week four...flowers will probably start appearing soon by the end of the week. Hope it's been able to fully recover from FIMing by then.

Likes
6
Share


@Magical_Surgeon
Follow
After you found some good sector and clone it you let the mycelium grow and fill almost all the petri dish like I did last week.
So now you're ready to move forward.
Making grain spawn!🍄🍄
For grain you can use Organic Rye Berries, but you can also get away with wheat berries, or brown rice or even corn kernels(which I used myself) !
And you'll need some mason jars or honestly I used some jars that I had home just clean them very well and sterilise before using
Making a grain spawn can be broken down into 6 easy steps.
🍄Hydrate Grain By Soaking
🍄Make Specialized Lids
🍄Simmer, Drain and Dry The Grain
🍄Sterilize
🍄Put your agar in the jar
🍄Colonize
🍄Soak the grain by placing it in a bucket, covering in water, and leaving it for 12 -24 hours. Easy.
🍄Drill 1 hole on top of the lid. Right in the center and cover with a small dab of high temperature silicone sealant, and leave it overnight to dry. And your jars are done. There other diff types for different methods like liquid culture etc. But I'm just going roughly through what Ive done.
🍄The next step is to simmer the grains on the stove. This will thoroughly hydrate the grains, and will soften them to make them easier for the mushroom mycelium to consume.
Cook soaked grain on the stove for about 15 minutes. You don’t want to cook it too long, because eventually all the grain will crack and you’ll get some mushy grain spawn. We don't want that. 🧐After the grains have simmered on a low boil, you’ll need to drain them off. What I did is I drop them in the sink with the drain cover on. The grains will drain over an hour or so, after which you can go ahead and fill your jars.
🍄Once your jars are filled, they need to be sterilised.This kills off all the other nasty contaminants in the grain cover the lids in tinfoil (to prevent water dripping into the lid) and then just pressure sterilise them for about 90 minutes at 15 psi.
🍄After that let them cool down. Get your SAB, wipe down the walls with some alcohol wipes and place the jars inside. And wait untill they will be warm to the touch... not hot and painful 😤patience is key. Bring in your plates that had been stored by you in a dark place. And what u have to do is sterilise your scalpel and just accurately and efficiently decide your mycelium into about 10 pieces and quickly place them in your jar. And complete for every jar u make. You have to be very quick. The more you keep you're jar and your agar plates lids open the more cans they will get contaminated. There certain technics you can see online..
🍄Ones you're done close all your jars lids tight and Jake your jar so the mycelium pieces will mix around the jar and place them in the dark place to colonize. And just keep waiting... 😅 Untill the mycelium will conquer your grain. Keep your eyes on the jars, any weird smells or colour during the waiting time.. because that would mean you got a contamination going on. Oh yeah and when about 55% of your jar is filled with mycilium shake the sh*t out of it so it will break the mycilium inside and make spread more faster.
Likes
2
Share


@valiotoro
Follow
Hello everyone 🤩
she grew fast and with a beautiful green colour on the leaves!
She has responded superbly to low stress training and topping & i defoliated her aswell and seems didn't even notice 😎
For the nutrient half grow half bloom and power buds 1ml/L
Spider Farme SE7000 70%
Wish you all a good day and happy growing 😎