


Likes
23
Share


@420DeepGrow
Follow
Toda esta fantasía se hace realidad gracias a Royal Queen Seeds y @James por confiar en mí. 🚀💥
Fiel a su linaje genético, la Hyperion F1 ofrece un aroma intenso que está dominado por notas frescas de pino y hierba, junto con un trasfondo terroso y un delicioso toque especiado. Aunque todos nuestros híbridos F1 producen excelentes concentraciones de cannabinoides y terpenos, no hay duda de que la Hyperion destaca entre el resto. Sus cogollos alargados y escarchados producen una resina rica y cargada de cannabinoides (sobre todo THC), y terpenos como mirceno, ocimeno, farneseno, terpinoleno, cariofileno y humuleno. Esto no solo da lugar a un aroma muy fuerte, sino también a un efecto bien equilibrado que combina una relajación física (en gran parte gracias al mirceno y al farneseno) con la euforia, risa y efecto motivador de otros terpenos. Al igual que el dios de la luz del mismo nombre, la Hyperion F1 causa un subidón esclarecedor que se puede disfrutar a cualquier hora del día.
🌻🚀 Consigue aqui tus semillas:
https://www.royalqueenseeds.es/semillas-de-marihuana-hibridas-f1/622-hyperion-f1.html
🍣🍦🌴 Xpert Nutrients es una empresa especializada en la producción y comercialización de fertilizantes líquidos y tierras, que garantizan excelentes cosechas y un crecimiento activo para sus plantas durante todas las fases de cultivo.
Consigue aqui tus Nutrientes:
https://xpertnutrients.com/es/shop/
📆 Semana 6:
Parece que el temporal por fin se va a pasar esta semana, todo esto le ha afectado y se va a quedar algo mas pequeña de lo que debería.
Se aprecian las primeras preflores ☺️.
Voy a empezar a aplicar abono de floración 🔥

Likes
3
Share

@UDUDUDUDU
Follow
It's time someone took things to da next level'
They have moved into de ground to start being real plants.
One week in everything is going perfect, even de rain is soft & gentle.


Likes
12
Share


@Terpyboyz
Follow
This grow should be coming to an end next 2 weeks or so some are looking to be in the last stages, only issue is having multiple strains is strains finishing at diff times.
There’s one exodus cheese that looks like she’s going to go 10/11 weeks but she’ll be cut well before that to start a new batch.
There’s 3 clones that were taken
1 being a big Buddha blue cheese that absolutely reeks of tangie/Clementine terps with a slight sour cheesey smell. This is getting revegged and cloned for the next run.
Ripper seeds - this is another strain I’m going to try to reveg as this is another keeper I should have taken cuts.
Platinum x harachata - 2 different pheno / one with rock solid nugs other is more Sativa.


Likes
8
Share


@JamaicanDream_420
Follow
De momento hubo dos que germinaron mal y seran repuestas por otra Gorilla cookies y la otra por una cream caramel auto,fallo tambien una northern,por lo demas todo bien,segundo riego desde germinacion con poquito de calmax y gooooo..Segundo riego de la semana a 50ml x planta aplicando algun nutriente pero sin subir mucho la Ec a 0.69,hasta la proxima semana budyyes


Likes
2
Share


@Chubbs
Follow
420Fastbuds: Germination Week
Papaya Cookies Auto
This grow I decided to rerun another of my favorite strains. I started 14 seeds by soaking them in a glass of water for 48-72hrs then planting directly into the soil. Within 48hrs all 14 sprouted and emerged into there journey of life. Super excited for these and to see how they'll grow. Last time I grew it and Drysifted the flowers and turned it into some premium hash it placed in the Universe Cup in Germany. All in all Happy Growing
Likes
26
Share


@siL01337
Follow
I mean it looks like it works..... I can't wait 4 this lovely mix of indica and sativa.... I want to taste and smell the ready product... But it needs 2 months of cure minimum.....
Likes
Comments
Share


@Slap22
Follow
Been forgetting to upload on here have not had many issues besides keeping heat down and humidity up but I’m getting a new led light for flower
Likes
17
Share


@Bobo_Zion
Follow
Just did some pruning of the lower level leaves that were yellowing or about to fall off. Found one of those pesky army worms 🐛 on one of the ladies growing in a 1 gallon pot, wasted no time putting an end to his career as a cannabis connoisseur ☠️ ⚰️. Other than that everything's as normal as can be I guess.
Likes
27
Share


@LockDownGrow
Follow
This lady is just about ready too come down , I will get her down tomorrow
Smell is strong and she is frostie as hell ,
She has been in darkness for 3 days now so she will be chopped down on day 6 of week 11 :)
Likes
4
Share

@MaltaHerbman
Follow
Finally Harvest day 😘
Smell is great how i had say on other weeks all house smell of this dank berry.Buds are nice and super sticky cant wait to try it.
Will plant more from this .


Likes
6
Share

@CalGonJim
Follow
1/19 1am MONDAY...TOO STONED TO TYPE..WHAT THE HELL IS THIS THEN..HEY SHUT UP....WAIT...IS THAT ME?😂
1/19 5 AM.🚨 I GOT THE HOLY TRIANGLE OF WEED THE WHOLE FUUCK'N TRAILER PARK IS HERE!!!!! Finally got black tea Tangie in the ground so Julian bubbles and Ricky are all growing with Montel and ice t.
1/20 1:20PM VEGING PERFECT AT 30 WATTS!!!
1/21 10:11 AM. The whole fucking park is here. Julian sprouted!!! Bubbles and Ricky are doing great. I’m gonna top them and then I’m gonna start them over from clones so they grow roughly the same time as Julian and I’ll keep the Ricky and the bubbles others as mother plants and I’ll just keep them going.
1/21 10:15 AM vegging 12 inches 30 W Samsung LED Mars Hydro light perfect
121 1:10 PM I moved black tea Tangie into the germination station. The 2 gallon fits in here just fine. This will be fine for germination.. She’s sprouted only after about 40 hours so she’s really strong.
1/21, 2:54 PM. I made a my own Star Wars movie. Special effects are incredible. It’s very removing made my own Obi-Wan.A CalGonJim Production 🎥🍿
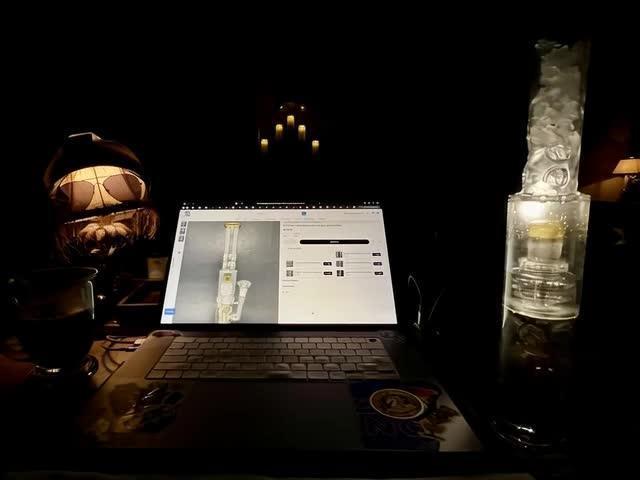
1/21 11:56PM Stoned Genie bong arrived today. my 2nd from them. Nice, this one has an ice catcher. got here in 2 days. 👍


Likes
30
Share

@Natrona
Follow
6/28-7/4 W9 F6
Hello Friends,
We have had several thunderstorms this week due to the heat. We are under a heat advisory with temperatures reaching 100 with a heat index to 110 the rest of the week.
I defoliated a few yellow fan leaves. I top dressed with azomite and rose and flower fertilizer and watered well.
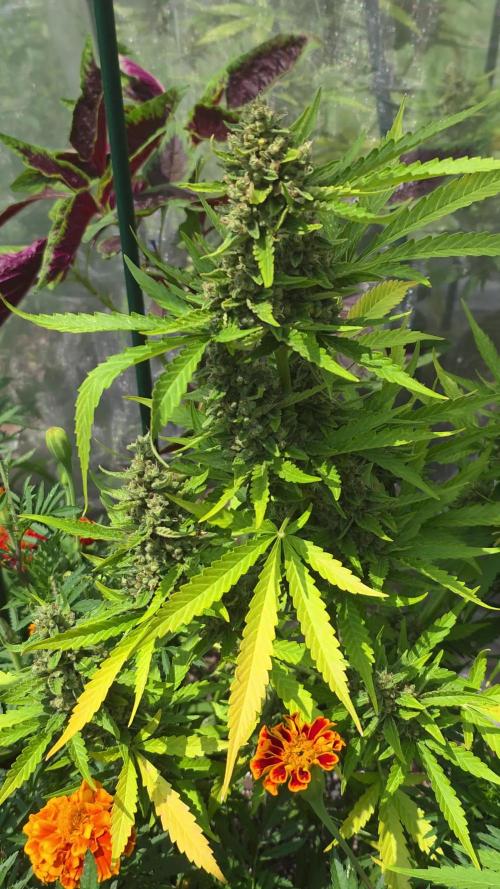
Trichome formation is well underway but only a few pistils are turning brown. I took some microscope pics to see her progress. She remains mostly clear and some milky. So far, no pests (using mesh bag) and no mold issues. Wedding Cake has reached her max height at 29 inches tall. Next week the weather looks the same. Hot and humid.
That’s all for this week.
Stay green, growers love 💚🌿
💫Natrona💫

Likes
5
Share


@Zeaiache
Follow
En su Nuevo suelo y con los microbios ganaron vigorosidad, las hojas están frondosas, y sus tallos engordaron, la verdad siento que prometen mucho 😈


Likes
6
Share


@Hommero75
Follow
End of week 3 for this for GG4 Sherbet FF.
She is taking her time to develop. I still have issues in the strain strength. The leaves keep getting the brown spots and dying. I had to remove all the bad and dead leaves. She is getting her cal-mag to help her with any deficiency . I will keep my eyes on her. Hopefully week 4 is better
Likes
19
Share


@alex1515
Follow
привет всем, и еще одна неделя позади и ближится конец и наслаждение...не могу понять что пошло не так и листья стали немного гореть, может сильно яркий свет....но уже нечего не поделать будем заканчивать гров так...
Likes
16
Share


@SirBudAlotts
Follow
Wow! So I have reached the end of this journey with 4 wonderful ladies 🚺 ❤️ 💕..
This was the easiest grow of my life lol! And she packed on size and stinky aromas everywhere..
Big shout out to the Kannabia Team!!!! Excellent strain, amazing colors, fat Colas, everything that makes you smile during harvest! Thick Frost coating..
Also big shout out to everyone that has been keeping an eye on this diary..Much love from my heart grow community ♥️
Perfecto 😀😃🌿🌿


