


Likes
Comments
Share


@GreenHouseLab
Follow
Day 35 looking like these will go 9+weeks, buds are stacking good size buds well over 3ft and should prove to little no trim with this cultivar.


Likes
10
Share
@Arcadium
Follow
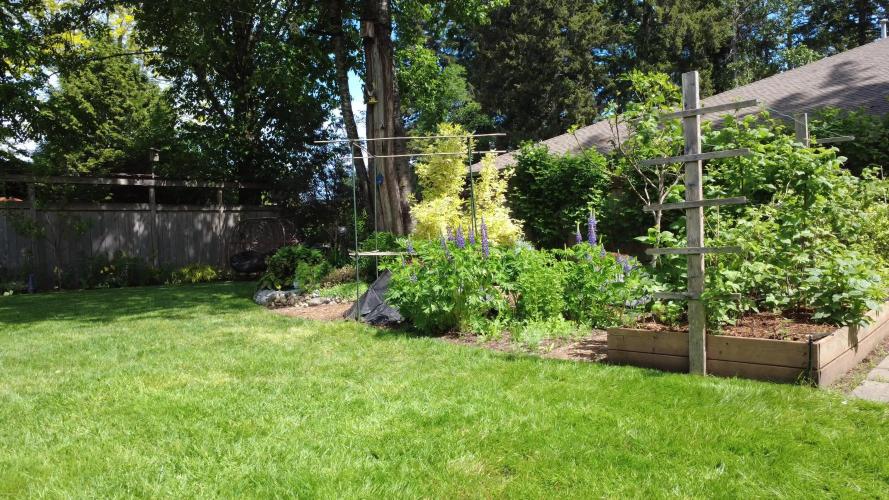
HOT wild heat wave roll through 30c. Had some minor yellow discoloration on the small one, maybe full does of silica +30c heatwave lockout?, didn't bother with PH, but she's still rolling through it.
4th round of topping on both, 32, one more before canopy is filled out and she'll go up. Then maybe one more top to even canopy out will see.
Some minor cattepilar damage, but I'm raising an army of Chickadees through nest boxes (bonus pics). A pair of chickadees can use 6000 to 9000 cattepilars to raise a brood to adults. Will hopefuy nab pics of the fledglings any day now, then will try and quickly clean out nest box and they're known to raise a second brood if the food is plenty, and it is
Compost tea tommorow, 5g bucket, 20ml fish / Kelp, 2 Tbsp molasses, aerated 24hr, then silica / diablo max 1/2 dose before watering.

Likes
17
Share


@Eddjack
Follow
Arrivato fresco fresco dalla Spagna si pianta subito.
12/01 12 h in acqua
13/01 l'ho messo in un tovagliolo di carta umido ed è è uscita la prima parte di radice ed è stato trapiantato in un vasetto.
14/01 e uscito dalla terra sfogliando le prime 2 foglioline tonde. Questa è una super partenza 72 h e già cerca la luce.

Likes
32
Share


@Bossman
Follow
Looks like I'm going to be satisfied with the autos and the photos their coming along fine very nicely. I super cropped the one outside and that's turning out fantastic

Likes
74
Share


@Mr_Maes
Follow
Nothing but colas on all 3 this is going to be a big harvest. Another 2 or 3 weeks max.


Likes
14
Share


@Broffel
Follow
The start of week 6 and the Girls are going in to flower so i switch the Light to flower and everything is going good
The midlle of week 6 and no problems
Almost the end of week 6 and the Girls are doing some nice stretching
The end of week 6 and the Girls are doing great. The only difference i can see between airpot and the normal pot is that the lady in the airpot is drinking a little bit more thn the normal pot


Likes
10
Share

@carlitoshaze44
Follow
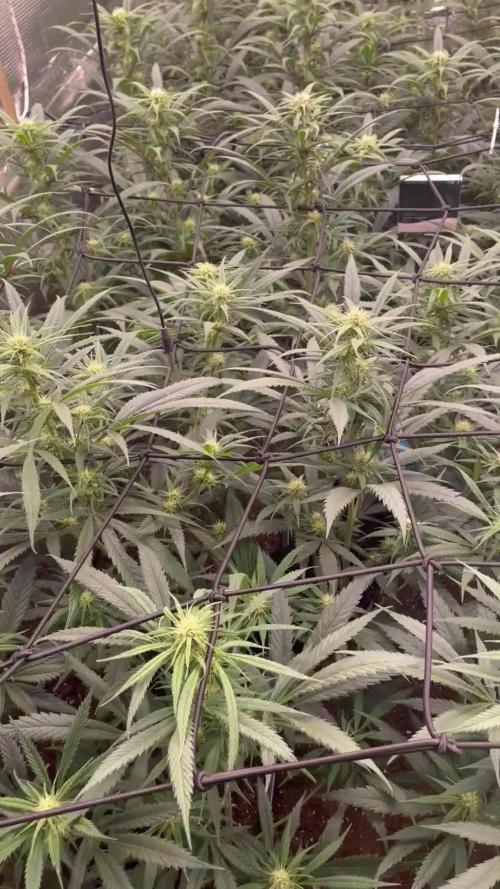
Día 20!!! Estamos en el punto de comienzo de la 4 semana de floración ! Esa en la que notamos como el cultivo nos da el cambio que queremos y a partir de los dos vemos como
Nuestras flores evolucionan de una manera u otra dependiendo de clima,genética,nuestra mano con ella etc..
Vamos a comenzar la media floración bien cargados con la paleta de nutrientes alta en potasio y nitrógeno!
Siempre añadiendo también,nuestras mañanas de agricultor.
Tuve el fallo de abrir el tupper de lombrices y echarlas a el cultivo y no poderos grabar el proceso.
Fue algo rápido que hice con el armario apagado..lo tuve que iluminar por un minuto para añadir la bola de lombrices unas 60!!!
La siguiente tanda de flores si empezara a sacarle provecho a estas amigas!!
Deciros que el cambio en altura es muy grande no para aún de crecer!
Y las últimas están engordando mucho las flores a pesar de el corto periodo se ve que nuestra selección de amnesia haze,es un fenotipo muy especial..
Es de unas 8 semanas de floración y muy buena productora!
Día 21
Primer día de la cuarta semana de floración tenemos una escalera
Desde la puerta del armario hacia el fondo tenemos alturas que van 54cm/62cm/71cm/80cm
Gracias a el control individual en altura de cada luminaria iré trabajando con el control de dividir el área en tres Alturas diferentes,así lo requiera cada planta.
Una pequeña planta que está cerca de una rendija de ventilación tuvo unas pequeñas picaduras de tips”.
Observaré si no es de un periodo anterior de antes del fumigado..
Si no es así trabajaré un poco de jabón potásico y ajo!
De momento el olor es muy sutil.
Algunas flores empiezan a producir resina de manera temprana.
Dia 22
Va todo sobre ruedas,un verde lima en las hojas,las puntas tensas y bien firmes esperando el regado de mañana!
Una humedad de un 55% en el armario,cerrándolo con un 59% una vez echo el seguimiento,inspecccion de este en el día de hoy.
Seguimos con una semana de humedad en el exterior del 90% y toda una semana por delante de más lluvias.
Seguiremos controlando la humedad como hasta ahora con los riegos.
Guardo paciencia en las plantas que aún no llegaron a la red,para poder tener un control visual de todas las puntas!
Me alegra ver la cantidad de flores que están produciendo por casi todas partes de la planta y la resina que empieza a producir alrededor de estas,es un gran fenotipo de amnesia haze,con gran rendimiento productivo de flores y resina.
Todo un hacierto para quienes buscan genes de sativa bien marcados con un corto periodo de floración.
Día 24
Primero felices fiestas y feliz navidad a todos.
Mi pequeño jardín de pinos 🌲 jejejej está estos días espectacular,ya comienza a afinar el olor ese toque a madera recién cortada y ese fondo de lima tan característico de las haze,aaag que rico olerá en las siguientes semanas buen fenotipo y no es el más oloroso..
Esta semana la humedad ronda 65% después de un riego que fueron 60litros,más de un litro por planta!.
Justo lo que va necesitando para esta etapa de formación y engorde de flores… espero que en los siguientes días vuelva mejor clima también a esta zona ya que estos días de agua fueron nefastos para la interacción de aire de el exterior..no ayudaban a reducir la humedad.
Deciros que el riego se aplicó el día 23.
Con una EC1300 PH6,3.
Una de las 44 en el último riego sufrió un poco de sobrefertilizacion,mostrando está un poco de color en el tallo,rojizo.
Solo una quedó más pequeña,siendo esta 52 cm.
🏴☠️
Dia 25
Todo perfecto,las plantas están al 100x100
Un color perfecto,las hojas tensas y cojiendo volumen como es debido.
Ya solo queda mantenerlas,y que no sufran ninguna carencia nutritiva ni exceso de esta.
Dia 26
Último riego de la cuarta semana de floración.
Esta vez adaptando el riego subiendo la EC de 1400 a 1700.
En la siguiente semana ya trabajaremos con una EC de 2000,si es que la planta lo permite ya que con la EC de la tabla no me convence.
El PH sube a 6,3 y se mantendra entre 6,2/6,3 en el sustrato.
El siguiente riego será otro con carga de azúcares y aminoácidos.
Intercalando riego sí y riego no el PK 50-30.
Hoy me sorprendió mucho lo definido que es el olor con la humedad ambiental exterior,teniendo la puerta abierta salía un rico aroma que gana más en madera que lima 🍋

Likes
36
Share


@grundoh
Follow
Right now I am just playing the waiting game with White Widow and Industrial Plant. Both have shown signs of maturation with their trichomes but neither one has a majority of milky trichomes yet. In hindsight, I should have waited until Industrial Plant was more mature before I started flushing her -- I've lost a few weeks that I could have been continuing to fatten her up. I added more bamboo rods and tied branches to them with some plant tape on both plants. White Widow's buds are rock hard and keep bending its branches so hopefully the extra support will help.
I cut off the main cola and a side cola of Industrial Plant CBD due to bud rot that I failed to notice for roughly a week. After cutting out all of the bud rot I could find on Industrial Plant I checked over her and White Widow meticulously to make sure everything was kosher. I added a spare oscillating fan in the tent to try and improve air circulation in the room. I have had trouble with humidity and temperature shifts throughout this grow -- something I'll have to dial in as I progress. I imagine the climate shifts combined with how thick the main cola was probably contributed to the bud rot.
Seedsman White Widow Auto is ready to be harvested as of Day 100. Over 2 days her trichomes really started to turn amber. I have started flushing her as of today and plan to harvest a day or two into the start of Week 15. As for Dinafem Industrial Plant Autoflowering CBD? I am thinking of just cutting my losses if her trichomes haven't gotten to at least majority-milky by the time White Widow gets chopped. She just looks mostly-dead and only wants a drink once every 7-10 days now. That and I have some new gear I really want to test out, as well as some different ideas for my second run that I've been itching to get started on.

Likes
62
Share


@MeaCulpa
Follow
2nd round.
Today it was the turn of the White Widows. 100.7g.
Together with the GG#4 they are 135g under one 150W Mars Hydro. I have to cut off a few more leaves. But I am completely satisfied.
Likes
61
Share


@Amaya
Follow
Оборвала веерные листья основного стебля чтобы дать больше воздухопроницаемости.
Текущий NPK профиль такой:
N90:P67:K149:Ca37,5:Mg45
Перевожу на цветение через пару дней.
Likes
4
Share


@frenchylovegrow
Follow
Premier test de one bud sur cette variété et au top pour ce mode de culture de bon bourgeons bien remplit et bien coloré .
Pour un poids final de 75gr
j'ai bouturé a nouveaux mon pied mère et je vous ferait un nouveau journal avec celle ci et des la croissance cette fois si ;)
Bon grow à tous😉

Likes
87
Share


@Mrs_Larimar
Follow
This is Harvest Part2, i harvested the Topbuds 10 days ago
First part were 100g dry, iam guessing for 60 gram more( dried)
This Growoff was alovely Journey and I had alot of fun
I want to thank all the Sposors, that helped us to raise Doations for Woman in Need
@weedseedsexpress
@urban_chili
@greenbuzzliquids
@Herbiesheadshop_com
@genoneeleven_nutrients
@zamnesiaxseeds
@spilffseeds
@Inseediousseeds
@sgreenlab
@royalqueenseedsrqs
@viparspectraled
and all the follower on Instagram and here who liked our Postings
Likes
14
Share


@Dieselnutz
Follow
kicking off week 4. Ran outta house and garden got some jacks comin in the mail hopefully there will be no issues swapping nutes this late in the game. These girls don’t like a lot of food, been feeding between 6-800ppm and still getting some burnt tips.
Likes
3
Share


@DogDoctorOfficial
Follow
Folder 13 — Blue Waffle — Pheno A
Week 2 Vegetation — A New Home Beneath the Surface
Welcome back, growers!
This week marks one of the biggest milestones since germination.
After spending the first week establishing a healthy foundation inside the starter container, Blue Waffle Pheno A has officially moved into her permanent home—a Plagron 8L Premium Coco Grow Bag, where the next stage of her journey truly begins.
Transplant day is always exciting. While the leaves tell us how a plant is feeling above the surface, it’s the roots that reveal the real story. And this week, that story was a very encouraging one.
⸻
The Environment
The Zamnesia ecosystem continues providing a stable and comfortable environment for these young ladies.
Current room conditions:
• Temperature: 29°C
• Relative Humidity: 68%
Airflow remains unchanged from last week:
• Extraction Fan: Level 5
• Circulation Fan: Level 4
Lighting also remains steady, with the LED running at 27% intensity, drawing approximately 86 watts from the wall.
At this stage, consistency is far more valuable than chasing rapid growth. Stable environmental conditions allow the plants to focus their energy where it matters most—building roots.
⸻
Feeding Program
Now that the plants have entered their coco home, the hydroponic feeding strategy officially begins.
The nutrient solution remains intentionally simple:
• Plagron Hydro A
• Plagron Hydro B
• Plagron Hydro Roots
Reservoir parameters:
• EC: 1.26 mS/cm
• pH: 5.83
• Solution Temperature: 23.1°C
Hydro Roots continues playing an important role during this stage, encouraging the rapid development of fresh roots as the plants begin colonizing their new substrate.
The objective isn’t explosive top growth just yet.
Everything starts beneath the surface.
⸻
Transplant Day
Last week the Plagron Premium Coco Grow Bags were slowly hydrated using distilled water, allowing the coco to expand evenly while creating a perfectly moist environment before receiving the plants.
Rather than forcing the transplant into a dry substrate or flooding the bags at the last moment, the coco had an entire week to stabilize.
When transplant day arrived, the process couldn’t have gone smoother.
Using the original nursery pot as a guide, I carefully created a perfectly sized cavity inside each coco bag. This simple step allows the entire root ball to slide into place naturally without compressing or disturbing the surrounding coco.
Sometimes the smallest details make the biggest difference.
A gentle transplant means less stress.
Less stress means faster recovery.
⸻
A Look Beneath the Surface
Before placing Blue Waffle Pheno A into her new home, I couldn’t resist taking a closer look at her root system.
And I’m glad I did.
While the roots haven’t completely filled the container yet, they are beautifully distributed around the entire root ball. Bright white feeder roots are visible across every side, with countless fine root hairs actively exploring the growing medium.
This is exactly what I was hoping to see.
There was no need for a heavily root-bound plant before transplanting. In fact, moving them at this stage allows the roots to continue expanding naturally instead of beginning to circle around the nursery pot.
Healthy roots don’t need to be massive.
They simply need to be active.
Blue Waffle Pheno A is giving every indication that she’s ready to explode into her new environment.
⸻
Blue Waffle Pheno A
Above the substrate, Pheno A continues to impress.
The compact structure remains intact, with tight internodal spacing and excellent symmetry across the canopy.
The leaves display a healthy green colour, while the petioles have started developing subtle purple pigmentation—a characteristic that can often appear naturally in younger plants depending on genetics and environmental conditions.
Most importantly, the plant showed virtually no signs of transplant shock.
Only a short time after moving into the coco bag, the leaves remained upright and turgid, while fresh new growth continued emerging from the center.
That’s always one of the best signs a grower can hope for after transplanting.
It means the plant is already getting comfortable in her new home.
⸻
Looking Ahead
With the transplant now behind us, the next objective is allowing the roots to colonize the entire Plagron Premium Coco Grow Bag.
As the root system expands, so too will the canopy.
The coming weeks should bring noticeably faster vegetative growth as Blue Waffle Pheno A begins taking full advantage of the increased root volume and hydroponic feeding schedule.
For now…
Healthy roots.
Healthy leaves.
Healthy future.
Exactly what every grower hopes to see.
⸻
Thank You
A huge thank you to everyone following along on this journey.
Special thanks to:
• Zamnesia for the incredible genetics, equipment, and complete ecosystem that make this project possible.
• Plagron for supplying the Premium Coco Grow Bags and the Hydro nutrient line that now powers this grow.
• GrowDiaries for providing an amazing platform where growers from around the world can learn from one another.
• And finally, thank you to every member of this incredible growing community. Whether you’re just starting your first grow or you’ve been cultivating for decades, your support, advice, and passion make this hobby something truly special.
The roots have found their new home.
Now it’s time to watch Blue Waffle Pheno A reach for the sky.
Growers Love and Keep Growing. 🌱💙🍁
Likes
4
Share

@Ensign420
Follow
|»» LOG DISCLAIMER: Not intended as a grow guide. Grow log entries are usually posted 3 weeks later and are for my learning reference. ««|
Introduction - Week 16 Summary -
Ensign's log, stardate 17547.8,
Wow what a great week in the garden!
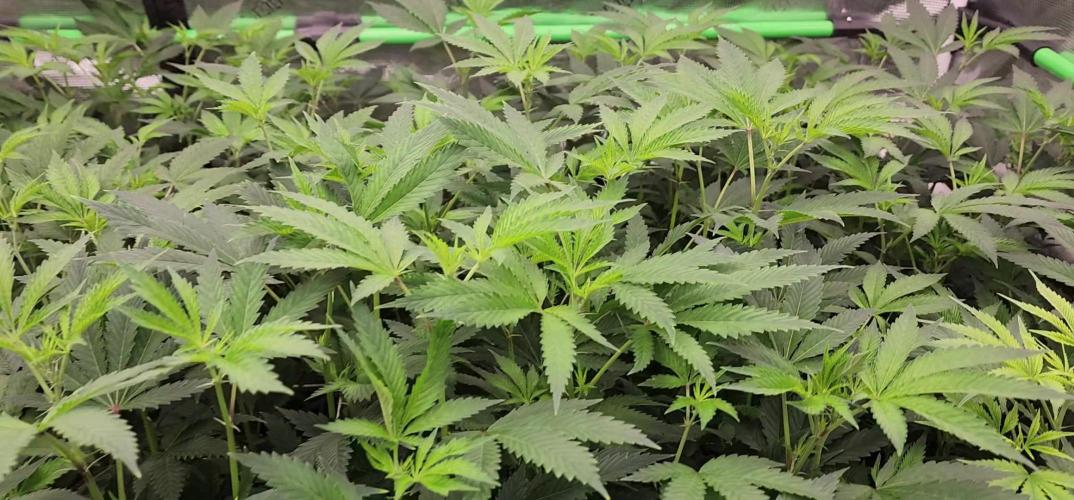
By the end of the week, the main tent has pretty much doubled in size! Upgraded the scrog frame and now have a second layer of netting about 14in above the original netting which is already filling in and looking incredible! The tent’s floor slightly flooded, but fixed it. Also trying Stash Blend for the first time!
As for the veg tent. To preserve the genetics, started the mother plant cycling process and took more clone cuttings (which were rooting in Coco Coins by the end of the week). To make more room, also bonsaied all mother plants.
The stretch is starting to slowing down and next week begins the first week of bloom!
Ca-Caw! Let’s go! Onwards Ensign!
[START OF WEEK 16]
==========================================================
---------- [ 4x4 MAIN TENT ] ----------
Heady OG BX1 #1 [Round4 ~Wk9] - WEEK 16 - Pre-Bloom [Stretch Wk2]
TKO [Round2 ~Wk14] - WEEK 16 - Pre-Bloom [Stretch Wk2]
----------- [ 3x3 VEG TENT ] ------------
Garlic Budder OG#1 - WEEK 09 - Full Veg
Garlic Budder OG#2 - WEEK 09 - Full Veg
Gorilla Goat #1 - WEEK 09 - Full Veg
Gorilla Goat #2 - WEEK 09 - Full Veg
08/04/25 → 08/10/25
This Week's Estimated Goals
----------------------------------------------------------------------------------------------
DLI: ~13 mol/m²/d
PPFD: ~300 μmol/m²/s
VPD: ~1.0 kPa
This Week's Meter Readings & Averages
----------------------------------------------------------------------------------------------
Light On/Off: 19:00 - 07:00 | Wattage: ~326.5W [LV04]
Distance From Canopy: ~31”, 27”
DLI: ~15.60 mol/m²/d
PPFD: ~361 μmol/m²/s
VPD: ~0.69 kPa
Soil %: [40.7, 47.0, 38.1, 56.6, 41.9, 42.7, 42.9, 43.9]
==========================================================
Day 01 - Monday - 08/04/25 - Total Days: 113
-----------------------------------
Daily Averages ~[+01:00]
- Temps: 83.6°F [28.7°C]
- Humidity: 83.6%
- VPD: 0.66 kPa
- Soil %: [49, 37, 45, 60, 44, 43, 43, 45]
-----------------------------------
- [+00:14]: Night check on the 4x4 tent.
--- Holy Cannoli! Wow! These girls are in full stretch!
--- Both cultivars have grown beyond the netting and have stretched beyond the (green) Vivosun’s CFM bars! Heady is a bit low on the left, but the canopy is pretty even and perky!
--- Ca-Caw! Let’s go cuddies!
--- Heady OG (BX1 #1) is starting off shorter than TKO, but am pretty confident that she’ll catch up.
--- TKO is looking incredibly healthy! She’s the larger plant, but also in the smaller 20-gallon pot. Well she is 5 weeks older than Heady OG so makes sense. Regardless of the growth difference, absolutely stoked for this grow cycle!!
- [+12:19]: Checked the Ecowitt soil moisture sensor data:
------------------ [ 4x4 MAIN TENT ] ---------------
------ 46% - [CH01 FT » G30 - Heady OG BX1 #1]
------ 37% - [CH02 FB » G30 - Heady OG BX1 #1]
------ 48% - [CH03 BT » G20 - TKO]
------ 62% - [CH04 BB » G20 - TKO]
------------------ [ 3x3 VEG TENT ] ----------------
------ 41% - [CH05 BL » GR7 - Garlic Budder OG#1]
------ 44% - [CH06 BR » GR7 - Garlic Budder OG#2]
------ 40% - [CH07 FL » GR7 - Gorilla Goat #1]
------ 50% - [CH08 FR » GR7 - Gorilla Goat #2]
--------- Veg: 38% - 45% | Flower: 45% - 55%
--------- General: 30% [Dry] «| 45 - 60% [Moist] |» 70% [Wet]
- [+00:14]: Checked the 3x3 veg tent.
--- Ooo yea! The veg garden is looking incredible!
--- All mamma plants are looking bushed out and beautiful!
- [+00:37]: Super-cropped and bend the canopy down a bit.
--- Lowered the canopy down a few inches. Really need to defoliate soon. The top growth is bushing out and getting really thick!
--- Clones are also looking incredible and both are rotting along beautifully! Heady is going to make it and she is looking great!
- [+00:38]: The cuttings are looking good for the most part. One is looking pretty droopy (damnit Ensign).
--- Misted the cups with RO water.
--- Think the RH may not be consistent enough and the cups might be drying out too quickly.
- [+00:41]: Checked the humidifiers.
--- Tanks are still full and no leaks found.
--- Another day done!
--- Okay! Since growth is raging upwards, decided to upgrade the scrog frame and plan to add a second layer tomorrow.
--- Ahh yea! This grow is turning out to be an epic one!
Day 02 - Tuesday - 08/05/25 - Total Days: 114
-----------------------------------
Daily Averages ~[+01:00]
- Temps: 83.3°F [28.5°C]
- Humidity: 83.3%
- VPD: 0.67 kPa
- Soil %: [49, 38, 47, 62, 41, 43, 43, 45]
-----------------------------------
- [16:25]: Evening check on the 3x3 veg tent.
--- Ooo yea! The clones are looking incredible!
--- The cuttings still seem to be struggling.
--- Hmm.
- [16:27]: Misted the cups with RO water.
--- Made a slight modification and wrapped the top of both cups with plastic wrap.
--- Cut a slit from the middle to the edge. Misted the cup through the slit with RO water (2-3 sprays each).
--- Then gently slipped the cups over each cutting.
--- Also slightly misted each Coco Coin with RO water.
--- Great! This should hopefully make a better seal and will keep the RH higher. I think.
--- Anyways!
--- The mother garden is vegging along beautifully!
--- Growth is getting really bushy and need to do a heavy defoliation soon.
- [16:56]: Checked the Ecowitt soil moisture sensor data:
------------------ [ 4x4 MAIN TENT ] ---------------
------ 48% - [CH01 FT » G30 - Heady OG BX1 #1]
------ 36% - [CH02 FB » G30 - Heady OG BX1 #1]
------ 47% - [CH03 BT » G20 - TKO]
------ 61% - [CH04 BB » G20 - TKO]
------------------ [ 3x3 VEG TENT ] ----------------
------ 41% - [CH05 BL » GR7 - Garlic Budder OG#1]
------ 43% - [CH06 BR » GR7 - Garlic Budder OG#2]
------ 41% - [CH07 FL » GR7 - Gorilla Goat #1]
------ 49% - [CH08 FR » GR7 - Gorilla Goat #2]
--------- Veg: 38% - 45% | Flower: 45% - 55%
--------- General: 30% [Dry] «| 45 - 60% [Moist] |» 70% [Wet]
- [19:03]: Night check on the 4x4 tent.
--- Ooo yea! Wow these girls are stretching!
--- Growth has clearly grown since the last checkup and getting taller!
--- Ca-Caw! Let’s go ladies!
- [19:14]: Wait. Uh-Oh!
--- The tent seemed to have flooded slightly.. DAMNIT ENSIGN!
------ [» A FEW HOURS LATER.. «]
--- Okay! Think I figured out why the tent flooded and how to fix it.
--- The main reason was the new soil sensor which was probably not in proper contact with the soil.
--- Fixed this by re-seating the unit. Also adjusted the drip ring a bit.
--- Also poured about a cup of water straight onto new sensor. This should make the surrounding soil wetter and will hopefully fix the dry pocket. I think.
--- For added redundancy, added additional trigger conditions to both Ecowitt WittFlows (TKO and Heady OG).
- [23:45]: Adjusted the watering triggers for the auto-watering system for TKO.
--- Changed the ON trigger from:
--------- When CH3 soil moisture is under 45%
------------ Updated to:
--------------- When CH3 soil moisture is UNDER 45%
--------------- AND When CH4 soil moisture is UNDER 50%
--- Changed the OFF trigger from:
--------- When CH3 soil moisture is OVER 50%
------------ Updated to:
--------------- When CH3 soil moisture is OVER 50%
--------------- OR When CH3 soil moisture is OVER 50%
--- Applied similar watering triggers for Heady OG.
--- Changed the ON trigger from:
--------- When CH1 soil moisture is under 45%
------------ Updated to:
--------------- When CH1 soil moisture is UNDER 45%
--------------- AND When CH2 soil moisture is UNDER 50%
--- Changed the OFF trigger from:
--------- When CH1 soil moisture is OVER 50%
------------ Updated to:
--------------- When CH1 soil moisture is OVER 50%
--------------- OR When CH2 soil moisture is OVER 50%
--- Will check back daily to make sure the flooding has completely stopped.
--- Well that pushed everything back a bit.
--- Okay! Anyways,
- [23:57]: Time to both build and install the second frame and netting. Let’s go!
--- Got four 1in PVC corner fittings (local Lowes) along with four 1in PVC pipes (10ft long each). Also got more self-tapping screws.
--- For the netting, using mason string. Usually use the braided nylon, but the twisted variant is a lot cheaper.
--- To build the frame, I cut the 1in PVC pipes down to two different lengths:
------ [» x2 @ 42.5in «] – Front / Back
------ [» x2 @ 44in «] – Left / Right
--- This makes the frame slightly thinner from left to right.
--- Saving the extra piping for future projects.
- [+04:04]: Okay! The new frame is built and looking sturdy!
--- Did not use any glue and simply dry fitted each component.
--- For easier fitting, smoothed the ends of each pipe with sand paper.
--- Also marked each pipe to indicate the front, back, left, and right sides.
--- For the fittings, used corner fittings and have open slot facing downwards. This way I can add the legs.
--- After the frame was built, marked and drilled screws about 3in apart (self-tapping). Made sure to mirror the screw spacing on the opposite side.
--- Time to weave the netting!
- [+04:06]: Using some mason string,
--- Started at one corner and strung all the horizontal lines.
--- Double-wrapped each screw.
--- After the horizontal lines were strung, continued and wrapped the vertical lines.
- [+04:44]: Now that the frame is built and the netting fully weaved, time to install the frame!
--- First the support poles. Cut and sanded more 1in PVC piping.
------ [» x4 @ 14in «] – Vertical Support
- [17:56]: Installed the back support poles before the front ones.
--- Temporarily removed the front CFM bar and had to raise the fan up a bit (was not easy, but got it done).
--- Once the support poles were installed, gently set the new frame on top.
- [+06:07]: Done and wow she’s a beauty!
--- Well that took a bit longer than anticipated (also the flooding did not help), but glad the frame fit perfectly and the netting looks great!
- [+06:12]: Checked the humidifiers.
--- Tanks are still full and no leaks found.
--- Ooo yea! What a day!
Day 03 - Wednesday - 08/06/25 - Total Days: 115
-----------------------------------
Daily Averages ~[+01:00]
- Temps: 83.9°F [28.8°C]
- Humidity: 83.1%
- VPD: 0.69 kPa
- Soil %: [42, 54, 43, 60, 42, 43, 43, 45]
-----------------------------------
- [+00:17]: Night check on the 4x4 tent.
--- Ca-Caw!! Let’s go cuddies! Growth is looking beautiful and green!
--- The second layer of scrog netting was not the easiest to install, but wow the garden is looking incredible!
--- Both Heady OG and TKO are still stretching upwards with new nodes branching out everywhere!
--- The canopy hasn’t reached the top net yet but hoping a few will make it.
--- Regardless, absolutely hyped for this flower cycle!
- [+00:23]: Checked the 3x3 veg tent.
--- Looking beautiful in the veg garden!
--- Wow the mothers have bushed out and have reached the grow light!
- [+00:32]: Super-cropped and lowered the canopy
--- The canopy is getting really thick! Plan to do a pretty heavy defoliation tomorrow.
--- Clones look great and stoked that both Heady OG and TKO seem to be rooting along in the cups. Need to check the weights. Let’s go!
- [+00:37]: Here are the starting initial watering ranges:
------ Heady OG BX1 » 261.4g → 301.2g
------ TKO » 240.9g → 301.4g
--------- General Solo Range: [Dry] «| [Initial Cup Weight] + ~55-100g |» [Wet]
--- All cups were last watered 5 days ago.
- [+00:37]: Took the starting weight of both clones before watering,
------ Heady OG BX1 weighed 250.4g
------ TKO weighed 240.9g
--- Oops! Probably should have watered earlier, sorry ladies!
--- Stoked that Heady OG is clearly going to make it! Also good to know the soil dryback can be at least 10g from the initial pre-saturated weight.
--- Anyways!
--- While on a scale,
--- Gently misted the straw mulch of both cups with RO water.
--- Focused on the straw and sprayed as evenly as possible.
--- Misted 10-20 sprays. Waited a moment, then misted again.
--- Made sure to reference the watering weights.
--- Repeated this process for both cups.
--- There was no runoff.
- [+01:08]: Took the saturated weight of both clones after watering,
------ Heady OG BX1 » 335.5g
------ TKO » 345.1g
--- Marked the final wet weight on the back of each cup. Also marked the watering date on the front.
--- Placed both phenos back into the tent.
--- Cuttings are looking better!
--- Glad that the slight modification to the cups helped to keep the moisture in (covered both with plastic wrap).
--- Gently removed both cups and re-misted each with RO water (~2 mists).
--- Carefully placed the cups back onto the cuttings.
- [+01:21]: Checked the Ecowitt soil moisture sensor data:
------------------ [ 4x4 MAIN TENT ] ---------------
------ 34% - [CH01 FT » G30 - Heady OG BX1 #1]
------ 52% - [CH02 FB » G30 - Heady OG BX1 #1]
------ 39% - [CH03 BT » G20 - TKO]
------ 58% - [CH04 BB » G20 - TKO]
------------------ [ 3x3 VEG TENT ] ----------------
------ 44% - [CH05 BL » GR7 - Garlic Budder OG#1]
------ 47% - [CH06 BR » GR7 - Garlic Budder OG#2]
------ 41% - [CH07 FL » GR7 - Gorilla Goat #1]
------ 46% - [CH08 FR » GR7 - Gorilla Goat #2]
--------- Veg: 38% - 45% | Flower: 45% - 55%
--------- General: 30% [Dry] «| 45 - 60% [Moist] |» 70% [Wet]
- [+01:23]: Checked the humidifiers.
--- Tanks are still full and no leaks found.
Day 04 - Thursday - 08/07/25 - Total Days: 116
-----------------------------------
Daily Averages ~[+01:00]
- Temps: 84.9°F [29.4°C]
- Humidity: 82.0%
- VPD: 0.75 kPa
- Soil %: [32, 51, 37, 57, 42, 43, 43, 45]
-----------------------------------
- [09:42]: Quickly checked on the propagation dome (in the 3x3 veg tent).
--- Nice! Clones are both looking great!
--- Heady OG is clearly recovering and looking better!
--- Wow! TKO is looking incredibly healthy! Top growth has perky leaves with a few nodal growth sites starting to stretch. As far as cloning, she has been healthiest with no issues the entire way!
--- Both Heady OG cuttings are looking beautiful and should be rooting. Plan to check for roots in a few days.
--- Plan to do a pretty heave defoliation today.
--- Also going to start the mother plant cloning process.
- [17:12]: Evening check on the 3x3 veg tent.
--- Mother garden is looking beautiful and the canopy is bushy with growth!
--- Both Heady OG and TKO clones also look green and healthy!
--- My main focus for today is the veg garden and the preservation of the genetics .
--- Lots of work to do and time to also start the mother cycling process!
--- This time, going to do a pretty heavy defoliation!
--- Going to pretty much bonsai each mother while taking a few clones to preserve the genetics.
--- Let’s go Ensign!
- [17:58]: Filled a measuring cup with 1.5 cups of RO water.
------ Added 1/8tsp of Horticultural Aloe
--- Mixed the solution and poured it straight into a clear solo cup.
--- Repeated this process until 4 cups were filled.
- [18:05]: Also marked each cup with the corresponding mother plant name.
--- Time to defoliate and take the clone cuttings!
- [18:07]: Using a pair of trimmers (AC Infinity),
--- Bonsaied each mother plant. Removed over 75% of overall growth leaving several branches and nodes.
- [19:44]: Done and wow what a difference!
--- Pretty much removed all growth leaving a few nodal growth sites to heal.
--- This is my first time going this heavy and am hoping that they recover.
--- If this bonsai defoliation heals up with healthy growth, this can also be an alternative to a full plant cycling.
--- Anyways!
- [19:46]: To preserve the genetics, made sure to cut clone cuttings from each mother plant.
--- To ensure successful rooting, took several cuttings.
--- Made sure to clean each cutting by trimming most of the branches off leaving the top one or two nodes.
--- Did not cut any leaf fingers and made sure to cut the tip of the stalk (about 45°) before placing into the cup of aloe solution.
- [19:55]: Placed the fresh cuttings into the 3x3 veg tent.
--- Have each cup resting on top of the corresponding mother plant.
--- Okay! Let the two-day soak begin!
- [20:00]: Mulched the trimmings in a paper bag.
--- Since the bottom of the paper bags tend to decompose, have the bag in a used BuildASoil soil bag which should not decompose (these are meant for soil).
--- Also added a bit of Kashi Blend and worm castings to the bottom of the bag.
--- Back to the Heady OG cuttings!
--- Gently removed the cups and misted the inside of each with RO water (~2 mists each).
- [20:02]: Carefully placed the new cups onto the cuttings.
--- Great! Plan to check for roots soon.
- [20:08]: Checked the Ecowitt soil moisture sensor data:
------------------ [ 4x4 MAIN TENT ] ---------------
------ 31% - [CH01 FT » G30 - Heady OG BX1 #1]
------ 51% - [CH02 FB » G30 - Heady OG BX1 #1]
------ 35% - [CH03 BT » G20 - TKO]
------ 56% - [CH04 BB » G20 - TKO]
------------------ [ 3x3 VEG TENT ] ----------------
------ 41% - [CH05 BL » GR7 - Garlic Budder OG#1]
------ 40% - [CH06 BR » GR7 - Garlic Budder OG#2]
------ 42% - [CH07 FL » GR7 - Gorilla Goat #1]
------ 44% - [CH08 FR » GR7 - Gorilla Goat #2]
--------- Veg: 38% - 45% | Flower: 45% - 55%
--------- General: 30% [Dry] «| 45 - 60% [Moist] |» 70% [Wet]
- [20:12]: Checked the 4x4 tent.
--- Ca-Caw! Ah yea! The garden is looking incredible and wow growth is raging!
--- The tallest growth is just barely under the netting!
--- Not much to do in the main tent now but to wait until the stretch slows down.
--- Time to relax and let the grass grow! Let’s go!
- [21:34]: Have an extra stainless steel rack and thought of a better way to hold the solo cups in the veg tent.
--- The cups are balancing on the edge of the pots am concerned that they may tip over.
--- Carefully too each cup out of the tent.
- [21:36]: Placed the rack upside-down in the middle of the tent.
--- Have the rack positioned on top of all 4 pots just above the center floor fan.
- [21:39]: Gently placed each cutting cup onto the rack.
--- The floor fan can easily still blow through the grid of the rack. Great!
--- This should be way more stable while still allowing decent airflow.
- [21:40]: Checked the humidifiers.
--- Tanks are still full and no leaks found.
Day 05 - Friday - 08/08/25 - Total Days: 117
-----------------------------------
Daily Averages ~[+01:00]
- Temps: 84.5°F [29.2°C]
- Humidity: 82.5%
- VPD: 0.72 kPa
- Soil %: [32, 50, 30, 53, 40, 42, 41, 42]
-----------------------------------
- [23:02]: Night check on the 4x4 tent.
--- Ahh yea! The garden is thriving!
--- Both Heady OG and TKO are still stretching upwards and the canopy is getting dense!
--- Wow! TKO has reached the top netting! Heady OG is just under the top netting.
--- Ca-Caw! Let’s go ladies!
- [23:11]: Checked the 3x3 veg tent.
--- The veg garden is looking great!
--- The bonsaied mother plants are still recovering from the heavy defoliation. But growth is looking a lot better than I would expect from such a large biomass reduction. Nice!
--- Cuttings are looking great as well!
- [23:13]: Time to swap the aloe water out!
--- Replaced each solo cup with a clean one filled with fresh RO water (1.5cups).
--- Plan to start using the propagation dome soon!
--- Going to let these soak for another day before transplanting into Coco Coins for rooting.
- [+02:05]: Quickly checked on the auto-watering system.
--- System is still charged and no leaks or kinks found in the tubing.
- [+02:08]: Checked the humidifiers.
--- Tanks are still full and no leaks found.
Day 06 - Saturday - 08/09/25 - Total Days: 118
-----------------------------------
Daily Averages ~[+01:00]
- Temps: 83.4°F [28.6°C]
- Humidity: 83.3%
- VPD: 0.67 kPa
- Soil %: [32, 50, 35, 52, 41, 40, 41, 41]
-----------------------------------
- [07:55]: Quickly checked on the 3x3 veg tent.
--- Looking great in the veg garden!
--- Mothers are all recovering nicely from the bonsai defoliation. Great!
--- Cuttings also look healthy and ready for transplanting!
--- Both Heady OG and TKO clones are looking perky and getting bigger!
--- Heady OG cuttings also looking green and rooting! I think. Will check for roots in a few days.
- [20:58]: Night check on the 4x4 tent.
--- Ca-Caw! This is why we grow! Wow!
--- Also hyped that the canopy is getting dense with nodal growth!
--- TKO has more tops stretching through the top scrog netting! Heady OG has not reached the net yet.
--- Stoked the 14in space in between the netting is filling quite nicely and just going to let everything grow!
- [21:01]: Checked the Ecowitt soil moisture sensor data:
------------------ [ 4x4 MAIN TENT ] ---------------
------ 29% - [CH01 FT » G30 - Heady OG BX1 #1]
------ 50% - [CH02 FB » G30 - Heady OG BX1 #1]
------ 34% - [CH03 BT » G20 - TKO]
------ 53% - [CH04 BB » G20 - TKO]
------------------ [ 3x3 VEG TENT ] ----------------
------ 40% - [CH05 BL » GR7 - Garlic Budder OG#1]
------ 40% - [CH06 BR » GR7 - Garlic Budder OG#2]
------ 40% - [CH07 FL » GR7 - Gorilla Goat #1]
------ 40% - [CH08 FR » GR7 - Gorilla Goat #2]
--------- Veg: 38% - 45% | Flower: 45% - 55%
--------- General: 30% [Dry] «| 45 - 60% [Moist] |» 70% [Wet]
- [21:05]: Checked the 3x3 veg tent.
--- Growth is still recovering quite nicely! This may be my solution to maintain mother plants longer between cycles.
--- Mother clone cuttings are also looking healthy and ready to be rooted!
--- Was originally planning on rooting all of the cuttings, but since the mother plants are recovering better than anticipated, just going to plant one of each pheno.
--- Let’s go!
- [21:23]: Filled a measuring cup with 1.5 cups of RO water.
------ Added a pinch of Quillaja Saponaria Extract [60]
------ Added 1/64tsp of Horticultural Aloe
------ Added 1/32tsp of Mycrobe Complete
--- Mixed the solution thoroughly.
- [21:26]: Dropped 4 Coco Coins into the measuring cup.
--- The coins immediately started to expand.
------ [» ~10 MINUTES LATER «]
--- Placed each fully saturated Coco Coin into half-cut solo cups.
- [21:41]: Using a squeeze bottle filled with Clonex,
--- Gently filled each pre-made hole with Clonex rooting gel.
- [21:43]: Time to plant the cuttings!
--- Using a pair of clean trimmers, made a final 45° cut.
--- Also stripped and scrapped some of the stem’s outer membrane.
--- To help with planting, gave each Coco Coin a squeeze to loosen the coco.
--- Made sure to insert each stem straight and snug with the tip about a 1/4 inch from the bottom of the Coco Coin.
--- Also secured the stem by pinching and pressing in the top of the Coco Coin.
--- Once each cutting was planted,
- [22:11]: Placed each pheno into the propagation dome’s tray.
--- Made sure to keep each clone properly tagged.
--- Added 1/4 cup of RO water to the bottom of the tray.
--- Placed the side extensions onto the tray.
- [22:15]: Misted the top of the propagation dome before covering the cuttings.
--- Vents are fully closed.
--- Also lowered the intensity from 5 to 1.
--- At the current light intensity (LV1), the PPFD is around 110 μmol/m²/s which gives a DLI of 7.13 mol/m²/d under an 18/6 light cycle
--- Will check back daily to cycle the air under the dome.
- [22:17]: Placed the extra mother cuttings back on the rack. Will try to keep these cuttings alive until the planted ones root.
--- Will need to change the water every day or two.
--- Also need to water the Heady OG and TKO clones.
--- Ca-Caw! Let’s go!
- [11:33]: Here are the starting initial watering ranges:
------ Heady OG BX1 » 261.4g → 301.2g
------ TKO » 240.9g → 301.4g
--------- General Solo Range: [Dry] «| [Initial Cup Weight] + ~55-100g |» [Wet]
--- All cups were last watered 3 days ago.
--- Took the starting weight of both clones before watering,
------ Heady OG BX1 weighed 257.0g
------ TKO weighed 259.7g
--- While on a scale,
--- Gently misted the straw mulch of both cups with RO water.
--- Focused on the straw and sprayed as evenly as possible.
--- Misted 10-20 sprays. Waited a moment, then misted again.
--- Made sure to reference the watering weights.
--- Repeated this process for both cups.
--- There was no runoff.
--- Also defoliated and removed the lowest growth on both clones.
- [23:03]: Took the saturated weight of both clones after watering,
------ Heady OG BX1 » 345.3g
------ TKO » 355.4g
--- Marked the final wet weight on the back of each cup. Also marked the watering date on the front.
--- Placed both phenos back into the tent. Have them now resting on the rack (on drip trays).
- [23:14]: Checked the humidifiers.
--- Tanks are still full and no leaks found.
Day 07 - Sunday - 08/10/25 - Total Days: 119
-----------------------------------
Daily Averages ~[+01:00]
- Temps: 83.9°F [28.8°C]
- Humidity: 83.6%
- VPD: 0.66 kPa
- Soil %: [49, 49, 30, 52, 43, 45, 46, 44]
-----------------------------------
- [08:02]: Quickly checked on the 3x3 veg tent.
--- Ooo yea! Looking great in the veg garden!
--- All mothers are still green and recovering. New growth is starting to develop and growth is looking healthy!
--- Quickly checked on the propagation dome.
--- All clone cuttings are looking green and healthy!
- [19:04]: Night check on the 4x4 tent.
--- Ca-Caw! Ah yea! Heady OG has reached the top scrog net!
--- TKO has several tops above the netting and she is raging with healthy!
--- Canopy is also showing more signs of pistil crowning and vertical growth seems to be slowing down. I think.
- [19:07]: Checked the Ecowitt soil moisture sensor data:
------------------ [ 4x4 MAIN TENT ] ---------------
------ 48% - [CH01 FT » G30 - Heady OG BX1 #1]
------ 49% - [CH02 FB » G30 - Heady OG BX1 #1]
------ 36% - [CH03 BT » G20 - TKO]
------ 55% - [CH04 BB » G20 - TKO]
------------------ [ 3x3 VEG TENT ] ----------------
------ 41% - [CH05 BL » GR7 - Garlic Budder OG#1]
------ 43% - [CH06 BR » GR7 - Garlic Budder OG#2]
------ 43% - [CH07 FL » GR7 - Gorilla Goat #1]
------ 43% - [CH08 FR » GR7 - Gorilla Goat #2]
--------- Veg: 38% - 45% | Flower: 45% - 55%
--------- General: 30% [Dry] «| 45 - 60% [Moist] |» 70% [Wet]
- [19:10]: Checked the 3x3 veg tent.
--- The veg garden is recovering beautifully!
--- Since the stretch seems to be slowing down in the main tent, going to give these ladies a little extra.
- [19:17]: Going to feed some Stash Blend for the first time.
--- This blend of beneficial microbes and mycorrhizal fungi also includes a bit of silica which should help during the bloom phase.
--- Also shout out to Mr. Grow It, Rob (from CLTV), and Pigeons420! Stay lifted!
- [19:19]: Filled a pitcher with 16 cups (1gal) of RO water.
------ Added 1/8tsp of Quillaja Saponaria Extract [60]
------ Added 1tsp of Stash Blend
--- Mixed the solution before pouring 6 cups straight into a pump sprayer.
--- Gave the sprayer a good shake before spraying the entire solution onto Heady OG’s straw mulch.
- [19:52]: Repeated this process again for TKO.
--- Depending on how growth develops, may start feeding these ladies weekly.
--- From personal experience, the veg phase can easily be grown with straight RO water.
--- Flower is probably the most important time to feed because there are more roots and the plants are trying to produce more biomass. I think.
--- Anyways!
- [20:10]: In the veg tent, repeated the watering process for all mothers (1 cup + 1 cup RO each).
--- Focused mainly on the straw (2 cups each).
- [20:13]: Checked the humidifiers.
--- Tanks are still full and no leaks found.
--- Wow what a grow week!
--- The difference in growth from Monday until now has been incredible!
[END OF WEEK 16]
Likes
6
Share


@Creatorknbsland
Follow
Crescendo tudo por aqui!tive que fazer uma super crop para caber aqui e parece que vou ter que fazer outro !AS Meninas estão todas bem cabeludas e tb ficando bastante espesso!polinização nos brotos
Inferior esta funcionando ja tem umas sementes! semana que vem tem mais!

Likes
14
Share


@Hazecat_420
Follow
Hermosos colores, exquisito olor afrutado, resinosas, las frutas engordan con normalidad. Terminará de buena manera este cultivo.


Likes
2
Share

@GREENPHOENIX6262
Follow
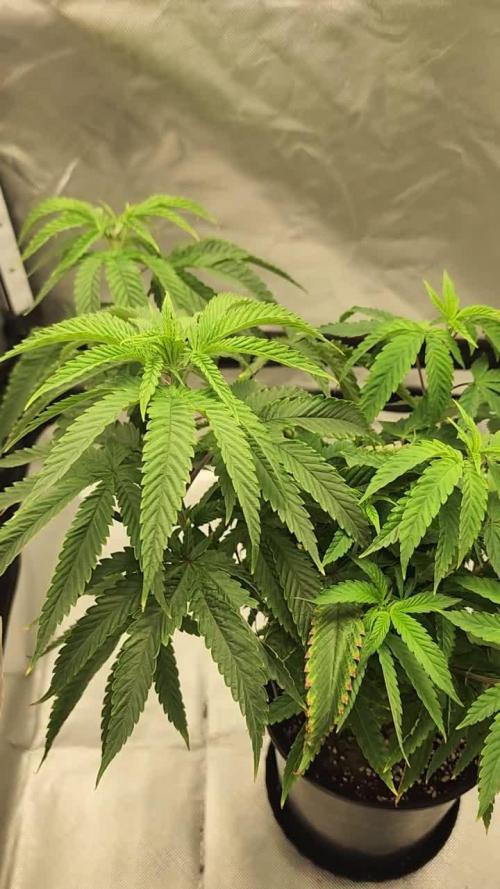
12/21 - Transplanting into a 7 gallon pot (coco/per) - increasing feeds starting tomorrow - swapped lights running the Marshydro 150W full spec - Did some light defoliation 😎😎😎😎😎
