


Likes
Comments
Share


@GrownwithLED
Follow
After germinating the seeds are transplanted into small pots with soil (see tutorial in VIDEO above). The soil is prepared with water mixed with a little bit of BIO NOVA Roots (0,5 ml/l), which aids the development of the seedling. Transplanting is very easy now, because they have grown a STRAIGHT tap-root while hanging during the SERIOUS' WAY of germination. This straight root allows for easy potting of the seeds. Simply make a little hole in the center of the soil with your pinky finger and carefully place the germinated seed with the white root pointing DOWNWARDS into the hole. Best is to lay it onto one side-wall of the hole with the seed shell right at the surface. Then I push the other side inwards and enclose the whole root with soil. At the end only the top of the seed-shell peeks out of the soil. IT IS VERY IMPORTANT to plant the seeds NOT TO DEEP into the soil. The seedling only needs extra strength to work itself upwards thru the soil and you run the risk of the soil drying out and the seed dying off. When you PLANT THE SEED VERY SHALLOW into the soil (=with the top of the seed-shell still peeking out) your seedling can grow out right away and you have a small plant already 24 hours after putting the seed into the soil.
The small seedling sometimes still has the seed-shell on its 'head', it normally falls off by itself, but sometimes you have to carefully help and take it off with your finger nails. Be careful to NOT clip of the seedling accidentally when you do this!
The seed-shall has an inner lining, which feeds the small seedling when it germinates. This inner lining sometimes gets tangled around the stem of the small seedling after the shell has fallen off. This little skin MUST be taken off the stem right away! Once it dries up, it gets hard and can strangulate the seedling around the stem. In order to avoid this, the skin must be taken off as soon as possible! I show it in the pics above and also made a video about taking off the inner lining of the seed.


Likes
4
Share


@estevencueto
Follow
Aquí os adjunto como van esta prueba de cultivo orgánico en base recetas orgánicas 100%naturales.. En la tercera semana recibió su primer riego con nutrientes vivos. Cada 10 días se realizará este te de compost aireado oxigenado por 24h con algún aditivo dependiendo del estado de la planta. Entre cada riego se regara una toma con agua sola y otra toma con enzimas naturales. En este caso el último riego antes del riego de té de compost ha sido un riego de áloe vera fresco. En este último preparado de te hemos añadido cola de caballo a la bolsa de te y agregado el ácido fulvico y la melaza antes de intruducir la bolsa de té. Se aprecia algún mordisco pero las plantas siguen su curso sin mostrar ningún síntoma negativo.


Likes
14
Share


@Salokin
Follow
So far they are both not looking like winners :(, but I’ll keep them runting away for the contest sake. But I can honestly not understand what stunted them like this and caused this kind of mutation. The rock-wool was properly balanced, light was also dimmed, no sign of nutrient burn or deficiency….Very strange. The one that didn’t popped was replaced by an Afghan auto which so far is not showing any issues on the same feed.

Likes
2
Share


@Alejangrow
Follow
The girls look happy so I'm happy. 😁
I think they're done stretching now.⬆️
Excited too see how these turn out. 🌺
Anyone have any experience with strain? 🤔

Likes
5
Share


@Ryno1990
Follow
Week 1 of veg an this Tropicana Cookies auto is looking good growing by the day under this fold 6 from medic grow can't wait to see her in a couple weeks
Likes
27
Share


@R_Dank
Follow
10 days into flower with the first taste of bloom! Happy with how things are going.. don’t know why my videos won’t play

Likes
9
Share


@FrostyCloudzz
Follow
Flush flush
Bigger buds buds
Let’s prepare harvest :)
Did the full cycle from the advanced nutrients feeding chart , know I flush and prepare the harvest , planing a late harvest for more cbn and relaxing high - and little bit other terps
Today 16.02.2025 - blooming starts at 20.12.2024 - D59

Likes
14
Share


@Bigbombbudz
Follow
Ok another week closer....
The girls are stacking and blowing up, everything is perfect....
The room smells like a chocolate store, love it.
Nothing really new ...but started dropping down on PPMs ....if they are not eating the nutrients why feed them it.......
Now is just ripening time...the next couple of weeks ..mmmm can't wait for some Cookies.
Likes
14
Share


@Echevarriaf
Follow
The strain grows pretty easy. She can definitely eat a lot nutes but be careful into flowering her ph tends to swing very slightly but if not caught early can be a bit detrimental later. Grew a 5 ft plant in a 3.5 gallon res and she flourished. Good and fun photo period plant.

Likes
13
Share


@Terp_Djiny
Follow
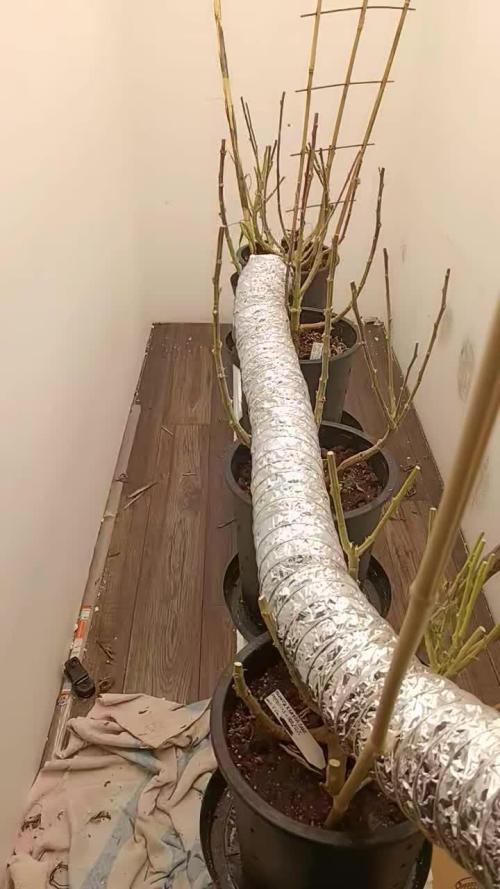
This week will be the last of the 18 hours of light. When the little ones have settled in on the increased light intensity. If the cycle is changed to 12/12 and then the wattage of the lamp is turned to its maximum of 300 watts. Gradually, of course. More on that later. I hope they will show their gender during the week that the bloom can be initiated.
Day 67: It is time for the first flowering phase. Plant 1 shows the first characteristics of the flower or rather it becomes sexually mature. If the others follow suit this week, it is the last week of growth. Instead of cutting out the big leaves, I spread them out under the net. In this way, the light also reaches the lower shoots without stressing the plants during sexual maturity. We don't want to provoke misfortune.
Day 70: 10 weeks of Vegetation. I think it's time for Bloom.


Likes
27
Share

@TrichoWitchka
Follow
Cafteee se👋😃. Mate se?😆 My sa máme úplne, ale že úplne mega peckovo😅. Od samého samučičké radosti ani neviem, čo píšem😊. Doufam,ze ocenis mou nespisovnou češtinou🤣.Tak sme sa dočkali konca😮💨.Hele,no-tak sa pojtme pozrieť na ty naše zelené potvůrky😁🌱. Bylo to 5 týždňov starostí, radosti a potu😅. Hlavne ta moje Drama Queen👑,co furt mala nejaky problem,no a roztočes ktorými som dokolečka bojovala🙈. Prešla som dvoma druhmi hnojiva-ANka a Crazy Hills?. Nemám moc talent opisovať veci, ale určite za mňa bola fajn-vonavá a lepivá😆. Za mňa Runtz x poschodová torta mala najkrajšie kvety-proste rozcuchané KONC jak já ráno🤪🤣. No ale to je tak, keď si vyberáte semínka podľa obrázku a farby obalu 🤣. I hnojky ANka som si vybrala podľa obrazu 🤣. A čo mi celý tento maličký grow dal? Veľa👍.Krome probdělých nocí🤣 v prvej rade hlavne to, že sme okrem práce, našli sme aj spoločnú zábavu s mojím najkulikulinkatejším 🤣Jankem♥️. I keď hlavný iniciátor, projektant a polévač jsem byla já, tak vždy mi byl po ruce i Janko-prosim podej, pridelej, podrž-zadrž nádrž😂, dones, oprav 🧑🔧.... Pre mňa, má toto celú väčšiu hodnotu, než celá uroda🌱. I jemu patrí velké ďakujem♥️?.
Děkuji samozrejme i vám všetkým za každú radu, každý lajk a povzbudenie jak nám to 🌱 prorazí střechu 🤣. Ďakujem vám ?💚. No a zadruhé som zistila, že pestovať konopí, nie je to samé, ako pestovať paradajky, chilly a ine😆. Ďalšie halové kolo, ktoré by som chcela začať niekedy na jeseň, určite nebude trvať 5 mesiacov a určite bude toho menej 😆. Za celou tu dobu tohoto kola môj mobil nafotil do alba 405 fotek🤪
Prajeme vám, ať to roste do krásy i do vône 🌱💚🌞. Baj👋 a nebojte sa- uvidíme sa v OUTdoore🤣 . A ešte ti pridávam nekolik čárek,a keby ti niekde nejaká chybjela,tak si ji tam dosať😂😂😂. NA ,,,,,,,,,,,,,,,,,,,,,,,🤪😂
💚?💚?💚KONEC💚?💚?💚


Likes
Comments
Share


@DawgPoundFarms
Follow
Combined the cop of water and paper towel method then planted the sprouts in root root cubes
Processing
Likes
20
Share


@Mr_nugs_lover_David
Follow
She's looking extremely healthy enjoying lactobacillus made by me and florians living organics full of 10 types of mycorrizae,humic and fulvic ácidas,aminoacids,vegetable hormones and beneficial fungus,also guanokalong extract which is also full of life man! She's just an organic happy girl in a soil full of micro life,thank you everybody peace ✌️ 💚 ❤️ 💛

Likes
42
Share


@rhodes68
Follow
2/14 Week 14 and things get interesting from here
Hell of a journey so far, do not expect that to change now
Just taking care of them and enforcing a good neighbor policy with defoliation
Without going into a lot of detail we looking at a harvest every three days or so for six weeks starting next week, grow will end 4/4 with the harvest of the Green Crack clones at @63 days of flower.
So earlier is possible
2/15 FFT-7 Clones have hit 36 inches already but should not go too much further. famous last words
2/16 Trying all of it on the same feed see how it goes, clones pretty far along think its ok.
2/17 So far so good on the feed, some concern over FFT-7 stretch so what else is new
Had to adjust the Peak running out and deliveries are messed up from weather so stretching it out
2/20 Final update on the week:
Clones are doing well only the FFT-7 proved undependable on the flowering stretch LSD and Green Crack look on track for 36 inches or less, FFT-7 headed to 4 feet
Dropping Grow again on the main flowering feed , clones remain as is, less Nitrogen is needed
Ran out of Soul Peak so full dose of KoolBloom till we get more
Bambi on the block next looks like Monday followed by Chew Mee and Dink Thurs or Friday.
Clearing this tent out so more can come in.
And that was the week that was


Likes
1
Share

@psychonaut420
Follow
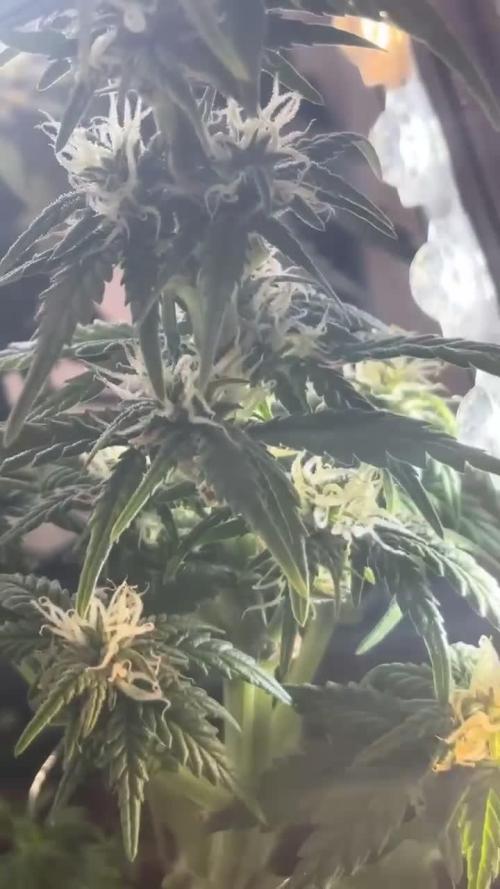
The autoflowers development is coming along well first 2 in the video are lemon cherry cookies auto and last one is frozen face auto the Lemmon cherry cookies have a purple streaks but the first more purple than the second and frozen face auto is bulking up slowly but surely

Likes
3
Share


@stolen_cheese
Follow
Die Pflanze hatte ordentlich durst und hat direkt 10 L bekommen, das sollte erstmal reichen. Zusätzlich wurde sie mit einer hohen Dosis Pflanzengeflüster (Harpin-Protein) besprüht, so früh in der Blüte ist das noch okay, das war aber insgesamt die letzte Anwendung davon.
Einige untere Triebe und Blätter wurden entfernt, manche Triebe wurden via Super Cropping "neu positioniert", sodass das Zelt ordentlich ausgefüllt wird. In der Vegi hatte ich zu wenig Zeit um mich ordentlich um die Pflanze zu kümmern, daher musste das jetzt stattfinden. Hoffentlich ist das nicht zu viel Stress gewesen.
Eingesprüht wurde die Pflanze mit 4 g / 1 L Pflanzengeflüster, bis sie Tropfnass war. Der Rest wurde auf andere Pflanzen verteilt.
Der Drain in der Wanne bleibt und sollte bald aufgesaugt sein - die Färbung davon kommt von der Erde selbst.
Likes
17
Share


@Widukindz
Follow
Everything is going well for this early growth, looking forward to repotting in auto Pot and trying to have a beautiful pink phenotype!
Likes
18
Share


@ButterfliesLittleFarm
Follow
Hello Diary.
The second week of flowering is behind me. I did a little defoliation this week, I honestly didn’t dare remove more leaves and branches, I didn’t know how they would react to it. Maybe I needed more?
The temperature is still high, sometimes rising to 29, 30 degrees, but mostly around 28. Humidity in the air is an average of about 55% but sometimes rises to 60%. The problem is frequent rains this summer which creates high humidity in the air and this affects the humidity in the box as well. But plants tolerate these conditions very well.
The flowers are developing nicely, and they have started to smell as well, but let the pictures speak for themselves.
Green Gelato is twice as small compared to her roommates, but there is still a big crowd in the box. Gelato grew with very dense branches and spread more than it grew in height. The 120 x 60 box size is perhaps too small for three plants (two Hulkberries and one Green Gelato), so the real jungle is in the box.
Due to the height of the Hulkberry in the box, and the spreading branches, it has become difficult to take them out every week for photography, but I am extremely careful with them.
The Green Gelato has grown to 48 cm and does not look like it will grow much in height. Probably due to the excessive distance from the light, which I had to raise because of the Hulkberry which reached a height of 1m.
18/07/2020. - Day 30.
Defoliation. I removed the leaves at the very bottom of the plant to make it easier for me to water them, after that I watered the plants but this time I didn’t put BioBizz, I just watered them with clean water.
21/07/2020. - Day 33.
Watering. This time I gave them BioBizz, on schedule for the second week of flowering. I also added CalMag 1.5ml / L, preventively. While they don’t show they’re missing anything, I’ll keep adding CalMag.
23/07/2020. - Day 35.
Photography and height measurement.
Green Gelato Auto - Day 35. - 48cm
That’s all for this week, see you soon.
Likes
55
Share


@Theia
Follow
Hello😀
Week 5 of flower begins as week 4 was. Pretty easy. Did a light defoliation as she was and is got some good leaf on her but I have decided I would go minimalist this round so no training to any plants has been given.
The only issue I had was my run off was coming out slightly higher PH then going in. After some sage advice from @lassos I was advised to remove the golden tree as it is more acidic then I want and I also ran PH lower at 5.8 for most of last week giving 2 feeds a day at an EC of 1.9. 3l morning 3l night. I am happy to say PH has balanced out so thanks again lassos👍.
Not much else to say she is stacking well with a nice looking flower. Smells kinda sweet not much there yet..
I plan to up the biobizz top max a little and maybe see if she wants a bit more bloom.
Temperature has remained fairly consistent with night lows of 20 and I try and keep the flower room at 26c with an RH of 70%. Got a good healthy plant and have some great airflow in there so not overly concerned about the higher RH.
That's all really this week.
Thanks for looking and I update Instagram with pics of all the girls.
Grow well🌱🌿🌱
Stay safe😷
