


Critical Mass CBD Auto #1










Perliet
Harvest Hero

Binnen
Kamertype
Transplantatie
weken 2
LST
weken 4-5
15 liters
Potmaat
Beginnen bij 5 Week
G
Ontkieming2mo ago
Nutrients 3

Mykos
1.3 mll

Support 4-0-0
1.321 mll

Grow 0-1.5-4
0.264 mll
Aeromatics Laten we dit nog eens proberen, oké?
Na mijn recente mislukking met White Widow CBD Auto, besloot ik over te schakelen naar Critical Mass CBD Auto, ook van ILGM. Critical Mass CBD Auto was tot nu toe mijn hoogst opbrengende auto (7 oz in 6,9 gallon), dus ik dacht dat het een geweldige, robuuste genetica zou zijn om te kweken als een 2-plantengroei in mijn 2 x 4.
Mijn doelen zijn hetzelfde als bij mijn White Widow-kweek, houd het simpel met een mooie CBD-kweek. Ik zal 20/4 kweken om lichtstresssignalen te vermijden die mijn laatste Critical Mass Auto misschien hebben gedwongen om tegen het einde van de kweek wat pollen te produceren. Daarnaast zal ik deze verplanten van hun .5 gallon potten naar hun uiteindelijke 3,9 gallon huizen rond dag 10 of 14, afhankelijk van hun grootte.
Voor training zijn deze dames agressieve rekker, dus ik zal ze langzaam begeleiden naar individuele canopies, en ik zal mijn best doen om solide toppen over het geheel te krijgen.
Voor dit kweekdagboekproces zal ik 2 aparte dagboeken bijhouden. Ik vind het leuk om een dagboek voor elke individuele strain te runnen, vooral voor wedstrijden en om de kenmerken van elke individuele plant te laten zien, aangezien fenotypes kunnen variëren.
De dagboekcommentaren zullen worden gelabeld in twee aparte delen: Individuele Updates (Critical Mass CHB Auto #1, #2) en dan Tent-Wide Updates.
Coco Plantproces:
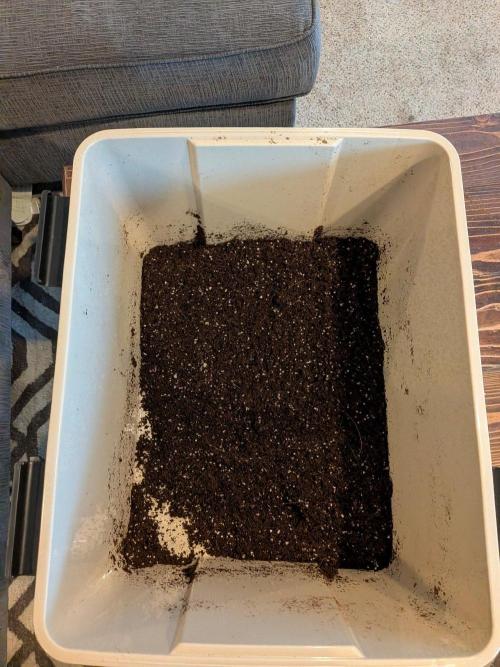
Voor mijn coco was ik erg blij dat ik een veel gemakkelijker voorbereidingsproces had dan bij mijn vorige runs. Canna Professional Plus komt voorgewassen en gebufferd, dus ik hoefde deze ronde geen grote spoel- en bufferprocedure te doen, wat erg fijn was.
Ik mengde een verhouding van 80/20 Canna Professional Plus met Harvest Hero Perlite en gooide alles samen zodat het volledig geïntegreerd was in één prachtig medium. Ik moet zeggen, de Canna Coco was absoluut prachtig… enorme upgrade!!
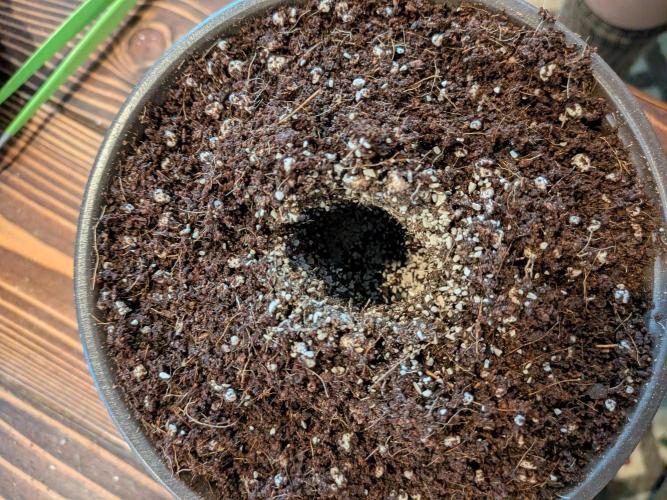
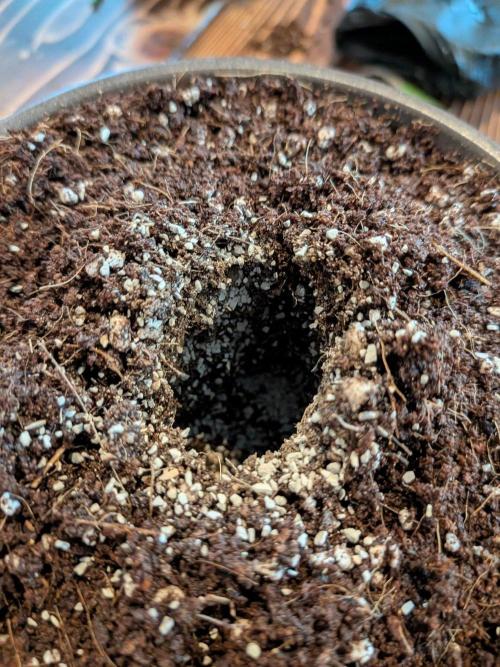
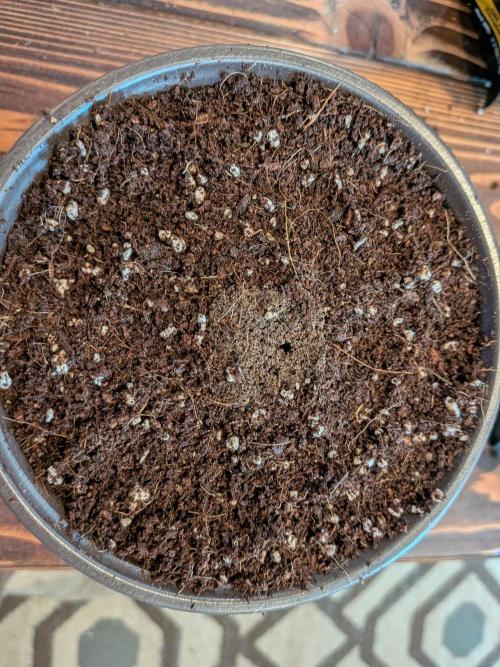
Om het gemengde medium voor het potten voor te bereiden, voegde ik ongeveer 500 ml RO-water en Ventana Plant Science-oplossing toe om de coco een beetje vochtig te maken, maar niet te overladen of te veel te laten weken. Ik wilde dat de coco zijn vorm zou behouden, maar geen water zou laten druppelen wanneer het werd samengeknepen.
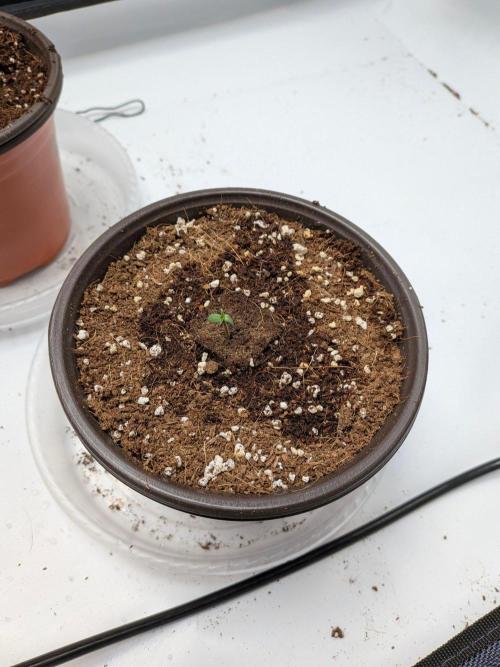
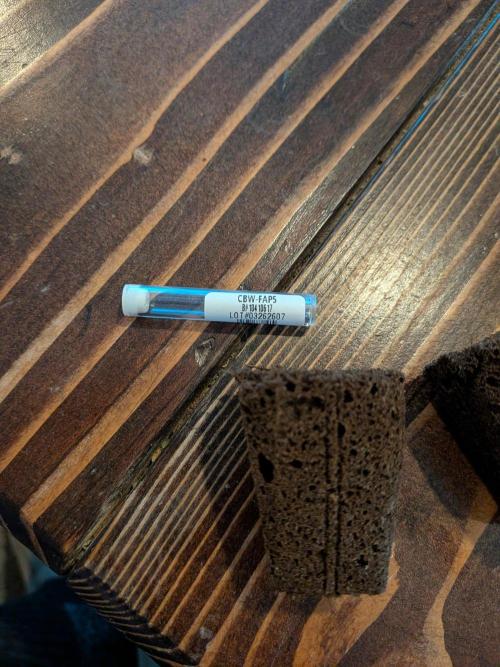
Toen het klaar aanvoelde, potte ik mijn halve liter potten en maakte ik me klaar om mijn Clementine Slush Seeds in Organiplugs te planten!
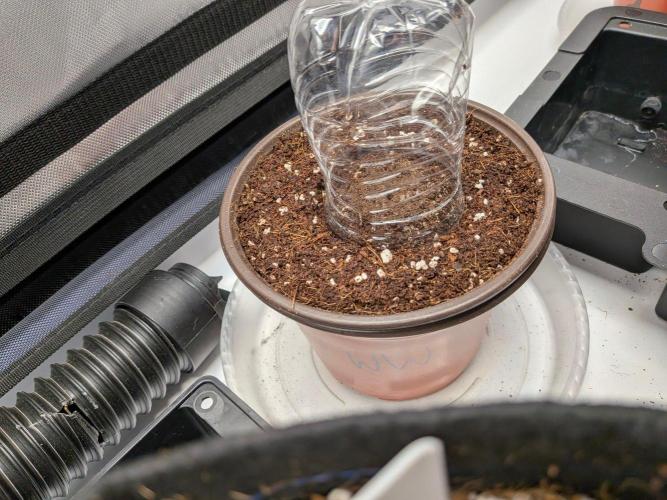
Ik plantte de gezaaide Organiplugs direct in de voorbereide Coco en zette ze in de voorbereide tent met een halve fles luchtvochtigheiddome, met als doel de blootstelling van de taproot aan open zuurstof/lucht te beperken. Mijn idee achter deze nieuwe methode is om mogelijke oxidatie van de wortel te voorkomen en de taproot zo snel mogelijk in zijn groeimilieu te laten komen zodra deze uit de Organiplug komt.
Bovendien kan ik Xtreme Mykos in elk plantgat strooien voordat ik de Organiplugs in de coco plaats, wat zorgt voor extra wortelgroei.
Ik ben van plan om deze rond dag 10/12 naar hun uiteindelijke huizen over te brengen, afhankelijk van de grootte en de ontwikkeling van de topwortel!
Laten we hopen op wat monsters, en bedankt voor het afstemmen!
6 houdt van
opmerkingen
Share
Used method
Rockwool Cube
Germinatiewijze
1
Week 1. Vegetatie1mo ago



5.08 cm
Height
24 uur
Light Schedule
27 °C
Day Air Temp
5.7
pH
Geen Geur
Smell
375 PPM
TDS
75 %
Air Humidity
1.89 liters
Pot Size
91.44 cm
Lamp Distance
Nutrients 2
Support 4-0-0
1.321 mll
Grow 0-1.5-4
0.264 mll
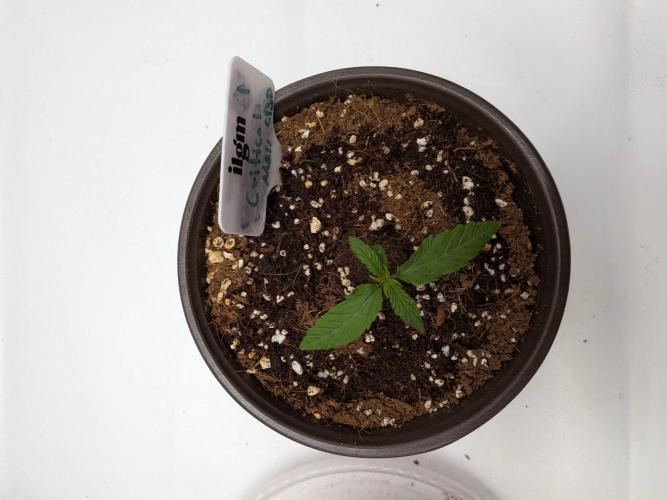
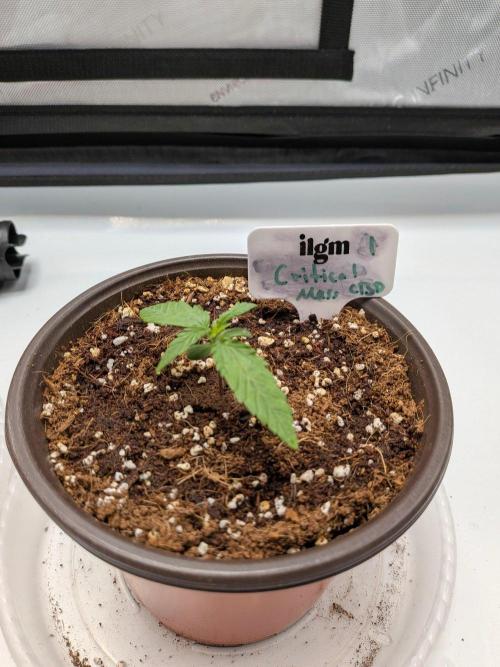
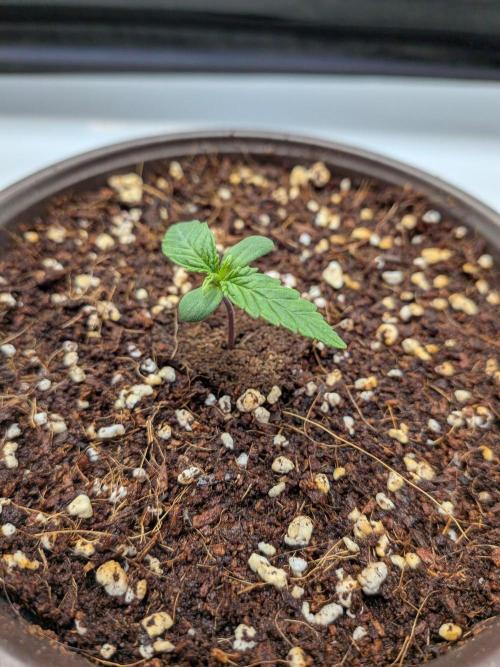
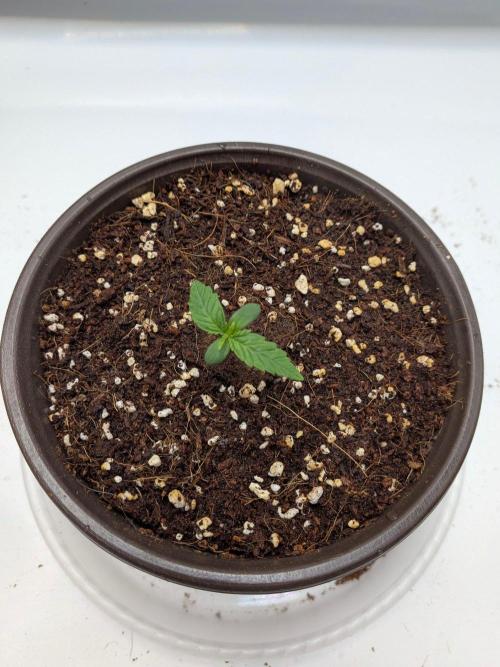
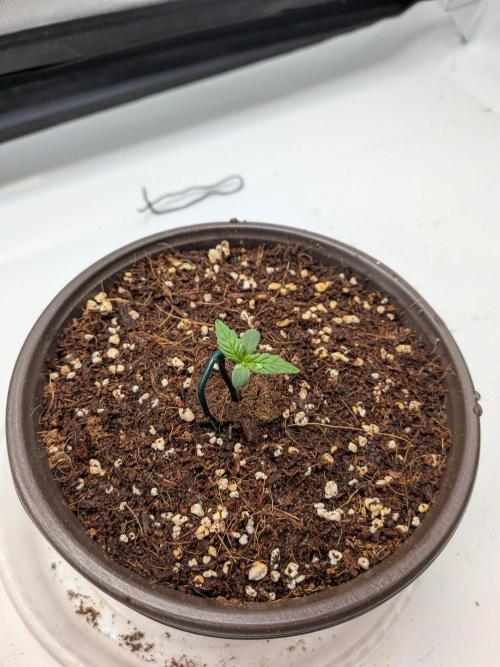
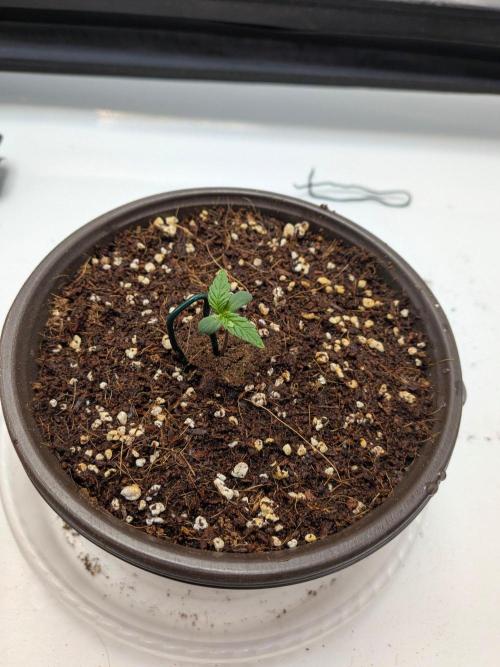
Aeromatics Week 1 is vrij soepel verlopen en een veel betere start dan White Widow CBD Auto. Het groeit al sneller dan die twee in grootte, dus ik denk dat we met wat oude zaden uit die batch te maken hadden.
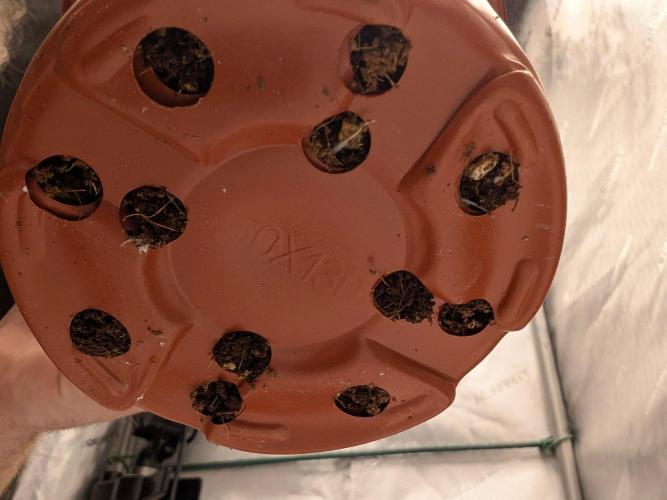
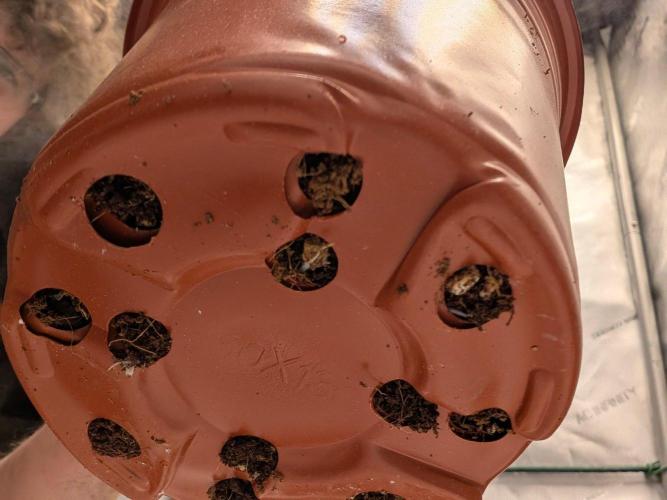
Ik heb het stekgebied mooi vochtig gehouden terwijl we werken aan het ontwikkelen van mooie wortelstructuren in onze .5 gallon pot. Ik kijk uit naar een transplantatie aan het einde van week 2 naar onze 3.9 gallon autopot, en voor nu zijn we goed begonnen!
Met ongeveer 50 ml per dag heb ik de volgende waterrecept gegeven:
1 gallon RO water
5 ml Ventana Plant Science Support
1 ml Ventana Plant Science Grow
ec .75 PH 5.7
PPFD schommelt rond de 240, maar ik ben van plan dat langzaam te verhogen in de komende weken.
Daarnaast heb ik nagedacht over mijn lichtstructuur voor deze. Ik denk dat ik na week 2 naar 20/4 ga, of misschien week 3 nadat de planten zich hebben aangepast aan hun transplantatie.
Ik blijf nadenken, maar voor nu zijn we goed begonnen!
8 houdt van
opmerkingen
Share
2
Week 2. Vegetatie25d ago
12.7 cm
Height
24 uur
Light Schedule
27 °C
Day Air Temp
5.7
pH
Geen Geur
Smell
375 PPM
TDS
70 %
Air Humidity
14.76 liters
Pot Size
91.44 cm
Lamp Distance
Nutrients 4

Mammoth P
0.264 mll
Support 4-0-0
1.321 mll
Grow 0-1.5-4
0.264 mll
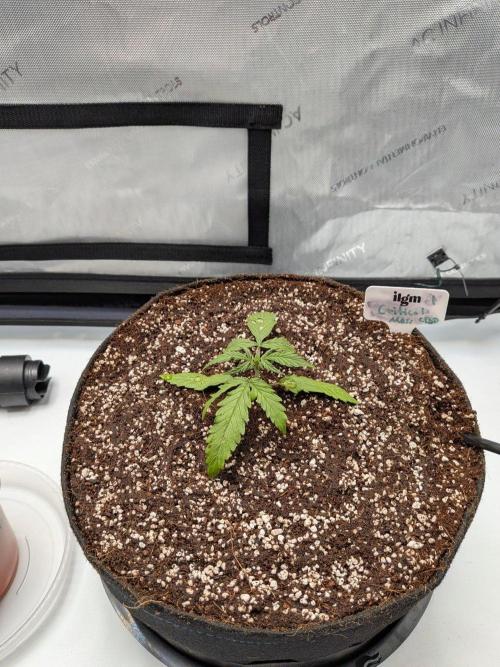
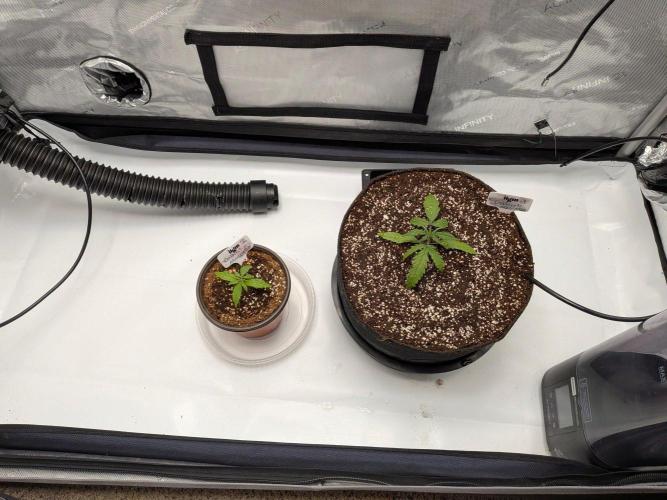
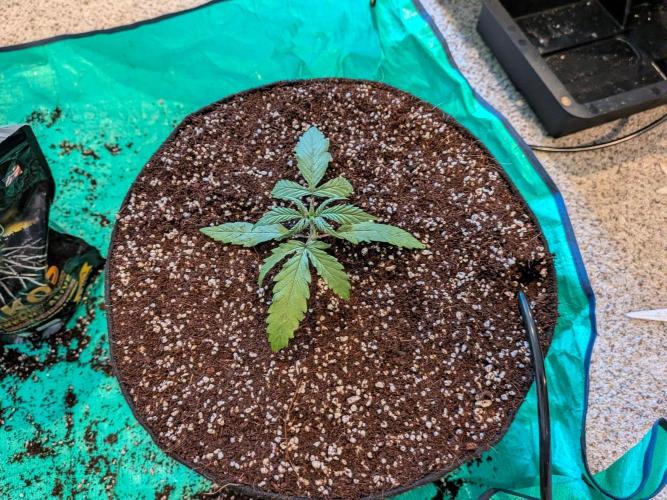
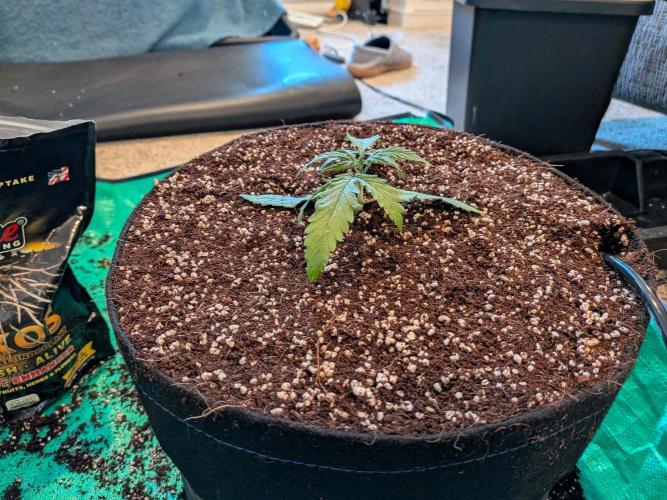
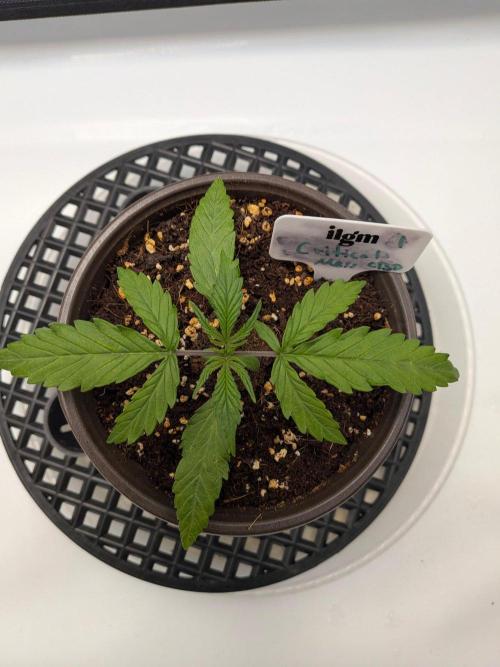
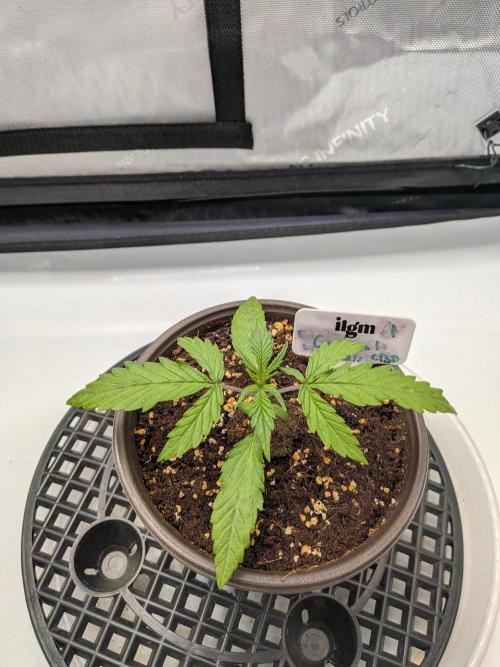
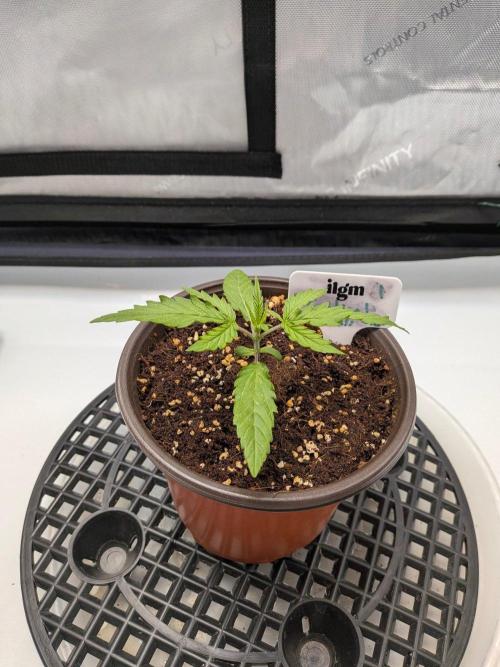
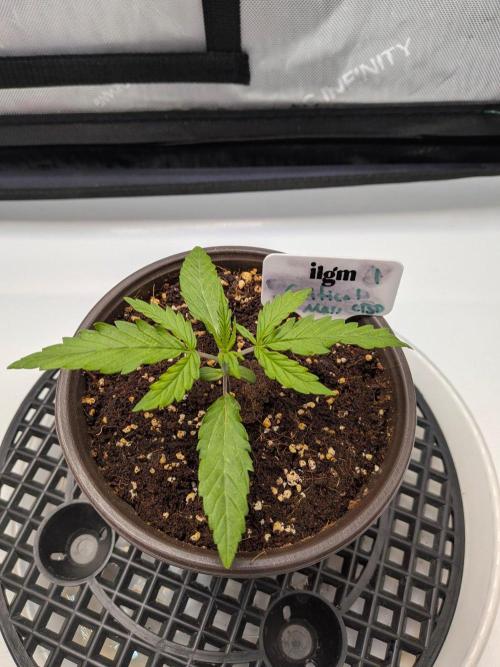
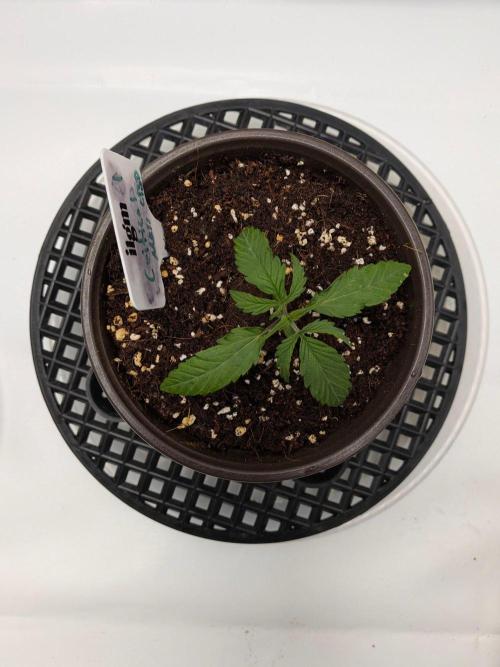
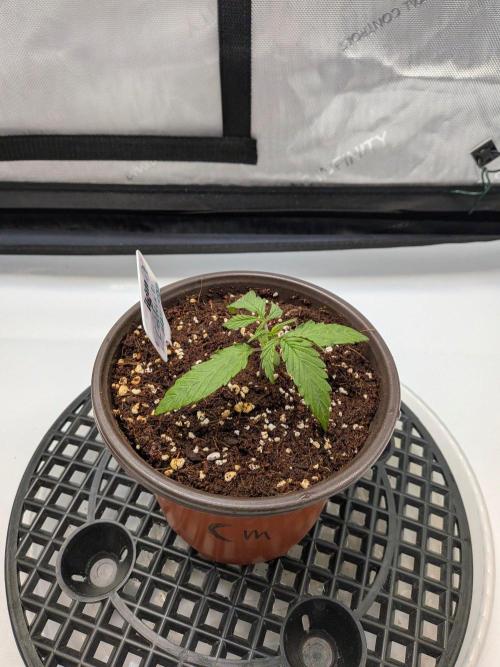
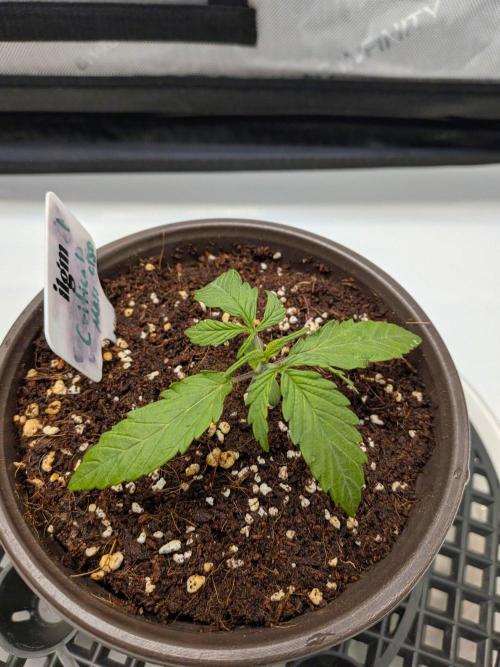
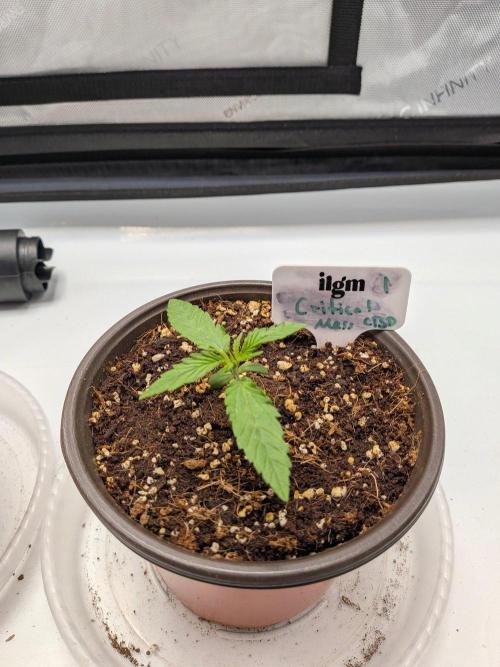
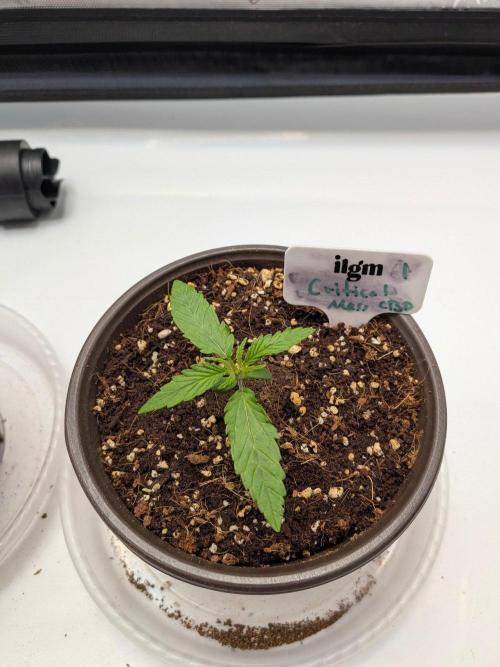
Aeromatics Critical Mass #1: Ze ontwikkelt zich geweldig, met een iets dunnere uitstraling vergeleken met een dikkere indica, maar ze beweegt fantastisch van week 1 naar week 2 en ze was klaar om te verplanten! Ik kijk uit naar de airdome boom die naar week 3 komt!
Tent-brede updates: Het is tijd om te verplanten!
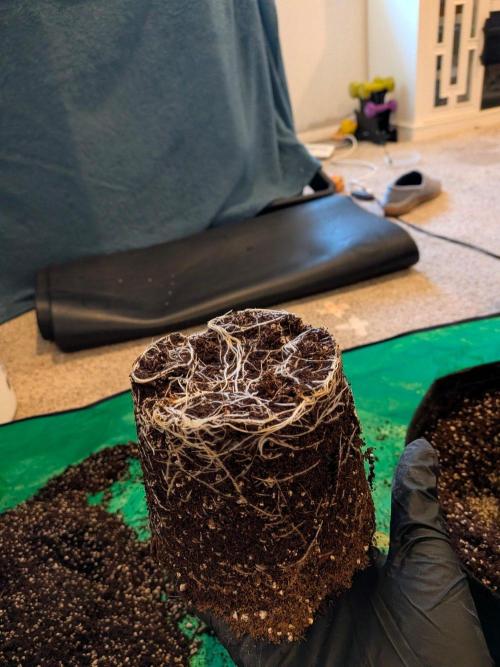
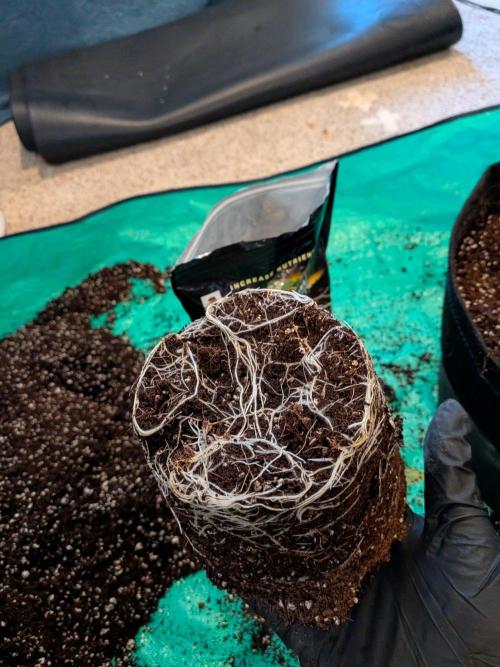
Deze dames hebben mooi geworteld in hun .5 gallon potten van week 1 en 2, en ik wilde niet dat ze te veel wortelgebonden raakten voordat ze naar 3.9 gallon potten verhuisden.
Bij het verplanten heb ik ze van onderaf water gegeven om die wortelontwikkeling aan te moedigen, en ze hebben elk een solide 500 tot 750 ml gedronken gedurende elke waterbeurt voor de verplantweek.
De mix was een eenvoudige:
1 Gallon RO Water
5 ml Ventana Plant Science Support
1 ml Ventana Plant Science Grow
.75 ec 5.7 PH
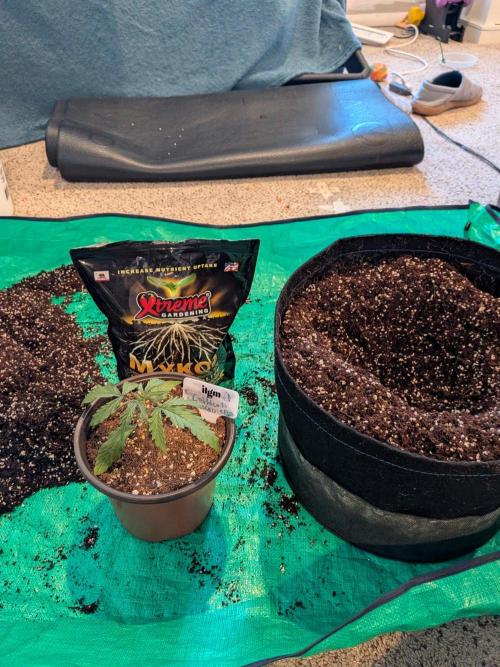
Bij het verplanten hebben we onze standaardmix van 70/30 Canna Coco Professional Plus en Harvest Hero Perlite gedaan.
Zodra ik elke batch mengde, zette ik ongeveer 1.5 gallon opzij en mengde ik 2 eetlepels Stash Base om wat van die Coco te verbeteren, zodat het een mooie boost voor de vegetatie kreeg.
Daarnaast strooide ik Xtreme Mykos op de wortelbundel en het plantgebied van elke plant en layerde ik die Stash Base-verbetering rond de wortelkluit en de bovenste 1/3 laag van coco.
Eenmaal ingepakt, gaf ik haar water met ongeveer 500 ml water met een beetje meer Stash Base en Mammoth P Active Microbes om ze op gang te helpen, rond de wortelkluit en het externe gebied van het plantgebied, en liet ik haar settelen voordat er iets anders werd aangepast, zoals airdomes of zelfs nadenken over de activatie van de autopot.
Het is een grote stap, maar ze was er klaar voor!
De volgende stappen zijn gericht op het voorbereiden van de wortelzone voor de activatie van de Autopot!
10 houdt van
opmerkingen
Share
Used techniques
Transplantatie
Techniek
3
Week 3. Vegetatie18d ago




12.7 cm
Height
20 uur
Light Schedule
27 °C
Day Air Temp
5.7
pH
Geen Geur
Smell
425 PPM
TDS
60 %
Air Humidity
14.76 liters
Pot Size
91.44 cm
Lamp Distance
Nutrients 3
Support 4-0-0
1.453 mll
Grow 0-1.5-4
0.396 mll

Structure (Silica)
0.132 mll
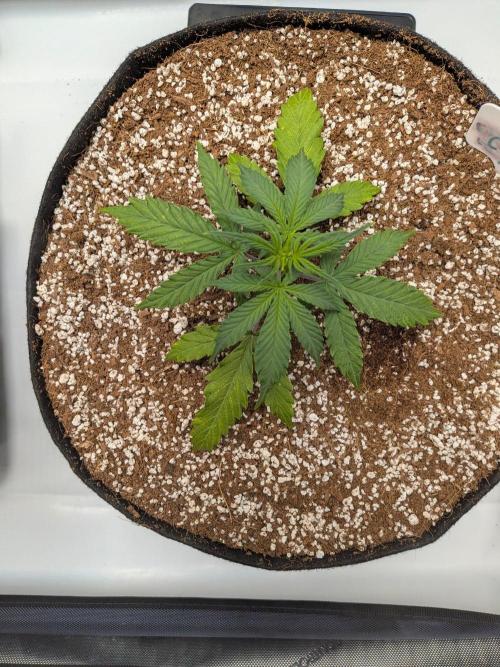
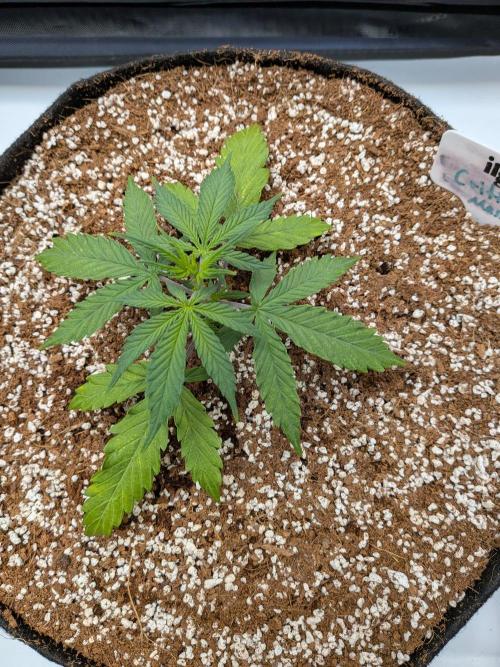
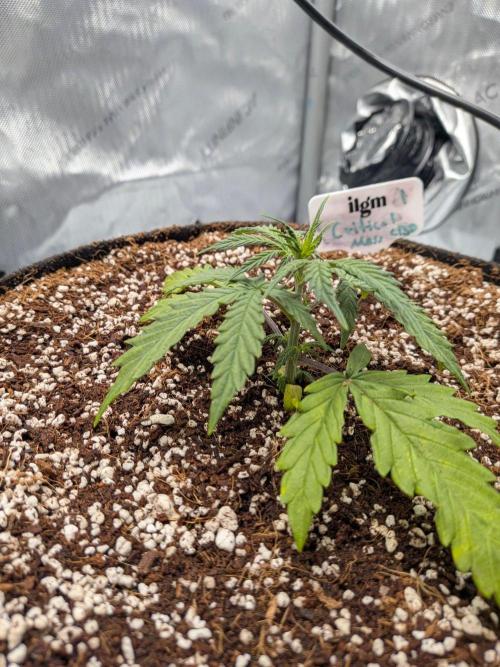
Aeromatics Critical Mass CBD #1: Ze heeft zich goed aangepast aan onze transplantatie, maar vertoonde een beetje stress, zoals verwacht. Ik ben oké met de stilstand, aangezien ik niet super gefocust ben op een mega plant voor deze kweek, en ik wil de stress minimaliseren door ze gewoon te laten wennen.
Tent-Wijde Updates: We gaan de derde week in en we richten ons op een hopelijk snelle herstel na de transplantatie in 3,9 gallon autopots. Beide planten hebben het goed gedaan, met #1 die er slechter uitziet dan de andere.
Ik heb elke plant topbewaterd met 500 ml van de volgende mix:
1 Gallon RO Water
5.5 ml Ventana Plant Science Support
1.5 ml Ventana Plant Science Grow
.5 ml Ventana Plant Science Structure
Bovendien hebben we een grote stap gezet in de hoop gestapelde stress te minimaliseren, de verschuiving van een 24/0 naar een 20/4 lichtschema. Ik wil deze CBD-planten de kans geven om een beetje te ontspannen en aangezien ik die 24-uurs lichtcyclus niet hoef te pushen, laat ik ze 4 uur per dag rustig aan doen.
Ik heb ook mijn autodomes aangezet voor ongeveer 6 uur per dag, met geleidelijke verhogingen gepland in de komende dagen om de wortelgroei aan te moedigen.
Buiten dat zijn we in een overgangsweek voordat we hopelijk ons autopot-reservoir aanzetten en de boom raken!
4 houdt van
opmerkingen
Share
4
Week 4. Vegetatie16d ago





12.7 cm
Height
20 uur
Light Schedule
24 °C
Day Air Temp
5.7
pH
Geen Geur
Smell
450 PPM
TDS
60 %
Air Humidity
14.76 liters
Pot Size
91.44 cm
Lamp Distance
Nutrients 3
Support 4-0-0
1.849 mll
Grow 0-1.5-4
0.528 mll
Structure (Silica)
0.132 mll
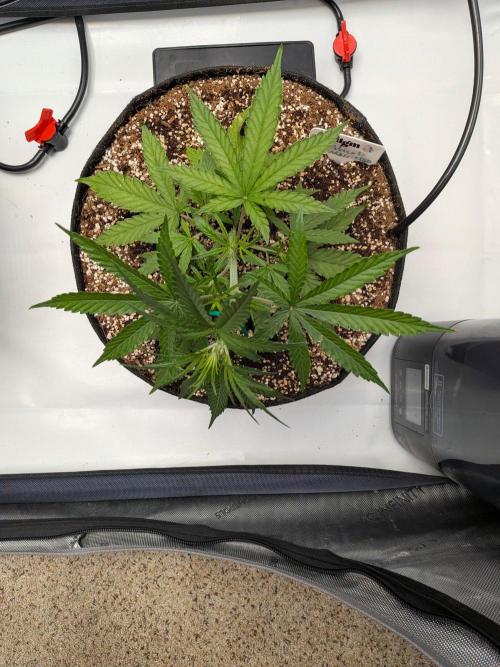
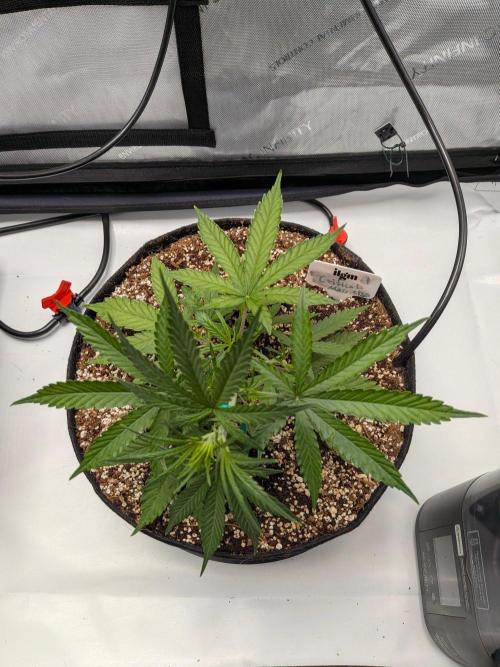
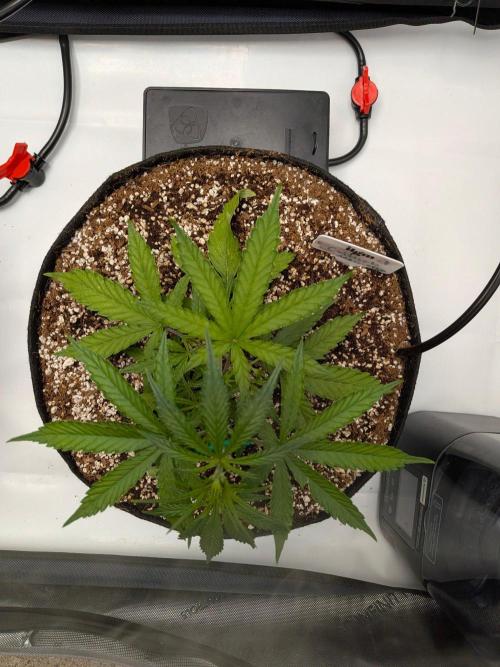
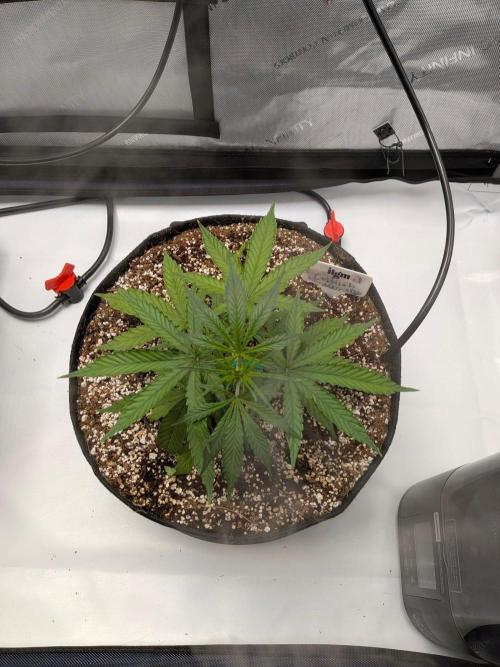
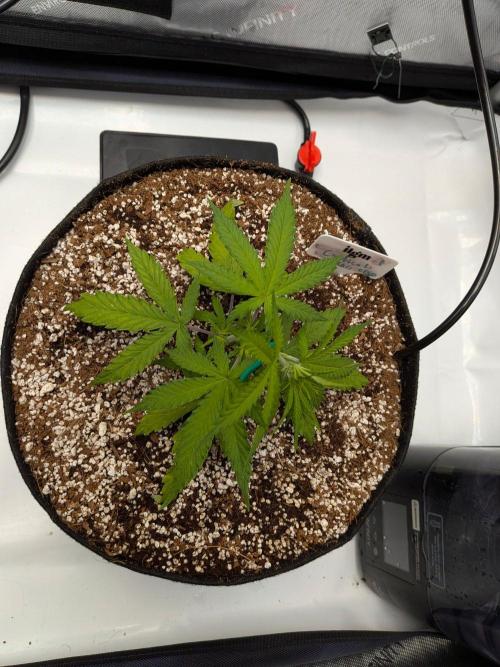
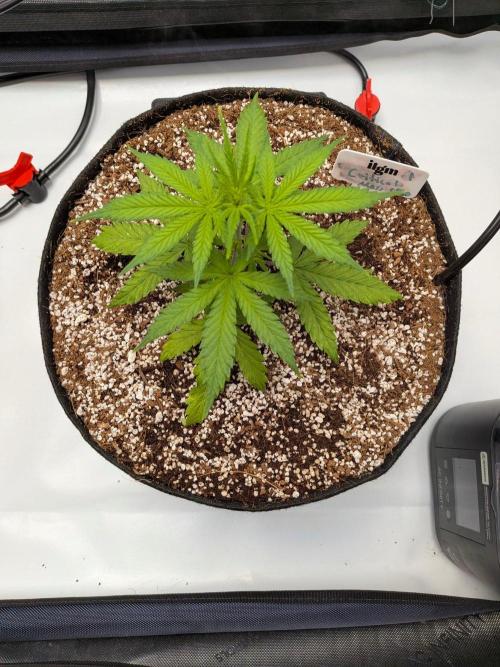
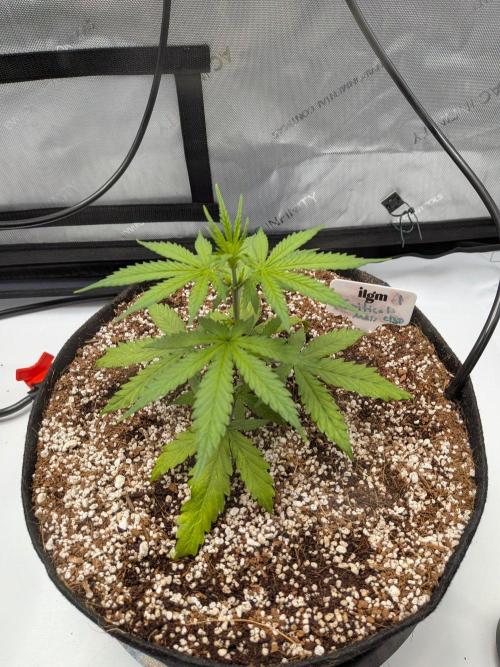
Aeromatics Critical Mass CBD Auto #1: Ze heeft grote fan bladeren! Ik zal haar de hele week gemakkelijk blijven trainen om wat licht op haar zijknopen te krijgen.
Tent-Wijde Update: Autopots Geactiveerd!
Ik heb haar getest met een paar keer 500 ml water gedurende de week om te zien of ze wat uit het reservoir zou opnemen, en ze bleek klaar te zijn om door te gaan naar dag 22.
Dus heb ik het systeem volledig geactiveerd!
Ik vulde mijn reservoir met 3 gallons van een mengsel dat de vegetatie ondersteunt:
3 Gallons RO water
1.5 ml Ventana Plant Structure
6 ml Ventana Plant Science Grow
21 ml Ventana Plant Science Support
Beide planten hebben goed gedronken, maar drie gallons was een beetje te veel voor 1 volle, dus ik ga het terugbrengen naar 2 gallons voortaan.
Ik heb mijn airdomes volledig aan voor de 20 uur dat de lichten aan zijn.
PPFD kan een beetje hoog zijn (380), dus we zullen zien of ik het wil verlagen om stress te vermijden.
Al met al ben ik blij en we zijn op weg naar een grote groeispurt!
7 houdt van
opmerkingen
Share
Used techniques
LST
Techniek
5
Week 5. Bloeiend3d ago


60.96 cm
Height
20 uur
Light Schedule
24 °C
Day Air Temp
5.7
pH
Zwak
Smell
430 PPM
TDS
55 %
Air Humidity
14.76 liters
Pot Size
91.44 cm
Lamp Distance
Nutrients 4
Support 4-0-0
1.849 mll
Structure (Silica)
0.132 mll

Flower 0-3-4
0.66 mll
Aeromatics Critical Mass CBD Auto #1: Ze begint zich echt te settelen in haar nieuwe huis! Na een beetje transplantatiestress en langzamere groei dan verwacht, begonnen we eindelijk wat momentum te zien toen haar wortelsysteem zich vestigde in de 3,9-gallon stoffen AutoPot. Haar kleur was aanvankelijk aan de lichte kant, maar een kleine aanpassing aan onze Ventana Plant Science voedingsstoffen hielp om wat gezonder groen terug te brengen. Ze heeft ook goed gereageerd op wat zachte LST, wat het bladerdak heeft geopend en verschillende ontwikkelende zijtakken aan het licht heeft blootgesteld.
Tent-Wijde Updates: Week vier en vijf brachten enkele spannende ontwikkelingen toen we beide planten officieel overzetten naar hun AutoPot-reservoir!
Na een paar gecontroleerde bodembewateringsproeven, toonden beide planten tekenen van het opnemen van vocht uit de trays. Zodra de coco volledig had geabsorbeerd en de planten comfortabel leken, activeerde ik het reservoir en liet ik het systeem het overnemen. De eerste twee gallons verdwenen verrassend snel, hoewel het verbruik vertraagde zodra de coco volledig verzadigd was.
We hebben ook geleidelijk ons AirDome-schema verhoogd van een paar korte intervallen naar continu draaien gedurende de 20-uur durende lichtperiode. Beide planten lijken zich goed aan te passen aan de extra beluchting van de wortelzone.
Voedingsgewijs hebben we enkele kleine aanpassingen gedaan terwijl de planten door de vegetatieve groei gingen en in hun vroege bloeifase overgingen. Beide toonden lichter groene bladeren, dus verhoogden we Ventana Plant Science Support terwijl we geleidelijk Flower introduceerden naast Grow.
Onze reservoirmengsels tijdens deze periode omvatten over het algemeen:
One Gallon of RO Water
Ventana Plant Science Structure: 0.5 ml
Ventana Plant Science Grow: 1–2 ml
Ventana Plant Science Flower: 1–2.75 ml
Ventana Plant Science Expand: 0.5 ml
Ventana Plant Science Support: 6–7 ml
Target EC: ongeveer 0.85–1.0
Target pH: 5.7–5.8
We hebben de voeding opzettelijk relatief mild gehouden. Aangezien dit CBD-autoflowers zijn, ben ik veel meer geïnteresseerd in het behouden van gezonde, stressvrije groei dan in het najagen van maximale grootte of opbrengst.
Ik heb ook wat zachte LST geïntroduceerd voor beide planten, met kleine aanpassingen om de ontwikkelende takken naar buiten te spreiden en de lichtblootstelling door het bladerdak te verbeteren. Niets agressiefs, gewoon genoeg om ze te openen en de ontwikkelende bloeiplaatsen wat ruimte te geven om te groeien!
Een interessante observatie was het verschijnen van enkele smalle, kronkelige bladeren toen de planten begonnen over te schakelen naar de bloei. Na te hebben geëxperimenteerd met PPFD in het bereik van 320–350, besloot ik het licht dichter bij 280–300 PPFD te verlagen. De planten leken positief te reageren, dus we houden het voorlopig conservatief.
Buiten dat, beginnen we eindelijk wat pistils en vroege bloei-ontwikkeling te zien!
Het doel voorwaarts is eenvoudig: stabiele omgevingsomstandigheden behouden, voeding consistent houden, onnodige stress minimaliseren en deze Critical Mass CBD Autos laten zien wat ze kunnen doen!
Door naar de bloei!
4 houdt van
opmerkingen
Share
Used techniques
LST
Techniek
Enjoying this diary? Follow for more updates!
Verkiest u de oude dagboekweergave?
Terug naar de oude dagboekweergave