


Likes
Comments
Share


@JBONE218
Follow
These clones turned out to be beautiful and easy to please little ladies. They did possibly go a few days longer than other growers may have allowed, but in my opinion Id rather a little longer than prematurely cut. I cannot wait for them to be ready to enjoy after some drying and curing. Thanks for letting me share and also gather info about growing some fine flower on this site PEACE and good luck to all growers

Likes
7
Share

@PavementPunk
Follow
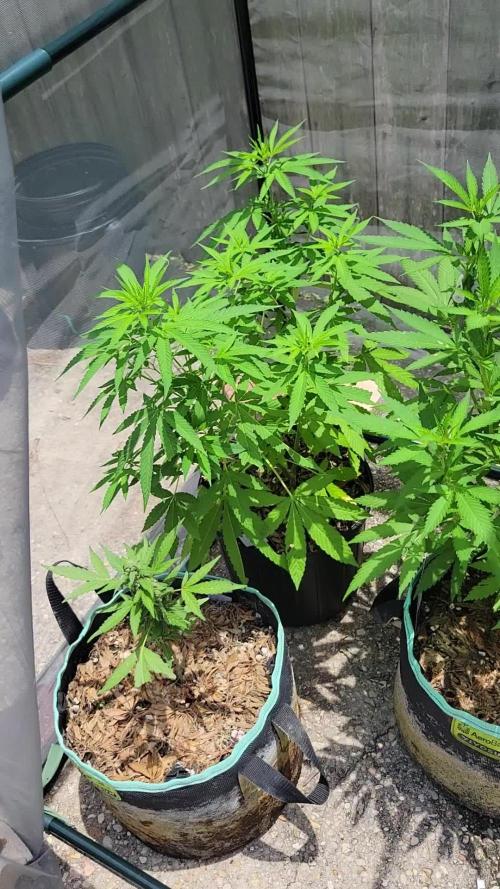
7/8/26 I really dont feel there is much to report on this plant or my whole grow in general. Maybe im just being lazy. I feel like it was just a bit of a normal week everyone got fed twice. I made sure to take my time and water them with care. Only real note is that i got a few spidermites in the tent. I caught it super early and manually squished them and hopefully its done. I did see one outside i believe. And thats got me wanting to lay down some pesticide to get rid of those bastards from around my house. This spit shot has been loving the sun loving it outside and is looking great. Photoperiod plants are the shit. Bad slow start? No worries just veg em longer and bang big gorgeous girl like woah now! 🙃happy growing friends ✌️
Likes
1
Share


@AMNESIA1100
Follow
Not sure if these 2 are auto plants? The blackberry are flowering quiet obviously, but these 2 are either really slow or I accidentally bought non autos. Anybody help? Cheers


Likes
57
Share


@Zurban_Poison
Follow
Well guys! home stretch!
as you can see in the photo, harvest day is not far away))
Both plants look amazing! the structure of the Buds, trichomes, smell, stickiness and oiliness, all this is in excess!))
Buds are very solid and elastic .. very happy ..

Likes
24
Share


@DeepRootsGrowTrees
Follow
GORILLA COOKIES 🍪 FF / FASTBUDS
WEEK #17 OVERALL
WEEK #9 FLOWER
This week she's doing good buds are looking good they are mostly dense decent trichome coverage and she's got a nice aroma to her and her buds are looking good she's got a few big buds going on. Stay Growing!!
Thank you for stopping by and taking a look it's much appreciated!!
Thank you FASTBUDS!!
FASTBUDS / GORILLA COOKIES 🍪 FF


Likes
109
Share


@MadeInGermany
Follow
Welcome to the
Green House Seeds Company Cup 🏆.
Today is day 48 since the time change to 12/12.
Hi everything 🤗.
I can't describe how good it smells this week .
You have to try them yourself 👌.
There is nothing wrong with this genetic 😎.
The growth, the color, the smell and the buds, everything is perfect.
I can't wait to try it for the first time 😃.
This week she will be flushed, so that after the flush she still has 10 - 13 days to utilize the remaining energy.
Until then, I wish you a lot of fun with the new update, stay healthy 🙏🏻 and let it grow 🌱🍀
You can buy this Strain and Nutrients at :
https://greenhouseseeds.nl/
☝️🏼☝️🏼☝️🏼☝️🏼☝️🏼☝️🏼☝️🏼☝️🏼☝️🏼☝️🏼☝️🏼☝️🏼
Green House Seeds Company Cup 🏆
Type:
Wonder Pie
☝️🏼
Genetics:
Wedding Cake x OG Kush
👍😍
Vega lamp: 2 x Todogrow Led
Quantum Board 100 W
💡
Flower Lamp : 2 x Todogrow Led
Cxb 3590 COB 3500 K 205 W
💡💡☝️🏼
Earth: Canna Bio
☝️🏼
Fertilizer: Bio Grow Feeding ( GHSC ) , Enhancer ( GHSC ) , Bio Bloom ( GHSC)
☝️🏼🌱
Water: Osmosis water mixed with normal water (24 hours stale that the chlorine evaporates) to 0.2 EC. Add Cal / Mag to 0.4 Ec Ph with Organic Ph - to 6.0

Likes
18
Share


@DeadJoke
Follow
happy new year ..
wishing you a year full of wealth, health and a kind of happiness and joyful moments that truly matters!
happy new year!!

Likes
8
Share


@pzwags420
Follow
At the start of week 13 I applied weekly nutrients. The girls are still bulking up and my favorite pheno is turning purple:). On day 2 I did a early harvest on pheno number 2 because it didn't have the traits I was looking for and was taking up valuable light/space so I harvested early...(plus I need the smoke 😉)I'm looking forward to harvesting pheno number 3 asap so I can reveg her to get more clones and flower them all out 😀 I harvested the tops of my pheno number 3. I could have let it go longer but the smell was getting strong lol. I am also eager to reveg pheno number 3 and clone that for my next run.
I will let the bottoms of pheno number 3 mature up and harvest along with my pheno number 1. This week has gone very well 👍

Likes
18
Share


@emanresU
Follow
Edit from 19th May. Literally 00:09
Pre-Flowering.
Fat Banana looks like Hermie.
Royal Critical = clean pre-flower.
Edit from 19th May. 16:26
Fat Banana had balls sack and pistils growing all over the place. I nuked everything that had balls on it. I left only top node with pistils.
Royal Critical is full of pistils, no balls.
Now I wish I had photoperiod seeds instead of automatics. I would give Critical 1 extra week in veg. She is around 10-15cm smaller then Fat Banana.
I switched the lights back to 400W.
Edit from 20th May. 14:45
I think 32C is maximum what these plants can handle. With 600W I was reaching 34C on some top leaves and that could possibly turn the Fat Banana into hermit (she was the tallest). I open the tent a little (front doors), I put big-ass fan on second gear blowing strong wind through the mesh-window of a tent. I put the lights straight up to the ceiling, I literally can't put them any higher.
Fat banana is now 58cm tall and around 80cm away from the light.
Royal Critical is now 41cm tall and around 100cm away from the light.
50% Humidity
28C under the canopy/on the ground under the leaves
31C Air temperature.
Fat Banana fan leaves temperature: 28.5C
Fat Banana center/middle of the plant: 30.9C
Royal Critical fan leaves temperature: 27.5C
Royal Critical center/middle of the plant: 27.8C
NOTE: Royal Critical ugly/yellow leaves have higher temp: 29-30C
The rest of small plants range from 28 and 32C
Surface area/soil temperature DRY: 35C
Surface/Soil temp. WET/SHADOW: 28-29C
That pistol/laser for checking temps was solid purchase. I can see back of my tent is more hot then other areas. Will do more Temp-Checks in the future.
I also deleted few things from "Condition" tab because one day they are correct, the other something change and the info is not accurate anymore. I'll update info here in edits.
~~~~~~~~~~~~~~~~~~~~
Farm Control Sheet
Date: 20th May 2024
Time: 16:57
Tent status: Side doors little bit open. Both windows fully open. Fan blowing air on second gear outside the tent, West window. Fan insides on full.
Lights power: 400W
Lights schedule: 18/6
Humidity: 50%
Dry soil temp: 35C
Wet soil temp:
28.5C
Fan leaves temp: 28.5C
Center of the flower temp: 30C
Stem temp: ~32C
Air temp. Inside tent: 30-32C
Air temp. Outside tent: 25.5C
Air temp. Outside house:
21C
~~~~~~~~~~~~~~
Farm Control Sheet
Date:
21th May 2024
Time:
15:53
Tent status:
Side windows full open. Front doors 75% open. Big-ass-fan on second gearwest window.
Lights power:
400W
Lights schedule:
18/6
Humidity:
50%
Dry soil temp:
36C-38C in front // 38C-40C in back
Wet soil temp:
Fan leaves temp: 28-29C
Stem temp: 29C
Air temp. Inside tent: 31C
Air temp. Outside tent:
26C
Air temp. Outside house: 20C
Details:
Smol plants growing stronk! They have little bit crumbled leaves cuz of heat I guess.
32C @ 50% RH is max for my setup.
Edit from 22th May. @ 13:10
Nothing changes. Plants are happy and praying to their god ( me ofc :) )
Same temps
Same RH
I watered them yesterday after long days/weeks of dry season (cuz of FuckYouGnats).
Edit from 23th May. @ 11:40am
Same temps or even a bit lower then in last two days. I like it. I closed 85% of windows in tent (door fully closed) to create negative pressure that's gonna suck out the hot air. It seems to work better than what I did yesterday.
Today I gave them second dose of nematodes. There is really very little Fungus Gnats around now. Sometimes, occasionally one or two "teenagers" or "baby" Gnats would fly out from bottom of pot or top of the soil after watering but that's like nothing comparing to what I had at the beginning.
Shit-ton of yellow-sticky-tape does the job as well, just put it everywhere you can.
/ What I'm singing to Lady Banan?
https://www.youtube.com/watch?v=OZEddFi1W8k
/ What I'm singing to Lady Banan?
Edit from 23th May @ 2pm
So I'm reading about VPD now and I think, this is what is happening in my tent right now. High temps but RH at right levels makes the plant comfy in that zones.
Right now plants sitting at 30.6C @ 55% RH
So I'm sitting at 1.27 VPD? If I could lower my temps to 29C and keep RH at 55% that would be 1.20 VPD (which would be perfect)
N o t B a d R o o k I e
Edit from 24th May @ 11:24 am
So in last 3 days the temperature outside my house is dropping + raining. So that means I have perfect VPD in my tent now. We are sitting at 30C @ 50-55% RH. Most plants have praying leaves, even Lady Banan stops being moody and just start fucking flowering like it should. Finally. But I can see she wanna grow even more upwards, like wtf, this is not 3 meter tent, its only 2.2m, chill the freaking out Lady Banan... Im gonna have literal forest if the rest of Bananas would grow like that.
As you can see I'm kinda happy with the grow now. Fungus Gnats still present but under control. Yellow Sticky tape, especially under the mesh window, the tape is catching fuck-ton of these motherfuckers.
Few days ago I did "Very Light Stress Training" with Royal Critical. So I basically just tackle the fan leaves in the way, where, when fan leaves are growing bigger, they push the side branches more to the outside (apologize for my English but you can check out the pictures and see what I mean). So she is training by her self, alone, with the power of nature = and it works, she is opening more and more every 2 days.
Edit from 25th May @ 21:53
Yoyoyoyoyoyo! So my ADHD and Bipolar kicks in so Idgaf about temps, its colder, around 29C @ 45%
They got a lot of fresh air today, I was "luchting" today.
I think I had to water them today but... Will do tomorrow morning.
I'm thinking about Pimpology classes for myself, for better communication with the bitches, you know what I mean... They ain't thickening up if they aint stressing!
Edit from 26th May. Sunday. 7am
DOUBLE DROP
NEVER STOP
LET THAT BEAUTY POP
69
PLANT SIZE:
BANAN = 72CM
CRITICAL = 65CM
😎


Likes
10
Share


@DaddyPrime2
Follow
8/21/24 1tsp foundation which is cal mag. 2 tsp bloom and 3 tsp grow. she is a super leafy plant. defoliated quite a bit and cleaned up underneath for the larfy stuff.


Likes
4
Share


@SuperGluedGrow
Follow
Got the guy separated and hopefully the other three are female so I can still flower two of them. Will be doing small pheno hunts with this strain in the future so ill be needing the seeds.
Likes
112
Share


@420DeepGrow
Follow
Gracias al equipo de AnesiaSeeds y al de MarshHydro, sin ellos no seria posible esta hazaña.
💐 🍁 Jealousy Dankness es el resultado del cruce de dos cepas excepcionales, súper sabrosas y de gran potencia: nuestra Gelato Dream, que destaca por su alto contenido en THC y su sabor celestial que recuerda al helado y la vainilla, y la Blueberry Sherbet, una cepa híbrida equilibrada que tiene un dulce sabor afrutado a arándanos y también mucha potencia.
Inmediatamente después de la primera calada, se pueden sentir los potentes efectos de Jealousy Dankness . Un subidón cerebral recorre todo el cuerpo, culminando en un estado que parece un sueño. Al subidón eufórico de la cabeza le sigue una explosión de energía y concentración mental, que estimula los proyectos creativos o las salidas a la naturaleza. A continuación, el subidón evoluciona hacia un colocón corporal que elimina por completo el estrés y relaja los músculos.
Debido a su alto contenido de THC de hasta el 33% y a sus propiedades sedantes, esta cepa es útil para las personas que sufren de estrés crónico, náuseas, insomnio o falta de apetito.
El tiempo medio de floración de esta variedad es de unas 9-10 semanas. Los cultivadores de exterior pueden esperar su cosecha a mediados de octubre. Jealousy Dankness ofrece unos rendimientos sólidos y grandes de 400-500g/m² en interior y de hasta 900g/planta en exterior. Las flores son muy compactas, densas y alcanzan un tamaño y un peso considerables.
🌻 🚀 Consigue aquí tus semillas:
https://anesiaseeds.com/es/product/jealousy-dankness/
💡 Mars Hydro TS 3000, como la lámpara de cultivo LED más grande de la serie TS, ofrece suficiente cobertura para un área de 4 × 4 pies con un precio asequible y rendimientos de calidad; a cambio, se puede aplicar tanto al cultivo doméstico como al cultivo comercial.
Potencia - 450w
Cobertura Vegetal – 5×5 pies
Cobertura de flores - 4 × 4 pies
La opción abrumadora para la mayoría de los productores que la aplican en tiendas de campaña.
Consigue aqui tu lámpara:
https://marshydro.eu/products/mars-hydro-ts-3000-led-grow-light/
📆 Semana 8:
Continuamos con la etapa de engorde, esto va que vuela 😍, la resina esta cada vez mas presente ❄️ , los cogollos comienzan a engordar
Esta semana estará el TS-3000 de MarshHydro al 100% y 30cm de distancia.
Se estan desarrollando mejor que nunca, con una floracion mucho mas rapida, noto una gran mejoria gracias al Marshydro TS-3000.
Se que va bien porque empiezan a clarear las hojas.
Continuo con defoliaciones
Aplico una solución con nutrientes EC 1500 y otra con agua del grifo reposada y PH 6.6

Likes
14
Share

@The_Holy_Herb
Follow
Hello my friends!
Almost weekend, are you ready for it ? I can't wait, the work drained me soooo much this week! Good that this little Titan gives me so much joy and satisfaction every time im back home!
Back to us!
Today is friday and marks the last day of her 10th week. Today is kinda important, is exactly 77 days since the plant showed up from the soil.
RQS is saying that normally this plant is ready to harvest in about 70 to 75 days. Mine is already 77 and is not ready yet.
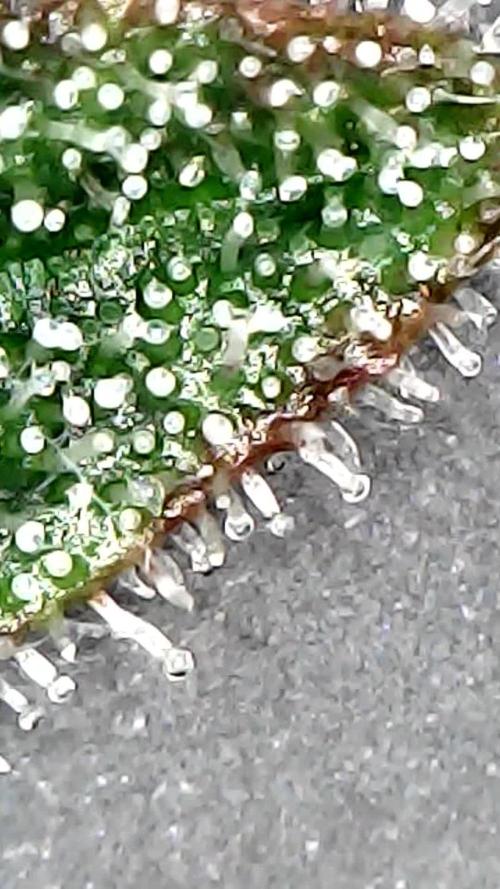
As you can see from the picutres and clips especially the last ones of this week...you can see that her trichomes are not quite ready yet.
The trichomes look like they are 85%/90% ready right now, as I am writing this post.
The pictures and clips are also from this morning, is all fresh material.
Most of the trichomes are cloudy but you can still see that few of them are not ready yet, also there is no amber colour at all.
All of this it must mean that the plant can go couple days more.
This week and the previous one I was reading and checking online about this plant and her previous grows. I understood that the plant in reality takes a little longer to get FULLY ripe and ready. A little over 80 to 85 days.
I will let her run for another week more or less, today is day 77. For peace of mind I am checking the trichomes every 2 days to don't miss it or be late.
It would be a shame to cut it down right now.
Why?
I can see the buds getting bigger and bigger everyday! She's getting thicker literally in front of my eyes, especially in this late phase of flowering.
I can see the buds increasing in size day by day. I am sooooo happy! Dope!
So harvest probably next week!
WATERING
This week I've started the FLUSH cycle.
The plant got 6 L of plain water adjusted to 6.3 pH and splitted in 3 watering sessions by 2L each.
In all 3 waterings the drained water was around 1 liter.
NUTRIENTS
No nutrients this week, same story next week.
Just plain water till harvest, the water will be adjusted to the correct pH. No more no less.
The harvest should fall exactly on the day that marks 2 weeks of no nutrients. So actually with this we are really spot on! Perfect I would say.
LIGHTNING
The light is always 100%, 24/7.
The only update here is that at the beginning of this week I lowered the light about 10 centimeters for this last days of flowering. Is an experiment...anyway my light is only 70 watts in the end. So I am not too worried about it, probably I should lower it couple of week ago to give that extra boost to the plant. But it is what it is, now is too late ahahahah.
Anyways talking about the light...before I've got 25 centimeters between the led lamp and the plant, now is about 15 centimeters of distance.
TRAININGS
NO MORE training techniques were applied to the plant.
At the beginning of this week I REMOVED all the LST that was trapping and keeping her strapped to the pot.
I wanted the plant to BE FREE during the last two weeks of her life. Like a little treat and mercy for this beautiful prisoner ahhahaha.
Removing the LST I allowed the plant to lift up a little bit more her branches.
In this way the buds sites went up and closer to the led lamp, closer about 10/20%. Maybe is not much but in the end everything counts on the scale. We will see the results.
The height of the plant didn't change in this last weeks, it reached 48 cm and stayed there.
Actually after I released her from the LST last week, it gained 2 cm.
So now at the end of her life the plant is 50 cm tall.
The smell is strong and pungent, refreshing somehow. Very pleasant, I love it.
OVERALL
Everything is going well, just a little bit late on the schedule.
The patience is the key for good and big buds!
I CAN SEE THE FINISH LINE, WE ARE ALMOST THERE.
See you next week for the final update! Stay safe y'all!


Likes
33
Share


@MrStryker
Follow
All plants are finished and drying harvest pictures and weights next Sunday !!!! Happy Growing


Likes
20
Share


@adam_pawloski87
Follow
We are in Flush !! Was giving them GH Flora series + rapid start + cal mag
Likes
6
Share


@Naujas
Follow
the girl was completely dry on the day of watering... it would be better to water the day before... but the spoons are already in the afternoon :) in a week the girl will probably get another leaf removal, her flowers have already started to grow :) good luck to everyone :).

Likes
18
Share


@biggreens420
Follow
this is a great auto flower she does what an auto should with little tender needed but with a decent light and good size pot the potential is great for a huge lemony harvest shes one of the easiest most resilient plants iv grown as shes not had the best run at all and has still done well she was only under the Mars hydro epistar120 with another auto and plants that I have in veg and still produced well would recommend to all growers new and old thanks to all who help comment and like and make the site a good place to be happy growing guys