


Likes
Comments
Share


@YaBoiSaundy
Follow
I continue to see yellow leaves and cannot figure out the root of it. I can't tell if its a nutrient deficiency or a PH issue, if the nutrients that I add do no suffice then I will go get some PH down, as my soil PH is slightly high at 7.0, but I would not believe that could be the cause of it, only time will tell. To end on a more positive note, even with some yellow leaves some of these plants are bursting with life, and starting the 3rd week with some monster leaves for such a young plant. *UPDATE* We are now currently near the end of the weeks and the plants are beginning to truly thrive with some nice stalks and an explosion of colas. The yellowing seemed to stop now that I give it a regular supply of nutrients, also trimmed off any excessively yellow leaves. I did some very light pruning as well to allow more light to the newer colas and may have accidentally topped to runt plant way too early haha whoops so lets just hope for the best for the little guy.

Likes
12
Share


@ZzTooRightOGzZ
Follow
Week 3 going well.
Topped her and doing a bit of lst to her as well hope everything goes well.
Week 4 fead her with 25ml off grow auto from living Soils.


Likes
6
Share


@ProfDoty
Follow
Half of the first harvest done still have k lots to learn but off to a good start still got the Green Poison Auto goin

Likes
4
Share

@GREENPHOENIX6262
Follow
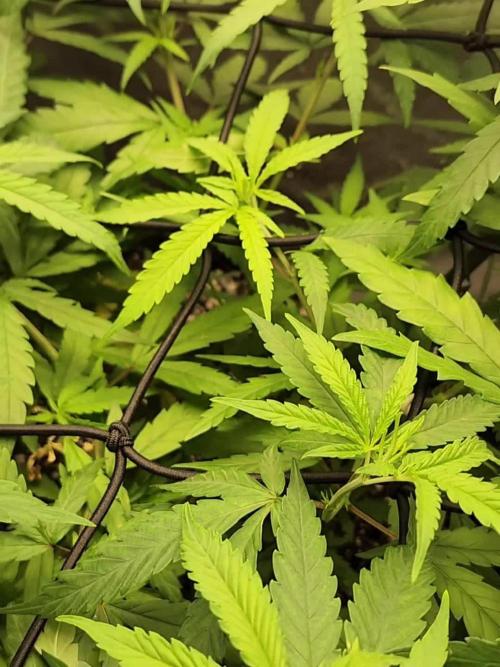
09/07 - Reveg still in process - Mother plant in recover from clone clipping - unhealthy clones disposed - cutting new clones this week - Myco and Superthrive feed increased - Net dropped an LST.
09/10 - Mother reset in motion - clones are healthy and rooting effectively - humidity 89% at 18 hrs.

Likes
12
Share


@DeepWaterGrower
Follow
🗓️ WEEK 1 / DAYS 1-7 (flo)
🔙 The first four weeks of vegetation went remarkably smoothly. I gradually increased the EC from 0.6 to 1.2, and the plant responded with healthy, compact growth. By the end of week 4, the plant was bushy, vibrant green, and ready for the flip after a 24-hour flush.
💧 At the beginning of this week I introduced a new nutrient solution with EC 1.6 - PH 6 and also started adding a flowering stimulator to the mix, Power Buds by Plagron. She's definitely thirsty, drinking about 2 LT/day, and importantly, isn't showing any signs of stress from the change.
🌱 With the switch to the 12/12 light cycle, the plant has started the stretching, increasing in height from 21 cm to 29 cm. It's also become incredibly bushy! Given her still relatively contained height, I've decided I won't be using a SCROG net.

Likes
78
Share


@DevilsBud
Follow
Flower power Time 🤘🏻🎉🤘🏻
They are starting to pube up
so good times ahead
Keeping posting Tru the week
28/10/22
Removed the lowest 2 branches
29/10/22
Removed the Layer of perlite and added some soil to top some Pots off
31/10/22
The Stretch is coming all sweet seeds gave nice structure red gorilla girl is little bit smaller then rest but she can always Catch up
Likes
31
Share


@The_Doctor_Green
Follow
21/10/22 dia 105 de la floracion y dia previo al comienzo de la semana 16..
En esta semana 15, he retirado bastantes hojas amarillas, no se agrego ningún aditivo.
En la semana siguiente lo que se hará es comenzar con el lavado de raíces con flawess finish de advanced nutrients, comenzare con 2ml x litro de agua y dejare drenar un 20% del riego y cuando seque volveré a repetir dicha operación.

Processing
Likes
51
Share


@Experimentgreen
Follow
Nice increase in height this week with many beautiful new growth nodes. If i was going to Top, I'd do it here soon, but this gals gonna be mostly au natural.
Still getting just the cfl bulbs for now while she's small so I can watch her closely. Already some amazing big fan leaves on her.
Humboldt Seed Organization has this Blue Dream CBD labeled at a 1:1 ratio. Which can hopefully bring in a thc and cbd percentage of 10. I'll be on the lookout for smells of berries, pepper and citrus.
Happy growing everyone. ✌️


Likes
15
Share


@Black_Widow
Follow
Привет садоводы
вегетация продолжается
еще 1-2 недели и можно ее переводить на цветение
день 42 и я перевел время на цветение


Likes
Comments
Share


@eldruida_lamota
Follow
Vamos familia, actualizamos la quinta semana de vida de estas Fruit cake de Seedstockers, salieron las 3 de 3, 100% ratio éxito.
Aplicamos varios productos de Agrobeta, que son increíbles para aportar una buena alimentación a las plantas.
Temperatura y humedad dentro de los rangos correctos dentro de la etapa de crecimiento.
La tierra utilizada es al mix top crop, por cambiar.
De 3 ejemplares seleccioné los 2 mejores para completar el indoor y apliqué tetra 9 vía foliar, también cambié el fotoperiodo a 12/12 y apliqué una buena poda de bajos, se ven bien sanas las plantas, tienen un buen color y progresan a muy buen ritmo por el momento.
Agrobeta:
https://www.agrobeta.com/agrobetatiendaonline/36-abonos-canamo
Hasta aquí todo, Buenos humos 💨💨💨

Likes
23
Share


@XperencdGmanXG
Follow
used my own fish shit to do a massive watering of nutrients and microbes into the soil. added some more power bloom because I ran out of stepwell bloom amendments. should have some in next week. they are looking like they are 3 weeks into flower at week 2. grow fam, love ya!
Likes
69
Share


@Natrona
Follow
Fractal week 18 & 19. 7/28 - 8/4-10
I am late for my outside ladies diaries updates. Life has been getting the best of me lately. I’ve been packing my daughter’s room and moving her things to her new home. For those that have followed my since my beginning here, Cancer left me with neuropathy and arthritis in my hands. I can no longer do my glass fusing or flame work. To close this chapter of my life, I’ve been inventorying glass, tools, equipment, molds and supplies to sell. The most stressful has been appealing Medicare claims and receiving the second denials on the same claims. They are the last payer of record so good luck getting any reimbursement you are entitled to.
My apologies to all of you for being so brief on your diaries and not providing many comments.
Photos are from 7/28- 8/9 for both weeks.
For my outside ladies, Opium, Auto Opium, Fractal, and Lemon Cake not much changed. They continue to live in sweltering conditions. Temps are in the upper 80-90s with humidity over 105. In addition to the heat, Hurricane Debby started up the coast but was downgraded to a tropical storm by the time it got to us. Expecting our normal thunderstorms, I waited til morning to bring the ladies inside.
Overnight, we had wind gusts of 25mph. Yeah, then I brought all gals into the house. The photo gals are strong and with thick stalks were able to withstand the winds. Both Opium’s got blown over Auto Opium is thin and spindly and before I could save her from the winds and rain, she got whipped side to side. The top 2 feet bent hard one way and the top 6 inches bent the other direction. The pics show my attempt to bandage the damage 😟 to her top cola with chopsticks and electrical tape.
I top dressed all ladies with Bloom Soil for organic fertilizer. Buds are fattening up, trichomes are minimal at this time but some fragrance is starting to be noticed.
Thank you @DivineSeeds
Thanks for the visits, likes and comments, I appreciate all the plant love💚.
Have fun & love what you grow 💚
Sending you good vibes of love, light, and healing 💫
💫Natrona 💫

Likes
4
Share


@2x2UkGrow420
Follow
Had to tie up branches to take the weight of these heavy ass nugs, can’t want to taste this smell orangey as f**k! 🔥🔥🔥 started flush midway through the week.
Likes
13
Share


@WeedM8
Follow
Hello m8 welcome to this journey with me in this diary will have very interesting strains hope u find something useful
Persian Girl
- [ ] 1st week Veg: germinated in substrate lighting very close so it jets medium high humidity after the 3rd day they started sprouting
- [ ] 2nd week Veg: this week my ventilator broke down and as the temperature stayed very warm nothing developed much
- [ ] 3rd week Veg:fortunately this week i had fixed the ventilation and the temperature has go down a bit allowing the little plants to develop and reinforce
- [ ] 4th week:very good developments in this week I already started feeding a bit two times but i didn’t have to…once was enough
- [ ] 5th week Veg:this week they were very strong green i only had to water them good and keep the ventilators going no stop .They have good hight already ,but as i have to strains together. I want to transplant them when the hight of the other one have stretched… I’m thinking to transplant next week if not the next one
- [ ] 6th week Veg
- [ ] 7th week Veg
- [ ] 1st week Fl
- [ ] 2nd week Fl
- [ ] 3rd week Fl
- [ ] 4th week Fl
- [ ] 5th week Fl
- [ ] 6th week Fl
- [ ] 7th week Fl
if this was useful please like and follow

Likes
10
Share

@Miketama
Follow
Fractal ~ Here We Go! 🌿
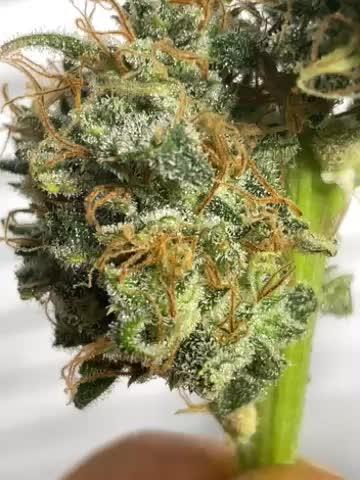
Tomorrow (day 53 of flowering) harvesting all the top colas Will complete the full harvest at day 60 of flowering - exactly the timeline indicated by Divine Seeds breeders🇨🇦🇺🇦 Nothing but love for them! 💚
First harvest complete! Trimmed all top colas fresh, removing parts without trichomes and selecting only useful trim. Largest cola split to prevent mold, main stem removed.
Harvest stats:
• Trimmed weight: 127g from this first harvest
• Now drying at 57% humidity and 19°C
• Very little material without trichomes
• Trim sealed in freezer bags (air removed with straw) and frozen - not weighed yet
Thanks to everyone for checking in! 🙏 Appreciate you taking a look!
More updates soon! 📸
Likes
4
Share


@PolezGardn
Follow
Day 69 flower, the ladies have become very fat! the white hairs are also slowly turning orange!


