Likes
17
Share
@NAG420
Follow
3 months update she is now starting to taste really good and smell so nice!!! Super happy on the 3 months cure. I have updated my review and this strain is great very happy with the outcome! Well guys had to close the chapter on this one it’s been a busy few months for me. Can’t wait till my next journey will be back!
Likes
21
Share
Everything seems to be going as planned. First grow Auto strains : Ak auto (1) Kush Auto (x3) General hydroponics nutes.(1/2 strength) hps+led total of 815 watts. DWC 24h lights LST+topping on 2 plants. LST on 2 plants anything else you want to know hit me up. led at 24"
Likes
25
Share
Day 22 22/07/24 Monday Nothing new to report. Starting to see them beautiful fans appear that's all 😁✌️ Day 23 23/07/24 Tuesday Feed today, giving them straight all nutes Inc flowering nutes. I will update the dose as they grow and develop a bigger hunger. (Not sure what's wrong with Overdose #2, bit mutated, we'll see how she gets on 😅) Video updates 👌💚 Day 26 26/07/24 Friday De-chlorinated watering pH 6 with 5ml calmag to 5L water. Watered each with 250ml and had small run off. I will continue to feed/water with small run offs to help prevent salt build ups. Video update.
Likes
27
Share
1/20/2023- So much to do pre grow and over the next 16 days, absolute first order of business is that I have to take down my current Grow---TIMBER-- Then I have a list of things I have to get done in order to be ready to start this grow 1 Feb. With that said T - 2 days until start 48 hour Flush T - 2 days until Start 48 hours of Light T - 4 days until TIMBER!!! Items that need to be done before 1 Feb 2023 1. I need to clean the tent out 2. I need to clean the equipment- Proper Sanitization between grows in Hydro is a must!!! 3. I need to get the hole in the ceiling above my tent repaired- For my last grow I had a deep sink installed in my grow room, to make Hydroponics a little bit easier and have a water source in the same room. The seals on the pipes they were installing broke and leaked through the ceiling causing some damage all the way across my grow room, I was already weeks into my grow and couldn't risk them working above my tent and it would have been very awkward positon for them to be working in as well, so have to get this done quickly between chop and germination. 4. I have to install my new light- I was using a Vivosun 4000 and for this grow I am switching up to a Spider-farmer SF 7000. 1/20/23- For this upcoming grow I am working with M/F photo seeds so I ordered 4 Sex determination kits. I recieved my my 4 Sex determination testing kits from Rimrock Analytics today. I will be using these to test my plants at week 2 of Veg so that when/if I take clones I know I am taking them off females. As well as I don't want to accidently pollinate my tent during this grow I am looking for big beautiful buds not seeded buds. :-) 1/24/2023- Harvest of current grow- Started at 2:00pm and finshed wet trim and firt batch into the freeze dryer. 1/25/2023- Next batch into the freeze dryer and cleaning all my equipment for this Grow. T-1 Day until the workers are supposed to be here to fix the hole in the Grow Room. T-3 days until I instll my new Gorilla Grow Tent and my New Light Spider Farmer SE-7000 for this grow. T-7 Days until Start of Germination 1/26/2023- Harvest is done ran through the Freeze dryer and dry tim completed. 1/27/2023- Grow Room repairs completed. Hole is gone Letting the paint dry before I install the new tent. T-2 days until Install the New Gorilla Grow tent and the new Light T-3 days until I put the hydro equipment in the new tent T-5 days until Germination 1/29/2023- Day 0- Final Pre Germination activities Germination Start T-3 days The paint on the ceiling was dry and it was time to finish prepping for Germination. I got the following items knocked off my list. New 4X4 Gorilla Grow Tent is up and ready New Spider Farmer SE-7000 Light is installed- Thanks Moony Grows for the suggestion and for the Code that got me some money off and free shipping (Moonygrows)!! I turned the lights all the way up to max and set the timer to 18/6 0600-0000. I will keep an eye on the temperature and humidity without my plants and see how hot it gets with the new light. I put my Hydro system back together and put in 40 gallons of water into it, time to monitor for leaks the next few days. I Setup my cloning machine for Germination Days 3-11 1/30/2023 let me break down the situation, ROOM in the TENT.. Enough said.. No really I tried putting my exhaust system up in the new tent with my new light, The light is so big corner to corner that it really didn't give me enough room for the lights be be raised, with the exahust hanging the buckets my plants are Starting in are 2 and 1/2 feet off the ground, great for plenty of room for roots but not so great for upwards space for the plant to grow. In a 6' 11 tent with the exauhst in side and hanging that only gave me a little over 4 feet of grow room to play with. My last grow if you saw my diary, anyone could tell I was struggling to keep the buds off the lights. No good, Since space was such an issue I was running my carbon filter inside on the ground but It really needed to be up sucking the heat out not shooting the cool out. With that setup I was sucking air through the filter and pushing it out the tent at a bottom exhaust hole cold out. Wasn't doing me any good for my heat. I was hitting temps of up to 85 degrees. I bought a portable AC unit and have been running it in the grow room to try and keep temps below 85 and I have had to lower the power on my lights during grow also not ideal.. With that said a friend of mine MoonyGrows (Check out his diary) took the time to look at my issue send me a picture of my grow tent setup with detailed instructions on how to suck the air out from the top but putting my filter and fan on top of my tent so no room issue and I am sucking the air out from the top where the heat is instead of pushing the air out from the bottom where the cool is... THANK YOU MoonyGrows For taking the time to help me get this straightened out.. Now I have room and I have the exhausts working right and now my temps with everything at 100% are topping out at 80 this dropped the temp by 5 + degrees at 100% max. T-2 days until Start of Germination Prepped my seed tray with humidity dome Prepped my Rapid Rooter plugs. I Used RO water, and I added a few drops of Hydrogen peroxide to Oxygenate the water. I then PH balanced between 5.7-6.0 the same that they will be getting in the Cloning Machine and when they get to thier final grow pod. I perfere the 5.8x range and I hit 5.84 for these rapid rooters. If you want to see a complete video on the process HowWeedGrow has an amzing video that shows step by step how to do it and explains it better than I ever could including how to plant the seeds. Which I will cover when I get to that step on Wed. https://www.howweedgrow.com/how-germinate-weed-seeds-cannabis-rapid-rooters/ 1/31/2023 T-1 day until Germination Start All set and ready have my Rapid Rooter plugs ready to go have my seeds out.. Have my seed tray warming up tonight. Tomorrow morning right into the Rapid Rooter then strait into the tray. I will spray the dome to start the humidity in there. 2/1/2023 Germination Day!! Let the games begin! 0600am Put the seeds into the Root Riots. And then put the seeded Root Riots into their first home the Seed tray. I have them under the light 24/7. Sprayed the dome 7:30pm Sprayed the Dome to keep humidity going on the dome. 2/2/2023 Day 1 of Germination Sprayed the Dome in the morning Sprayed the Dome in the evening 2/3/2023 Day 2 of Germination Roots are starting to come out the bottom of the root riot plugs and the heads are slowly popping out of Number 4 just below the surface. Afternoon- Number 4 has popped up Evening- Number 3 has popped up as well. Happy Dance!! 2/4/2023 Day 3 - Germination Surprise Surprise Surprise- all 4 have now poked their heads up.. Happy day!! 100% Germination succeeded. Now major milestone to track is how many are female and how many are male. I will take look at the roots this afternoon/evening and see if they have enough root to go into the cloning machine for the next 7 days before they go into their Hydro Pods. Day 3 - Germination - Evening.. Roots looked good and they were tall enough to make it into the cloning machine. Now that they are all in the cloning machine I have switched the lighting to veg state 18 on 6 off. 2/5/2023 Day 4 - Germination - Morning All the Ladies (fingers crossed) looking great stretching nicely and look nice and green, Photo synthesis underway.... UPDATE!! After a very interesting POD cast on FSTS by Dr. Bruce Bugsbee from Utah University, I have shifted my lighting to 24 hours on through seedling and then I am going to shift to 20 hours on the rest of Veg. 2/6/2023 Day 5 - Germination While Checking on my conditions inside the new tent last night, I found that the Humidity was down to 39 Percent. I added an AquaOasis Cool Mist Humidifier, the reason I selected this humidifier is that I needed one that could be turned on and off utilizing my Inkbird Humidity Controller IHC200 that I have my Pro Breeze Dehumidifier currently running with. Root structures are starting to get there about 1/4 of an inch. 2/7/2023 Day 6 - Germination Everything seems on track more roots poking out of each today. They are each getting a little taller as well. Checked in the evening and number 3 was drooping the Root riot plug on the bottome was dry and the roots were not in the water yet. I raised the water just enough that the longest root that was sticking out is now hitting the water. 2/8/2023 Day 7 - Germination Everything looked good while checking in on them this morning number 3 is now full up and no droop again. 2/9/2023 Day 8 - Germination T-2 days until Plant into Forever Pods and we start week 1 of Veg .. :-) Surprising thing to me is that number 1 and 2 were later in popping then 3 and 4 but the roots are growing longer in 1 and 2. 2/10/2023 Day 9 - Germination Number 1 and Number 2 are definitely ready for transplant today.. Based on how they were yesterday and where they are today I am hoping by tomorrow 3 and 4 are ready. Today they look to me where 1 and 2 did yesterday.. I really hope 3 and 4 catch up by tomorrow since.. T-1 day until transplant to new/ final home for grow. Need the roots long enough to have some clay down in the basket to keep the root riot out of the water and only roots in the water.. 2/11/2023 Day 10 - Germination Today they got placed in thier forever Home, 7 days from Sprout and 7 days until Week 1 Start. PPM- 180 this is water out of the Tap Temp Water: 70.7 Temp Tent: 77 Humidity: 40% I have a humidifier going 24/7 to try and bring this up.. I also have Humidity Domes on each plant. 2/12/2023 Day 11 - Germination Sprayed the domes, all are looking good.. Nothing much to do at this phase but Keep monitoring the PH level in the system and making sure they have a comfortable home. T-6 days until Week 1 start 2/13/2023 Day 12 - Germination Sprayed the domes, They were looking a little yellow today so I moved the light down to assist. Nothing much to do at this phase but Keep monitoring the PH level in the system and making sure they have a comfortable home. T-5 days until Week 1 start 2/14/2023 Day 13 - Germination Sprayed the domes, They were looking a little Florissant yellow today, with what looks like slight burn on the tips, I talked with a fellow grower and we agreed that It was probably that I was drowning them, Yes you can drown you plants even in Hydro, but only early on.. :-) It usually happens with the water being too high, which soaks not only the roots but the medium (root Riot plug in this case). I lowered the water from touching the bottom of the pot to about 1" away. This will probably take 3-4 days to resolve. I will continue my daily monitoring. T-4 days until Week 1 start 2/15/2023 Day 14 - Germination Sprayed the domes, continue my daily monitoring they look a little darker green instead of lime green now that I lowered the water levels in the system, so I think that I might have resolved the issue but it will take a few days for recovery to happen. T-3 days until Week 1 start 2/16/2023 Day 15 - Germination I looked in on them this morning, 3 and 4 look like they are doing well and recovering nicely. Number 1 not so much it has brown spots on the leaves, this very well can still be a side effect of the overwatering but I decide to go ahead and add Nutes earlier than I was planning just incase. I was going to wait until Saturday but I think intervention is necessary now especially after drowning them early on. I added 1/2 what I am planning on adding for week 1 start. I also think I am going to adjust my chart to add 1/2 2 days after plant from now on. I don't think it would hurt it to have some Nutes to pull from. .25ml/Gal Calmag = 12.5ml 1ml/gal GH FloraMicro= 50ml 1ml/gal GH FloraGro = 50ml 1ml/gal GH FloraBloom = 50ml T-2 days until Week 1 start = I will drain the system and start it over on Saturday with Week 1 Nutes. 2/17/2023 Day 16- Germination I didn't even want to post today after looking in on them this morning, 3 of the 4 are now showing signs of dronwing.. Brown spots on the leaves, the water levels were still too high.. I drained about another inch out of the tanks.. Will see how quick they recover.. I start week 1 tomorrow and will have to ensure my water levels are at least 1" away from the basket on this round.
Likes
6
Share
Vanilla Latte is very special strain for me: I've never grown the plant like this: thank you Humboldt Seed Company for such a good job
Likes
2
Share
Likes
23
Share
05/13: graine mise pour 12h dans un verre d'eau 05/14: passage dans le papier toilette. 05/15: germe sorti la graine commence à s'ouvrir direction le jiffy 05/16: 24h plus tard le jiffy ce craquelle et on aperçoit la graine remonter vers la lumière 05/17: je me réveille et aperçoit la graine presque ouverte qui a percé le sol encore quelque heures et je place le jiffy dans le pot de 11L qui l'attend. Voilà qui est fait le jiffy est enterré avec un dôme dans son pot. 05/18: je suis épaté par la vigueur de ce plant, elle a vraiment envie de vivre la petite elle est passée au travers de la graine avec une force incroyable !! Je compte suivre la logique d'arrosage suivante: je maintient le substrat dans sa globalité +/--humide car la petite est au millieu de son énorme pot et je vais arroser à hauteur de +/- 150ml les pourtours du plantules quand le subsrat montrera des signes de sécheresse plus avancés et je réhydrate la terre en surface en dessous du dome pour maintenir un taux d'humitée élévée pour les premiers jours de la lady. 05/19: première arrosage en douceur autour du plantule. Dans ma première culture j'ai utilisé des pots de 5L mal rempli y devais y avoir +/- 3.5L en réalité et sur cette plante ci j'utilise un pot de 11L et l'arrosage est plus simple à gérer dans un grand pot enfin on as moins peurs de sur arroser. ... 05/20: jusqu'ici tout va bien!
Likes
9
Share
Week 8 Day 1: how did we get here?! Northern Lights is looking beautiful (the only plant in a 5 gal pot outside). No major issues. Kids were fed liquid nutrients for the second time 9/8, and will be recieving them once a week moving forward (hopefully every other watering). Gotta find a way to make watering a smoother process tho, might invest in a home RO filter 😂 Big dreams being discussed, this could be the start of the only cultivation, breeding, and distribution center that has a primary focus on re-entry and subsequent business development.. That’s how you do socially responsible business and policy. You heard me?
Likes
3
Share
Sehr schwere Buds - einfach zu maniküren - jetzt erstmal trocknen
Likes
2
Share
@FEBREZE
Follow
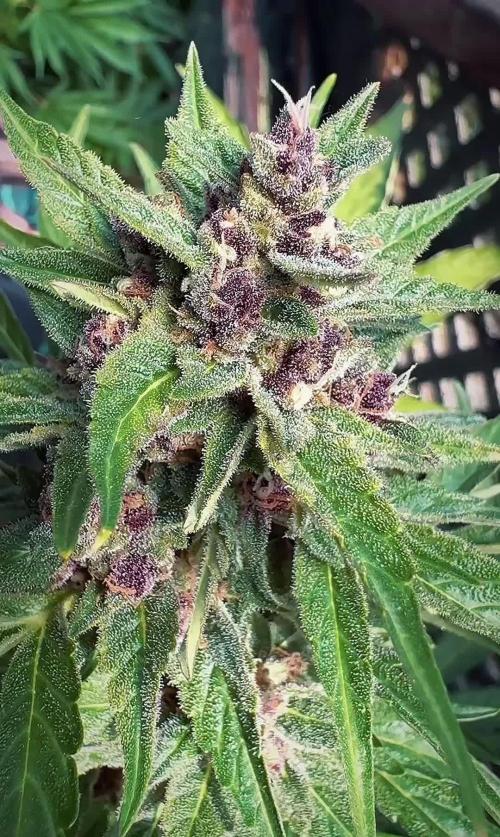
Studio54 – Original DeepEast x WizardTreez Cut aka RS54 Sunset Sherbert x OZ Kush#54 Tag 35 der Blütephase wurde etwas Entlaubt. Die Buds sind schon ordentlich dick geworden und fangen an zu Purplen.
Likes
10
Share
This was a seed from Skunk Fem V1 lets see how it turns out male or female.
Likes
11
Share
@PanGrower
Follow
The leaves continue to turn yellow from the bottom. It seems that I started fertilizing too quickly and the tips of the leaves burned a little
Likes
14
Share
Day 65 harvest of the main buds and some bigger side buds. Lower parts stay for a couple more days for better results.
Likes
25
Share
week intel: im felling in love with them everything is good . this week was time of second net layer , the first layer was for spreading the branches and doing LST now the second layer is for supporting branches for later weeks when the buds gain weight and gets heavy the net will hold branch stand up without benting. stresses: im just gonna cause a little E.C stress to raise the terpens. i found their max tolerance is 1.9 E.C so im not gonna reach or get close to that amount again and beside this wont cause any more streses untill week 6 that will do second pruning and we are done with trainings then. feeding: as always im feeding plants 3 times per week with nutrients , no plain water at all, just with nutrients with adjusted p.h at this order : day 1 : i feed them heavy with silicate +base nutrients(calcium & micros + Bloom) and karbo about 950 ppm - 1.8 e.c to cause a little e.c stress. day 3 : i feed them low dose for start of Green House Feeding Booster around 267 ppm - 0.6 e.c alone cuz this bad boy is very strong. day 5 : i feed them with medium dose of Top-Max around 160 ppm - 0.3 e.c to let them recover the stresses and eat the previous nutrients untill next feed at next week and the next 2 days will rest and eat :D just remember never feed them plain water besides the first week of germination always feed water with nutrients to feed them right p.h every time and to avoid excess water problems, and let them eat the previous meal for 24 hours and dry the soil, so at total only feeding nutrients 3 times a week other days let them dry and rest