


Likes
Comments
Share


@NSCanna
Follow
Not much for feeding this week, accept for the Rezin and some blood meal since she's not as dark green as I would like. Nodes are looking okay so I'm leaving it at current light distance to keep them closer together.
Did a large trim and another spray for thrips. Microbe populations are also looking good.
Added supplemental CO2

Likes
2
Share


@Yuriboyka99
Follow
la resa è ottima, la resistenza di questa genetica altrettanto. Ho avuto problemi con le mosche bianche e nonostante ciò non hanno accusato molto lo stress.
Likes
11
Share


@Teezkiee
Follow
Handmade DWC and noticed a great start for week 2
Started in Root Riot cube


Likes
Comments
Share

@OB-GYN-Kenobi
Follow
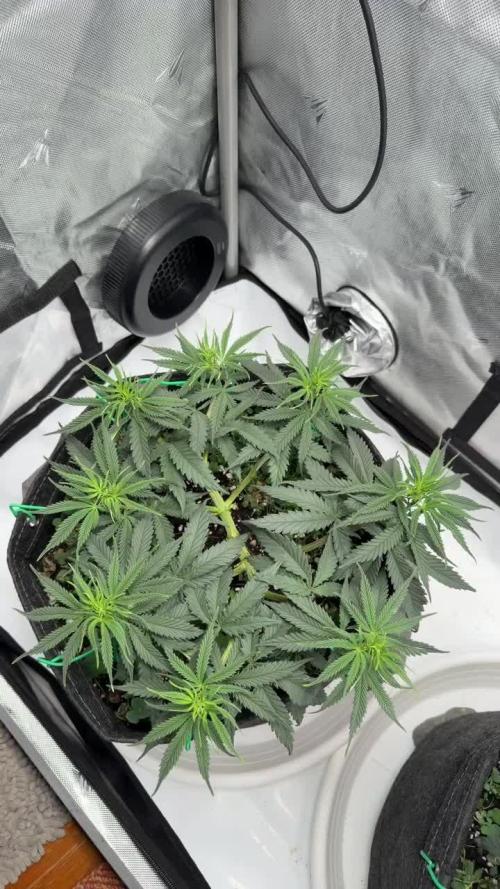
Very pleased with the state of the Chemdawg bonsai, the ceramic cupcake reveal is working nicely. Still need to clean up those roots once they firm up a bit. She's also starting to show pre-flowers now.
Meanwhile, the main Chemdawg is looking great, the octo-colas are shaping exactly like I hoped, and she's mostly outgrown the overwatered thing. That said, she's a very fast grower and I'm running out of horizontal room. I'll probably need to top her again just to slow her down compared to her tent-mate (Lemon Tart Pucker, growing in a much more indica fashion).
Tent is still holding at 600 PPFD, 82 F (28 C) daytime temps, target VPD of 1.0. Did another Rootwise soak across the tent this week, plants seemed to enjoy it.
Likes
12
Share


@Willy_Balls
Follow
After lots of perturbations, including visit from electricity company and moving 80cm-1m plants to another location in plastic bags 😅 we finally can start this run. Plants look super happy so far. They are all my best clones. This time I will try another cut of violet face and it will be probably the last time I grow her. I have coco jambo from. Anesia in another tent. There is so many names strains to discover. I’m so pumped for the future.
If you wish, please join me on the next adventure.
Cheers,
Growers love


Likes
2
Share


@Nofeckingclue79
Follow
I've not had to trim any fan leaves they have all died on their own and I have just picked them off with tweezers apologies for the video I don't know what happened but I add smoked a doobie before 😂😵💫

Likes
11
Share

@Teezkiee
Follow
Biggest Autoflower Ever - Pineapple Express was the GOAT.
479 Grams Dry Weight,
78 Days from seed to Harvest
Was a big surprise having almost a HALF KILOGRAM FROM AUTOFLOWER,
Always thought 500 grams per square meter description was a legend but no, IT CAN BE TRUE
Good luck to all my grower fellas, I will not stop on growing in hydro, even tho half of this run was in handmade hydro.
It was my third hydro Grow and I see the Improvement
Last one was only 300 Grams dry weight Strawberry Banana from FB
Pinepple Express itself is a 10/10 strain, it says mostly Indica but feels like the best Sativa I have ever tried, great pineapple smell and taste, hits like Mike Tyson, perfect strain and YUMMY as hell, loved it, will grow it again probably as it's not only mine favorite strain.
Cheers Fellas, good grows and big yields to everyone!
Likes
3
Share


@Mismatas
Follow
APROXIMADAMENTE CUARTA SEMANA EMPEZAMOS POR PRIMERA VEZ NUESTRO LST Y UNA LIGERA PODA DE BAJOS.
SEGUIMOS CON EL CABLE DE CALOR PUESTO Y TAMBIÉN AÑADIMOS UN CALEFACTOR PARA MINIMIZAR LAS BAJAS TEMPERATURAS

Likes
2
Share


@Roster
Follow
Setted up this cutting of Skywalker. Having some initial problems with air and humidity. Hopefully is going to rain soon so humidity will rise a bit. Planning to do some LST and ScrOG. I'm helped by a friend because my skills are not good enough yet.
Let me know if you liked the sequences! I'm trying to do some timelapse research as well. Raspberry is running the timelapse and compiling the video I'm trying to update every day or two.
😷7/12 Changed water due nutrients deposit. Clean start as the roots have touched the water. EC 1.5 Ph 6.2
😵Ps. light was set with VEG and BLOOM BOTH ON! Lol, hopefully this is the 5th day 😂
Likes
6
Share


@Huntablunt
Follow
So, day 14 will start today at 5pm......the bigbud develops quick, the cherries seem to be a bit slower. The "Cripple" shown on one photo develops the slowest. Seems to me, that the cherries had a bit of a problem with light intensity, which surprised me. So I changed the lamp distance and since then they seem to like it better.
Never used led light and am surprised about their power. Never had the problem with too much light intensity. So I will most definitely buy another and smaller lamp for the first week or 2. Operating at 25% was still too much for the cherries. Alternatively I could change light distance in this time.
Plants are fed 2ml of root juice and biogrow per liter. From week 3 on I will increase it to 3ml.
UPDATE DAY 19
Plants receive 3,5ml of biogrow per liter. They drink like alcoholics so now they get about 1litre of pure water and about 400ml of nutrition.
I started LST as you can see. Temperature now sucks a bit, but it's hot outside but will change tomorrow fortunately this is no permanent problem.
If I am lucky and nothing unplanned happens, like insects..... I will enjoy these probably. Plants also began to show gender and look female so far.
In about a weak I will change nutrition for blooming
UPDATE DAY 20
As the pervert that I am I watched this video over and over.........😂
well, the one I posted......What I thought I have seen was slight signs of over nutrition. Wouldnt wonder, because first 2 weeks (more or less) they did get just root juuice and I jumped from 2 to 3..5ml of grow....😁Ladies seemed thirsty but right now I guess, the color I thought was a sign of undernutrition is just the "normal" pheno from the cherries. Sry for my english.
Day21
So I was able to apply a bit more lst since plants start to stretch a bit. The biggest plant in the back got bend down in order to avoid burning the top or having to adjust the lamp.
I get more and more excited to see them develop! I also started taking of lower leaves that are not needed. Plants are super bushy and will have about one more week, before they enter blooming.
The stems are pretty strong and sidebranches get bigger and stronger too. So far, everything alright.
Plant height is about 25-45cm, estimated, but my eye is quite OK. And 1 or 2 cm more or less don't change the general fact that they are impressing me so far
I actually just wanted to share a creative moment I had this morning..... I guess you all know Dean Martins "let it snow"..... Lol
Oh the weather inside is right
And the lamp is burning bright
The trickomes brightly glow
Let it grow, let it grow, Let it grow
Man growth doesn't seem to stop
And soon I'll reap my crop
If lights are turned way down low
I will sow, I will sow, I will sow
When I finally taste the weed
And enjoy the smoke so sweet
I know the potency I have grown
What a stone, what a stone, what a stone
I really love these plants
A true first sight, sweet romance
And as long as I have room
Let it bloom, let it bloom, let it bloom
I don't care what judges think
Just take care that it won't stink
No noise, no talk no smell
Keep it stealth, Babylon go to hell


Likes
35
Share


@Master_weeda
Follow
Bonjour à tous les padawans et les maîtres jedis
Pour cette semaine je prévoit de pratiquer comme technique spéciale le LST et juste un arrosage.
Pour cela comme à mon habitude j'attend le cinquième noeud ou que je juge la plante robuste.
Je profite que cette semaine qui va être relativement calme pour faire un LST appliqué et vous faire un rappel de ce qui est pour moi la meilleure technique pour arroser une autofloraison et la façon dont je pratique le LST.
En suivant ces quelques simples conseils vous obtiendrez un résultat optimal tout au long de votre culture :
Le cannabis est une plante qui n’aime pas recevoir un léger arrosage en continu. Il est impératif de l’arroser en grosse quantité, puis d’attendre que la terre soit bien sèche avant d’arroser à nouveau!
Pour calculer la quantité d’eau nécessaire à chaque plante, suivez cette règle :
Le volume d’eau à donner lors de chaque arrosage doit représenter au moins environ un quart du volume du pot !!
Exemples :
pour un pot d’1L, donnez 0,25L d’eau à chaque arrosage pour un pot de 4L, donnez 1L d’eau à chaque arrosage pour un pot de 12L, donnez 3L d’eau à chaque arrosage pour un pot de 30L, donnez 7,5L d’eau à chaque arrosage !etc…
Pour donner un tel volume d’eau, il est souvent nécessaire d’arroser en deux (voir trois) fois, lentement et uniformément sur toute la surface. Disposez de bonnes coupelles sous les pots, celles ci se rempliront d’eau qui remontera dans le pot par capillarité en moins d’une journée. Il est également très important d’utiliser un bon terreau de qualité, avec une bonne capacité de rétention d’eau mais qui assure également un bon drainage (celui ci doit contenir de la perlite, et/ou de la coco, etc..)
Il vous faut alors maintenant attendre quelques jours en sous-pesant régulièrement les pot avec vos bras. Quand ils seront redevenus très légers, vous pourrez arroser à nouveau !!
En effet, comme l’eau pèse beaucoup plus lourd que la terre, un pot gorgé d’eau pèse plusieurs fois le poids d’un pot d’une plante prête à être arrosée. Avec un peu d’entraînement, vous apprendrez donc très rapidement à sous-peser vos pots pour savoir quand une plante a soif.
C’est une technique à la fois très facile et très efficace, et qui peut être appliquée à toutes les plantes en pots !
En arrosant de cette façon, en général vous devrez arroser vos plantes tous les 3 à 6 jours.
Pour cette semaine 3 au jour 17 ma plante fais 12 centimètres et son cinquième noeud apparaît je décide donc de pratiquer un LST sur ma plante.
Pour ce j'utilise du fil de fer galvanisé que je plante directement dans le substrat en faisant attention de ne pas endommagé les racines car n'oublions pas que ce qui pousse dessus pousse aussi dessous.
Jour 17 je pulvérise du une solution composé d'une cuillère à café de savon noir mou dilué dans un litre d'eau en prévention d'éventuels nuisibles.
Je corrige mon LST suivant la pousse de ma plante ...
Pour ma par c'est la manière dont je procède. Comme promis petit rapel de:
Quand commencer à appliquer la technique LST
De nombreux cultivateurs commencent la manipulation dés que les plantes possèdent entre 3 et 6 nœuds ou une paire de feuilles. Durant cette première étape de la croissance, le tronc encore flexible est pliable sans risque qu’il ne se casse, même si au fur et à mesure du développement de la plante il sera de plus en plus difficile de le plier. Nous pouvons continuer à guider la croissance des branches durant toute la culture, même durant la floraison, ce qui pour cette étape représente un grand avantage face à la taille, qui n’est pas du tout recommandé une fois que la formation des têtes commence, cela stressera en effet la plante, ce qui aura pour effet de retarder la récolte.
Comment appliquer la technique de guidage LST
Si nous sommes prudents, la flexibilité naturelle des fibres du cannabis permet de plier leur tronc et branches avec une relative facilitée, même durant la floraison des plantes.
En utilisant une corde fine, nous pouvons accrocher la pointe de la plante à la base du pot par exemple ou à un tuteur que nous aurons planté dans le substrat. Nous plierons le tronc avec précaution et nous le fixerons avec la corde, à partir de là, nous pouvons augmenter progressivement la tension de la corde, chaque jour un peu plus, jusqu’à obtenir la position souhaitée. Soyez attentif à la réaction de la plante, essayez de ne pas appliquer trop de pression sur la corde et rappelez-vous que la flexibilité des branches peut varier d’une plante à l’autre.
Pour obtenir de meilleurs résultats, il suffit de suivre quelques règles simples. Pour commencer, nous devons choisir une corde fine mais pas trop pour ne pas blesser les troncs au fur et à mesure qu’ils grandissent et qu’ils deviennent plus gros.
Nous pouvons utiliser des crochets en plastique souple ou de n’importe quelle autre matière flexible pour éviter d’endommager les plantes. Spécialement en intérieur, utiliser des cordons en plastique de couleur (voir les diaries de @Silky) est très pratique pour voir facilement les accroches et faciliter le travail au milieu du réseau formés par les cordes, les tuteurs, les mailles ou les supports que nous aurons dans la culture. Bien entendu, en culture extérieure et surtout en guerilla nous ferons juste le contraire et nous utiliserons des matériaux de couleur qui n’attirent pas l’attention pour que notre jardin reste discret.
Pour stresser les plantes au minimum, la mieux est de réaliser ces manipulations le soir ou juste après que les lampes en intérieur s’éteignent, ce qui leur permettra de se remettre durant la nuit. Normalement, le jour suivant nous pourrons observer comme les pointes des branches que nous avons pliées se dressent de nouveau vers le haut à la recherche d’une source de lumière.
Que la force soit avec vous
Likes
46
Share


@Rollex420
Follow
- 17-05-21 (Day 1)
// //
- 18-05-21 (Day 2)
three of the girls got out of the soil correctly!😊
while the Runtz sprout is the only one that still remains in its seed despite she already opened it for 2/3 day now..🤔
its root seems to struggle to grow or pierce the soil ..
I'm helping her by keeping the humidity higher since I put this bag, we'll see what happens 🤷♂️🏻
..Any advice will be welcome 🙏🏻
as always have a nice day and happy growing to everyone! 😊☮️💚
19-05-21 (Day 3)
..Unfortunately the Runtz Muffin is dead, was unable to come to life like her little sisters.
After three days, i tried to help her removing her seed husk.. but there was nothing to do 😢
So here is a new start!! 😊
I put this Lemon Tree “Freebie” seed to germinate aaand to replace the poor Runtz Muffin. 😕🙌🏻
We'll see how it goes this time.. 🤞🏻🍀
Sending positive vibes for you and your garden ☮️💚
20-05-21 (Day 4)
All the girls are doing great and continuing their grow.
The Lemon Tree is doing great too with its germination, that in just six hours the seed has opened!
Now I’ll wait that the sprout grow a tiny root of (1,5/2cm) at least, to pass it into the soil.
Happy grow fam. Stay smoky 😙💨
21-05-21 (Day 5)
With today the girls are in their fifth day of growth. 🙌🏻
Bio-heaven (amino-acids) added to the recipe (1ml/1L)
As you know after the death of Runtz Muffin, I have been germinating the Lemon Tree for two days now, today is the third day for her after an excellent germination, I have transferred it from the paper towel to the soil to make it grow.
Let’s see how she will grow, Despite being a week behind, I hope she grows strong, healthy and fast🤞🏻
Have a good weekend, lift up and relax. Peace ☮️ 💚
22-05-21 (Day 6)
The Lemon tree is officially out of the soil, ready to grow! 🙌🏻💚
The other girls are fine, they are on their sixth day of life and they love the environment where they are growing up.
..Plus they are always listening to music (Lo-Fi) 24/7 ☺️
I hope they like it.. 🤷♂️🏻😆
That's all for today. Have a good weekend gromies!! 🧑🏻🌾👩🌾🏻☮️💚
23-05-21 (Day 7)
Today last day of the first week for the girls and first day of life for the Lemon Tree!
The nourishment for them is always the same, except for the Lemon Tree which for the moment I am just spraying water to irrigate it.
..In this round I expect great things!
Happy growing to everyone! ☮️💚
Likes
10
Share


@Aleks555
Follow
Всё норма , наш Himars M142 растёт хорошо . За неделю вырос на 20 см . Удобрение сделал сам ))) 0.5 кг чая грузинского залил 0.5 литра воды , настоялся 2 часа розбавил на 2,5 литра воды и этим раствором поливаю . И ещё одна удобрюха - 2 банана перемолол в блендере затем эту кашу размещал в 2 литрах воды , процедил и 2 дня настаиволась это смесь ,ей и поливал .
Everything is fine, our Himars M142 is growing well. It has grown 20 cm in a week. I made the fertilizer myself))) I steeped 0.5 kg of Georgian tea in 0.5 liters of water for 2 hours, diluted it with 2.5 liters of water and watered the plant with this solution. And another fertilizer - I blended 2 bananas and placed the mixture in 2 liters of water, strained it, and let the mixture steep for 2 days. Then, I watered the plant with this mixture.
Likes
10
Share


@PEANUTBUDDA
Follow
I'm still working out how much water to give, and I've probably under watered. The heat wave has driven the temps up, but these plants are still growing.
Started flowering around day 23. Tied them down to try to get more light to the lower flower sites.
Still haven't decided what to feed during flower, other than Big Bud. Any recommendations are welcome!
Likes
13
Share


@DrewbieDoobieNoobie
Follow
48 hrs. of dark are up and its time to chop. pots have dried from the last flush. These did not stretch as much as I would have liked I will have to adjust my light better next time and there was a lot of lower development near the media, hence not enough air flow. when I flushed the pots the water level went up to the lower growth on the Think different and the bottom was wet and rotted the bottom half. I did a mild lollypop on them I'm early flower it just was not enough, LESSON LEARNED. Chopped on 2/8/20 whole plant drying low and slow 54% RH 68F for 10-14 days then will trim and jar. 981 grams wet with the lumber. lets see how they dry. I got a rosin press coming today I will squeeze all the trim and larffy buds into dabs yummy! All in all I recommend these genetics I will try the think different again I'm sure I just got a recessive dwarf gene. I have seen other grows of this same strain same breeder that are huge and stacked. thanks again to Fast Buds 420 and Green Buzz Nutrients for suppling the goods for the grow. Stay tuned for the harvest pics and vids along with the rosin squish. Be cool to one another we could really use it these days.👏 please fell free to comment on the grow as this is my first true auto flower grow. If any one out there is experienced with rosin pressing and you have any tips for beginner's let me know I will incorporate them in the next videos. thanks


Likes
17
Share

@Bunterbiber
Follow
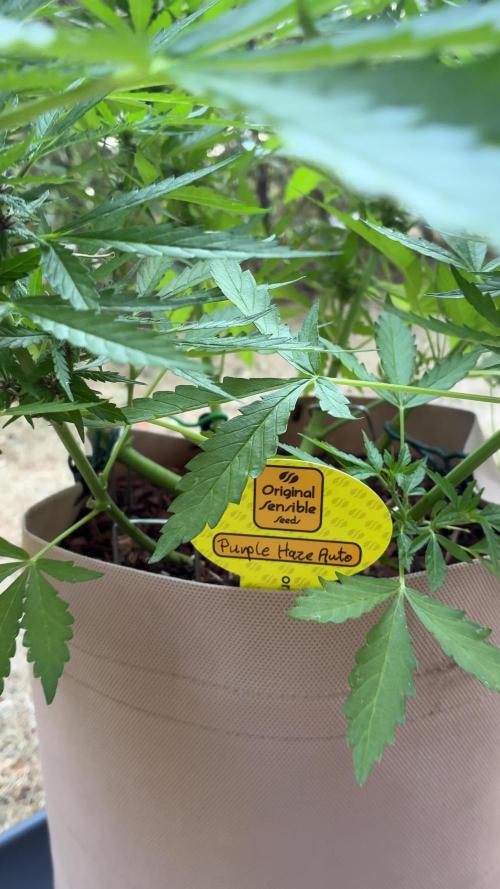
Week 8 is officially here, and it has been an absolute furnace out there! Temperatures soared between 35–38°C this week, pushing the plants through some serious outdoor heat stress. Hydration was the main mission—she’s been chugging an impressive 3 to 4 liters of water a day!
She did sacrifice 2 or 3 of her older bottom leaves to cope with the extreme temperatures, but that's completely expected when it gets this hot. I’m crossing my fingers that she continues to push through the summer heat with this much resilience.
Honestly, she’s handling it like a total trooper. She’s currently sitting at 53cm and looking fantastic. The buds are shaping up beautifully, and I am absolutely obsessed with the look of those violet flower stems underneath the bright white pistils. It is such a stunning look under the natural sunlight!
Don't forget to check out the Black Orchid Auto diary on my profile to see how she's handling the high temperatures!



Likes
3
Share


@Chubbs
Follow
Hey family. Weekly update on these purple girls. One is super purple as the other two have shades of it. Getting close as most likely only a couple more weeks. I really couldn't be happier the way they're progressing and the flowers are dense to the touch with a super sweet smell.