


Likes
Comments
Share


@Weedbadk
Follow
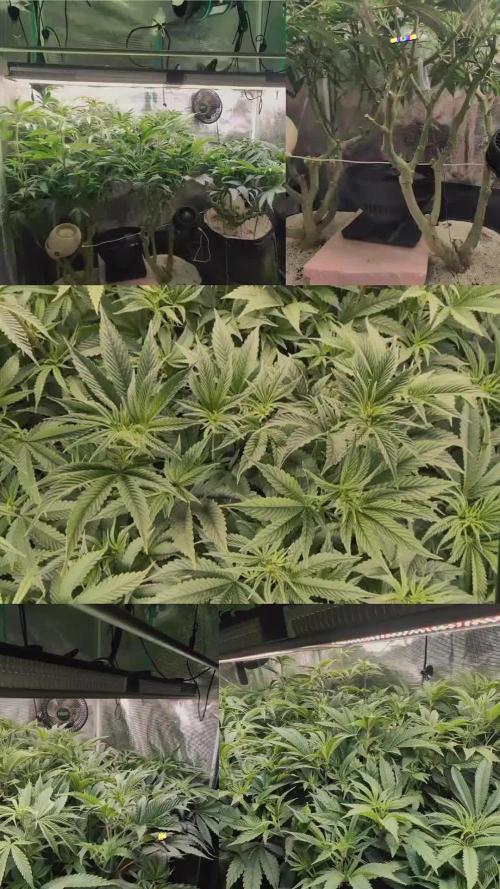
Enamorado de esta variedad,está demostrando unos colores muy hermosos,su aroma es muy fuerte y notorio,esta semana vamos a aplicar la técnica rib para ver si tiene un beneficio en la planta . Ahora se viene el engorde unas de mis etapas favoritas.estoy pensando en poner tutores para soportar el peso de las flores

Likes
4
Share


@GLOrganics
Follow
Rains came. Plants protected as flowering was about to start. Mesh to prevent moths from laying eggs. They are a big problem were I live and I amb not a big fan of foliar spray during flowering as we live in a very humid area. Some defoliation was done.

Likes
6
Share


@Finsfan
Follow
Started putting on all of its weight in last 2 weeks. Dense triangular shaped buds. At Least 1-2 more weeks I think.
I did a final light defoliation to expose the buds that weren't getting much light.
Try to fatten up what I can before chopping.
Happy with how it's come so far.. one more week before I begin flushing.

Likes
Comments
Share


@All_about_420
Follow
Die ersten Blätter sind gefallen,
die erste Spitze wurde gekappt
und die ersten Zweige wurden trainiert.
Eine gute Grundlage, um nach der Erholungsphase genau so weiter zu machen.
Likes
31
Share

@yan402
Follow
FERMAKOR BARREL MIX – BASE IN USE
(Testing on the Fantasy Feast girl we pulled out of another diary
https://growdiaries.com/diaries/274722-grow-journal-by-yan402 )
(FERMAKOR BASE SYSTEM KOH VERSION diary
https://growdiaries.com/diaries/278391-grow-journal-by-yan402)
(Urea & Micros on the way — first week running without them)
🍶💧🍶💧🍶💧🍶💧🍶
💧 30 L Barrel – Current Working Mix
🍶💧🍶💧🍶💧🍶💧🍶
Step 1 – Calcium Nitrate (Part A)
7 L warm water (~35–40 °C) → added 45 g Calcinit, stirred until fully clear.
That’s the calcium + nitrogen backbone for the feed.
Step 2 – FERMAKOR PK Base (Part B)
15 L water in the main barrel → added 30 ml FERMAKOR PK Concentrate, mixed well.
This forms the main P + K part of the formula.
Step 3 – Combine Solutions
Slowly poured the Calcinit mix into the barrel while stirring — no reaction, still crystal clear.
That confirms the mix is stable and precipitation-free.
🌿 Step 4 – FPJ / FFJ Batch
Added 30 ml homemade FPJ (fish + veg batch) ≈ 1 ml/L.
Color shifted to a light-amber tone — looks alive and active.
🍋 Step 5 – Citric Acid Balance
Added 1 tsp citric acid after everything was blended to fine-tune pH and help chelate micros later on.
📦 Step 6 – Top Up & Check
Filled to the 30 L mark with plain water → pH tested with drops, showing yellow-green — roughly 5.8 – 6.0 range.
Nice clean look, stable smell, no residue.
💧 Current Base Ingredients (Active Mix)
Warm Water ≈ 22 L total
Calcinit 45 g → N + Ca foundation
FERMAKOR PK Base 30 ml → P + K support
Citric Acid 1 tsp → Chelation + pH balance
FPJ / Fish Emulsion 30 ml → Organic enzyme booster
Result: clean amber mix, mild and balanced.
I’ll let this version run for a week before adding anything.
👀👀👀👀👀👀
Observations and changes
👀👀👀👀👀👀
27.10.25 VW27 noticed some min burnt tips so I decreased Calcium Nitrate 45 to → 40g, decided to add two more elements micros and Epsom salts just to make sure they got everything, Fetrilon Combi 1 (Micros): 0.5 g, Epsom salts: 8 g
28.10.25 VW27 she seems devoid of any deficiencies, seems ready for the flip to 12/12
02.11.25 VW27 girl is looking good so I decided to stop making daily videos and do a standard once a week update.
09.11.25 aVW28 7 days since flip,stretch in full swing, first pistils showing, leaf color deep and healthy. Slight tip burn early week → gone after pH stabilized.
Feed stayed clear, no residue, roots clean and sweet-smelling.
🌱💦🌱💦🌱💦🌱💦🌱💦🌱
🌿Day to day tasks & actions 🌿
🌱💦🌱💦🌱💦🌱💦🌱💦🌱
09.11.25 VW28 -- Fed 5l of #1→ no runoff
🍶💧🍶💧🍶💧🍶💧🍶
💧 Nutrients in 30 L #1 Veg — FERMAKOR
🍶💧🍶💧🍶💧🍶💧🍶
💧 Calcium Nitrate (Calcinit / Nitcal): 45 → 40 g
= 1.33 g/L → 207 ppm N + 253 ppm Ca
🍶 PK Concentrate (FERMAKOR Base): 30 ml
= 1.00 ml/L → balanced 1:1 P:K + light micros (from extract)
💧 Home-made FFJ/FPJ (Fish + Veg): 30 ml
= 1.00 ml/L
🍶 Epsom Salt (MgSO₄·7H₂O): 8 g
= 0.27 g/L → 26 ppm Mg + 35 ppm S
💧 Fetrilon Combi 1 (Micros): 0.5 g
= 0.017 g/L → Fe 0.7 ppm • Mn 0.7 ppm • Zn 0.3 ppm • Cu 0.3 ppm • B 0.1 ppm • Mo 0.02 ppm
🍶 Citric Acid (Chelation & pH Balance): ½ tsp (max)
= 0.16 tsp/L → add only after pH check
💧 Target pH: 5.8 – 6.0 (drop test yellow-green)
📦 TOTAL: 60 ml / 48.5 g inputs per 30 L
= 2.00 ml/L + 1.62 g/L
YouTube Link: https://youtube.com/-m8h?si=A7x4Zlr2kj-_ga31
Likes
Comments
Share


Likes
19
Share


@Sublyme_ness
Follow
this diary is a week ahead. will get in back in line soon. day 0-7 to be as week 1 not including the germ week.
This banner kept much shorter than its brother. its also in a slightly shallower tub of soil so this one is flowering a bit quicker than its counterpart too. to keep it at the same height as all my others ive raised it from the floor slightly and then put the screen over top to bend the top cola. buds forming nicely now. i said fuck it. full organic feed for you.! nutes then fresh water twice then nutes again. deinking now a litre every 3 days. hardy plant but a couple white spots on the leaves... slight calmag to give prob.. end of week 5 flowering up to day 35. week 6 as of 36-->
ps if anyone has a spare grow tent that they could donate me that would help a brother out ;)
day 40. adjusted to normal schedule

Likes
4
Share

@DogDoctorOfficial
Follow
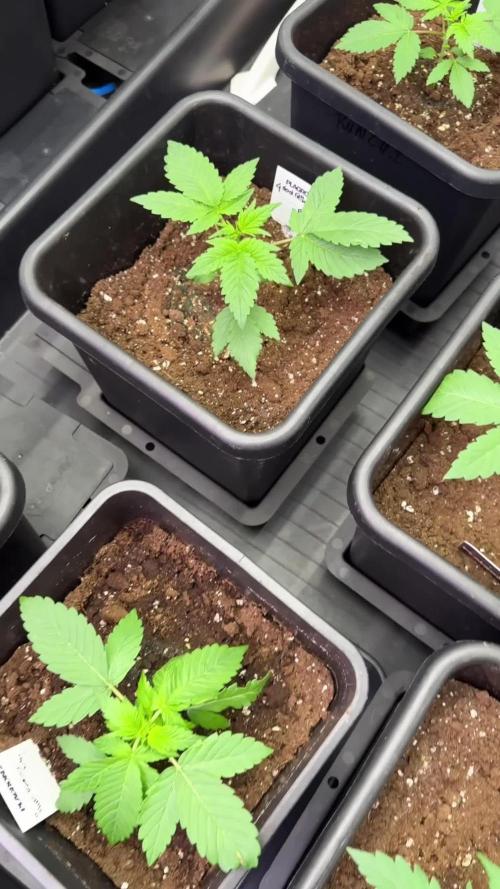
🌱 Week 3 | Purple Haze Photo | Folder 7B | Growing at Her Own Pace
Welcome back to another chapter of Project Blue, where every Purple Haze phenotype receives its own dedicated diary. Although every plant shares the same genetics, environment, nutrients, and lighting schedule, each one expresses its own unique growth pattern, making every folder a story of its own.
This diary is part of my ongoing exploration of 12/12 From Seed, a cultivation technique that has become one of my favourites. From the day these seeds emerged from the soil, they have grown under a 12-hour light cycle, encouraging compact development, excellent internodal spacing, and allowing every phenotype to reveal its natural structure without excessive vegetative growth.
Purple Haze 7B reminds us of one of the most important lessons in growing:
Not every healthy plant develops at the same speed.
She entered Week 3 slightly behind some of her sisters, but she never showed signs of stress or weakness. Instead, she quietly focused on building a strong foundation. Comparing the first photographs with those taken at the end of the week, the improvement is obvious. New nodes are stacking, the stem has thickened, and the canopy is beginning to take shape beautifully.
Sometimes patience is the best nutrient we can provide.
⸻
🌡️ Week 3 Growing Environment
Every phenotype in Project Blue benefits from the same carefully controlled environment.
During this week the room remained stable with the following conditions:
• 🌡️ Day Temperature: 27°C
• 🌙 Night Temperature: 25°C
• 💧 Relative Humidity: 55%
• 🌱 Root Zone Temperature: 21°C
• 🚰 Nutrient Solution Temperature: 20°C
• ⚖️ pH: 6.0
• ⚡ EC: 1.3
• 🌬️ CO₂: approximately 666 ppm
• 💡 Photoperiod: 12 Hours ON / 12 Hours OFF
• ☀️ Average PPFD: 600–700
Providing identical environmental conditions across every plant allows each phenotype to express its own genetic potential, making differences in growth much easier to observe and document.
⸻
🌿 Feeding Schedule
Purple Haze 7B continues receiving the complete Plagron Terra vegetative feeding program:
• Terra Grow — 1.8 ml/L
• Power Roots — 1 ml/L
• Pure Zym — 1 ml/L
• Sugar Royal — 1 ml/L
Rather than increasing nutrients simply because another plant grows faster, I prefer feeding according to overall health. She has shown excellent colour, healthy new growth, and no indication that she needs anything beyond a consistent and balanced feeding schedule.
Healthy roots always come before explosive growth.
⸻
🍃 Letting the Plant Set the Tempo
One thing I enjoy about phenotype hunts is learning to respect each plant’s individual pace.
It’s tempting to compare sisters growing side by side, but plants don’t read calendars.
Purple Haze 7B may have started the week slightly behind, yet every day she added another piece to the puzzle. Her leaves gradually became larger, her stem gained strength, and fresh shoots began emerging confidently from each node.
Rather than chasing rapid vertical growth, she invested her energy into creating a sturdy framework for the weeks ahead.
That’s exactly the kind of patience I like to see.
⸻
🌱 Preparing for Future Training
With several healthy nodes now established, this phenotype is approaching the point where gentle canopy management will begin.
For now, the focus remains simple.
Allow every branch to develop naturally.
Maintain strong root growth.
Keep the environment stable.
As the side branches continue to elongate over the coming days, they’ll become excellent candidates for gentle leaf tucking and Low Stress Training (LST), helping open the canopy without interrupting the plant’s natural momentum.
There’s no need to rush the process.
Every training technique works best when the plant tells you she’s ready.
⸻
🌿 Quiet Progress Is Still Progress
One of my favourite things about Purple Haze 7B is her balance.
The leaves remain a beautiful healthy green.
Internodal spacing is nice and compact.
New growth appears vibrant and vigorous.
The stem continues to strengthen with each passing day.
Although she’s one of the smaller ladies in the room, she carries herself with confidence, and every new set of leaves suggests she’s finding her rhythm.
She may not be leading the race today.
But healthy, steady plants often become some of the biggest surprises later in flower.
⸻
🔭 Looking Ahead
Week 3 has given Purple Haze 7B exactly what she needed: time.
Time to establish healthy roots.
Time to strengthen her stem.
Time to build the structural foundation that will support future flowering.
As she enters the coming week, I expect her side branches to accelerate, her canopy to become fuller, and her compact frame to transform into a well-balanced flowering structure. With stable environmental conditions and consistent nutrition, she’s now perfectly positioned to continue catching up naturally.
Some phenotypes sprint.
Others build quietly before showing what they’re truly capable of.
Growers Love and I have a feeling 7B belongs to the second group.
A massive thank you to Plagron for providing the outstanding Terra nutrient line that keeps Project Blue thriving, to Zamnesia for making this incredible journey possible, and to everyone following these individual phenotype diaries. Every comment, question, and bit of encouragement makes this adventure even more rewarding.A massive thank you to Plagron for providing the outstanding Terra nutrient line that keeps Project Blue thriving, to Zamnesia for making this incredible journey possible, and to everyone following these individual phenotype diaries. Every comment, question, and bit of encouragement makes this adventure even more rewarding.

Likes
8
Share
@squalino
Follow
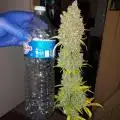
frost banger
la plante m'a surpris. je pensais à vue d'œil recevoir dans les 250 grammes .
mais les tête sont dense et lourde .
donc resultat final 370 grammes humide . le nombre de trichome visible et impressionnant super plante à première vue . plus que le séchage et la dégustation
la deuxième plante est plus grosses.
donc 1er conclusion
elle a l'air d'être exceptionnelle attendre la suite
Likes
1
Share


@BruWeed
Follow
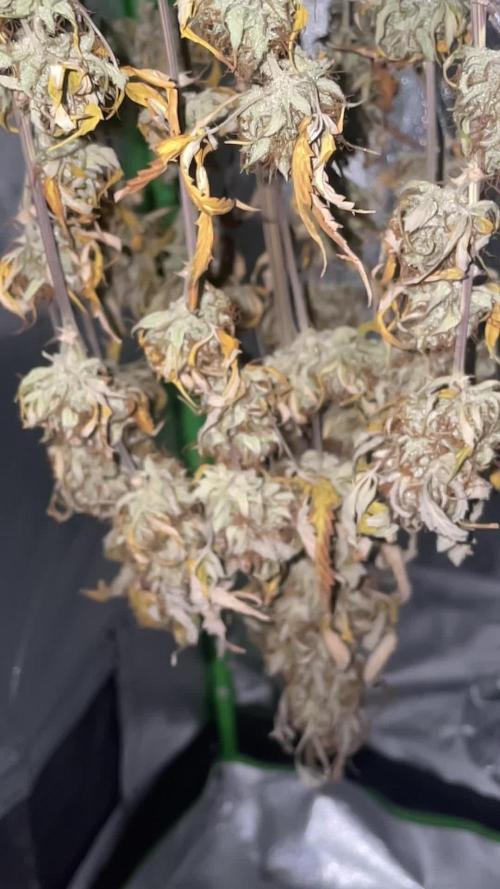
Se secaron rápido. Los cocos son pegajosos y tienen aroma muy fuerte.
En humedo me dio 150g en total. Tengo que esperar que se sequen para ya saber el resultado final.

Likes
26
Share


@Highgrade_Harvests
Follow
Week 2 of flower is in the books and all 3 girls are looking extremely healthy. Perfect time to start packing on the weight. There are tons if bud sites that will get tons of light due to all the defoliation I've done. I've never defiliated plants this much before and I'm curious to see the difference in bud production below the canopy level. I love trying new things and experimenting with these plants. Always coming up with new ideas on how to do things and making things easier along the way. Can't wait to see how much I'll get off all 3 and see the difference in phenotypes.

Likes
37
Share


@Cheeba_Inu
Follow
As of day 14, I am happy (although a little worried) about how the grow is going. Growth continues to be somewhat strong and new growth seems to be healthy, but the issue that affected the lower leaves has left me a little spooked. It has continued to the second set of leaves to a limited degree. I have mostly eradicated the fungus gnats who moved in from some houseplants so that is a plus. Poor transplanting technique could have also damaged the roots, as the issues became most apparent after potting up to 1 gallon containers. Although I have been very careful to PH my nutrients after mixing, I realize I was not PHing at every fertigation and may have missed some early swings upwards in my watering reservoir so I am now being more diligent making sure the PH is consistently under 6.2. I am hoping that these actions will have fixed whatever issue was occurring, but if there is anything I may have missed please let me know!
I have a expanded the timelapse to contain all the growth up to day 14, and will continue to re-edit it for every week. Thanks for reading, and happy growing!
Day 16: began LST to expose/encourage the new branches. There has been plenty of healthy new growth, so I suspect that the leaf issues were due to temporary PH fluctuations in my watering reservoir that went undetected. Thank you to those who answered my grow question! 👍
Day 17: FIMed the Blue Dream'matic, which has been growing strongly. I went a little more aggressive because in the past I have messed the technique up by getting mostly leaf instead of the new node of growth. Hopefully it goes well this time!
Day 18: more LST will wait as my smaller plant Staples do not have enough hold, when I transplant to 5g pots I will continue.
Day 20: a few lower leaves continue to show the browning. I will transplant at day 21 which will give me a chance to check the roots, and I will be adding h202 to my watering bucket to prevent pH swings due to bacteria (which I believe has caused the issue). The plant is still growing vigorously and is branching well post FIM.
Likes
11
Share


@Ananacio
Follow
Hola, solo les doy agua. Van por el dìa 70 de floraciòn.
Seguramente otra semana de agua y despues cosecha.
Saludos!

Likes
8
Share


@Mikeyc420
Follow
23rd April and Current stage I am at
Week 3 in to flowering and the buds are coming on very nicely with the THC shining nice on the buds and leaves
(Hopefully I'm doing something right as it don't look to bad any advice would be appreciated)

Likes
5
Share


@Ensign420
Follow
Greetings fellow growers 🖖 and welcome to my first grow ever. This adventure actually started several months ago when I decided to stop buying flower from dispensaries and just grow my own bud. How hard can it be!?
This is actually my second seed of this strain. The first bean sadly died due to over watering (sorry girl, RIP). I was literally watering the cube to the point where water was dripping from the bottom, then heavily sprayed the humidity dome and tray with the vents completely closed. Everyday. Multiple times. I never let the dome or try dry out. So after about 8 days of not sprouting, there was a funky smell of rot. So that was that.
Later I learned that rockwool retains a lot of water and can easily drown seeds. So a wet/dry cycle is best for rockwool germination.
So even after hours of researching and digging through forums and tutorial videos, I was still under prepared for this journey. Did not consider how delicate the germination phase is. Oh well. Lesson learned. Reset and try again!
I hope everyone is safe and stoned during this corona crisis. Just like everyone else in the world, I want this pandemic to be over with. But in the meantime, let's grow some weed! 🖖
[START OF WEEK 01]
Day 01 - Monday - 08/03/20 - Total Days: 001
-----------------------------------
- [0830]: Light Schedule: 24Hrs/0
--- Soaked cube in 5.5 PH water for 10 min. Did not shake water out.
--- NO NUTES! Only PH'd down to control the PH levels.
--- Did not use the default hole (way too deep).
--- Flipped cube upside down and made a shallow hole for the seed (less than 0.25" deep).
--- Placed seed in and pinched hole close. No additional water added.
--- Sprayed the tray and dome with straight water (5.5 PH).
--- Vents are cracked opened a for ventilation (about 1/4 opened each).
--- Distance between the light and tray was 53"
--- AC was set to 80 °F
--- Exhaust fan was set to 86 °F
--- Room average temp was at 85 °F
--- Dome humidity was at 85-99% when sprayed.
--- Allowing to completely dry before respraying.
- [2200]: Dome and tray were completely dry! Sprayed only tray and dome with more water.
Day 02 - Tuesday - 08/04/20 - Total Days: 002
-----------------------------------
- [0845]: Sprayed dome and tray in the morning. Everything was dry.
--- Hoping for the best!
- [2130]: Everything was dry again, so sprayed dome and tray at night along with a light spray on the cube.
Day 03 - Wednesday - 08/05/20 - Total Days: 003
-----------------------------------
- [0830]: Everything was dry again. Resprayed dome and tray. Slightly sprayed cube.
- [2125]: Hooo damn!! She popped! Am little stub is visible! Resprayed dome and tray again.
--- Still going 24/0 for lights.
- [+0033]: Just checked up on her and I swear she grew a bit taller! Getting excited!
Day 04 - Thursday - 08/06/20 - Total Days: 004
-----------------------------------
- [0845]: Wow! Went from a little stub to fully sprouted overnight! Everything was pretty dry again so resprayed dome and tray.
- [2200]: Tap root is visible! Over 1" long too! Just resprayed dome and tray again.
-- Going to prep for hydroton transplant tomorrow!
Day 05 - Friday - 08/07/20 - Total Days: 005
-----------------------------------
- [0930]: She keeps growing!
-- Added a bit of CalMag to the spray bottle (8 drops to 650ml of distilled water). Resprayed dome and tray. Water was at a 5.4 PH with 141 PPM.
- [1045]: Prepped the bubble bucket with 4.5gal of water. Water is high enough to reach about 0.25" above the bottom of the net pot.
--- Added 3 drops of Superthrive
--- Added 3.5ml of CaliMagic
--- Added 2ml Hydroguard
--- Then PH'd down to 5.6
--- Solution Strengh: 120 PPM
--- Water chiller is set to 20 °C
- [1100]: Transplant time!
--- Filled the net basket 1/3 with hydroton. When placed in the bucket, air bubbles are not visible, but are slightly below the surface (slight digging will reveal the water/bubbles below).
--- Removed plastic on rockwool cube and placed in basket, then filled around and covered with hydroton. Making sure to block any light from passing through the net pot and into the nutrient solution.
--- Covered with a half-bottle dome sprayed with the CalMag water from earlier.
--- Hoping for the best!
- [1300]: Raised Bucket 5" higher. Now light distance is 48" to top of bucket.
- [1820]: Lowered tent exhaust temp to 76 °F
--- Lowered AC to 75 °F
--- Raised bucket even higher so light distance is 30" to top of bucket.
- [2300]: Looking good!
--- Sprayed dome and surrounding hydroton with more CalMag water.
--- Attached timer to light! So new 18 Hrs On/6 Hrs Off light schedule.
--- Lights On: [1600] (4pm)
--- Lights Off: [+1000] (10am the next day)
--- Decided to go with lights on during the evening/night and off during the later mornings/afternoon (the hottest part of the day) to see if temps can be controlled better.
--- Please survive girl!
Day 06 - Saturday - 08/08/20 - Total Days: 006
-----------------------------------
- [0800]: Everything was dry. Resprayed hydroton and dome.
- [2000]: Here first night cycle seemed to go well! Get'n taller!
--- Dry again. Removed the dome.
--- PH went up to 6.5 so PH'd down to 5.7
--- Ran the top feed drip ring for a bout a minute to wet the hydroton and rockwool with the nutient solution.
---Too scared to leave the top feed on 24hrs (I don't want over water her and cause dampening-off). Will let dry before re-watering.
- [2100]: After closer inspection, I think she's looking a bit yellow.
--- Decided to add a bit of grow nutes to the bubbler solution.
--- Added 2ml of Sensi Grow A
--- Added 2ml of Sensi Grow B
--- Solution strength after adding more nutes: 176 PPM
--- PH went up to 6
--- I hope that the extra chelating properties of the 'PH Perfect' solution is enough of a buffer for proper nutrient uptake.
Day 07 - Sunday - 08/09/20 - Total Days: 007
-----------------------------------
- [0800]: Water dropped a bit (mostly due to evaporation) so solution strength was at 190.
--- Checked PH again. Was still at 6, so PH'd down to 5.4
--- Ran the top feed for a minute to wet the hydroton a bit.
- [0915]: Since she's looking perky but still a bit yellow. So decided to up the nutrient concentration even more before lights out.
--- Added 2ml more of Sensi Grow A
--- Added 2ml more of Sensi Grow B
--- Solution strength after adding more nutes: 199 PPM
--- PH went up to 5.8
- [1700]: Checked nutrients.
--- PH: 5.9
--- Solution strength: 202 PPM
--- Added 4ml of Voodoo Juice
--- Added 4ml of B-52
--- PH after adding more nutes: 5.9
--- Solution strength after adding more nutes: 238 PPM
- [2130]: Decided to make a new foliar spray to address the continued yellowing.
--- Started with 500ml of distilled water.
--- Added 3 drops of CaliMagic
--- Added 3 drops of Sensi Grow A
--- Added 3 drops of Sensi Grow B
--- Added 3 drops of B-52
--- Added 1 drop of Superthrive
--- Solution strength: 164 PPM
--- PH was at 5.9 and did not adjust.
--- Gave her one spray.
--- Also sprayed the surrounding hydroton.
[END OF WEEK 01]


Likes
17
Share


@GAS_TENT_GENETICS
Follow
This week i switched to the new tent and been working on my vpd . Both ggs are doing amazing and bushing out moee then growing tall. They all are very happy now and growing faster then ever. Added lst clips this week and i really like them


Likes
47
Share


@Northern_Ent
Follow
May 4: nice spring day so the plants were outside in the afternoon. Some direct sun but mostly in the small greenhouse to stay warm out of direct sun.
Still spraying with water to make up for low humidity, but also starting to water soil in a circle around the plant.
Using Monster Maxx this year. Used last year in my compost tea and the root balls were very dense and intricate so it seems to work as advertised. Will still be mostly used for compost tea but also according to label direction of 2 mL/L once a week.
May 5: mixing soil and sorting out grow bags for this year. Putting some spruce cones in the bottom to ensure air gets to the roots at the bottom. Indoor growers often use clay balls for this apparently but I’ve got lots of spruce cones handy and they’ll do the trick.
May 6: looking good with all three looking very similar at this early stage.
May 7: looking good. Room temp could be higher but oh well.
May 9: beautiful warm spring day so I decided to transplant the chosen seedling into the final container. It’s also now warm enough to stay outside overnight.
#seedsman420growoff
#seedsmanseeds
Likes
6
Share


@DaddyPrime2
Follow
i was surprised that she was done on 2/15/25
spidermites had completely taken over one bud so i decided to check trichomes and she seemed ready.

Likes
5
Share


@Malina
Follow
Hello everyone!
I transported plant to final bucket! i add nutrients, the Trichoderma and the Mycorrhizae
Ec solution up to 10ec a everday. i pour pure the water, This is down Ec
ph stable 5,8