


Likes
Comments
Share


@roberto420
Follow
Early week 6 update (i'll add more pictures and comments as needed):
Unfortunately I hit some challenges!
Light got way too close and stunted growth for a day. I noticed it on tips closest to the light only. Raised lamp to 22 inches.
Indica bagseed (plant in the center front) got too stacked: stuff like leaves on top of each other with lots of moisture, no light/airflow penetration, etc.
I did some basic LST, leaf tucking, net tucking, to open her up and go sideways more a bit at first. It helped a bit.
Unfortunately aug 27, had to get more aggressive on this beast and remove 3 shade leaves on the right side. not happy about defoliating, but had to do it.
Will see how she takes it and then look at left side on a later day.
Growing the first time is educational and actually therapeutic in today's world for me.
I've already learned so many lessons for the net time: don't need such a yuge pot, lamp brightness/distance, air circulation!!!
Thank you to everyone that responds with positive encouragement/messaging, it really helps.
Adding two more fans to help air circulation aug 28. hopefully it reduces the need to desecrate the plants!
Meanwhile the plants in back (purple canyon) want to stretch their faces off, esp. the one in back left, so it is a balance. I only have so much vertical height :)
aug 29, flipped to 12/12. plants are happy and i want to control the space for first grow. let's see how it goes.
updated the humidity for the week to ~ 60. Ida etc has made it miserable, it should get better soon.

Processing
Likes
26
Share


@Dirtysouthgrower27
Follow
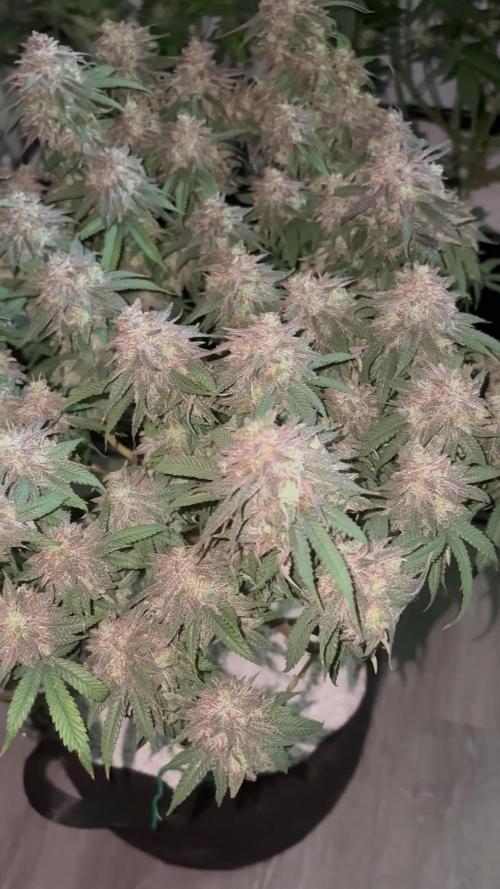
82.5 grams she taste so good ... thanks for all the love everyone



Likes
4
Share


@badirama
Follow
So i went for quick vacation/holidays to Georgia (love it!) and asked a friend of mine that lives nearby to take care of me babies 😊 so he watered the girls every 3,5 days on average (4 times during 14 days) with just as little as 100 ml per plant. Now I come back yesterday and I’m very happy with my girls - they look super thriving and eager to grow! I’m surprised as so very different they look from my previous grow in same setup except hydroponics - this time in soil in same day of vegetation they look much more dense and just thriving! Wow soil makes huge difference indoors.
I saw 2 top leaves (on pictures & on video) with light nutrients burn (no idea why - I just added root juice). Also I know for sure that my light timer has broken - there were days when light was 24h on...I don’t know what might that cause... but now is all good - light timer fixed. I think that I will just keep feeding them water. What do you think guys? Would love some advice!
Oh and pictures and videos are from yesterday. Before topping and after topping. On 2 girls I have used new topping technique.
Thanks!


Processing
Likes
4
Share


@TegridyCal
Follow
Here in TegridyCal we love all our daughters but we must admit that the beautiful ones make our hearts beat faster. The Girl Scout Cookies of Zamnesia is increasingly confirmed as the queen of this round, the numerous bruches topped with perfect timing and recovered with truly effective speed and power are giving us hope. The first smells arrived, here too the first weeks of flowering we had a phenomenon of fading of the leaves probably due to too close to the light but we resolved by defoliating and distancing the queen. As you can see, the inflorescences are swelling properly and the topping with that fantastic timing / reaction ratio that I mentioned gave us bruches that will become very full in our opinion, we hope.
Likes
1
Share


@nefcxt
Follow
Except for them getting a bit elongated this week went quite well. They have already grown multiple pairs of leaves and despite being so thin feel relatively robust. For watering I've just used rain water and I also added some of those reflective blankets to the walls (which are black otherwise), they're not perfect but better than nothing.

Likes
8
Share


@Chubbs
Follow
420Fastbuds
FBT2312/Week8
What up what up grow fam. Weekly update on these two frosty girls. They both are maturing nicely at the flower sites. Starting to smell super pungent. Still keeping up the same routine for the next week or two before I'll start checking trichs.
All in all Happy Growing
Likes
21
Share


@Bak2Blk
Follow
Yall see the yellowing of the leaves closest to the top? I've since switched my nutes over to Tiger Bloom and I've thrown in some Cal-mag into the mix. They'd gotten kinda droopy but since I changed their nutes up a bit, they've been perky af even tonight as it's getting close to lights out. I switched them over to flower on Sunday. They're already starting to stretch in just a few days which tells me that they're feeling much better. My last video... even though it's not loaded correctly is from tonight. It's 11pm, lights are out in an hour and they're still perky. Love it!! 😍😍😍
4/6/23: Yall.... the plant in the back right hermied!!! OMFG. The 2 tallest branches had seeds on them... just popped up because they weren't there yesterday or at least I didn't notice. The seeds were concentrated at the top, I didn't find any on the rest of the plant but with as bushy as they are, there may be more. I cut those 2 tallest branches down to below where the seeds were but I will be watching that plant and the rest like a hawk for more seeds. I didn't find any on the other 3 plants but still I'm saddened. Unsure of why this one plant is hermie'ing. Smh


Likes
3
Share

@Lontra
Follow
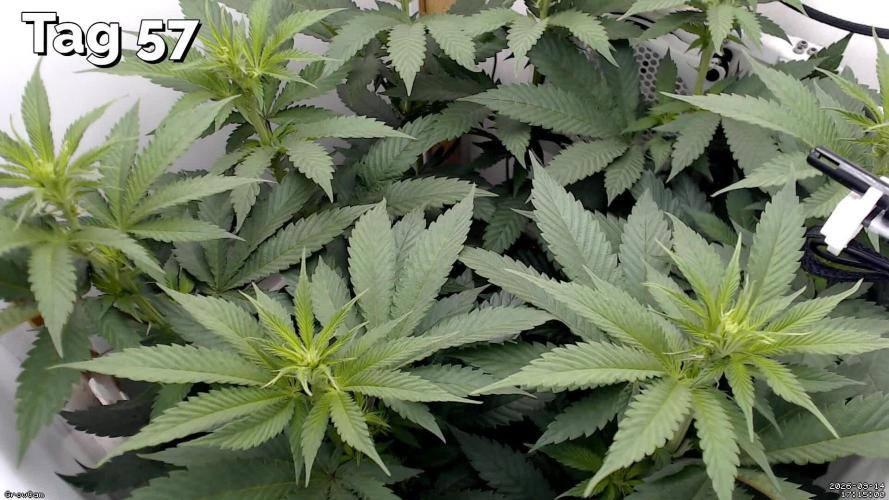
Diese Woche war wahrscheinlich die bisher stressigste. Direkt zu Beginn der Woche ist mir an Tag 57 beim Versuch, die unteren Hauptarme per LST noch einmal neu zu justieren, ein Malheur passiert: Ich habe aus Versehen den Stamm der Pflanze gespalten. Ich habe die betreffende Stelle im Anschluss direkt mit etwas elastischem Isolierband umwickelt und den Riss anschließend mit Kabelbindern fest fixiert, um den Spalt zusammenzuhalten. Das LST wurde daraufhin zunächst erst mal komplett entfernt.
Zum Glück zeigte sich relativ schnell, dass die Pflanze diesen Schaden erstaunlich gut verkraftet. An Tag 59 habe ich dann die unteren 4 Hauptarme mit Bodenankern von unten gestützt und das LST vorsichtig wieder aufgebaut, damit die Verteilung der Triebe wieder etwas besser und damit auch das Zentrum der Pflanze wieder etwas offener ist. Ansonsten habe ich das LST diese Woche nicht weiter verändert, um den eingerissenen Stamm möglichst nicht noch weiter zu belasten. Die Fixierung sieht weiterhin stabil aus. Bisher gibt es keine Anzeichen dafür, dass einzelne Triebe schlechter versorgt werden. Die Pflanze scheint den Schaden also überraschend gut wegzustecken.
Parallel zum Stammproblem ging der Stretch weiter. Die Pflanze legte in dieser Woche deutlich an Höhe zu und der Abstand zur Lampe wurde dabei zunehmend kritisch gering. An Tag 62 (BT16) blieben nur noch ~14cm Abstand zwischen den höchsten Trieben und der Lampe, weshalb ich mich dazu entschied, einen kleinen Umbau an der Box vorzunehmen und die Abluftanlage aus der Box herauszunehmen und auf das Dach zu montieren. Dafür habe ich eigene Halterungen für den Lüfter und den AKF konstruiert und in PETG gedruckt. Die Halter wurden mit Moosgummi etwas von der Growbox entkoppelt, um Vibrationen und Körperschall möglichst zu reduzieren. Dadurch habe ich noch mal ein paar Zentimeter gewonnen und konnte die Lampe noch etwas höher hängen, um so wieder auf einen Abstand von ~21,5cm zu kommen.
Am Ende der Woche (BT17) liegen die 5 höheren Haupttriebe bei ~55cm und die 3 kürzeren Haupttriebe bei ~47,5cm. Damit bleiben aktuell noch rund 19 cm Abstand zur Lampe. Ich hoffe daher, dass der Stretch in den nächsten Tagen so langsam endet, denn jetzt bleibt kein Spielraum mehr, um die Lampe noch höher zu hängen. Trotz des zeitweise sehr geringen Lampenabstands konnte ich bisher zum Glück keine deutlichen Anzeichen für Licht- oder Hitzestress erkennen, obwohl die Lampe weiterhin dauerhaft mit 100% Leistung lief.
Ansonsten gab es diese Woche wieder 2 Bewässerungen:
1. Gießvorgang: Tag 58, insgesamt ~4,5 Liter (0,5ml/l Fish-Mix, 2ml/l Bio-Grow, 2ml/l Bio-Bloom, 1ml/l Top-Max, 2ml/l Bio-Heaven, 1ml/l Alg-A-Mic, 0,81ml/l CalMag, ca. 0,24g/l Bittersalz, pH-Wert ~6,5, EC-Wert ~1,8mS/cm, Topfgewicht vorher ca. 4,4kg, nachher ca. 7,6kg)
2. Gießvorgang: Tag 61, insgesamt ~5 Liter (2ml/l Bio-Grow, 2ml/l Bio-Bloom, 1ml/l Top-Max, 3ml/l Bio-Heaven, 1ml/l Alg-A-Mic, 0,81ml/l CalMag, ca. 0,24g/l Bittersalz, pH-Wert ~6,4, EC-Wert ~1,9mS/cm, Topfgewicht vorher ca. 4,2kg, nachher ca. 7,7kg)
Die Blütenbildung wurde im Laufe der Woche deutlich sichtbarer, und alle Haupttriebe zeigen inzwischen gut erkennbare Blütenansätze. Für die nächste Woche steht dann, nach hoffentlich abflachendem Stretch, das Lollipopping auf dem Plan, um etwas mehr Luft und Licht in die Pflanze und vor allem das volle Zentrum zu bringen und vielleicht dem ein oder anderen Nebentrieb noch eine Chance zu geben. Außerdem werde ich im Laufe der Woche vermutlich die Kabelbinder und das Isolierband am Stamm entfernen, um die Stelle einmal besser inspizieren zu können. Wenn alles gut aussieht, wird die Stelle danach zur Sicherheit mit Veredelungsband und neuen Kabelbindern wieder fixiert.
Likes
11
Share


@horticulturale
Follow
Buena planta la dichosa Hulkberry.
La técnica de doblar el tallo todavía no está muy conseguida. No me gustaba el aspecto que tenían esta vez.
Contra todo pronóstico, han dado más cantidad de lo que parecía a primera vista.
En todo caso los resultados son superables. La planta más pesada ha dado 22 gramos, y la que menos, 6 gramos de cogollos.


Likes
8
Share


Likes
6
Share


@didioganja
Follow
24/08/2023 - made a 2.2sh solution with 2ml bio grow, 8ml bio bloom, 8ml top max, and 6ml bio heaven and fed like 40% of it today and will give the rest tomorrow. 5.5ph and 735 ppm was the measure readings. Did not gave nutes to the monster cropped one, only plenty of plain water.
26/08/2023 - gave the rest of the solution to them. noticed today some deficiency, plants must be requiring more nutes for the flowers

Likes
6
Share


@CarpediemOK
Follow
I had to travel, as soon I arrived(3 days with no water) they look with all leeds failed down, I put water on she refused but few hours after she becomes like this, really healthy


Likes
5
Share


@SurSideCrew
Follow
Phenotipos muy similares pero con problemas de Hermafroditismo, tuvimos que cortar los bajos para que no se polenize lo demas.. Producto final increíble! Terpenos a auténtico Gelato dulce y cremoso con toques Gassy que la hace casi perfecta en mi paladar! Planta pequeña con pocas ramas y cosecha poca-media de calidad top!


Likes
5
Share


@MotherNaturesSon
Follow
good with training and strong genetically. good for extracts. medicinal potentials include fatigue, tension, and stomach pain. my grow style seems to minimize ‘cheesy’ terpenes in favor of amazing tropical sweetness. cheers


