


Likes
Comments
Share


Likes
241
Share


@Still_Smoq
Follow
📆 Week 8, 12-18 March 2024
12-18 March - Let the plant grow and observed.
📑 The end of this week, the start of next week she will be flipped into the 12hr cycle. I look at the beginning of the period a little different than most. This transition can take up to 2 weeks before pistil formations can be seen - a true sign of flowering, and during this time it has the potential to gain substantial mass. So I continue to consider it in a vegetative state until flowers start forming. It’s easier for me to keep up with actual flowering weeks this way.
🍽️ 12 March changed nutrient solution
🐲 12 March updated feeding schedule
🌊 Using reverse osmosis water with EC/TDS at 0
🐉 Nutrient Solution EC 2.5 at 63 degree F
💡 Light power at 50%, DLI 35 canopy coverage at 18hrs
That is it for this week. Thanks for the look, read and stopping by.

Processing
Likes
43
Share


@MUDBUG
Follow
11-24 Going smoothly starting to frost up LAMFER #1 and #3 is behind MELLO YELLO she took off fixed herself and is becoming a beautiful ass plant 33 inches so far and frosting up and getting fatter by the day im a week are so behind on the other 2 3 different phenos this round all are 100% different 1300 ppms total 6.0 ph a gallon a day between these 3 alone🔥🔥🔥🔥🍇🍇🍇🍇🍇🍇🍇🍇🍇🍇👌👌👌👌👌👌👌👌🏆🏆🏆🏆🏆⛽⛽⛽⛽⛽⛽⛽⛽

Likes
1
Share

@Phaticus
Follow
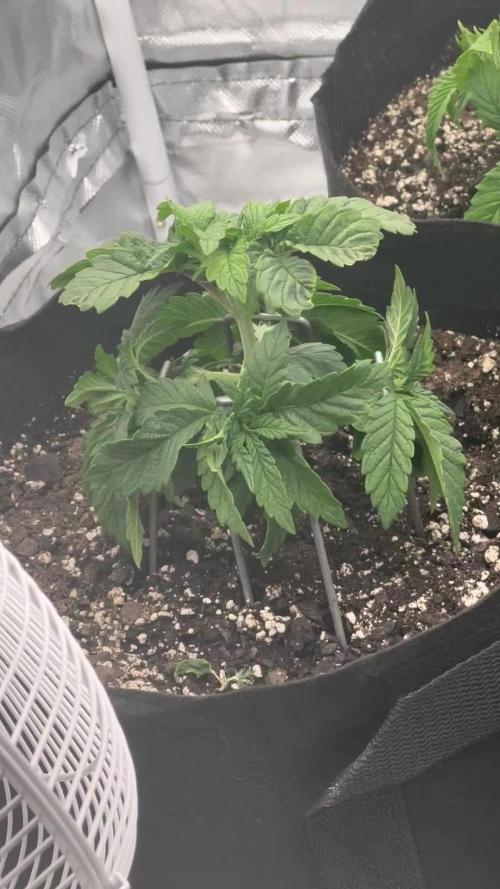
The smallest plant 1 in front actually broke but somehow managed to catch the elders who are roughly 1.5 weeks older
Likes
2
Share


@Drtomb
Follow
Just finishing up week 3. Girls are a nice nice shade of green. Buds are starting to shape and the fan leaves are getting some crystals. All is good. I harvest the other side tomorrow and ill be starting a karma genetics - sherb biker grow journal. Be sure to subscribe to that.
Likes
Comments
Share

@Black_Widow
Follow
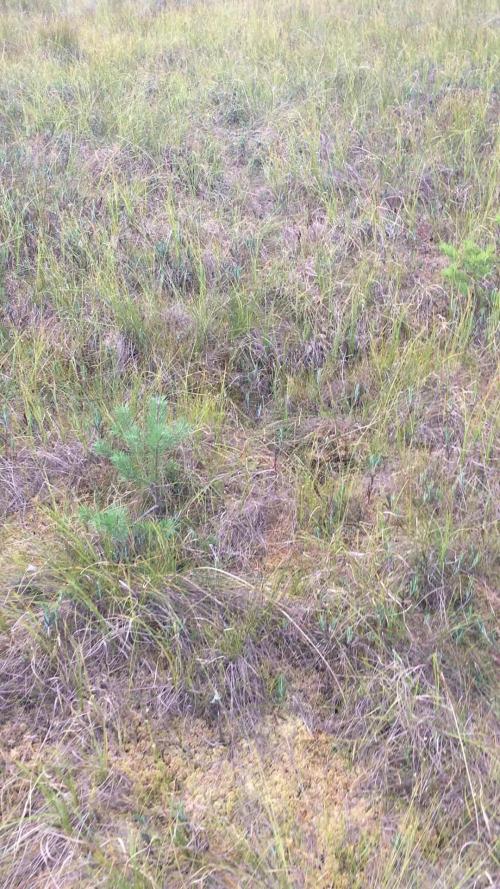
Привет садоводы !!!
Вот и подошла к концу история на улице
Вроде все прошло хорошо
выросли 3 симпатичных куста
к сожалению четвертый куст ,в связи с небольшой путанницей оказался не autoflower и он еще не зацвел,а если и зацветет , то в любом случае не успеет дожить до конца из-за погодных условий
А в ощем не плохо
цветы не заплесневели и за 11 недель успели созреть
можно и еще было оставить их на недельку, но обещали дожди и я решил их срезать
кстати попробовал смолу с ножниц после маникюра
вставляет хорошо
Спасибо SSSC за прекрасные цветы !!!
Likes
13
Share


@Haoss
Follow
The plant has entered an active flowering phase, has undergone defoliation, feels good


Processing
Likes
5
Share


@Tim_Marley
Follow
In this week, most of the plants have developed pistils. I will keep using vegetation fertilizer for a few days, until they evolve completely. I also decided to use scrog method to keep the plants at the same height.

Likes
12
Share

@PPFDaddy
Follow
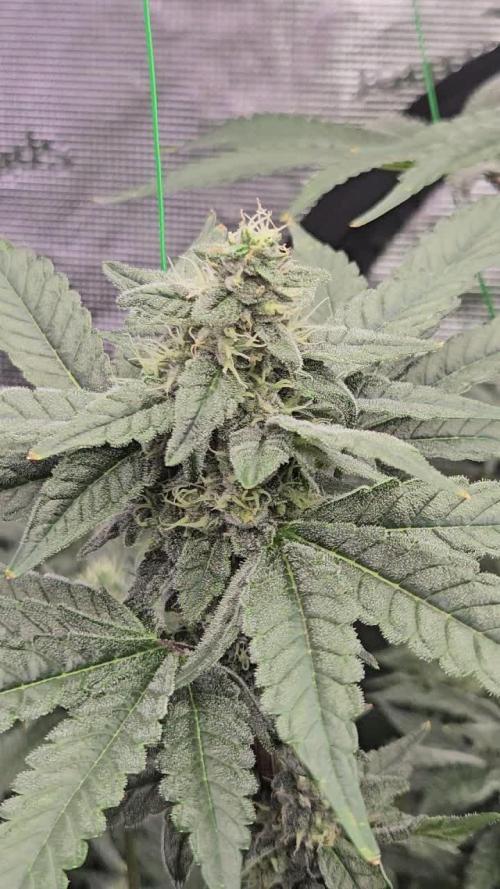
Hey everyone! Volume hasn't increased dramatically this week, but trichome production has gone into overdrive. And honestly, that makes me just as happy.
Pistils are still almost entirely white, so the colas haven't fully expressed their potential yet. There's more to come.
Temperatures hit 31°C during the day and 28-29°C at night, yet the Rainbows have maintained solid vigor throughout. Runoff EC came in only 0.2 points above input, so the nutrient solution stays unchanged. Plants are clearly in a good place.
One thought though: could the trichome explosion be a natural defense response to the heat? What do you all think? 🤔
Good luck to everyone and as always critiques and advice are more than welcome! 🙌
Likes
8
Share


@Fullmeltalchemist
Follow
Was a good learning experience. I'm not going to get near the weight I expected from these, and though the bud turned out really tasty, I don't think I'll grow it again. I'm not sure I would recommend to a newbie. It was in some awesome living soil, but some deficiencies crept up in flower, and I wasn't impressed with the roots upon post mortem exam. On second look, even the photo on msnl's site shows some spots that looks like deficiencies. Definitely some grower errors here, but all of my ongoing grows faced the same challenges and these just seemed less adaptable. Anyhow, I've been graced with some clean meds for now, and I'm a happy growin hooman. 👽
I also probably won't do any more autoflowers moving forward. Just not my style. There are some great peeps doing outstanding work with autos though. Best to them and all! :)
D82 - 12.12 - cut the second auto cheese yesterday. Let her go as long as I was comfortable. Think her run in with the gnats resulted in the the deficiencies. Awfully covered in trichs, so it should make for tasty smoke after dried, trimmed and cured.. Shall update

Likes
51
Share


@cheetah844
Follow
They're really starting to bush out, I think I'm liking the topping of all tops on the whole plant 1 time. Makes it easy to train as well. We'll see how they compare in harvest amount to my LST long veg plants.


Likes
4
Share


@Growedbypepper
Follow
En esta semana me encargo de entregarle a ala planta poco más que melaza y microorganismos ya nos encontramos en la recta final de esta planta espero poder cultivarla bien pronto con tu olor tan cremoso que carga 🔥🔥🔥 tengo un par de inconvenientes el clima cuando está lloviendo demasiado complica mucho espero no tener que cosechar antes de tiempo 🛵🛵
Likes
24
Share


@Grnhead
Follow
At about mid-week the canopy was becoming very full so I defoliated to let light hit all of the bud sites. I found an article that mentioned "Schwazzing" and it seems close to how the approach this grow has gone. They got heavy defoliation just before flower and then also a few weeks in.
The broken stem has healed dramatically even though I didn't reconnect it but let it stay split. I put rooting gel in the wound and then duck taped it. Now it looks like its going to seal itself back up within a few more weeks.
The light is intense, 70-75K LUX on the top of the canopy. I have a little room left to raise the top light before I have to start dimming it. Hopefully I can manage to keep them at max 75K LUX without dimming, or may try supercropping depending on how the stretching goes. This week all the side lights are on along with the main light. They all seem to be loving the light and the heat has been manageable.
They are drinking about a half gallon of water a day and TDS started at 1100 and ended at 800 by the end of the week.
* Pineapple Express 1 is the furthest along and I can already tell the smell is going to be amazing, very fruity.
* Pineapple Express 2 is very lush but flowering a notch slower.
* Pineapple Skunk has a concentrated number of buds sites compared to the others, I'm very excited for this one.
Day Temp: 75 degrees F
Night Temp: 65 degrees F


Likes
18
Share


@DeepRootsGrowTrees
Follow
PURPLE KUSH / KANNABIA SEEDS
Week #13 OVERALL
WEEK #1 FLOWER
This week she was flipped to 12/12 so it's really transition week she did start to
flower towards the end of the week. Stay Growing!!
Thank you for stopping by and taking a look it's much appreciated!!
THANK YOU KANNABIA!!!
BUDTRAINER.COM BUD CLIPS
KANNABIA.COM PURPLE KUSH


Likes
12
Share

@GERGrowDesigns
Follow
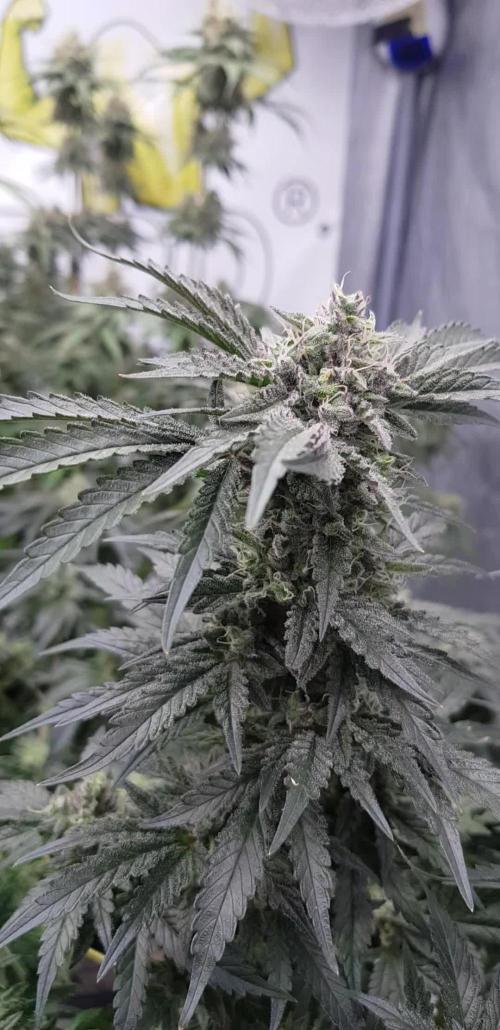
Welcome to Flower Week 8 of Sensi Seeds Mandarine Jam
I'm excited to share my grow journey with you from my
Sensi Seeds Project . It's going to be an incredible ride, full of learning, growing, and connecting with fellow growers from all around the world!
For this Project , I’ve chosen the Feminized Photo Strain Mandarine Jam:
Here’s what I’m working with:
• 🌱 Tent: 120x60x80
• 🧑🌾 Breeder Company: Sensi Seeds
• 💧Strain Info : 20-23%
• ⏳ Flowering Time: 7-8weeks
Likes
34
Share


@Southwest_budders21
Follow
Kre8 Genetics, Candyman are Day 92 and day 42 of flower!
The tent absolutely stinks of berry terps and getting so frosty now. Not many weeks left now 😍 these have loved being on monkey Nutrients aswell
Likes
5
Share


I wish I could figure out why I don't have more trichomes this is supposed to be Gorilla Glue supposed to be covered by now as far as I know anybody got any thoughts on this
Likes
41
Share


@Mrs_Larimar
Follow
2024-07-28
2 Opium Plants remain in my Outdoor Garden.
One sits in a 75l container, and stands near the house
the other Plant sits into 30 l container , in a corner in my Garden
Die Outdoor Girls are starting to flower, still in stretchmode
the Plant in the 75l container looks super impressive
the 30l girl gas a good spot to go on
lets see.
for any reason the system dont let me do another updates, so iam forced to do all updates at once in one week
2024-08-16
The Plants are stretching and building sweet flowers
Temperatures became perfect, with lots of Sun and warm weather.
2024-08-23
The Weather continues to stay very warm and sunny,
the Girls drink up to 10 liters daily, and they get some feedings with
organic more PK, because they need the Energy
2024-08-30
Both Girls doing fine,
the Plant in the 75l Growbag, is very thirsty and develops sweet Floweringsites.
the Girl in the 30l pot, has grown into the open Ground.
she was sticking her roots out of the holes from the growpot
i was wondering why she looks so fresh and green without getting nutrients, now i know why, she is sucking all good stuff out of open ground
clever, clever.
2024-09-07
In the meantime we had some heavy rain and Wind, i had to stabilize both Plants
the Girl in the 30 l Container was stretching so massively , she was growing one meter!! in short time
but she was blown the most, i had to tie her and she is leaning onto a bigger treee
i kinda forgot to save her from winds. but anyway, shes safe and goes on
The Girl in the 75l is safe for the moment
she shows already massive buds, next week i have to take pictures from above her
2024-09-13
Weather truned for summerly and hot, to autumn and raniy and cold
so i have to watch her closely, and hope for more warm / dry days, for her to finish up.
It weather continues to stay rainy- and she starts to mold, we will harvest
instantly.
