


Likes
Comments
Share


@my420experiment
Follow
Learning a ton as I go.
Started low stress training using rubberized wire poked down into the soil.
Spent a lot of time just tucking the fan leaves down.
I'm an idiot when it comes to watering.
I dont think I'm getting enough down to the bottom of the pot, but dont want to over water.
I'll just continue with what I'm doing.

Processing
Likes
88
Share


@No_Clout
Follow
25/07/18 - watered with 300ml each 24 hours ago giving them their first taste of veg nutes and their responding well so far, I will be upping the dosage later this week.
29/07/18 - everything’s looking alright so far, plant #3 did fall over because of the weight of the leaves but I’ve sorted it all out and it’s back to standing on it’s
own two feet.
30/07/18 - I dident feed them from 72hrs and the girl in the middle started to droop so I fed them all 600ml each.
31/07/18- the girl in the middle has perked up abit but all three seem to be not praying 🙏🏻 to the sungod.


Likes
51
Share


@Bread_n_Buds
Follow
Here we are again ready to start again, always under the sign of Zamnesia, we make our fantastic plants and we show you what we are capable of. We have 5 autoflowering strains and 5 photoperiodic ones and now we present them to you.
The second autoflowering that we present to you is the Black Orchid Autoflowering. This was advised and recommended to us directly by the Zamnesia elves and we are sure that they are keen to send us refinements, we have seen some super beautiful photos of this strain. Guys, black is black as a style of beauty for me it is unbeatable.
To explain my germination method which is a combination of experiences acquired in the field and readings of the right advisors, I have chosen to divide it into phases so that those who want can follow them and understand better step by step.
- Preparatory Phase ---- Check the average temperature in the room, humidity status to understand if it is the case to start or wait, I decided for the end of August because the temperatures start to drop towards the 22-25 degrees recommended for germination.
Then another thing more or less credible depending on the sensitivity is the control of the lunar phases. I believe in it a lot, it is a method that ancient farmers used to understand when it was best to plant depending on the attraction of the moon. To make my life easier I use a simple app that advises you on the right time to plant, harvest and put in the jar (depending on the lunar phases).
- Phase 1 --- Soaking in water. There are many authoritative friends who advise against this method due to the risk of drowning, but I have always been fine and I follow the rule if it opens in water the seed is almost certainly healthy and will come out of the ground 90% normally.
- Phase 2 --- Opening the seed in water. As soon as the seed opens and the root comes out a little, you have to be very very careful not to leave the seed in the water open for too long. This is why there is a risk of drowning. So as soon as the root comes out, it must be planted. Do not wait for it to stretch out a lot, you can wait a little longer in the absorbent paper, but not in water.
- Phase 3 --- In the meantime, while I soaked the seeds, I prepared my pots: I use small biodegradable pots (choose the ones with holes underneath for drainage). A few hours before working with the opened seeds, I moistened the soil with water adjusted to the right pH (5.8 - 6.2) and Plagron Power Roots. The small root is now open and we can make a little hole with a toothpick, widen it and insert the seed. Not too deep with the root facing downwards. From Serious Seeds we learned the dome technique: if you put a small dome of soil on the seed the water will settle on the sides avoiding overwatering problems.
- Phase 4 --- The plant emerges from the soil. So far I have not put the light, now I turn it on at minimum after half a day of soil to give direction to the seedlings. The first week the light will be gradually brought from 40% to 60% to go to 70% - 75% in the remaining weeks of veg. During the first week maximum, I keep the cycle of 24 hours to avoid stretching. Be careful not to exceed the first week at least with photoperiodic plants.
- Germination % --- In water 20/20 seeds have opened for good luck I'm waiting to talk when they come out of the ground but it seems that we are going towards an excellent percentage of germination..."Not too bad"...
- Soil and Food --- The soil used is entirely organic in every part and is the Plagron Promix that will be used with the 100% organic pack provided by Zamnesia complete with all the main fertilizers for your plant buy it at the link --
https://www.zamnesia.io/it/11457-plagron-easy-pack-natural.html
// Strain Description // It is said that the orchid symbolizes love, refinement and beauty. Well, we can confirm that the Black Orchid Automatic contains all these attributes and many more. This autoflowering variety has a lot to offer: a particular but very pleasant aromatic profile, and a relaxing and carefree high. Furthermore, this plant is very productive when grown in optimal conditions.
- Get a seed of this fantastic strain --- https://www.zamnesia.io/it/9493-zamnesia-seeds-black-orchid-automatic.html
- Soil and Fertilizers entirely organic --- https://plagron.com/en
- Growbox --- https://www.secretjardin.com/
- Music and sound --- I made my girls listen to 432hz frequencies and music from www.radionula.com
- Z --- You can find these seeds, much more from the world of cannabis, mushrooms and an incredible series of accessories and gadgets on the reference site not only mine but of many growers ----
https://www.zamnesia.io

Likes
6
Share


@RegadorDeCactus
Follow
BIGGER:STRONGER:FASTER
#NITROHAZE
#OUTDOORGANG
D61 Solo riego de agua, espero esta semana comenzar con el LST y corte apical de las ramas bajas. Ah pegado estirones fuertes y notorios. Tiene ganas de crecer y estirarse luego del corte Apical que recibio. Un amigo le saco estas Grandiosas Fotos para el dia de hoy
D63 Corte Apical sano, hoy riego de fertilizantes y pensando en corte apical en ramas bajas. Se que detendra un poco el crecimiento pero espero que de buenos frutos.(espero tener un arbusto). Despues del corte apical se ve un crecimiento considerable en las ramas bajas.
D68 Al parecer hay una oruga o un bicho comiendo pero no puedo encontrarlo, lento crecimiento, puede ser por el Apical o por las bajas temperaturas que hay en mi region.Veo aun asi un estiramiento en las ramas bajas.

Likes
10
Share


@Dirty_rich
Follow
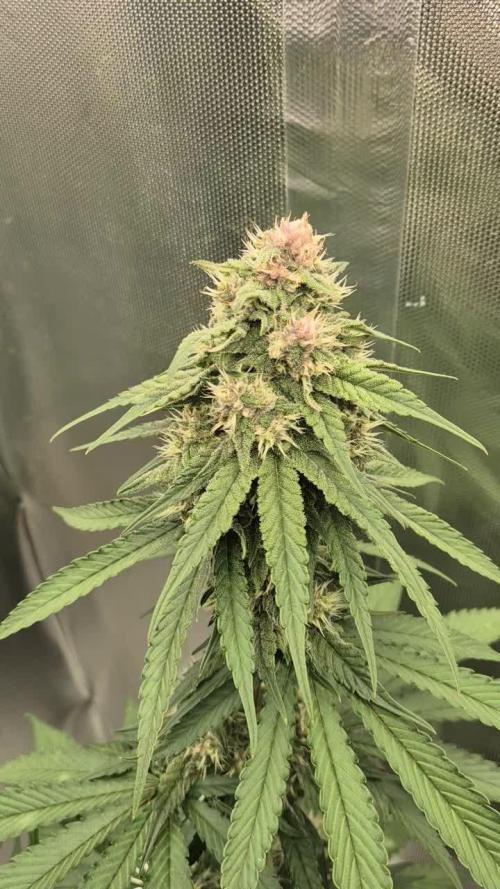
Etapa final de engorde, me está sorprendiendo el engorde final.
Olor muy tenue pero delicioso a limon dulce y un fondo a pino.
En 1 semanas más calculo estar cosechando


Likes
30
Share


@TightNugs
Follow
Plant 1 finally harvested and dried for crimbo.
Final weight-plant 1
5.1 oz prime bud(4oz to cure for 1 month),1 for now 😎
🍁🍁🍁
1.2 oz popcorn buds(larf)to make vape liquid
🍁🍁🍁
0.25 oz nice close leaf
🍁🍁🍁
Big thanks to Voost.com LED awesome boards.
LIGHT-VOOST vst 120 veg
vst 240 flower
https://voost.com/
Code- TightNugs
🍁🍁🍁🍁
Breeder-white label purple bud auto #1
🍁🍁🍁🍁
Nutes-advanced nutrients,plant magic,cx horticulture.
Easy plant to grow with regular defoilation and lst.
Early smoke is what I expected as I have grown b4,a proper bud and as smooth as u like.plant 2 doing well and will be chopped next week.
Thanks for looking and happy growing 🤞🏴🍁

Likes
21
Share


@NSABND
Follow
Start of Week 9 🙌
I plan to use fertilizer for bud growth from day 64 to day 70+... depending on when the harvest time occurs 😉😄👍
Started working with fertilizer today, every 2 days a mixture of 10ml per liter as long as the buds have not properly developed trichomes 😵 I hope this works 😵😲😱
Day 68 with fertilizer again
Likes
3
Share

@BLAZED
Follow
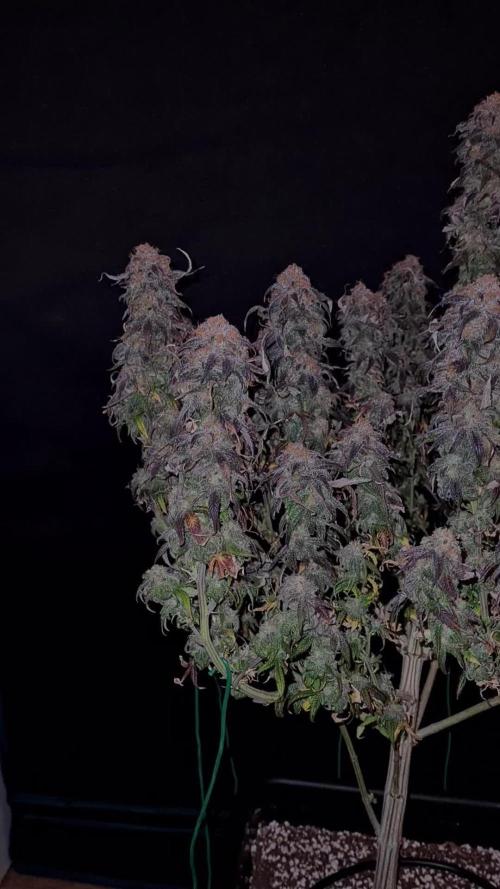
Week 23 (18-11 to 24-11)
18-11
Temps: 18.9 to 26.3 degrees
Humidity: 39% to 61%
Watering: Both 500 ml.
19-11
Temps: 18 to 25.4 degrees
Humidity: 44% to 60%
Watering: Both 500 ml.
Dry Weight #1 3.8 kg. #2 3.6 kg.
20-11
Temps: 17.6 to 25.5 degrees
Humidity: 42% to 59%
Watering: Both 500 ml.
Dry Weight #1 3.7 kg. #2 3.6 kg.
21-11
Temps: 17.1 to 24.9 degrees
Humidity: 43% to 63%
22-11
Temps: 16.9 to 24.9 degrees
Humidity: 42% to 61%
Watering #1: 500 ml. #2: 600 ml.
Dry Weight #1 3.7 kg. #2 3.6 kg.
23-11
Temps: 17 to 26.7 degrees
Humidity: 42% to 62%
24-11
Temps: 17.4 to 26.1 degrees
Humidity: 43% to 62%
Watering #1: 500 ml. #2: 600 ml.
Dry Weight #1 3.6 kg. #2 3.4 kg.
Likes
102
Share


@Roberts
Follow
I am dropping a Ztrawberriez auto seed from Fast Buds. I will be growing her in a 1 gal Ice cream pale. The only substrate will be just course perlite. Thank you Fast Buds. 🤜🏻🤛🏻🌱🌱🌱
Thank you grow diaries community for the 👇likes👇, follows, comments, and subscriptions on my YouTube channel👇. ❄️🌱🍻
Happy Growing 🌱🌱🌱
https://youtube.com/channel/UCAhN7yRzWLpcaRHhMIQ7X4g
If anyone needs to purchase fastbuds here is a link for my affiliate program
https://myfastbuds.com/?a_aid=60910eaff2419
Likes
12
Share

@TrickzGrowz
Follow
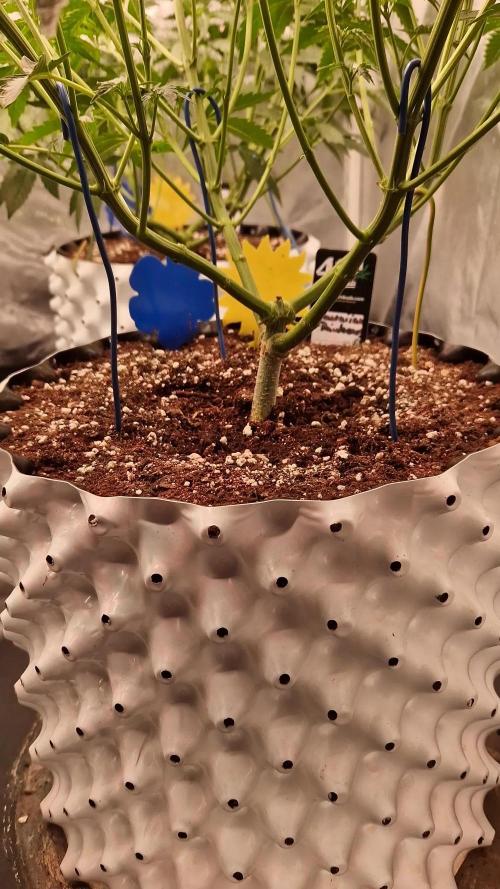
Die bis jetzt dickste Lady von allen. Sehr viele starke Triebe. Das Stretchen geht aber auch schon los.
Likes
49
Share


@masterofsmeagol
Follow
6/9 I can't believe it but I had faith. The transplant yesterday LOOKED like it was fucked. I cleaned it up though and left it outside. This morning it was standing straight up. Both transplants were! I put tarps up to block the wind tunnel between buildings. It's still overcast and rainy. Sun isn't supposed to come out for a couple poke days. Chance of thubder storms tomorrow but I'm going to try to get everyone in their forever homes today. Or at least most of them. I plan to light dep a few right in the 3 gallon. I'm sure I'll be updating this after I get some work done.
UPDATE: I WENT OVER AND GOT THREE MORE TRANSPLANTED. THAT MEANS FIVE ARE OUTSIDE IN THE CAGE. TWO 10TH PLANET, 2 BLUEBERRY CHEESE AND A LITTLE PURPLE PUNCH. THE 3 GALLON POTS WERE RELATIVELY HEAVY SO I PICKED THE LIGHTER ONES TO TRANSPLANT. I LEFT THE ORHER TWO 10TH'S IN THE GARAGE WITH THE DOOR OPEN WITH THE REMAINING PLANTS. I ALSO ADDED WIND BREAKS AND SUPPORTS TO EVERYTHING. I WANTED TO GET EVERUTHING DONE TODAY BUT THERE MAY BE A THUNDER STORM SO IF I DONT GET IT DONE ITS NOT A BIG DEAL AND ILL FINISH TOMORROW. TRANSPLANTS WENT SMOOTH. I THINK THEY'LL GO EVEN SMOOTHER IF THEY DRY OUT A BIT. STILL HAVE THE 50 AND 40'S TO FILL. Took a bunch of videos but the don't want to load. I'll have to try tomorrow or later tonight.
UPDATE: I TOOK TONS OF PICTURES AND VIDEOS BUT THEY DONT WANT TO SEEM TO UPLOAD. IVE GOT SIX IN THERE FINAL HOMES OUTDOORS 20s and 30 gallon smart pots. Still have massive plants but I'm going to out those in the 50 and the 40. I'll finish this shit up tomorrow and get all the girls in their forever homes and if I don't have room for some I was planning on doing a light dep anyway so that will work out good. I learned a lot and transplanting went a lot smoother todsy than before. I feel really proud of myself. The last Transplant I did break a few leaves off that I didn't notice but whatever. I used tomato cages for suppirt on two and bamboo poles and string on the others. I'll add the vertical trellis as they grow. I'm proud of myself.
6/10 I got a lot done yesterday. Six are outside already. Two are in 20s in the garage. I'm planning on transplanting the rest today or tomorrow. I'll update later. Accidently uploaded lots of stuff on the wrong week. UPDATE: I TRANSPLANTED THAT SUPER TALL PURPLE PUNCH THAT I DIDNT TOP OR HST AT ALL INTO A 40 GALLON TUB. ROOTS WERE DRY AND THIS TIME IT ACTUALLY LOOKED LIKE THEY FELL AWAY. THE PLANT HOWEVER STAYED STANDINGVUP FINE. I THINK THIS PHENO IS GOING TO BE A TOUGH ONE. LOOKS GOOD LIKE AN HOUR LATER. I HAD THE 50 READY TO TRANSPLANT THIS MONSTER BLUEBERRY CHEESE I FIMed BUT THE POTS WERE SUPER HEAVY AND I FIGURED I NEEDED TO SLOW DOWN AND THINK. WE HAVE THUNDER STORMS COMING TONIGHT. TOMORROW IS GOOD. I MAY TRY TO FINISH UP TONIGHT BUT WE SHALL SEE. THE GOOD THING WITH DOING IT A FEW AT A TIME IS THAT IF SOMETHING HAPPENS OUTSIDE IVE STILL GOT A CROP INSIDE LOL. WHAT IM PLANNING TO DO IS EITHER LIGHT DEP THAT BIG BLUEBERRY CHEESE OR PUT IT IN THE FIFTY BUT IM PLANNING TO LIGHT 3 RIGHT IN THEIR 3 GALLON CONTAINERS. HAVENT DECUDED FOR SURE BUT IM THINKING THATS WHATS GOING TO HAPPEN.......of course videos won't upload and the ones that do are old videos. Damn. I need to sharpen my computer skills....and my growing skills. Especially transplanting. I suck at transplanting. I decided not to out all my eggs in one basket and left the 10th planet amd Blue berry cheese in the 20s in the garage. I pulled them out for light further but I'm ousting them back a little tonight. That way I'll have a back up if something catastrophic happens. I doubt it but better safe than sorry. I'm proud of what I've accomplished thus far. I've successfully uploaded my 1 minute plus video several times but it won't appear. Oh well. I'll try to load the videos tomorrow I guess. Just started raining. Just a light rain. Probably what fresh transplants like.
6/11 BEAUTIFUL outside. Today is the day. Most is done and I'll add the supports as trellis as they grow. This new grow space gets about twice as much sun as my old spot. The tar stops the burrowing insects. I'm getting everything out today. I just need to decide if I'm going to light dep that MASSIVE blueberry cheese or bite the bullet and put it in the fifty. Maybe I'll try to get some help from my cousin. Plants withstood the thunderstorm like Champs. I'll update as the day goes on. I planned better this year so I SHOULDN'T have an unmanageable jungle. UPDATE: WATERED THE 3 PLANTS LEFT IN THE 3 GALLONS (1 10th PLANET WITH GREAT BRANCH STRUCTURE AND TWO PURPLE PUNCH THAT WERE THE SMALLER ONES. IM GOING TO LIGHT DEP THEM. EVERYTHING IS OUTSIDE NOW IN A MIX OF 1/3 FOX FARM OCEAN FOREST, HAPPY FROG AND ROOTS ORGANIC 707 IN EQUAL PARTS. TRANSPLANTED WITH MYKOS. EVERYTHING IS OUTSIDE NOW. FINALLY DECIDED TO GET The MONSTER BLUE CHEESE I FIMed INTO ITS FOREVER HOME A 50 FALLON POT. IT WAS TGE EASIEST BEST TRANSPLANT OF THEM ALL. JUST LIKE AETTING A POT IN THE WHOLE. I DONT EVEN THINK THE PLANT NOTICED. ONE OF THE PURPLE PUNCHES HAD ROOTS OB ONE OF ITS LEAVES WHEN I LOOKED BUTVIT WAS STILL STANDING UO STEAIGHT. I KNOW SOME OF THE PLANTS LOOK DROOPY BUT WEVE HAD SEVERAL DAYS OF RAIN AND A MASDIVE THUNDER STORM. I BROUGHT OUT THE EARLIER TRANSPLANTS AS WELL. THEY ARE OUT OF THE SHOCK. WIND IS PRETTY HIGH BUT I DONT WANT TO ADD MORE TARPS. I THINK THINGS ARE SECURED GOOD ENOUGH FOR NOW. IM SUPER STOKED THAT TRANSPLANT WENT SO GOOD! Went back at 7:30pm. Some plants have a little bit of transplant shock and a little bit of burn but it's negligible considering they've been through a thunderstorm with pouring rain and extremely high winds. That blueberry cheese in the 50 transplanted so easy and still looks like it didn't even know the difference. I'll start light dep once I get a plan. Plants are recovering nicely but should something happen to one I could replace it. I'm interested in the light dep though and I've got a pretty good idea how to start.
6/12 The plants that had a little transplant shock are coming out of it. We had a thunderstorm and pouring rain the day of some of the transplants. Wasn't forecasted. High winds moved the plants around a bunch bit they are tough as hell. Everything is out now. Suppisedcto have showers the next few days. I'm putting together a feeding schedule abd setting up a spit to start light dep on the three plants I decided to flower early. The cage now gets twice as much sun as before. This is going to be a good year.
Went back over and plants are perking up and doing even better everytime I see them. I took a video but it might not upload until tomorrow. I may start a new diary for the light dep. I have a few places I'm thinking to use for light dep. I need to make a solid plan before I start so maybe a day or two. Trying to upload again but I doubt it.
6/13 Had a rushed morning but I watered the plants in the 3 gallons as they were dry. I had added more soil to a couple of the bags. The top soil is startingvtj dry out but the plants look good and we are supposed to get rain so I don't really want to water if it's going to be raining. I think I've found my light dep spot and schedule. I'll update after I do something.
WENT BACK OVER AND SPRAYED A LITTLE BIT OF WATER ON THE EXTREMELY DRY TOPSOIL THAT I HAD TOPPED SOME OF THE PLANTS OFF WITH. SHITTY THING IS THAT WAS ADDED AFTER THE THUNDER STORM SO IT MAKES IT HARDER TO JUSTE THE PLANTS WATERING NEEDS. I CAN TELL THAT ONE OFCTHE FIRST TEANSPLANTS IS STILL HOLDING WATER. I MEAN WE GOT A DOWNPOUR AND I DONT WABT TO WATER IF WE'RE GOING TO BE GETTING RAIN ANYWAY. IM GOING TO LOOK BACK OVER THE DIARY. THATS ONE GREAT THING ABOUT THESE. YOU CAN GO BACK AND CHECK YOUR WORK.
6/14 Glad I held off watering. It's raining today. Just showers. We haven't gotten any of that extreme wind we usually do. I have the plants supported but I still worry. Definitely more than I should. Plants are still doing good and acclimating to there homes. I have not started the light dep with the 3 gallons but I think I've found my spot. Once I start it will just be staying consistent putt8ng them in and out. I need to train them anyway. I have some research to do and a joint to smoke so I'll update later.


Likes
61
Share


@BelSun_420
Follow
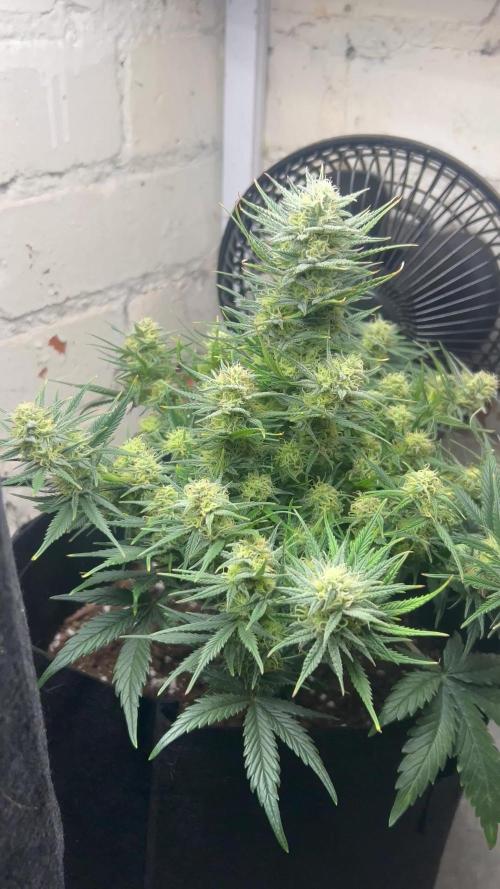
According to the website, it takes 8 to 9 weeks to flower, and we’re now entering the eighth week, so I’m already counting down the days until I can chop this girl!
From now on, I’m only watering with plain water until the finish.
💚



Processing
Likes
11
Share


@MRTHC
Follow
.... Really good week but the work continues. The stretch is on. The 2 ladies on the extreme left has a proper stretch going on. It may be due to those are the girls I mainlined or it could be the blurple lights that both of them are under. Still removing some of the thick lower growth below the netting. its think but i remove just a little everynight for a gentle reduction in foliage. Not pictured here but on Day 12 white hairs were beginning to show. A few issues with high humidity during lights on or high heat when the dehumidifier is on. No strain specific smells as yet. Huge difference observed between the mainlined strains ( Orange Sherbert and Green Gelato) and the other LST strains in the tent. The stems of the mainlined strains tend to be fatter and there is a significant reduction on foliage on the mainlined strains. The LST strains (Blue Gelato 41 and the Vanilla Kush) are more bushy, squat with heavy foliage. Also not so much as a long stretch.
Likes
91
Share


@DogDoctorOfficial
Follow
And this week wold not be the same if something did not came up, so lets take this in to different parts lol, they are way to big for this space and the LED power was just not felling enough, so and since i had finish my run on another closet with the Viparspectra P2000 , i decided to had it to the party and with this solve the not enough lights felling of mine loll
And as they are big af they also are getting heavy af lol so i had to instal a 3rd net to help and support, all good apart from the size and that i am not drone that can easy work from above them, and if i was one, there wold not be enough space for me to fly any way hahahaha
And wen doing all this i got full sticky all over me from top to bottom , direct to shower and closes to the washer, this girls are on fire and i am so but so glad that i decided to keep cuts from the chosen one that i liked the most wen i grew Zamnesia Runtz fr the first time, oh and by the way the passion fruit mixed with pineapple, pines and a walk in the woods smell is getting retarded intense , i think she is getting beter and better over time like a wine vine <3 <3 <3
And with this said this was the week so far , sorry jut now the update but at least was before next week one hahahaha
Oh almost forgot, dod not change the food supply but for next week i am cutting P and increasing the rest , just to let you guys know <3 <3 <3
They keep growing and growing , i almost can see them grow hahahaha
As always thank you guys for your love , your time, your support and it all, i fell blessed and i am truly thankful <3 <3 <3
All info and full product details can be find in can find @
https://www.zamnesia.com
https://aptus-holland.com
#aptus #aptusplanttech #aptusgang #aptusfamily #aptustrueplantscience #inbalancewithnature #trueplantscience #zamnesiaseeds #growerslove
With true love comes happiness <3 <3
Always believe in your self and always do things expecting nothing and with an open heart , be a giver and the universe will give back to you in ways you could not even imagine so <3 <3 <3
More info and updates @
https://growdiaries.com/grower/dogdoctor
https://instagram.com/dogdoctorofficial
https://youtube.com/channel/UCR7ta4DKLFMg2xxTMr2cpIg
<3 <3 <3 Growers love to you all <3 <3 <3
Likes
19
Share


@Dunk_Junk
Follow
Day 18 - FIM cut made.
Day 20 - Repotted to her 38 litre airpot. I planted her quite deep to help with stability so she has 'shrunk' 0.5cm this week 😂

Likes
6
Share

@AestheticGenetix
Follow
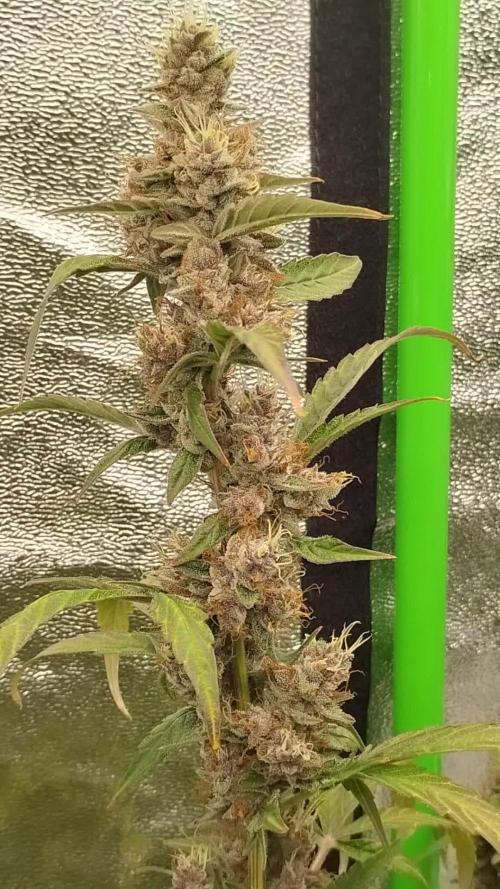
8/22/25 good Lord y'all this is a beautiful strain. The colors and the frost. She's starting to stack the trichomes pretty thick on there. Fades coming in pretty strong. She's going to be an easy one to trim

Likes
19
Share


@Master_weeda
Follow
Bonjour à tous les padawans et maîtres jedis
Tout d'abord merci à James de Royal queen seeds de me permettre de faire cette culture
Je rappelle je n'utilise que le strict minimum du matériel nécessaire à une culture correcte au prix le plus bas possible
MATÉRIEL CONFIGURATION
Box 80×80×160
Lampe led greenception GC4 250WATTS
Ventilateur à pince 15 watts
Xiaomi Deerma humidificateurs 5L
Hygrometre thermomètre
Extracteur PROFAN 107 m3/h - 100
Prise programmable électronique ×2
1 pot geotextile noir 10 litres (RQS)
RQS feeding easy boost organic
RQS easy combo tablets
Substrat cellmax bio ligthmix
Fil de fer et pince coupante
Microscope
Petite balance de précision
CULTURE ÉTAPE PAR ÉTAPE
J'ai tout dabord fais germé ma graine avec le easy start de Royal queen seed et je suis agréablement surpris car franchement le taux de réussite est très élevé (9 graines sur 10) simple d'utilisation et très efficace.
Une fois la plantule sortie et d'une hauteur de 2 ou 3 centimètres je la prend délicatement et la place directement dans son pot définitif. Je préconise des pots allant entre 10 litres et 15 litres pour des autofloraisons cultivées en intérieur.
Le pot aura été préalablement préparé (video dans diarie) avec 50 grammes d'engrais RQS easy boost organic, soit l'équivalent de à peu près 5 grammes par litre de substrat.
Je dépose donc la plantule dans son pot définitif je recouvre un peu de avec de terre je tasse légèrement et j'arrose pour garder le substrat humide pas plus
Je place ma lampe led 300watts à environ 90 centimètres de la plantule avec un cycle de lumière de 24/24 pendant une semaine. Au début de la semaine 2 le cycle de lumière passera en 20/4 grace a un programmateur car c'est pour moi le cycle de lumière qui offre le meilleur rendement pour une autofloraison.
Jour1: léger arrosage
Jour2: léger arrosage
Jour5: préparation de 3 litres d'eau ph6.3 à laquelle j'ajoute une tablette grow easy combo RQS ensuite arrosage avec 1,5 litre d'eau ph6.3