





Likes
87
Share

@squalino
Follow
Journal de Culture : Frost 1 -
Babouch (Semaine 10)
Génétique : Frostbanger (F2 Perso) | Système : Autopot 20L (Géré en manuel pour le rinçage)
📣 Remerciements
Un immense merci à toutes les personnes qui suivent ce journal depuis le début ! Un grand merci en particulier à @MIA_BIOTABS et à Mrs_Larimar pour leurs précieux conseils toujours aussi utiles. Merci à tous pour votre soutien !
🛠️ Configuration Technique (Ajustement final)
Éclairage : Lumatek ATS 300W Pro (réduit à 75% pour préserver les fins de fleurs)
Distance lampe/canopée : 50 cm
Climat : Jour : 25°C / Nuit : 21°C
Humidité (HR) : 50% (gérée par le déshumidificateur)
Tente : 1m80 de hauteur
📅 Évolution & Rinçage J+7 :
Des couleurs superbes et fin de floraison en douceur
Hauteur actuelle :
84 cm (parfaitement stabilisée).
Structure des têtes :
Les buds sont vraiment bien gonflés et compacts. On observe de légères "queues de renard" (foxtailing). C'est le résultat d'un petit stress lumineux, la lampe à 100% étant un peu trop près de la canopée la semaine dernière. Rien de bien méchant !
Action éclairage :
Pour calmer ce stress et aborder sereinement la dernière semaine (ou presque), j'ai redescendu le Lumatek à 75%.
Couleurs & Trichomes :
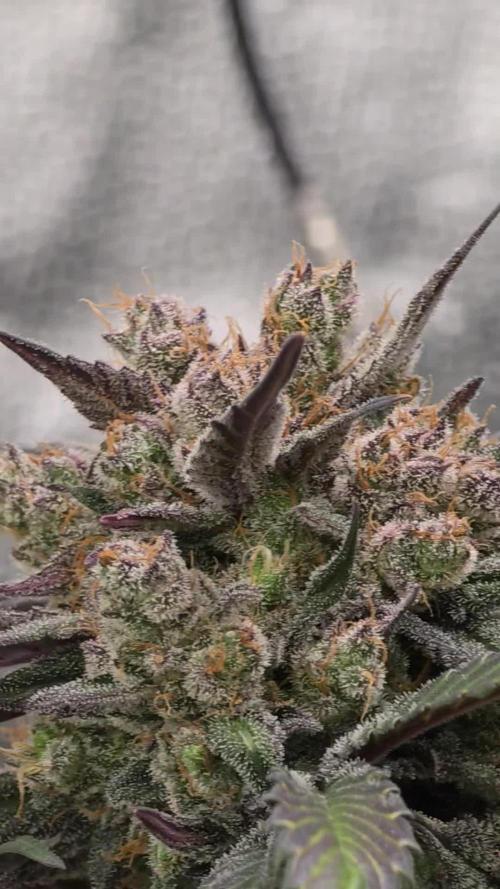
Babouch affiche une couleur superbe qui tire sur le violet / gris sombre, un effet magnifique accentué par la quantité de résine.
Visuellement, les trichomes sont majoritairement laiteux, mais il n'y a pas encore vraiment d'ambrés à l'horizon.
Rinçage & Sénescence (À la diète !) :
Suivi de l'arrosage :
Voilà maintenant 1 semaine complète que la plante est au rinçage à l'eau claire et en mode manuel.
Évolution :
Babouch commence à peine sa sénescence. Les feuilles vont doucement commencer à se décolorer dans les prochains jours au fur et à mesure qu'elle puise dans ses dernières réserves.
Résumé :
Tout va pour le mieux dans la box, la plante est tout simplement superbe. Les têtes sont lourdes, la résine est omniprésente et l'odeur est à son maximum. Le retour à 75% de puissance lumineuse va lui permettre de mûrir tranquillement sans faire de nouvelles excroissances. On surveille les trichomes de près pour le moment fatidique !
Le contraste entre le violet très sombre des calices et le blanc des trichomes sont incroyable à voir. C'est tout à fait normal que la sénescence mette un peu de temps à se lancer : les Biotabs nourrissent tellement bien la terre en profondeur que la plante a beaucoup de réserves à consommer !
À bientôt pour le final ❤️

Likes
79
Share


@JUNGLE_B4RNS
Follow
-Sensi Seeds Research:
The Sensi Seeds Research breeding project has created eleven cannabis seed varieties.
How? By combining new cannabis cultivars with a selection of strains from their long-established cannabis gene bank. For the first time in thirty-six years, they are opening the doors of the Sensi Seeds Research and Development Department.
Week #13, week 5 of Flowering.
Well well well... everything is going well 😄 Or should I say, swell swell swell... everything is going to swell 😉
As I said in previous week, they started to drink like maniacs ( 2 liters more in the week ), meaning swell is starting now (👈 the tip is free bro, just hit the like and subscribe if you want some more 😎), flowers opening is over. Dehumidifiers are set on 55% and will decrease 5% by 5% each weeks now. I will keep an eye on the buds, particularly the new genetics, as I never grow them before I don’t know their resistance to mold, but I believe these strains should be tough enough as everyone is in perfect condition and all healthy.
I have finally found a better lightening solution for the middle of the room. You can really see the difference between Pictures A and B. The Mars Hydro SP 250 is definitely the best LED solution for its price, you can get a serious LED light which is bright enough to be able to grow some serious buds like a pro, and I can tell just by seeing the quality and the intensity of the spectrum from my experience.
This LED light will make you say WOW when you plug it in and each time you will see it turning on, for sure 👍 Before receiving this baby, I’ve read the driver becomes hot, but in my definition something hot, is something that you can’t handle more than a few seconds... to be honest, for me this driver becomes a bit warm and you can handle it with no problem. And one last thing about this driver, it is removable, in case if you personally think it’s too hot for your growing area.
So I would definitely recommend the SP 250 for anyone who has understand that serious buds grows under serious lights, without spending one month of salary in one light just to impress the galleria 😊
Enter in de dance, plug it in an we begin
Crowd up in de center, they watch fi de rydim
Watch the way we drop it in a mix timin’
Rise and amplifyin’ when we come in wit de swing
Just followin the back and naturally harmonizin’
Climb into position wit synchronized things
Live from out a ghetto, we maximazin’
We superstylin’ lin’ lin’ lin’... 😎
(I’m looking for a job in the Cannabis industry as Master Grower, Mineralogist, Quality Control 🐞)

Likes
34
Share


@rhodes68
Follow
5/17 Week 8 ... and the state of the grow is unsettled
This grow has fought us since germ and it is showing no signs of giving in. Just cannot seem to find their "happy place" environmentally or nuet wise.
They doing ok-ish this is not a big yielding strain no matter the ad copy but havent had this much issue with it indoors before.
Starting at baseline with the lighting HID 300w 16 inches above Baba LED moved towards front of tent.
Both lights tilted very slightly towards each other hopefully giving better dispersal.
Still showing nitrogen sensitivity so reducing Bloom to 8ml/gal while increasing PK to 6 so PK does not suffer, will watch for deficiencies
Looking at going considerably over on these now, nothing coming up behind them so zero space issues, see what happens.
Continue to leaf pluck when one needs to go
Evening feed 5/17:
They look better and some experimenting with the lights showed me the angle tilt needed increasing and HID increased to 450w giving a total of 600w in the tent.
Should not cause too much heat issue. Still have 150w in reserve
5/18 PM
Pic of lights - Seems to be working out managing to cover base of tent with both lights giving a 5000k and 3000k spectrum. Buds building faster now in particular on Baba,
Hadnt gotten sick we would have thought of this weeks ago, aint that inspired. Man this Cov-19 stuff will cloud your thinking.
Keeping HID at 450w
Pics of plants - doing better
Nuets - Running low on Soul Peak so gradually working in the KoolBloom to make it last. Seriously think the Soul Peak is better.
5/18
TAHTA TA TAHHHH! Baba found her happy place and is bulking very fast.
See how long it continues
Re-did the lights
Had to drop wattage on HID due to heat even after a redesign of the extraction to eliminate drag on air movement.
For 14 hours they will run at 450 watts but for 6 hours a day will drop to 300 watts. This should keep any problems from occurring.
Just hard to run that Metal Halide at more than 300 watts in warm weather without AC which aint happening.
HID to 300/450 watts, 13 inches above Baba at a 20 degree tilt to disperse light.
LED at full 17 inches above Athena with a 20 degree tilt.
Coincidentally that puts them at the same height.
Added a 30 watt 2700K LED on Baba and Athena give them some more red. See how it works.
Nuets as is
5/20
Pics
After viewing tricones beginning to walk down the EC to flush in a couple days. Plan 10 day flush.
That puts them finishing about the middle of week 11.
Not perfect but nothing so far with this grow has been lol
Adding the 30 watt 2700K LED in the bottom seems to be helping, lot of increased lower growth WHICH I WILL TAKE ... 😬
Seriously every bud counts lol
5/21
Buds continuing to build at a decent rate finally.
Had to re-arrange the tent my wife's plant is getting big
Holding nuets where they are till flush, plan to begin flush during week 9.
Working on a tactic to harvest Sally ahead of Jane without hurting either
After a talk with her and looking seriously at what we have here I am going to break up the feeds.
Athena will need to go into flush first she is furthest along. So start it on week 9.
Sally ... we are going to do something unusual for her and Jane.
Since flushing Sally per normal would be just no good for the twin Jane we are going to flush but then put the plants on organic bloom.
So big initial flush with agent to clean out the salts then shifting her to light organics to continue feeding the twin without having to revisit the flushing issue.
No idea how long the twin may go
Baba will just play by ear on her, continue the light Bloom feeding keeping her PK up until we see the go signal from her. Hoping she goes a week longer than the others.
5/22
Lights to full weather is cool today and time is short
Holding nuets here till new week then begin flush on Athena
Buds still building nicely on Baba
Almost forgot the twin:
Here is the plan we flush the pot same time as Athena but on the next feeding we introduce organic bloom nuets for Jane instead of a flush as normal.
We dont smoke so not overly concerned with harshness just want the pot clean. The organics will belay any further need of flushing. Best we can do
5/23
Need to start flush now so Athena and Sally on water only till I introduce organics to Sally.
No agents
Baba staying on feed
Likes
170
Share


@Master_weeda
Follow
Bonjour à tous les padawans et maîtres jedis jour84 arrosage avec 25 centilitres d'eau ph6.3
Jour87 arrosage avec 30 centilitres d'eau ph6.3
Jour88 pratique de la techniques du tronc fendu (videos explicatives) et arrosage avec 20 centilitres d'eau ph6.3
COMMENT FENDRE LES TIGES DE VOTRE PLANT DE CANNABIS
Pour fendre les tiges de votre plant de cannabis, il vous faudra :
Une lame propre et aiguisée (une lame de cutter fonctionne bien)
Un mètre ruban
Une ficelle ou un adhésif pour marquer les coupures que vous ferez le long de la tige
Un crayon, une baguette ou une brochette pour séparer la tige une fois fendue
1. Tout d'abord, commencez par mesurer la partie de la tige que vous allez fendre. Il faut faire une incision d'environ 10–20 cm juste sous la branche la plus basse de votre plant. Utilisez un ruban adhésif ou de la ficelle pour marquer le début et la fin de l'incision.
2. Ensuite, prenez votre lame et faites une incision en travers de la tige, en commençant par le haut. Attention à faire une coupe propre, jusqu'au centre de la tige.
3. Utilisez votre lame pour tailler en descendant vers le bas, jusqu'à la marque inférieure de la mesure que vous avez prise auparavant. Essayez de tailler aussi droit que possible. Une fois que vous avez atteint votre marque du bas, laissez la lame au centre de la tige, puis utilisez un crayon/baguette/brochette pour ouvrir la partie coupée, puis sortez votre lame.
QUEL EST LE MEILLEUR MOMENT POUR FENDRE LES TIGES ?
Il existe de nombreuses théories sur le meilleur moment pour passer votre tige au couteau, mais la plupart des cultivateurs suggèrent de le faire à la dernière semaine de floraison. Même si certains cultivateurs recommandent de le faire dans les 3 derniers jours avant la récolte, nous recommandons de le faire un peu plus tôt (7–10 jours avant la récolte).
QUELS SONT LES RISQUES À FENDRE LES TIGES ?
Fendre les tiges est une technique à stress élevé très agressive que nous ne recommandons qu'aux cultivateurs expérimentés. Nous ne recommandons également pas de fendre les tiges sur les variétés à autofloraison, car cela peut être bien trop intense pour elles.
FENDRE LES TIGES, ÇA MARCHE VRAIMENT ?
Il existe un solide ensemble de cultivateurs expérimentés qui déclarent que le fait de fendre les tiges peut produire de bons résultats. Malheureusement, peu de données qualitatives le prouvent. Cependant, il semble que la fente des tiges soit originaire des Pays-Bas, où elle est pratiquée par des cultivateurs néerlandais experts depuis les années 1970.

Likes
12
Share

@cultivars
Follow
OCTOBER 11h to OCTOBER 17th
Sunrise: 08:20 | Sunset: 19:03 | Total Daylight: 10:43
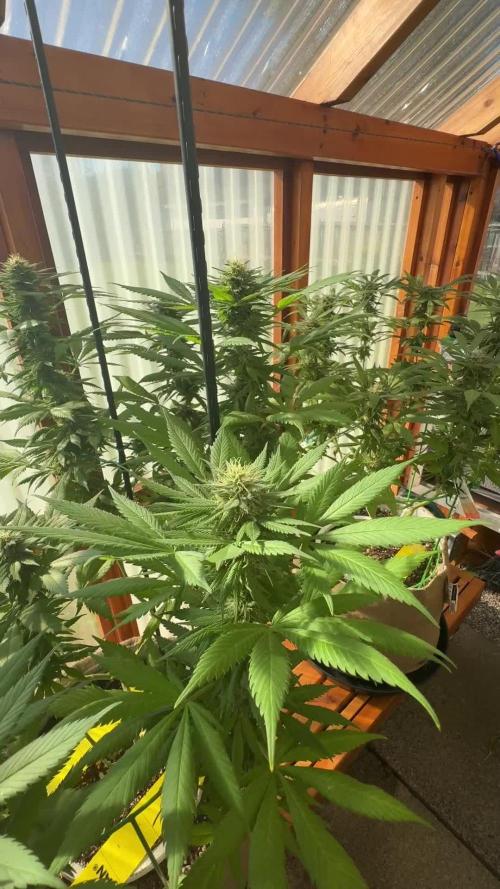
This was another pretty good week for weather, however the last couple of days have been cloudy with rain, causing some spikes in greenhouse humidity. Temperatures for the most part have been good, with one overnight low in the greenhouse of 13C.
Purple Romulan is doing well but is the furthest behind in reaching maturity of all specimens in garden. Flowers are of decent size, with adequate trichome production.
Greenhouse is emitting very strong smells now, mostly a sweet skunk scent.
Weather forecast appears as though it will be adequate and manageable temperature wise for the next week.
DAY 155
Greenhouse 13C in the morning, with outdoor temperatures down around 3C (frost evident on rooftops in area). 500mL drip of plain rainwater to all specimens.
DAY156
1L hand water BTI treated rainwater (no additives); Greenhouse held to 18C overnight, humidity a little high (51%) but dropped as sun rose; Overcast day.
DAY 157
Beautiful sunny day, with warm temps; Greenhouse was 18C in the morning.
DAY 158
-1C in the morning outside, 13C in the greenhouse, which is fine. Nice sunny day.
DAY 159
Overnight low outside 5C, 17.5C in greenhouse, which is ideal. Humidity in check, at 41%. Cloudy, overcast day, with greenhouse heater working to maintain day-time temps of 21C (no solar energy to drive heating).
DAY 160
Greenhouse 14C in the morning, 3C outside. Humidity at 41%; Clear morning, with some sun, turning cloudy with light rain in the afternoon, resulting in a humidity spike in greenhouse to 50%.
DAY 161
Lots of rain overnight, causing spike in greenhouse humidity to over 60%; Will require monitoring; Temps in the morning 18C in the greenhouse, mild outdoors.
Likes
1
Share


@Lazuli
Follow
I use a new EC meter wich shows higher numbers, so now my water shows 1500ppm with 1.2 grams/L drypart and 1ml/L calmag, the thing is if the runoff is about the same as what goes in yr all good.
Likes
3
Share


@Bluemels
Follow
Tag 29: Ich habe die Pflanze etwas entlaubt, und setze Holzstäbchen zum Strecken und biegen der Seitentriebe ein.

Processing
Likes
13
Share


@GrowGuy97
Follow
Just got the new 8x4 setup and got some new seeds in from Seedsman so let’s see how this run goes! 5x5 is week 2 of flower going strong!


Likes
10
Share

@TrickzCutz
Follow
Servus Moin!
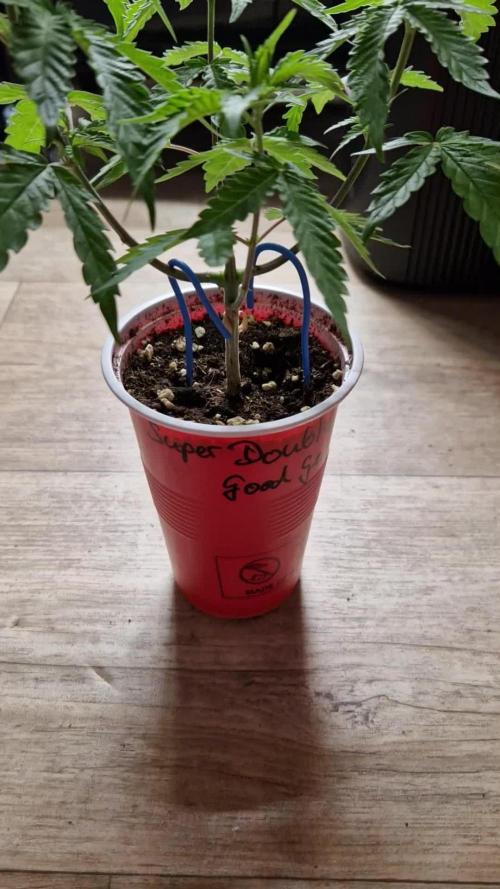
Die Super Double Cherry wartet jetzt nur noch auf das umtopfen. Bis dahin wird sich sicher auch nicht mehr viel verändern.


Likes
5
Share

@deseed_uy
Follow
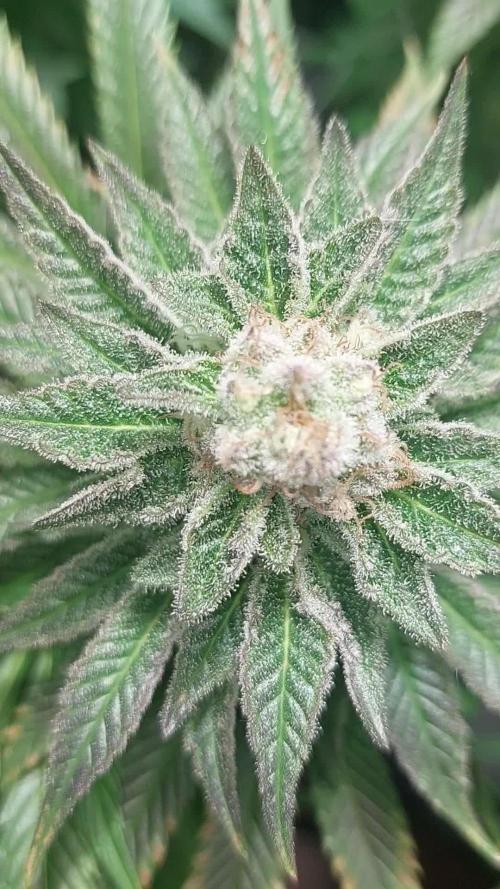
Segundo riego con overdrive para cookies 1 y 3, la numero 2 tiene el ph un poco elevado (6.8) y no se esta alimentando tanto, aún no pidió riego y está con algunas hojas apenas quemaditas, igual vienen muy lindas.
Processing
Likes
22
Share


@Yiyis_Grow
Follow
Semana tranquila. Algunas hojas inferiores se están poniendo amarillas por falta de luz. Este cultivo decidí no quitar hojas y dejar que las plantas tuvieran el mínimo de estrés, por lo tanto las hojas inferiores no reciben luz.
Las flores han aumentado bastante de tamaño y ya comienza a oler bastante rico el cuarto.
Están consumiendo prácticamente dos litros de líquido al día.
Buenos humos para todos!


Likes
5
Share


@GirlGoneWeed
Follow
Clones got transplanted into 1gal Rapid Stack pots, this will facilitate the next transplant into the live soil grow bed with no stress. Quick and easy transplanting with no root shock or damage to the plant.
Plants still drinking rain water, top dressed with Bokashi Pro-Gro, the soil is recycled and organic :)
Check my Instagram for more grow content @GirlGoneWeed

Likes
32
Share


@Hawkbo
Follow
Daytime smoke, nighttime smoke. Depends when you go to bed.
Photos shot with Nikon D5600 with various lighting and stop settings
Videos shot on Samsung Galaxy S8 and cut with inShot00
Likes
1
Share


@Gumbassman
Follow
Looks drippy so I water with ph on 6.5 I start lst later on today overall looking good I water about 200 to 400 ml at a time.


Likes
2
Share

@Smev1337
Follow
Starting off strong this week 💪😎 the left plant is looking so good and also the buds on the left plant are so nice and big 😋 the right plant is showing yellowing but that is fine because she will be turned into bubblehash anyways 😏 happy growing all!😎💚✌️