


Likes
Comments
Share


@Brickie74
Follow
This week went well. The Jelly Rancher plant was getting big enough to move to a bigger pot (1 gallon fabric pot). It may have been able to stay in the Jiffy Pot a little longer but figured I'd get it done with a few others I was transplanting. The roots looked great, the plant seemed nice and strong.

Likes
25
Share


@m0use
Follow
They are doing well this week, the spikes are holding out and the birds have fucked off with these plants. The steady feeding from the pro mix is still holding up and may feed next week with a smaller dosed solution. The video prerequisite for the contest is a bit funny, not a lot happening in them. Just did a fly by this week. Mustard greens are growing better then these fast buds lol.
Had a near perfect rainbow the other day and included that in all the diaries. Bring some happiness to the page.

Likes
85
Share


@Teamdirtbag2
Follow
She is growing good. Defoleated A lot. She is starting to get frosty. No burn upped the newts to 680 ppm.
Hung the second light. So things should get interesting.

Likes
5
Share


@Bryankush
Follow
Giorno 1 bene le ragazze si sono riprese bene dal trapianto e stanno sviluppando bene le radici e iniziano a bere più acqua. Al termine di questa settimana verrà pulita bene
Giorno 3 LST
Giorno 4 leggera defogliazione sotto, annaffiata con 1L di acqua
Giorno 7 defogliazione e lollipopping

Likes
23
Share


@Mosquito_Haarlem
Follow
Het is week 10
Ik dacht dat ik haar te veel drinken had gegeven omdat de bladeren slap hingen en ze aan het vergelen waren, maar dit komt dus door de fungus gnat.
Ik kwam steeds meer van die vervelende vliegjes tegen in de tent.
Ik heb een laag zand over de bodem gestort zodat die fucking vliegjes er niet meer doorheen kunnen om eitjes te leggen.
Dit had ik al weken eerder moeten doen.
Dit is de tweede keer dat ik dit heb meegemaakt en beide keren was dit met de lightmix van biobizz, dus deze potgrond ga ik nooit meer gebruiken.
Ik heb de vergeelde bladeren weggeknipt.
Ik zal gedurende de week nog verse foto's updaten, hopelijk zal ze haar bloemen flink oppompen.
💪🏽

Likes
15
Share


@bhanga_garden
Follow
12/6 Update - seed is germinated and ready to grow! I will post a new weekly update tomorrow!
So I had to scrap this plant - it was just growing too slow and it was unfortunately not a health plant. I decided to remove the plant altogether and have started a new seed. Since this plant will be four week behind its neighbor in the tent I will have to modify my approach to training on this one. I typically mainline - mostly just to utilize the space in the best way that I can. This time around I think I will just top it maybe once or twice and then let it recover for two weeks then flip to flower and manage out the lower branches from there. It will be kind of fun to do a side by side with these. The neighbor plant is super healthy and is almost ready for its first topping, I did however go through today and remove all of the growth from the plant (other than topping) so that should slow that one down quite a bit and give this new plant some what of a chance to catch up.
Also - check out the worms!!! I pulled out that plant and reached down into the soil just to see what the worm activity was looking like - I pulled out this little ball of freshly hatched worms!
Barney's Farm Gorilla Zkittles - Feminized. I'll be growing just one of these plants in this 2x4x5 tent. It will be growing side by side with another plant but I wanted to be able to document them separately.
This is my fourth grow using this set up, I'm excited to document the process this time around!
The seed broke ground today! Photos and time-lapse coming soon!


Likes
26
Share


@1Right_Angle
Follow
Feb 19th,
- week 9 of flower sees a lot of subtle changes going on. The smell at the door is one, and it’s becoming a very dense and dark odour. Fruit-like up close.
- Molasses doubled as root boosters get removed and Calimg has only 1 feed left, tonight.
- Mar 1 is the tentative flush, first day of week 11 in flower.
Those will be a long couple of weeks, feeding h20 & sugar only
- noticing the stems of Fan leaves are turning Red/Crimson on L plant. A few are in the R as well.
** question asked about Red Stems **
23rd
- noticing a definite increase in the Trichomes of the Buds, under the UVB (pics tonight).
There are simply more now and it’s kinda obvious when side by side. Lite spill from uvb is falling on the left plant as well, but not from 14”
- feed tonite will include a bit of CaliMag once again moving forward and a lingering taste of Medi-One.
- Trichomes were checked today. As happy as I was to see a few Amber ones. They were very wide-spread with most of the others still 50/50 clear and cloudy.
- Based on todays Trichome check; hoping to flush ~ Mar 7 now. That will be the end of 11 complete weeks of Flower. FYI: Breeders expectation "11-12” weeks. Happy to see it linger a bit, diet, humidity and lighting changes have been incremental throughout. How quickly the next changes happen ie: clear to cloudy etc., I have no idea.
Would love to see ~ 10% Amber, just enough to say it’s Very ripe. ( Not in any way thinking of couch-lock lol )
- literature & product labels on Humic Acid recommend usage throughout Veg & Flower... just Not the last 3 weeks. That rules this batch out... So the next batch(s) get introduced.
- Macro shots tonight of the Buds under the UVB... cannot wait.
** found 1 bud on the R plant, that had quite a bit of Amber showing. Nowhere to be seen in the L plant, but it looks like a high concentration of Cloudy Trichomes on the L regardless.
One more serious search tonight of the R plant and it may just be time for a rinse.
Surprised to see so many Ambers, alone on this one bud.
Pics uploaded ! re: 24th a.m.
Feb24th,
- when the lights came on this evening, I did another thorough check on both plants and there were more Amber trichomes found. Ready or not, both plants were Thoroughly flushed.
- Flush aid used in the process.
- 10 Litres of Water was mixed with Molasses / Rezin as the first liquids poured into the plants, after the Flush...
- when it came right down to it, the sudden appearance and then rapid spreading of the Amber Trichomes made it an easy call, to flush both plants.
Thoughts on the amount of white hairs left... they have a couple weeks to get their shit together... if I can get a couple weeks of flushing-in, that’s a definite bonus.
25th
- humidity spike in the Tent. doors are cracked and a floor fan has been added for extra air flow. Exhaust fan increased...
26th, no liquid to remove from the plants btm Trays, but still showing a high humidity. R.H. coming down slowly, aimed the fans at the fabric pots... doors cracked etc.
* why mess around, hooked up the dehumidifier... R.H. dropping, end of issue

Likes
7
Share

@Skynets_Growing
Follow
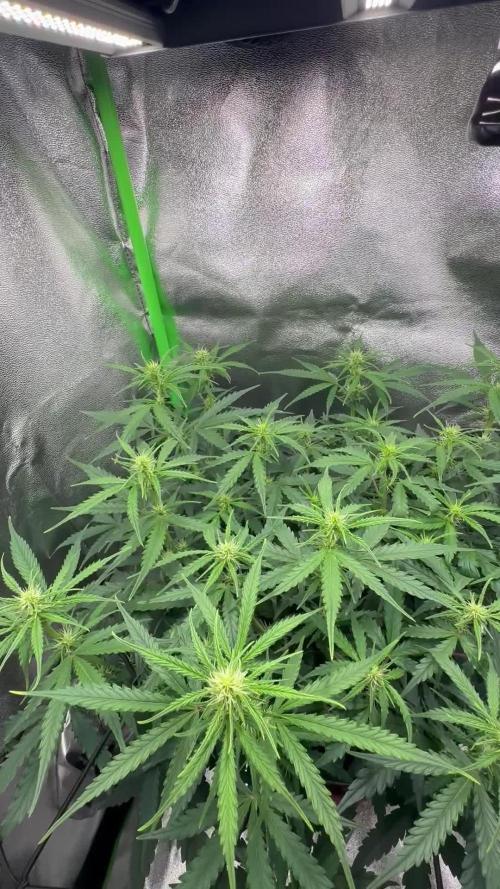
Tamara starts her second week of flowering with a solid stretch, which I had to keep tucking into the scrog net so she could get more light exposure. It’s truly amazing how much she can grow in just 24 hours.
Looking closer, we can already see the first trichomes forming, and I have to say it again: I absolutely love


Likes
4
Share


@Bncgrower
Follow
Another week almost over, the girls are beautiful and smell great. Apparently everything is under control, I'm really looking forward to the results.
Happy growing! 🌱🌱🌱

Likes
10
Share


@AsNoriu
Follow
Day 35. I know its last day of previous week, just didnt wanted to mess with week type.
Its BIG week .
New light was added and rhythm changed to 12/12.
Pot was top uped with 3 handfulls of BioBizz Worm Castings. 1.5 g of Biosys and 1.5 g of Great White were added too.
After training she got 2.5l of water, fastest drinker at the moment.
Girl got small defoliation, when you bent main top, one fan leaf is always staying in everyone's way, so he had to go. Think to do big clearing on day 14-18 of flower.
Got first wave of LST, main top was lowered, couple shoots were repositioned and secured too...
Girl is a racer, double the size of others, thinking to scrog her even ...
Still get nitrogen excess and magnesium issues, girl is on plain water, but pot is still too rich and i added castings ;))))
TS1000 by Mars Hydro, great light, did perfect job during veg period, now i added one more for better coverage of long tent. Think in tent 1x1m i could manage to flower all 3 without any ad ons ....
Great small light for amazing price.
Day 37. I see more progression, went with 3.5 liters of higher ph 6.5 , run off was 495 ppm, 6.3 ph, so all should sort out .... i still believe its more overdose than lack. She drinks fast, was even droopy a bit, needed watering few hours earlier...
Day 38. Looks like higher ph and run off helped her a bit, anyways still see some damage, but form of even canopy compensate everything, she is very nice !
Day 41. Girl got heavy training, 5-10 leaves were taken off, most shoots secured. One leaf was double ;)))
3.5 liters of 6.3 water went in.
Happy Growing !!!

Likes
6
Share


Likes
38
Share


@Silverback_Guerilla
Follow
8/17:
I fed today and did a little training. They're "sardined in" pretty well, so I'm limited as to how much I can do, but I worked on a couple of #4's since they were already bushy, and supercropped my tallest auto, and a tall one that's either a #2 or a #3.
8/18:
After seeing them beginning to flower, I have reached the conclusion that I have 4 different varieties of the FFT clones growing!
There are definitely 4 x #10
There are definitely 5 x #4
There are probably 4 x #2, but maybe only 2
There are probably 2 x #3, but maybe really 4
The #3 in the outdoor garden was a seedling (my last FFT bean) grown outdoors and pathetic looking, so I'm not sure what it would have looked like when looking at the clones.
The #2 in the outdoor garden was viciously attacked by hoppers and mites so it didn't have much foliage to compare with, and died this past weekend before budding up enough to compare with.
8/22:
I fed them today, and started them on Beastie Bloomz.
8/23:
They're doing great. Fattening every day. Not bad for 2 weeks of flower.
That's it for week 6!

Likes
7
Share

@SwabianMadness
Follow
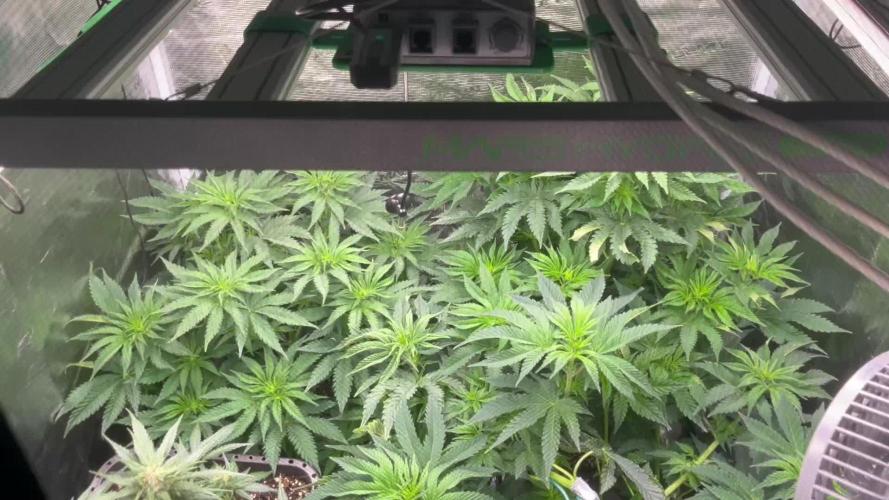
Have to do something against the one which kisses the LED 😂 so i cropped her very hard. But she bounces back with no Problem

Likes
4
Share


@LittleBigTrees
Follow
I've been pulling the top fan leaves to stop the main stem growing any taller and repotted them into 4L pots, once they show roots I'll flip them over to flower.
They've all outgrown their mutations but the apple fritter has a slight varigation.

Likes
10
Share


@Nix6969
Follow
Buenas noches comunidad.
Esta noche se ven creciendo con gran vigorosidad estas cepas Chilenas Pure Inferno y Bloodnana, actualmente estas comenzando la 3era semana desde sus 2 hojas reales.
las nenas se alimentas bien y se ven felices actualmente se da alimenta con fertilizante Advance nutrients.
Veremos como se ven las ultimas semana antes de tirarlas a floración.
Se hace corte Apical en el 5to nudo.
trasplante con Great White Micorrizas.
PH:6.3
EC:550
Likes
2
Share


@CannaIGrow
Follow
She’s growing well and finally starting to grow
out of her lil leaf mutation at the beginning.
Likes
30
Share


@Roberts
Follow
Watermelon auto is starting her journey. The first seed that was cracked ended up being a dud. The second seed now has started with no issues. She will be growing under the Medic Grow Mini Sun-2 in Gen 1:11 organo-mineral nutrition. Everything is looking good so far. Thank you Medic Grow, Gen 1:11, and Royal Queen Seeds. 🤜🏻🤛🏻🌱🌱🌱
Thank you grow diaries community for the 👇likes👇, follows, comments, and subscriptions on my YouTube channel👇. ❄️🌱🍻
Happy Growing 🌱🌱🌱
https://youtube.com/channel/UCAhN7yRzWLpcaRHhMIQ7X4g

Likes
6
Share


@Gruschel_Muschel
Follow
Cash Express 03.01.2025
Tag 51/ 26.2.2025
Für die zwei Cash Express hat die 7 Woche begonnen. Heute, werde ich sie neu zurecht Binden (LST), damit sie ihre gewünschte Form erhalten.
Feedback: Cash Express um 9:00 Uhr gebunden!
Likes
201
Share


@JamMAKEcan
Follow
Very satisfying very
Sticky as heck. Smells already only few wk into flower.. She is going to be very strong.. Love it
