


Likes
Comments
Share


@CornishFarmer
Follow
--- Day 50 ---
22/06/2021
Shes really happy in the new tent, I'd officially say we're in preflower / flower now 😄 I'm watering 4L and she's really loving it.
I've watered her again with 4L of 23C, 1500PPM, 6.0PH water with the above nutrients
--- Day 51 ---
23/06/2021
Things are looking really good, flowers are coming in nicely, she's still growing and most of the low quality leaves have fallen off 😁
I've watered her again with 4L of 23C, 1500PPM, 6.0PH water with the above nutrient
--- Day 52 ---
24/06/2021
Shes really happy, everything is going great. I measure her and she's 32" tall now 😄
I've watered her again with 4L of 23C, 1500PPM, 6.0PH water with the nutrients above
--- Day 53 ---
25/06/2021
Nothing really to report, she's still growing good. The flowers and coming in more and more, they're everywhere now.
I've watered her again with 4L of 23C, 1500PPM, 6.0PH water with the nutrients above
--- Day 54 ---
26/06/2021
Yet again, nothing much to report. She's still really happy everything is going well 😄
I've watered her again with 4L of 23C, 1500PPM, 6.0PH water with the nutrients above
--- Day 55 ---
27/06/2021
Pistils are growing alot, they're starting to get quite long, there's more and more flowers popping up everywhere.
I've watered her again with 4L of 23C, 1500PPM, 6.0PH water with the nutrients above
--- Day 56 ---
28/06/2021
She's really happy. I'm glad I got the bigger tent and the new Extractor, it's really needed and working well. Nothing much to report, she's getting bigger and more and more flower spots are showing up 😁
I've watered her again with 4L of 23C, 1500PPM, 6.0PH water with the nutrients above

Likes
7
Share


@fabialien
Follow
Lunes 11 de marzo 7 am de 2024:
Se dejaran hidratando las semillas por 24 hrs.
Martes 12 de marzo 7 am de 2024: pasamos a papel dejamos por 24 hrs.
Miércoles 13 de marzo 10 am de 2024: revisamos las semillas y vamos preparando macetas pequeñas para transplante.
Miercoles 13 de Marzo 3:30 pm se traspasa a tierra.
Viernes 15 de marzo 11:47 pm 2024, ya que abrieron bien se pone bajo lámpara 100w a 30 cm de distancia, tienen domo protector! El lunes en la nueva semana subimos el avance, hasta el Lunes...
Sábado 16 de marzo 2024, de las 3 semillas la 1 ya abrió completamente, 2 y 3 están por abrir completamente.
Processing
Likes
7
Share


@TegridyCal
Follow
The purple Lemonade despite a very beautiful structure is a little worrying us because the flowers are swelling very slowly. We are afraid that they will remain small but it seems they are getting bigger so we wait a little longer to express ourselves even if the painta seems in excellent salu...

Likes
1
Share


@RosQuare
Follow
Everything has now been topped except the stunted GG#4 that we tossed away (tops cloned for the hunt)
Last week of veg to fill out their pots

Likes
25
Share


@pifflestikkz
Follow
Day 29
01/08/24 Thursday
Another feed today using de-chlorinated tap water pH 6, there now taking 300ml every evening.
Day 32
04/08/24 Sunday
300ml De-chlorinated tap water pH 6 today again with Plagron PK13-14 and power buds.
All plants doing really well!
Had an infestation of leaf minors this week, no idea how, but they are treated and I'll check every 48 hrs on progress of pets.
All of them have shot up this week 💚
Day 34
06/08/24 Tuesday
De-chlorinated tap water pH 6 today with calmag only.
Pre flower stretch initiated, pre flower female sex pistils forming 😍
All happy and healthy!


Likes
6
Share


@TrialAndErrorGrows
Follow
Week 7
Transplanted ivory from 1 gallon pot to 7 gallon felt bag on day 1. Tied her down again on day 3. Was going to top again but decided to wait till next week. Give her some time to recover. And get some roots spread out in the new soil.

Likes
14
Share


@LokalGrenz
Follow
Still just water and some fish shit
Jan. 1 Happy New Year welp to start new year off drop my very cheap PH meter in the bucket water and now the readings are off and I probably watered them today with wrong pH water Sour diesel looks cool didn’t water today soil was still moist but the amnesia haze be


Likes
10
Share

@420DeepGrow
Follow
📆 Semana 4
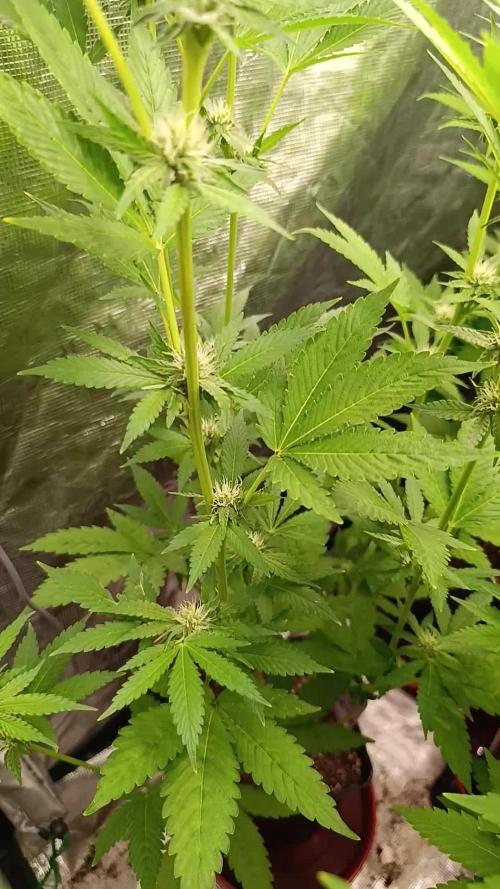
El estiramiento llega prácticamente a su fin y las plantas centran ya la mayor parte de su energía en la formación de flores. La estructura queda completamente definida, con una canopia uniforme que aprovecha al máximo la intensidad lumínica y favorece un desarrollo homogéneo de todos los sitios florales.
Los cogollos comienzan a ganar volumen de forma visible, aumentando la producción de pistilos y el desarrollo de tricomas. La demanda de fósforo y potasio se incrementa progresivamente, mientras que el calcio y el magnesio siguen siendo fundamentales para sostener el intenso metabolismo y evitar carencias en las plantas de mayor vigor.
⚡ EC: 1.7–1.8
💧 pH: 6.2–6.5
🌡️ Temp: 21°C
🌫️ Humedad: 45–50%
💡 Intensidad: 950–1050 PPFD
🔥 Nota de cultivo: La cuarta semana marca el inicio de la fase de engorde. Mantener un clima estable, una nutrición equilibrada y una iluminación uniforme permitirá que los cogollos comiencen a ganar densidad sin generar estrés, sentando las bases para una floración de máxima calidad.
¡Seguimos creciendo fuerte! 💪

Likes
12
Share

@Z420Organics
Follow
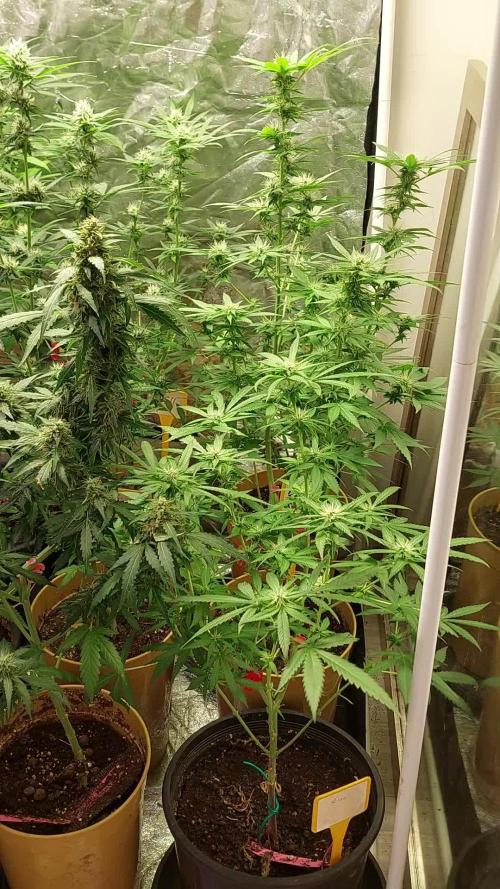
The plants are doing great overall! 💪🌿
RS11 is filling up beautifully — the structure looks amazing and the sweet smell is starting to show! 🍬✨
Amnesi-K Lemon has such juicy-looking buds 🍋💦 — that’s honestly the best way I can describe them right now.
The surprise of the run is definitely Apple and Bananas 🍎🍌 — the plants are packing on heavy trichomes, even on the sugar leaves. This one’s going to be an interesting strain for sure! ❄️🔥
Monkey Grease is growing steady and strong — zero issues so far 🙌🌱.
Cherry Dreams… well, that’s where I made a big mistake 😅. When I mixed the soil, my ppm meter turned out to be faulty — so they went into a very hot mix. I’m currently flushing to remove excess salts so the roots can breathe and work properly again 💧🌿. Lost some time there, and they’re definitely behind compared to the others. But hey, it’s all part of the learning process. This will be an interesting one to see how it finishes! 🧠✨.

Likes
19
Share


@Anxious_Passenger
Follow
Update: 29/07 - Thought I would include a short video which shows that I have quite a small space to work with and my setup. She’s looking good and seems happy, swelling away in her garden and is even starting to get purple tints! She’s living up to her name, the purple pheno is quite rare so I’m super chuffed.
Welcome to week 10!
As you can clearly see by the pictures, she’s doing well and covered in sugar! Pistils are still quite white although a few are starting to darken, trichomes are becoming increasingly cloudy with a few that are amber but still a small amount. I am going to harvest a bit later to grab a bit more CBN.
Buds are fattening up and she’s turned out to become a real stunner, for a first grow I’m sitting quite proud of myself.
Peace brothers and sisters ✌️

Likes
11
Share

@Bncgrower
Follow
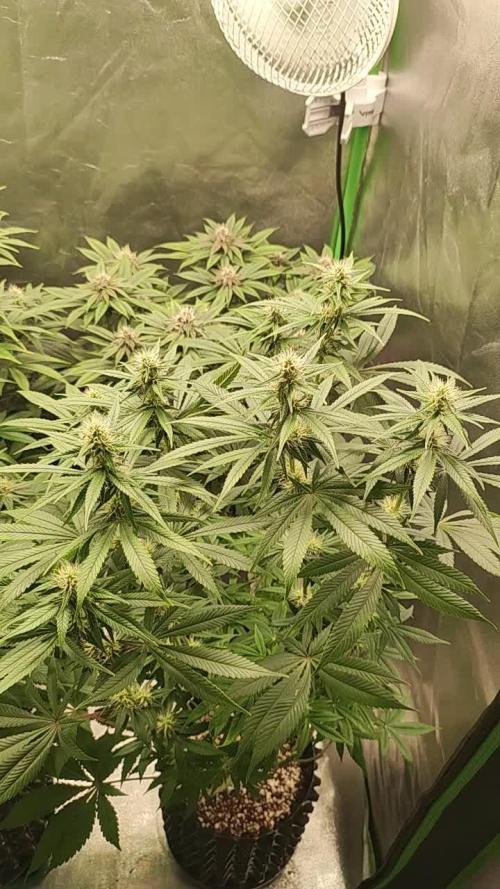
Following the plan, the girls are beautiful and were already quite big during this stretching phase. I hope everything continues as it is now during this growth and weight gain phase. For the rest, just wait for time to pass. 🌱🌿✌️✌️

Likes
8
Share


@Fast_Buds7272736
Follow
Week 10 – Ready for the final stretch
Most of the pistils have turned brown, with only a few white hairs remaining – a clear sign that harvest is approaching fast. The buds have bulked up nicely, becoming denser and stickier, covered in a frosty layer of trichomes.
The aroma has intensified, leaning towards a sweet, fruity profile, likely enhanced by the Bud Candy. The foliage looks healthy, and I performed a light defoliation to improve airflow.
At the beginning of the week, the plant received its final feeding: a mix of Green Sensation and Bud Candy in 2 liters of distilled water. That was followed by a dose of Flawless Finish. From now on, only pH-adjusted water will be used until harvest.
Likes
11
Share


@ZombieKushAddicted
Follow
to view this lamp or any other marshydro product go to: https://instagram.com/marshydro_aliexpress?igshid=YmMyMTA2M2Y=

Likes
5
Share


@Tmasm
Follow
Saudações
Iniciar diários fast buds
Encomenda chegou dentro do prazo, muito discreto.
Dia 16/11/2023
Selecção de 5 sepas, colocando em papel toalha
Dia 17/11/2023
Colocando em vaso final, com um cúpula para manter umidade alta.
Agora é esperar que corra tudo bem
Não se esqueça de ver novidades em https://2fast4buds.com
Likes
18
Share


@eezeegrow
Follow
I really love this strain. It's very powerful and growing is quite simple. These are seeds that I've won on GD from Dinafem and I've to say thanks to both. Dinafem for the perfect seeds and GD where I've learned a lot about growing this lovely plant!

Likes
16
Share


@Oimjr
Follow
So far, so good. I used a but of koolbloom. I'm pretty new to this, so I don't know of it will help. But here goes. Not much longer I think. May e a few more weeks.
Water change on 3/9. 4 gal well water 1 tsp maxi bloom 1 tsp Kool bloom ph to 5.8. Looking good!


Likes
19
Share


@MadeInGermany
Follow
Hey guys :-)
A lot has happened this week :-).
She has developed very well.
Today it was topped on the main shoot for the first time.
How often I will use topping on her, I make it dependent on how everyone else develops.
I want to bloom soon so it won't happen very often :-).
It was poured twice this week with 1 l each time (for nutrients, see table above).
Fast plant spray from GBL was applied 2 times this week.
New was added this week Fast Bud from GBL is preparing her for the coming flowering.
Bio Grow Stay away for a while because the substrate is 30-50 % consists of fresh earth and the ladies are nice and dark green :-).
Today there was another spray with neem oil against the remaining tripse which I will repeat one last time next week.
As always, everything was cleaned and checked.
Have fun with the update and stay healthy 🙏🏻
👇🏼👇🏼👇🏼👇🏼👇🏼👇🏼👇🏼👇🏼👇🏼👇🏼👇🏼👇🏼
You can buy this Nutrients at :
https://greenbuzzliquids.com/en/shop/
With the discount code: Made_in_Germany you get a discount of 15% on all products from an order value of 100 euros.
👇🏼👇🏼👇🏼👇🏼👇🏼👇🏼👇🏼👇🏼👇🏼👇🏼👇🏼👇🏼
You can buy this strain at :
https://gardenofgreenseedbank.com/candyland/
Water 💧 💧💧
Osmosis water mixed with normal water (24 hours stale that the chlorine evaporates) to 0.2 EC. Add Cal / Mag to 0.4 Ec Ph with Organic Ph - to 5.8 - 6.4
MadeInGermany

Likes
Comments
Share


@MellowVibes_CBD
Follow
Definitely satisfied with the results I m getting from purple punch by Fast Buds!! It’s definitely looking beautiful!!!
Likes
141
Share


@bioaccessory
Follow
Ух! 😅
Этот цикл мне показался особенно хлопотным. Как видно из названия репорта, в этот раз я осваивал метод Scrog, и тут с самого момента установки возникли некоторые сложности. В первую очередь нужно продумать систему полива под сеткой(возможно автоматизировать), в этот раз мне приходилось лить маленькими порциями для равномерного распределения жидкости по горшкам, что называется "кормить с ложечки". Сетку нужно устанавливать чуть раньше, и ниже на 5-7см. Ну и наконец я немного испугался сильного роста на цвете(все-таки сативный гибрид), можно было позже на неделю-две переводить на цветение. В процессе работы со скрогом меня не покидало забавное ощущение, что я приходил на грядку на своём огороде😝 Главное, я разобрался как это работает, и в будущем учту свои ошибки, тем более на качество урожая они никак не повлияли.
Ну и как всегда - благодарности-обнимашки😍: SumoSeeds за интесный стрейн, GD-team, и всем-всем-всем кто заходил и комментировал этот дневник, вместе мы совершенствуем наше мастерство.
До конца лета ухожу на каникулы, надеюсь появятся интересные идеи для нового цикла.
Спасибо, что были на связи, и будте здоровы 🙏
! 💚💛❤️ !

Likes
6
Share


@DBQush
Follow
Last week with me not here, the girls seem happy still on the photos and videos I’ve gotten from my flatmate.
They are very very bushy so apparently it’s hard to close the tent, so will need to do some serious pruning when I’m back at the start of the week.

