


Likes
Comments
Share


@Aloysius
Follow
It has continued to be Too Hot here in the UK, so in an effort to mitigate further foxtailing (and after a nine-day flush) I think we’re ready to harvest!

Likes
22
Share


@OutdoorRookie
Follow
I estimate another 2 to 3 weeks. Then I can harvest.
I'm really looking forward to my 2 ladies 🤩😎

Likes
17
Share


@Brickie74
Follow
This week went very well. She grew another 7 +/- inches. A little bit of stretch but not too bad, I'll keep an eye on it. If i didn't already have 2 more SD growing, I probably would have kept this plant for a mother plant. I'm just starting to do a little cloning. I like SD but i don't want 7 plants right now. With the little bit of LST i did, my canopy is pretty even height wise.


Likes
13
Share


@Robeeriegenetics
Follow
First week of flowering in the bag, trying out a new deep voice in my videos does it sound sexy? Let me know in the comments. seeing a little bit of stress on the leaves, but nothing major. The new developing growth is green so everything seems to be going well. I’m gonna give it another week and then I’ll defoliate. So far so good. having a little trouble reversing the wrath rock, candy icy cuts. but I’m not worried. I have backups of the mothers and I have backups of those backups so I’ll definitely still be able to take another shot after seeing the results from this grow ….
Processing
Likes
24
Share


@ElChicoDelaWeed
Follow
21 DÍAS DESDE EASY START.
Maceta RQS 10L.
-EASY BOST ORGANIC NUTRITION.(preparación del suelo con 50g en 10 litros de sustrato con perlita)
-EASY COMBO BOOSTER PACK.
-En la 3ª semana sigo regando las 4 plantas con agua mezclada con la pastilla EASY GROW BOOSTER (la dividí en 4 trozos para la semana 2,3,4 y 5 diluyendo en 1L. de agua la mezcla).
-Las 3 que están en vaso de plástico esta semana le voy añadir al vaso uno granos del EASY BOOST ORGANIC que no le mezclé cuando las planté).
Likes
6
Share


@PrinceOfHerbs
Follow
The plants look very healthy, on day 17 of flowering, the lollipopping method was applied and leaves were radically removed.
Flowers become larger and larger and resin begins to form.
Flowering day: 17


Likes
8
Share


@Maggie_de_Block
Follow
Didn't have a lot of time this week so she missed her waterings for a couple of days, also didn't empty the dehydrator so humidity was up a few days.
Installed a second cheap blurple led on the side, but doubt this will really help much.
Having some trouble keeping temps up as winter is coming and I dont have a heater in my garage

Likes
21
Share


@CanadianFillmore
Follow
Welcome to week 3F of growfessor theatre, 4x4 edition.
The ladies are looking happy and healthy. Do-si-dos received a heavy defoliation, there were a ton of small inner branches starved for light, so they got cut.
LSD, Green Crack and Mandarin dreams all received a light defo, yellowing leaves were removed.
Lighting provided by Mars-Hydro TSW2000.
Thanks for stopping by, tune in next week growfessors for the next episode 👽🌳💚


Likes
6
Share


@GreatDaneCannabis
Follow
1 Strain, same breeder, same tent and conditions but 3 different agendas. Molly is just over 42”, Meredith is 30” and Marissa only 16”. I think Molly’s stretch is over and the other 2 have a ways to go. This week I defoliated all 3 again to open up the bases and thin the canopies a little. I’m no expert but I’m learning and the ladies are looking great. Added some more coco to make up for the sinking and while I’ve been trying to keep this as simple as possible just using Advanced Nutrients and CalMag, after doing lots of reading I ordered some Big Bud for Coco and will be starting that when it arrives. Haven’t run the humidifier this week at all or the dehumidifier. Just letting it stay 45-55 on its own. Figured out how to gain almost 6” in the tent without sacrificing ventilation so got Molly back under the light fully, then she grew another 6” out of spite…lol. Great week! I love opening the tent and having the humidity and smell hit me in the face.

Likes
12
Share


@cheetah844
Follow
I'm hoping this one is a female, I'm in need of some BBOG flower.
I topped and defoliated every plant. I'm trying to form them into canna-bushes. Hopefully I'm doing the correct training procedures to make them all grow that way both indoors and out.
Likes
2
Share

@BasedBuds_89
Follow
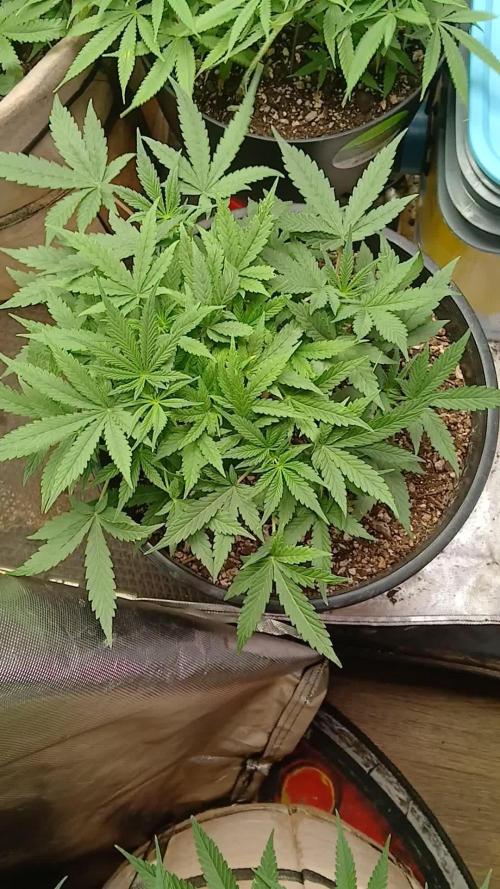
Had a good week, this has been a very easy grow, she's responding really well to the LST and defoliation. I would suggest any new growers try out Red Devil Auto from Weedseedsexpress. They're having some great sales right now!

Likes
17
Share


@Hashy
Follow
Week 13
Light cycle=12/12
Light Power=100w
Extractor controller settings
High temp= 25c
Low temp= c
Temp step=0c
High Rh= 40%
Low Rh= %
Rh step=0%
Speed max=10
Speed min=1
Smart controller settings (during lights on).
Lights on=10.01-21.59
Radiator on= below 22.0c
Radiator off= above 23.0c
Dehumidifier on= not in use
Dehumidifier off= not in use
Smart controller settings (during lights off).
Lights off=22.00-10.00
Radiator on= below 18c
Radiator off= above 19c
Dehumidifier on= not in use
Dehumidifier off= not in use
Seperate feeding program.
#1 and #2 go onto flawless
#3 and #4 stay on schedule.
Fri 15/3/24
#1 (Day 85)(Day 47 flower)
📋
Sat 16/3/24
#1 (Day 86)(Day 48 flower)
📋 Smart controller settings (during lights on).
Lights on=10.01-21.59
Radiator on= below 22.0c
Radiator off= above 23.0c
Dehumidifier on= above 55% RH
Dehumidifier off= below 50% RH or above 24c
Smart controller settings (during lights off).
Lights off=22.00-10.00
Radiator on= below 18c
Radiator off= above 19c
Dehumidifier on= not in use
Dehumidifier off= not in use
Sun 17/3/24
#1 (Day 87)(Day 49 flower)
📋
Mon 18/3/24
💧💧💧💧💧💧💧💧💧💧💧💧💧💧💧💧
Method= automatic
Feed=Flawless plants 1&2
Flawless finish=2ml/L
Easy Ph down=0.008ml/L ( 1 drop total)
Ec=0.37 PH=/
Time start=12.00pm
Finish time=13.45pm
(11×5 minute runs with 5 minute gaps)
Total flow rate=190ml/min
Flow rate per plant=47ml/min.
Total volume made=8L
Total volume left=3L
Total volume used=5L
Volume per plant=2.5L (Est)
Runoff.
Total runoff=1L
Ec=3.3 PH=5.9/
💧💧💧💧💧💧💧💧💧💧💧💧💧💧💧💧
💧💧💧💧💧💧💧💧💧💧💧💧💧💧💧💧
Method= manual
Feed=water plants 1&2
Neutralise=0.1ml/L
Easy Ph down=0ml/L
Ec=0.2 PH=6.9/
Time start=7.45pm
Finish time=8.15pm
Total volume made=4L
Total volume left=0L
Total volume used=4L
Volume per plant=2L (Est)
Runoff.
Total runoff=3L
Ec=2.4 PH=6.1/
💧💧💧💧💧💧💧💧💧💧💧💧💧💧💧💧
#1 (Day 88)(Day 50 flower)
📋 End stages for this one, after Flawless she will be getting water until harvest.
Tue 19/3/24
#1 (Day 89)(Day 51 flower)
📋
Wed 20/3/24
#1 (Day 90)(Day 52 flower)
📋
Thur 21/3/24
#1 (Day 91)(Day 53 flower)
📋 H=101cm D=14cm DLI=40.0
Small defoliation.
She is looking really nice, I removed some fan leaves to let more light hit the lower leaves. Won't be long before she is ready to harvest.
This will be the last update until I have my harvest report finished.
Back soon.
Take it easy.
Likes
15
Share


@MrJones
Follow
MrJones Ztrawberriez Auto
🍓╰⊰🍓´🍓⊱╮🍓╰⊰🍓´🍓⊱╮🍓╰⊰🍓´🍓⊱╮🍓╰⊰🍓´🍓⊱╮🍓
💧 Feeding - Using Gaia Green Grow / Bloom and Compost Teas
🍃Training / LST-Defoliation-Topping TBA
🕷️ IPM - Will be using Green Cleaner" 1 OZ per Gallon, and CannControl from Mammoth alternating between products each month for Integrated Pest
🍓╰⊰🍓´🍓⊱╮🍓╰⊰🍓´🍓⊱╮🍓╰⊰🍓´🍓⊱╮🍓╰⊰🍓´🍓⊱╮🍓
▶️Saturday 11.18.23 - These girls are just blowing up, always like the flower stretch of FastBuds strains, the smells are nice and they are starting to drink more, the closet is filling up, did another PPM treatment with CanControl.
🍓´🍓⊱╮🍓╰⊰🍓´🍓⊱╮🍓╰⊰🍓´🍓⊱╮🍓╰⊰🍓´🍓⊱╮🍓
▶️Bud Description Ztrawberriez Auto produces long and fat buds with a beautiful light green shade with oftentimes purplish hues and a thick layer of resin that starts at the top of the flowers and continues all the way to the tip of the sugar leaves. It’s the typical bud structure you would expect from hybrid varieties topped with an explosion of fruity terps that’ll hit you in the face with a blend of creamy, fruity, and sweet aromas as soon as you break the buds open. Definitely a must for terp heads and extractors looking for exaggerated flavors and aromas
🍓╰⊰🍓´🍓⊱╮🍓╰⊰🍓´🍓⊱╮🍓╰⊰🍓´🍓⊱╮🍓╰⊰🍓´🍓⊱╮🍓
▶️SOIL MIX
40% ProMix HP
40% Coco Coir 70/30
15% Worm Castings
05% Malibu Compost
🍓╰⊰🍓´🍓⊱╮🍓╰⊰🍓´🍓⊱╮🍓╰⊰🍓´🍓⊱╮🍓╰⊰🍓´🍓⊱╮🍓
Likes
7
Share


@Pilotpanthro
Follow
Welcome to week 8.
This plant really does amaze me, it's getting stronger and stronger and the bud sites are now starting to get bigger. I have started to feed her every other day with roughly 1 to 1.5 litres. Some have mentioned it should be about a litre a day but as soon as I go over that litre I start to get run off and overflow in the tray so not sure what's going on but she seems healthy and started to smell wonderful.
Looking forward to week 9 update 😀
Likes
3
Share


@Budz420
Follow
So far so good happy with the results, had to give them a nice hair cut.
Had some issues with heat inside my tent but I managed to solve it.
Feeding them every 24 hours, they are ready for flowering .
So exited let's see how things go 😁
Likes
11
Share

@Bncgrower
Follow
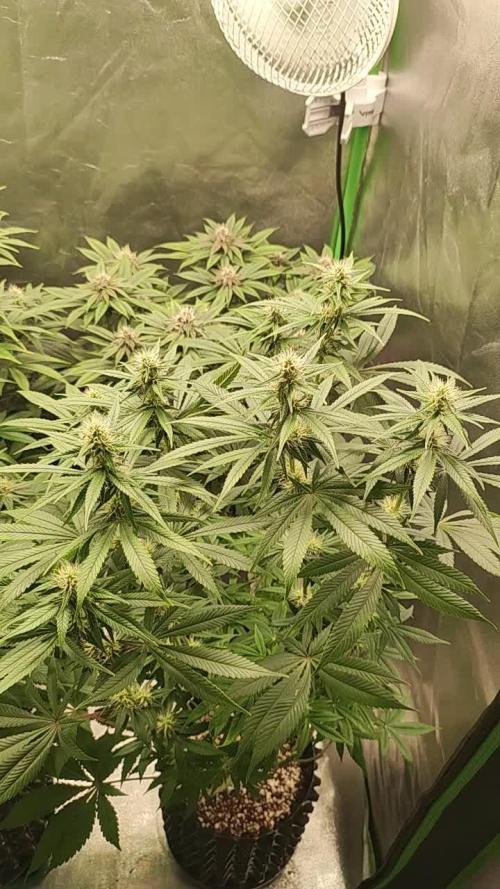
Following the plan, the girls are beautiful and were already quite big during this stretching phase. I hope everything continues as it is now during this growth and weight gain phase. For the rest, just wait for time to pass. 🌱🌿✌️✌️

Likes
26
Share


@BudBoutique
Follow
! this is my current status, gonna upload my last veg weeks within the next week - got a bit busy around Spannabis - thank you for your understanding! 💚
Welcome to Bud Boutique Grow Diary - really appreciate all your love and support :)
Dont forget to check out my other current grows!
🗓️ This Week:
after 48 hours of complete darkness (important for seedlings to make sure all plants switch into flower same time), I finally switched my lights to the 12/12 schedule and sent my ladies into the flower.
- This one Phenos super strong
- more than healthy and going well
- Day 3: Foliar spray with APTUS Regulator and APTUS Nutrispray to give them extra micronutrients and give them a little shell for protection.
! always use APTUS Regulator first and mix well with your water before adding any other nutrients for Feeding or Foliar!
Thank you for still staying with me 💚
___________________________________________
--- 🌱 Strain (Sponsor) ---
🏷️ Blue Cinderella 99 FF by MSNL
https://www.marijuana-seeds.nl/blue-cinderella-99-fast-flowering
--- 🥗 Nutrients and Feeding (sponsored by APTUS: APTUS Ambassador) ---
🍸 APTUS: full nutrient schedule extreme
-- Regulator, N-Boost, P-Boost, CaMg-Boost, K-Boost, Allin1 Liquid, Startbooster, Topbooster, Enzym+ every feeding
-- Fulvic-Blast, NutriSpray as Foliar each once a week
🔗 https://aptus-holland.com/
--- ♻️ Grow Control (Sponsor) ---
TROLMASTER: TENT-X + LM14 Light Adapter to dim/sunrise/sunset lights + Temp & rH Sensor all remote on App
🔗 https://www.trolmaster.eu/
--- 🏭 Grow Setup ---
💡LUMATEK Zeus Pro 600
* 🏠🌿 Indoor: Homebox 120x120x200cm (4x4)
* 📐🌀 PrimaKlima exhausting Fan 1180m3/h (running on 60-80%)
* 🌀 Can Light Filter 800m3/h & 1x Fanbox 1x Dyson fan for Air circulation
🔗 https://lumatek-lighting.com/zeus-600w-pro-29/
🔗 https://primaklima.com/de/shop/ventilatoren-de/ec-ventilatoren/pk160ec-tc/
🔗 https://canfilters.com/products/filters/
All Likes and comments are highly appreciated!!!
👨🌾 don't forget to check out my Instagram for daily educational content: budboutiquee
- Bud Boutique

Likes
37
Share


@Roberts
Follow
Mandarin XL auto has snapped out of the heavy nutrition mutation. She is making grow progress. Things are going in the right direction. 🤞🏻it keeps going smooth. Thank you Meduc Grow, Gen1:11, and Ganja Farmer. 🤜🏻🤛🏻🌱🌱🌱
Thank you grow diaries community for the 👇likes👇, follows, comments, and subscriptions on my YouTube channel👇. ❄️🌱🍻
Happy Growing 🌱🌱🌱
https://youtube.com/channel/UCAhN7yRzWLpcaRHhMIQ7X4g

Likes
12
Share


@SSKNFbyHAZE
Follow
In a week, I give compost tea, and fermented plant juice once each ^^
Hope you guys have a wonderful day today ^^v
*** Please Like, comment & share ***
Highly appreciated -----/-----<@
