Likes
Comments
Share


@SooSan
Follow
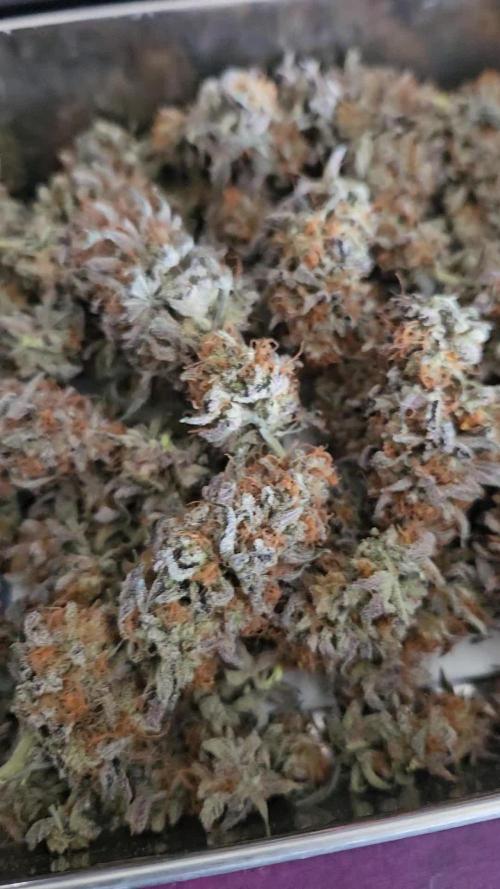
Dans l'ordre :
Blueberry
Dutch Passion
Blueberry
00 Seed
Blueberry
PEV Seed
Blueberry
Bulk Seed
Animal Cookies x Blue Monkey
Exotic Seed
Red Hot Cookies
Sweet Seed
DoSiDos x Purple Punch
PEV Seed
Purple Shot
Exotic Seed




Likes
18
Share


@VI_Cannabis
Follow
May 31st
Everything is looking good after the LST from last week, I said I was going to swap them into flower and I realized that I should wait another week or so as they will be going into a new home so to speak. Updates coming next week for that. Doesn't look like to many PH issues anymore or whatever was happening but the plants seem a bit happier now
June 1st
I Figured today would be a good day to do a bit of defoliation on these girls in order to get some more light down to the newer growth. I didn't take a ton off as you can see, but for the size of the plant I suppose it was a decent amount. I read somewhere that a general rule of thumb is only defoliate roughly 30% of the plant at most. I'm not to sure if it is true but I tried to stay within that general rule.
June 2nd,
I decided since I would have them in veg for at least a little while long I would top them again. After topping I gave them some water and nutrients. I know I said I would do straight water for the next one but I went for it anyways as it seems the flowering mixture may be giving it some deficiency's. So I gave them the recommended feeding for heavy veg growth. I gave about 3L to the bigger plant and around 2L to the smaller plant (as it was still a bit moist but it wasn't damp). My crappy soil tester was saying my soil was at around 8PH so I figured I would aim to feed around 6ph. With the small amount of runoff from the smaller plant I did A PH test and the PH seemed to be around the 4.5-5ph area. My liquid ph meter arrived broken so I am waiting for the new one, therefore I am using the general hydroponics liquid test kit. I presume my soil ph is lower then the water I have given seeing as it went from 6ph water to around 4.5. Next feeding I will aim to feed at 7PH. With the defoliation I just made sure that the tie downs were decently tight still and moved what I thought needed to be moved.
June 3rd,4th
Not a ton to update on. I didn't get any pictures for these 2 days.
June 5th
Some obvious problems going on with the bigger plant. I am guessing it is the PH issue but I am still unsure. The one browned leaf I accidentally squished in the tie down while I was low stress training it so it got a bit damaged. Other then that the plants are growing decent. Im not sure why I didn't have more pictures for today but I mainly took problems of the problem areas.
June 6th
Not much going on still. They are still just hanging out not doing to much. It was a busy work week so pictures in general were a bit lazy. I will try to get more for the upcoming weeks. Big news for next week!
Likes
5
Share


@Ensign420
Follow
Greetings fellow growers 🖖 and welcome to my first grow ever. This adventure actually started several months ago when I decided to stop buying flower from dispensaries and just grow my own bud. How hard can it be!?
This is actually my second seed of this strain. The first bean sadly died due to over watering (sorry girl, RIP). I was literally watering the cube to the point where water was dripping from the bottom, then heavily sprayed the humidity dome and tray with the vents completely closed. Everyday. Multiple times. I never let the dome or try dry out. So after about 8 days of not sprouting, there was a funky smell of rot. So that was that.
Later I learned that rockwool retains a lot of water and can easily drown seeds. So a wet/dry cycle is best for rockwool germination.
So even after hours of researching and digging through forums and tutorial videos, I was still under prepared for this journey. Did not consider how delicate the germination phase is. Oh well. Lesson learned. Reset and try again!
I hope everyone is safe and stoned during this corona crisis. Just like everyone else in the world, I want this pandemic to be over with. But in the meantime, let's grow some weed! 🖖
[START OF WEEK 01]
Day 01 - Monday - 08/03/20 - Total Days: 001
-----------------------------------
- [0830]: Light Schedule: 24Hrs/0
--- Soaked cube in 5.5 PH water for 10 min. Did not shake water out.
--- NO NUTES! Only PH'd down to control the PH levels.
--- Did not use the default hole (way too deep).
--- Flipped cube upside down and made a shallow hole for the seed (less than 0.25" deep).
--- Placed seed in and pinched hole close. No additional water added.
--- Sprayed the tray and dome with straight water (5.5 PH).
--- Vents are cracked opened a for ventilation (about 1/4 opened each).
--- Distance between the light and tray was 53"
--- AC was set to 80 °F
--- Exhaust fan was set to 86 °F
--- Room average temp was at 85 °F
--- Dome humidity was at 85-99% when sprayed.
--- Allowing to completely dry before respraying.
- [2200]: Dome and tray were completely dry! Sprayed only tray and dome with more water.
Day 02 - Tuesday - 08/04/20 - Total Days: 002
-----------------------------------
- [0845]: Sprayed dome and tray in the morning. Everything was dry.
--- Hoping for the best!
- [2130]: Everything was dry again, so sprayed dome and tray at night along with a light spray on the cube.
Day 03 - Wednesday - 08/05/20 - Total Days: 003
-----------------------------------
- [0830]: Everything was dry again. Resprayed dome and tray. Slightly sprayed cube.
- [2125]: Hooo damn!! She popped! Am little stub is visible! Resprayed dome and tray again.
--- Still going 24/0 for lights.
- [+0033]: Just checked up on her and I swear she grew a bit taller! Getting excited!
Day 04 - Thursday - 08/06/20 - Total Days: 004
-----------------------------------
- [0845]: Wow! Went from a little stub to fully sprouted overnight! Everything was pretty dry again so resprayed dome and tray.
- [2200]: Tap root is visible! Over 1" long too! Just resprayed dome and tray again.
-- Going to prep for hydroton transplant tomorrow!
Day 05 - Friday - 08/07/20 - Total Days: 005
-----------------------------------
- [0930]: She keeps growing!
-- Added a bit of CalMag to the spray bottle (8 drops to 650ml of distilled water). Resprayed dome and tray. Water was at a 5.4 PH with 141 PPM.
- [1045]: Prepped the bubble bucket with 4.5gal of water. Water is high enough to reach about 0.25" above the bottom of the net pot.
--- Added 3 drops of Superthrive
--- Added 3.5ml of CaliMagic
--- Added 2ml Hydroguard
--- Then PH'd down to 5.6
--- Solution Strengh: 120 PPM
--- Water chiller is set to 20 °C
- [1100]: Transplant time!
--- Filled the net basket 1/3 with hydroton. When placed in the bucket, air bubbles are not visible, but are slightly below the surface (slight digging will reveal the water/bubbles below).
--- Removed plastic on rockwool cube and placed in basket, then filled around and covered with hydroton. Making sure to block any light from passing through the net pot and into the nutrient solution.
--- Covered with a half-bottle dome sprayed with the CalMag water from earlier.
--- Hoping for the best!
- [1300]: Raised Bucket 5" higher. Now light distance is 48" to top of bucket.
- [1820]: Lowered tent exhaust temp to 76 °F
--- Lowered AC to 75 °F
--- Raised bucket even higher so light distance is 30" to top of bucket.
- [2300]: Looking good!
--- Sprayed dome and surrounding hydroton with more CalMag water.
--- Attached timer to light! So new 18 Hrs On/6 Hrs Off light schedule.
--- Lights On: [1600] (4pm)
--- Lights Off: [+1000] (10am the next day)
--- Decided to go with lights on during the evening/night and off during the later mornings/afternoon (the hottest part of the day) to see if temps can be controlled better.
--- Please survive girl!
Day 06 - Saturday - 08/08/20 - Total Days: 006
-----------------------------------
- [0800]: Everything was dry. Resprayed hydroton and dome.
- [2000]: Here first night cycle seemed to go well! Get'n taller!
--- Dry again. Removed the dome.
--- PH went up to 6.5 so PH'd down to 5.7
--- Ran the top feed drip ring for a bout a minute to wet the hydroton and rockwool with the nutient solution.
---Too scared to leave the top feed on 24hrs (I don't want over water her and cause dampening-off). Will let dry before re-watering.
- [2100]: After closer inspection, I think she's looking a bit yellow.
--- Decided to add a bit of grow nutes to the bubbler solution.
--- Added 2ml of Sensi Grow A
--- Added 2ml of Sensi Grow B
--- Solution strength after adding more nutes: 176 PPM
--- PH went up to 6
--- I hope that the extra chelating properties of the 'PH Perfect' solution is enough of a buffer for proper nutrient uptake.
Day 07 - Sunday - 08/09/20 - Total Days: 007
-----------------------------------
- [0800]: Water dropped a bit (mostly due to evaporation) so solution strength was at 190.
--- Checked PH again. Was still at 6, so PH'd down to 5.4
--- Ran the top feed for a minute to wet the hydroton a bit.
- [0915]: Since she's looking perky but still a bit yellow. So decided to up the nutrient concentration even more before lights out.
--- Added 2ml more of Sensi Grow A
--- Added 2ml more of Sensi Grow B
--- Solution strength after adding more nutes: 199 PPM
--- PH went up to 5.8
- [1700]: Checked nutrients.
--- PH: 5.9
--- Solution strength: 202 PPM
--- Added 4ml of Voodoo Juice
--- Added 4ml of B-52
--- PH after adding more nutes: 5.9
--- Solution strength after adding more nutes: 238 PPM
- [2130]: Decided to make a new foliar spray to address the continued yellowing.
--- Started with 500ml of distilled water.
--- Added 3 drops of CaliMagic
--- Added 3 drops of Sensi Grow A
--- Added 3 drops of Sensi Grow B
--- Added 3 drops of B-52
--- Added 1 drop of Superthrive
--- Solution strength: 164 PPM
--- PH was at 5.9 and did not adjust.
--- Gave her one spray.
--- Also sprayed the surrounding hydroton.
[END OF WEEK 01]


Likes
2
Share

@Danger_Mouse
Follow
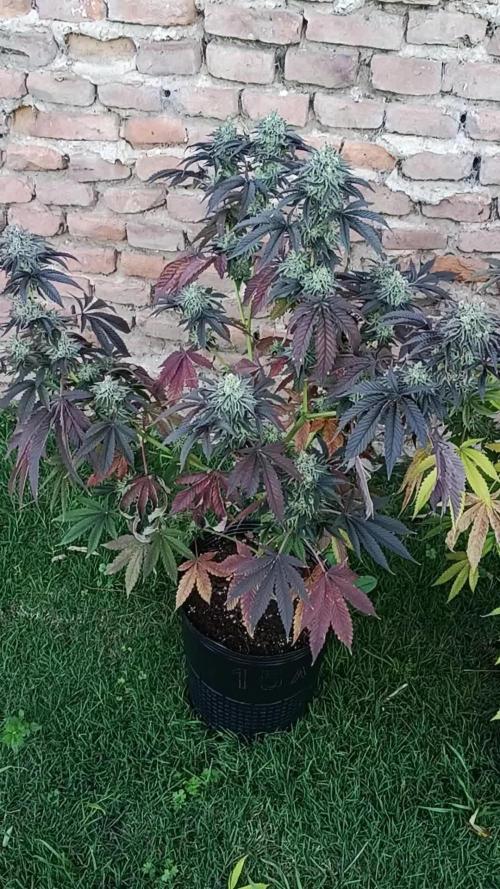
Plantas super faciles de cultivar y muy resistente a Botryitis (las 3 Radical Juice fueron las unicas que no tuvieron ni el mas minimo sintoma a pesar de que 6ta y 7ma semana de floración fueron dias de muchisima humedad ambiente). Hare la reseña final cuando este secos los cogollos. El olor en verde recuerda un poco a Tangilope, Clementine, NYC Diesel.

Likes
20
Share


@Inhomerhizome
Follow
Pretty happy with the grow and the harvest, the drying went well also!
Each grow highlights changes for the next and this has been no different! I'll be making more training adjustments in the next runs to try and refine the vertical scrog and get to the point where it's a wall 1 bud thick! I know it will get there in the end it's just like relearning how to do a horizontal scrog! I just need to predict the way the plant will respond when the light is from the sides! Bravery and brutality during pruning I think is the key! 😂✌️💚
Likes
8
Share


@Canna055
Follow
6 weeks in flower nothing much to do
the cherry poppers & the HerzOG to the right doing good but i have no clue what to do with the other plant maybe she outgrow her 25L pot in veggi, she was quit tall back then idk man


Likes
54
Share


@Ganjagrandaddy
Follow
Day 9 flower: Orange Sherbet: This girl is a pleasure to grow so far. Her budlets dwarf the others in the room so far and at only 9 days flowering , shows a good indication of the overall finish she should have. she is packing buds on all over her structure now and following her defol on day 7 , she has really pumped them up. The shogun boost is a killer concoction it seems. Cannot fault this lady at all to date. She is slightly tacky now too which is a shock for her age.
Cookie Kush : This lady is a midget !!! She is a lot smaller than other kush strains i have grown but looks healthy enough. I think her housemates dont help as they are all such good growers. She is big enough to keep up with the canopy but will need encouraging constantly to match them at some point.


Likes
25
Share


@Snaak
Follow
This week ill try to switch over to an English diary because the translation is absolutely crap and i might learn a thing or two about the English terms in growing, also because the American and Canadian researchers extended the growing knowlegde in an absolute insane tempo and i would probably get most of my information from them.
I don't have a spelling-check on this pc, therefore i apologize in advance ;).
I uploaded some photo's with crappy lighting (Next grow ill switch day-night rythm and should give me better opportunities for photo's, but we'll get to that in the future) but also i short video of some notes which i will elaborate below:
Last week on saturday i turned off the carbon vent because i could not get the humidity level right and i was still waiting for my humidifier. I placed a big fan inside the tent for air circulation and besides that i installed a small vent-filling fan in in front for clean-airflow.
Last weekend i closely watched what the humidity and temperature did and started playing with the setup.
All the changes i made in the tent last week are:
06-02:
- Shut down carbon vent
- Added rotation fan inside
- Added small front-fan for clean airflow
07-02:
- Added humidifier (setting 55%)
- Dropped HPS 600W about 15 cm's to 110 cm height
08-02:
- Humidifier setting 60%
09-02:
- Dropped HPS 600W about 20 cm's to 90 cm's height
10-02:
- Front fan on 2 instead of 1
11-02:
- No changes because all is stable
12-02:
- Placed humidifier at the back instead of the side of plants
- Dropped HPS 600W 15 cm's again to 75 cm's height
- Moved the inside fan more to the top-back of the tent (more facing downwards)
- Opened up a vent-hole in the top of the tent for a little warmth release
From the moment i turned off my carbon vent last week the sprouts started flourishing, especially when i added the humidifier. All the changes, noting, and looking at them how they pose, reading blogs and learning have brought me to the point that i think i stabelized it. Allthough i am going to turn on the carbon vent sooner or later (i might do this tomorrow) i need to pay attention again because i'm predicting it will drain the humidifier in a higher speed and that means i have to refill approx. 15 liters in 2 days? The tank is 5.5 liter and at the moment i refill it every evening, so thats already 11 liters in 2 days. I'm really expecting it to increase significantly i ill keep my notebook ready. :p
I'm also a bit worries it will be so warm in my tent because the outside temperature is pretty cold, and that might also be the reason the temperature doesen't go above 28 degrees anymore.
Okay enough about the tent setup changes. Lets talk plants.
After the transplant last week to their end-pot these auto's started to grow immediately and i think they did really well this week. Since the humidifier got added to the tent, every morning the plants praise their "Hallelujah" pose which is really pleasing to watch...
**Last weeks's first time watering in the big pots:**
06-02 around 09.00:
- 750ml around the side
- 750ml around the middle area
- 750ml with nutrients spreaded around the pots
All is equally divided through 4 plants.
This week's watering and nutrients:
08-02 around 16.00:
- 750 ml around the pot
- 750 ml with nutrients
11-02 around 10.00:
- 500ml around
- 500ml around
- 500ml with nutrients
12-02:
- Sprayed Vita Race first time 4ml in 750 ml and sprayed about 15% of it on the leaves, no drups, mostly nebula.
The vita race really made the leaves shine, also within 1,5 hours all moist was took in or evaporated, Today probably again around 1600 ill water them again but ill hold the next vita race for tomorrow or something. as long as the plants shine the same i don't know if it's neccasary?
Okay, last but not least.... This week on wednesday i kinda mis-read some shit on internet and topped 3 of my 4 plants. I think it went okay, because they don't seem to stressed about it. They still flourish and hallelujah on! Still i'm pretty worried because i made the cut right next to the nodes which isen't the best thing (learning phase :p)...... The reason i topped 3 outta 4 because i wanted to see if i diden't stress the smallest one, he would out-grow the others, but that does absolutely not seem to be the case.
Also i think it's a great way to learn by not stressing one plant to see the differences, i want this first grow not to be about end results but more about learning and developing my own personal experience and point of view.
Oh PS, i also drilled all the holes to prepare for LST, but i think they were kinda to small on 10-02 when i drilled it. I'm going to watch the recovery from the topped plants closely coming week and maybe start with LST.
Stay tuned while this noob messes around with Auto Critical Orange Punch of Dutch Passion.


Likes
25
Share


@Dabking
Follow
8.73 oz from 2 plants. Very dense and potent nugs. Love it so far. Now for curing

Likes
15
Share


@I_Identify_As_A_Dan
Follow
Week 17 for Gelato 41 by seedstockers,
All photos were taken on 0.5x because the plant just doesn't fit in the picture frame... She's getting too big😂 I just want her to flower now i don't think i can take her getting any bigger than she currently is.
Last week was another hot hot week but we are coming down to the low 30's again for the rest of the upcoming week so think the plants will be happier.
Im not sure whether to just leave her be & not defoliate but at this point learning as i go along because ive never grown something so large. 😅

Likes
44
Share


@Cogollo_eu
Follow
**Encontrarás la traducción a español al final de la descripción**
From/Desde: 12/04/19 || To/Hasta: 18/04/19
From day/Desde día: 50 || To day/Hasta día: 56
You can find the Money Maker Diary here:
** Podéis encontrar el diario de las Money Maker aquí:**
https://growdiaries.com/diaries/25667-gorillamakingmoney-gorilla-vs-money-m
-----IMAGES & VIDEOS-----
I'm sorry for not having a tlapse video this week, i slaved the cam onto my 60x60 tent to record the first growing week of another plants, next week i will return with more tlapse videos.
-----WEEK SUMMARY-----
To have a visual size of the plants take into consideration that the SCROG net it's fixed 24 cm abobe the top part of the soil.
There's something i want to correct and remark this week. About the question i asked some weeks ago on growers help, about the plant with decoloring problems (Photos 7 & 13), where i've choose the defoliation answer as the correct one. Watching the plant today, I would say that it can be an excess of co2 in the roots caused by a co2 tablet that I used during the first days of growth. You can notice how the part of the plant in the back does not present de decoloration it have in the front.
Also remarking what i've told last week, i must say the SCROG is not a true SCROG, as some colas begin below others, and also colas are of different heights among all plants. Anyway i'm very happy on how everything is going. And insisting again, I have very very few experience growing cannabis, this is my 3rd grow, 2nd indoor, and first time with photo-period at indoors, and of course is the first time too i'm trying to apply growing technics on a serious way. I really don't know if i'm doing things right or wrong.
-----WATERING CALENDAR-----
13/04/19 - 1.250 ml with all week nutrients -(Sensizym, bloom stimulator, bloom nutrition & amino complex) @ PH6.4 & 1.3 E.C.
17/04/19 - 1.250 ml with Silica Power, Pro Active, Bloom Stimulator, Bloom Nutrition, Sensizym & 5 drops of Amino Complex @ PH6.5 & 1.3 E.C.
*****ESPAÑOL*****
-----IMÁGENES Y VÍDEOS-----
Siento no tener vídeos timelapse esta semana, he esclavizado la cámara en el armario de 60x60 para grabar la primera semana de crecimiento con otras plantas que tengo en el.
-----SUMARIO SEMANAL-----
Hay una cosa que quiero corregir y remarcar esta semana. En sobre la pregunta que realicé hace unas semanas sobre la planta que tenía una decoloración (Fotos 7 y 13), en la que escogí la respuesta de la variegación. Viendo la planta a día de hoy, yo diría que es un exceso de CO2 en las raíces causado por una pastilla de CO2 que usé durante los primeros días de crecimiento. Al fijarse bien se ve como la parte trasera de la planta no presenta las decoloraciones y sin embargo la frontal si.
Para tener una idea más o menos certera del tamaño de las partes de las plantas, tened en cuenta que la red está fija a 24 cm de la parte superior de la tierra de los tiestos.
También remarcando lo que dije durante la última semana, he de decir que el SCROG no es un SCROG real, ya que las colas no empiezan desde la misma altura ni son de la misma altura, ni las plantas son de la misma altura. Pero yo estoy muy contento con como va la cosa, vuelvo a insistir que es mi primera vez con foto-dependientes indoor, mi segundo armario indoor y el tercer cultivo de mi vida, y por supuesto la primera vez que aplico o intento aplicar las técnicas de cultivo. Lo estoy intentando realizar bien y de manera eficaz, pero realmente no se si lo estoy haciendo bien o mal, yo simplemente me lio y veo como responden las plantas.
-----CALENDARIO DE RIEGO-----
13/04/19 - 1.250 ml con todos los nutrientes semanales -(Sensizym, bloom stimulator, bloom nutrition & amino complex) @ PH6.4 & 1.3 E.C.
17/04/19 - 1.250 ml con Silica Power, Pro Active, Bloom Stimulator, Bloom Nutrition, Sensizym & 5 gotas de Amino Complex @ PH6.5 & 1.3 E.C.


Likes
11
Share


@Bread_n_Buds
Follow
Here we have a strain that has had great success in recent years and the Zamnesia one already has a great reputation among growers.
We also have Green Crack F1 Hybrid 2 plants but I'm showing you the other one in a separate diary now because it is even smaller than this one that is already in advanced flowering, there are many buds growing and we hope they swell well.
The structure created with mainfoldindg, mainlining, topping and lst vari is very pleasant, the plant is at medium internodal distance and flowers quickly so it is a plant on which I would feel like recommending these techniques that it is true that they can slow down the harvests but they give a satisfaction to the sight and an unparalleled fun in making them.
We are still using soil, fertilizers and all the additives recommended by Plagron 100% organic.
With her We have switched to the late flowering program that wants the additives Sugar Royal, Pure Zym for another week and adds the flowering stimulant Power Buds and the myth Green Sensation. Obviously the basic fertilizer is now Alga Bloom.
---- Decide on the right soil and calculate your fertilization program based on the soil on the official website. -- www.plagron.com
Try a seed of this strain that drives us crazy..
---- https://www.zamnesia.io/en/10677-zamnesia-seeds-green-crack-f1-automatic.html
Zamnesia Description // Forget what you think you know about cannabis. Green Crack F1 Automatic by Zamnesia Seeds is here to shake up the entire industry. Using F1 genetics, growing cannabis has never been easier. These plants offer uniform and abundant yields. Get ready to harvest high-quality buds, full of flavor and amazing effects.
All the best that mother nature has to offer is at ---- www.zamnesia.com
Likes
235
Share


@SlowpokeFuegobud
Follow
DAY 103
Lebby got the chopping. ✂️
🖤 🙏 ✨ 🖤 🙏 ✨ 🖤 🙏 ✨ 🖤 🙏 ✨
I put the leaves in a plastic bag, cut off some few sugarleaves to make bubble hash, and the buds are drying now.
I feel empty. 😅
I saw some spidermites under one leaf.. not webbing at all. 🕷️ 👀
The plant looked absolutely beautiful, if I may say so. 😅 It would be an amazing outdoor plant!
Test bud smelled like smurfberries, forest and earth and hash, and aftertaste is just smurfberry. 🖤 If you want to know what that tastes like, you have to grow Black Lebanon. 😎
Thank you, my growmies, for visiting Lebby and liking her so much!! 💚
_____________________________________________________________
SET UP
Mars Hydro LED TS1000 sponsored by @marshydrococo2 😘
https://www.mars-hydro.com/led-grow-lights/ts-1000-led-grow-light
custom exhaust fan 270/320 m³/h
3x Garden High Pro fans 5W
tap water EC 0,25 - adding Calmag (Plant Magic) to EC 0,4-0,6 - adding pH minus Bloom (AHH) to pH 6,5
biobizz Lightmix - later Plantaflor organic tomato soil 🍅