


Likes
Comments
Share


@DreamIT
Follow
There isn't much more to say. The quality of the photos is not excellent because they are extracted from a direct instagram. I was hoping for a better result but it lost a lot of quality while saving the video. I'll make up for it with the photos of the dry plant trichomes and with the next cycles 😜 Thanks for following my diary and see you soon with the smoke report 🤘🦄

Likes
14
Share


@AntiWar
Follow
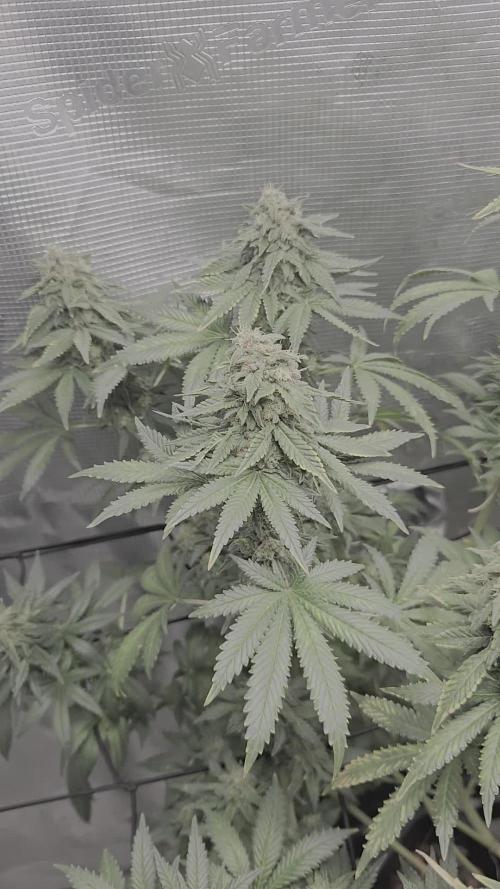
70 день, следим за трихомами... всё на фото
72 день, последний раз кормлю Ripen
77день, несколько янтарных трихом, скоро срежу их)))

Likes
8
Share

@Fank0
Follow
Začina kritická fáza kvetu, postupna defo slabnúcich listov, inak dobre, čus

Likes
27
Share


@Smokepurple137
Follow
All plants are starting to flower and doing great. Starting bloom feed 20/12/20. I'll update 3 or 4 times this week.

Likes
120
Share


@CBD_Sweden
Follow
Hi all the happy people here in GrowDiaries.
This is my second cultivation ever and it will be fun to try a bigger space than my closet grows
First, I'm just going to say I'm done with the construction of my new growroom.
I put some pictures on the construction here in week one.
The room is 2.14 meters by 1.7 meters and has a ceiling height of 2 meters.
It provides a floor area of 3.6 square meters.
I use a 54 Watt Lightwawe T5 for germination and 2 Pcs 400 Watt HPS lamps.
I have a channel fan that replaces the room air about 40 times an hour to get a comfortable theme in the room, the air enters a fresh air intake from the outside.
The air is purified through a carbon filter to then leave the room to the rest of the basement.
Then I use that heat to heat the rest of the basement.
I will use 8 pcs 15 liter Autopots to grow with and a 100 liter water tank that supplies the pots of water and nutrition.
I will grow completely organically in soil and will watercure my buds to get the best possible medicine for me.
But there are no cultivation rooms to be displayed here, so I continue with what is most important.
Today I have put my seeds in my moisture dome and hope the seeds have germinated within a few days.
I am very excited to see how the new growroom will work and how this CBD Fast Eddy plant from Royal queen seeds will turn out.
CBD Fast Eddy Automatic is combining Cheese x Juanita la Lagrimosa x Ruderalis, Fast Eddy is a rapid growing, flavourful, and CBD-rich auto strain that goes from seed to harvest in 8-9 weeks, produce generous yields, and induce a clear, mellow, and most importantly, functional high.
THC: 9%
CBD: High
Yield Indoor : 400 - 450 gr/m2
Yield Outdoor: 80 - 130 gr/plant
Height Indoor: 60 - 100 cm
Height Outdoor: 80 - 120 cm
Flowering: 6 - 7 weeks
Harvest month: 8-9 weeks after sprouting
Genetic Background: Cheese x Juanita la Lagrimosa x Ruderalis
Type: Sa 50% In 40% Ru 10%
Effect: Clear, Painrelief
Climate: Mild
..............................................................................................................................................................................................................................................................................................................................................
Update 2017-08-15. Both seeds have germinated and planted in small pots inside the humidity dome.
I'm so glad it worked so well and now it's just hoping they'll start growing and become 2 big healthy girls :)
...............................................................................................................................................................................................................................................................................................................................................
Update 2017-08-16. I have mixed my own soil today. Its 40% sieved peat harrow H2-H4 0-30 mm, 45% sieved peat harrow H4-H6 0-30 mm. 5% sand and 10% of compost soil. And i use 15% of perlite and mix it all together.
...............................................................................................................................................................................................................................................................................................................................................
Update 2017-08-20. These girls are much slower to germinate and to start growing than the other 6 girls I started at the same time.
One of the germinated seeds split in half, so I had to take a new seed and germinate it. It took 2 days.
It was just a smal taproots after germination with this strain as opposed to my Fastbuds cbd.
But I hope everything goes well from now and that they live up to their name, Fast Eddy.
................................................................................................................................................................................................................................................................................................................................................
Update 2017-08-21. New pics.
................................................................................................................................................................................................................................................................................................................................................
2017-08-22. Nr1 dident make it and died. Started germinate a new seed to get another Nr1.
..............................................................................................................................................................................................................................................................................................
2017-08-27. Nr 1 is in a small pot in humidity dome and i hope shes going to break the surface soon. Nr 2 is slow but doing fine.
---------------------------------------------------------------------------------------------------------------------------------------------------------------------------------------
2017-08-28. Nr2 is transplanted in 15 liter autopot.
---------------------------------------------------------------------------------------------------------------------------------------------------------------------
2017-08-29. New movie of the girls Nr2. Its no water for 3 days now so the roots develop more and match the plant above the soil. The temp controlled fan is awesome, its easy to set what temp you like to have in the room. Right now its 28 celcius. And humidity is 56%.
-----------------------------------------------------------------------------------------------------------------------------------------------------------------------------------------------
2017-08-29.
Hello to you who read my diary, I just want to say that I am pleased that you have chosen to check in with me and in my diary.
I just want to say that I do this for myself and for a steady flow of my medicine.
Everything you read and see in my diary is 100% honest and I will never distort or beautify anything here.
I document my crops so that I can learn from my mistakes and also to look back at those different crops.
I try to update with pictures every day and with text if something special has happened in the garden.
This is my strainhunt for the best medicine and the beginning of my journey with cannabis and the cultivation of it.
-----------------------------------------------------------------------------------------------------------------------------------------------------------------------
2017-08-30. Cleaned the room this morning, just vacuuming and cleaning with chlorine solution. Im testing the fan to control temp and humidity, it works great.
Added a movie. Everything is looking great right now.
------------------------------------------------------------------------------------------------------------------------------------------------------------------------
2017-08-31. 3 New pics.
------------------------------------------------------------------------------------------------------------------------
2017-09-01. New pics and a video of the grow room from today.
Likes
Comments
Share


@MrStarOn3
Follow
Week3 day4 -Have had the coke bottles how they are as a humidity dome and starting to give a small dose of thrive nutrients
Likes
2
Share


@Hempcules
Follow
WEEK 4 (DAY 22-28)
The plants are growing good.
They are receiving plenty of light as they share a tent with older plants. Therefore, I always try to place them in areas with less light intensity.
The mainfolding has been handled quite well, and both plants are now growing two strong and evenly balanced shoots each.
Likes
18
Share


@Grow4Releaf
Follow
Only fed the bigger plant #2 . The first is getting cloudy just waiting for her to go alil further .
Will update more this week but their getting closer.
Likes
44
Share


@Ukfarmer420
Follow
So this week i harvested the orangesherbert so sticky and stinks of orange, 50grams dry of 🔥 bud.
Curing in a big jar at 21 degrees and humidity of 60% dark cool cupboard.
Watermelon zkitles is bouncing back, the runts is doing amazing with the lst and leaf tucking.
I had to kill the purplelemonade due to it herming on me I dont have space for that so I'm going to run a ethos genetics seed in its place.


Likes
18
Share


@Grower_Of_Persia
Follow
week intel:
its time to harvest some of plants the ones that is mature enough. indica dominant plants will done first always so we should harvest them first
because my base nutrients and one of boosters was salt based, i'll do flushing this week to get some relieve to plants in the last days
stresses :
flushing
Drought stress via watering only one time with flushing this week
feeding:
day 1 : i flushed them with Advanced Nutrients Flawless finish and adjusted ph
day 3 : no more feeding from now on
day 5 : no more feeding from now on
guide of the week :
i harvest in 2 parts : first i harvest top of the branches and will let the lower buds to ripe another week then ill harvest the second wave.
indica dominant plants will get done 1 or 2 weeks sooner than sativa dominant plants that will often takes more than 8 weeks so be aware to harvest them sooner.
my dry and cure style is this:
3 days of hanging upside down to get water activity lower to around 0.6 in 50% humidity and 26 C temp (i know its a little high but we are in a hot summer right now and i cant get it lower even with air conditioner) and then after 3 days of drying i remove leaves and stalks, trim buds and move them to jar for the rest of their life :D . and in the first 4 days of curing i open the jar door and let hem get some fresh air in the jar for about 5 minutes and close the jar door again, after 4 days of curing like that buds are smokable but they will get better as they getting cured about 1 month.
im happy as hell with this harvest :D.

Processing
Likes
2
Share


@BigGGrows
Follow
She is now coming into preflower and loving the new T5's. She is growing nice and bushy with future tops shooting for the stars. The stretch is definitely near. She will continue to be tied down and has been pruned and defoliated as needed to give her that sexy shape i want her to have in flower. Her terpines are beginning to be noticeable and is of lemons, earthy notes, and loud gas. She is now also getting kelp extract added to the nutes. She is growing very nicely and i could not be happier at the moment. So far OSSC has my attention as their phenotypes have been very nice.

Likes
11
Share


@russrahl
Follow
Everything looking normal so far, had some ph issues a bit and 1 plant took it a bit harder and seems to have looked out. Got a lot of its guard leaves spotting but it’s nothing to worry about really, plants aren’t always perfect looking... corrected it quick I think so she should be fine in a few days. Cheers 💨

Likes
28
Share


@cyberkyd
Follow
Week 5 Updates : -
Plants are in their stretching and 3 out of 4 grows are not in flower yet. I took this opportunity to do Some LST with minor defoliation by bending branches and about 1 day before writing this I used proper LST equipments rather than DIY. Almost all have got 9 Branches. And my attempt is to at least have them stretch wider and healthier if not bushiest. But has definitely gone benefiting and I can already see the difference since I left one of the OG plant completely Untrained and you can see the difference which one is which. Mars Hydro Dimmer after working for a while Broke again( third time it fixed and broke again) throwing 100% light again so I ended up restoring the Light height to almost Max 110cm from plants top to distribute about 350-400 PPFD here and there.
Hoping my 2*2 to arrive soon so I can fit these new batch of 3 plants into that tent.
PEACE.


Likes
4
Share


@SamDo
Follow
Vegetative Week 6 – Pineapple Upside Down (Round 2)
This week confirms a full recovery in vegetative growth.
The plant clearly regained vigor and momentum.
Growth is strong, foliage is dense, and overall structure looks healthy.
Internodal spacing is noticeably tight, resulting in a very compact and bushy plant.
This could be influenced by the full-spectrum lighting, which appears to promote dense vegetative development.
Although topping or defoliation was considered, no structural work was done this week.
The priority is to let the plant continue growing naturally and fully stabilize before any training or shaping.
Nutrition remains unchanged from the previous week.
The nutrient solution is maintained around EC 1.4–1.5, with pH close to 6.0.
The plant is responding well, showing no signs of deficiency or stress.
While some time was lost earlier in the cycle due to initial issues, the delay is clearly less significant than in the previous run.
Progress has improved, and this recovery phase highlights areas to refine in future germination and early-stage management.
This week ends on a positive note.
The plant looks healthy again, and the focus moving forward is simply to let her grow and maintain consistency.
See you next week. Take care.
-Update: 04/02/26-
•Structural work update:
Today, a full structural intervention was carried out on the plant.
Defoliation, topping, and pruning were all done in one session.
The plant had become too bushy and overly dense, with poor airflow and excessive humidity trapped inside the canopy.
To correct this, the structure was reset: four lateral branches were selected and kept, while the main apexes were topped to start defining the future shape of the plant.
At this stage, the goal was not refinement but foundation.
This intervention marks the beginning of the plant’s final structure, or at least the first clear step toward it.
A significant amount of foliage was removed, leaving the plant with much less leaf mass than before.
The work is now finished, and no further cutting is planned for the moment.
From here, the plant will simply be left to recover from the stress of this heavy intervention.
The focus now shifts to recovery, stability, and healthy regrowth.

Likes
46
Share


@Merrymoosefamilyfarms
Follow
Hey there growmies from around the world, we are back! I hope everyone had a wonderful week, and everyone’s gardens are doing fantastic! It is week 11, let’s get into it!
Back to the canopy we went this week as I had to get in there to maintain that shrubbery! it’s unfortunate, I didn’t have the same amount of time that I had last week to spend in the tent (at any one given time I mean) and I had to choose between defoliating and continuing to tie everything down to further expand the reach of that canopy. I chose the latter….
Hindsight being 20/20, I probably should have just defoliated first… In doing that , I would’ve improved the airflow, increased the visibility (for when it came time to tie stuff down) and would have just cleared it out a bit making it easier for me to tie things down and weave the plant through the net with LESS fear of damaging the plant. But alas, hopefully this is just something I’ll remember the next time I am faced with this decision….🤷♂️🏻
So despite all that I said above, I DID decide to tie everything down- it went well but felt a bit rushed. I got more done than I originally thought so that’s a plus!
The rock candy cake is doing excellent though, it seems to be liking the future harvest nutrients, as do the fast buds (they really had some substantial growth this past week)
The next few weeks will certainly be a test of patience, I kind of just have to let the plant do its thing while I wait for the canopy to fill out that net. She’s doing a beautiful job so far, but we still have a while yet (especially due to the fact that when I moved her into the 5x5, and had to scrog it all over again- she is no longer center so I still have a bit more to go on that one side) to tell you the truth, I’m probably more curious about what I’m going to do to keep it going on the short side.. we shall see.. sounds like next weeks problem. Something else I plan on doing is that much needed defoliation I was talking about- I might wait two more days just to make sure we are all good after yesterdays antics (the tie down) other than that,I think we will just have to see what’s in store for us this upcoming week, hopefully some insane growth, but I’ll take any progress haha just gotta keep moving forward! Either way, I am having an absolute blast and I hope to see my growmies here for week 12!
As always, I hope you are all killin it in your gardens and are able to enjoy only the most bountiful harvests! Later everyone!! 💚🤙🌱
Processing
Likes
6
Share


@Greenthumbguru
Follow
This one has been a breeze big fella :no_good:😂😂 I moved her closer to the light shes super Frosty orange hairs the fan leaves are even Frosty

Likes
5
Share


@Ensign420
Follow
Greetings fellow growers 🖖 and welcome to my first grow ever. This adventure actually started several months ago when I decided to stop buying flower from dispensaries and just grow my own bud. How hard can it be!?
This is actually my second seed of this strain. The first bean sadly died due to over watering (sorry girl, RIP). I was literally watering the cube to the point where water was dripping from the bottom, then heavily sprayed the humidity dome and tray with the vents completely closed. Everyday. Multiple times. I never let the dome or try dry out. So after about 8 days of not sprouting, there was a funky smell of rot. So that was that.
Later I learned that rockwool retains a lot of water and can easily drown seeds. So a wet/dry cycle is best for rockwool germination.
So even after hours of researching and digging through forums and tutorial videos, I was still under prepared for this journey. Did not consider how delicate the germination phase is. Oh well. Lesson learned. Reset and try again!
I hope everyone is safe and stoned during this corona crisis. Just like everyone else in the world, I want this pandemic to be over with. But in the meantime, let's grow some weed! 🖖
[START OF WEEK 01]
Day 01 - Monday - 08/03/20 - Total Days: 001
-----------------------------------
- [0830]: Light Schedule: 24Hrs/0
--- Soaked cube in 5.5 PH water for 10 min. Did not shake water out.
--- NO NUTES! Only PH'd down to control the PH levels.
--- Did not use the default hole (way too deep).
--- Flipped cube upside down and made a shallow hole for the seed (less than 0.25" deep).
--- Placed seed in and pinched hole close. No additional water added.
--- Sprayed the tray and dome with straight water (5.5 PH).
--- Vents are cracked opened a for ventilation (about 1/4 opened each).
--- Distance between the light and tray was 53"
--- AC was set to 80 °F
--- Exhaust fan was set to 86 °F
--- Room average temp was at 85 °F
--- Dome humidity was at 85-99% when sprayed.
--- Allowing to completely dry before respraying.
- [2200]: Dome and tray were completely dry! Sprayed only tray and dome with more water.
Day 02 - Tuesday - 08/04/20 - Total Days: 002
-----------------------------------
- [0845]: Sprayed dome and tray in the morning. Everything was dry.
--- Hoping for the best!
- [2130]: Everything was dry again, so sprayed dome and tray at night along with a light spray on the cube.
Day 03 - Wednesday - 08/05/20 - Total Days: 003
-----------------------------------
- [0830]: Everything was dry again. Resprayed dome and tray. Slightly sprayed cube.
- [2125]: Hooo damn!! She popped! Am little stub is visible! Resprayed dome and tray again.
--- Still going 24/0 for lights.
- [+0033]: Just checked up on her and I swear she grew a bit taller! Getting excited!
Day 04 - Thursday - 08/06/20 - Total Days: 004
-----------------------------------
- [0845]: Wow! Went from a little stub to fully sprouted overnight! Everything was pretty dry again so resprayed dome and tray.
- [2200]: Tap root is visible! Over 1" long too! Just resprayed dome and tray again.
-- Going to prep for hydroton transplant tomorrow!
Day 05 - Friday - 08/07/20 - Total Days: 005
-----------------------------------
- [0930]: She keeps growing!
-- Added a bit of CalMag to the spray bottle (8 drops to 650ml of distilled water). Resprayed dome and tray. Water was at a 5.4 PH with 141 PPM.
- [1045]: Prepped the bubble bucket with 4.5gal of water. Water is high enough to reach about 0.25" above the bottom of the net pot.
--- Added 3 drops of Superthrive
--- Added 3.5ml of CaliMagic
--- Added 2ml Hydroguard
--- Then PH'd down to 5.6
--- Solution Strengh: 120 PPM
--- Water chiller is set to 20 °C
- [1100]: Transplant time!
--- Filled the net basket 1/3 with hydroton. When placed in the bucket, air bubbles are not visible, but are slightly below the surface (slight digging will reveal the water/bubbles below).
--- Removed plastic on rockwool cube and placed in basket, then filled around and covered with hydroton. Making sure to block any light from passing through the net pot and into the nutrient solution.
--- Covered with a half-bottle dome sprayed with the CalMag water from earlier.
--- Hoping for the best!
- [1300]: Raised Bucket 5" higher. Now light distance is 48" to top of bucket.
- [1820]: Lowered tent exhaust temp to 76 °F
--- Lowered AC to 75 °F
--- Raised bucket even higher so light distance is 30" to top of bucket.
- [2300]: Looking good!
--- Sprayed dome and surrounding hydroton with more CalMag water.
--- Attached timer to light! So new 18 Hrs On/6 Hrs Off light schedule.
--- Lights On: [1600] (4pm)
--- Lights Off: [+1000] (10am the next day)
--- Decided to go with lights on during the evening/night and off during the later mornings/afternoon (the hottest part of the day) to see if temps can be controlled better.
--- Please survive girl!
Day 06 - Saturday - 08/08/20 - Total Days: 006
-----------------------------------
- [0800]: Everything was dry. Resprayed hydroton and dome.
- [2000]: Here first night cycle seemed to go well! Get'n taller!
--- Dry again. Removed the dome.
--- PH went up to 6.5 so PH'd down to 5.7
--- Ran the top feed drip ring for a bout a minute to wet the hydroton and rockwool with the nutient solution.
---Too scared to leave the top feed on 24hrs (I don't want over water her and cause dampening-off). Will let dry before re-watering.
- [2100]: After closer inspection, I think she's looking a bit yellow.
--- Decided to add a bit of grow nutes to the bubbler solution.
--- Added 2ml of Sensi Grow A
--- Added 2ml of Sensi Grow B
--- Solution strength after adding more nutes: 176 PPM
--- PH went up to 6
--- I hope that the extra chelating properties of the 'PH Perfect' solution is enough of a buffer for proper nutrient uptake.
Day 07 - Sunday - 08/09/20 - Total Days: 007
-----------------------------------
- [0800]: Water dropped a bit (mostly due to evaporation) so solution strength was at 190.
--- Checked PH again. Was still at 6, so PH'd down to 5.4
--- Ran the top feed for a minute to wet the hydroton a bit.
- [0915]: Since she's looking perky but still a bit yellow. So decided to up the nutrient concentration even more before lights out.
--- Added 2ml more of Sensi Grow A
--- Added 2ml more of Sensi Grow B
--- Solution strength after adding more nutes: 199 PPM
--- PH went up to 5.8
- [1700]: Checked nutrients.
--- PH: 5.9
--- Solution strength: 202 PPM
--- Added 4ml of Voodoo Juice
--- Added 4ml of B-52
--- PH after adding more nutes: 5.9
--- Solution strength after adding more nutes: 238 PPM
- [2130]: Decided to make a new foliar spray to address the continued yellowing.
--- Started with 500ml of distilled water.
--- Added 3 drops of CaliMagic
--- Added 3 drops of Sensi Grow A
--- Added 3 drops of Sensi Grow B
--- Added 3 drops of B-52
--- Added 1 drop of Superthrive
--- Solution strength: 164 PPM
--- PH was at 5.9 and did not adjust.
--- Gave her one spray.
--- Also sprayed the surrounding hydroton.
[END OF WEEK 01]


