


Likes
Comments
Share


@Sandero
Follow
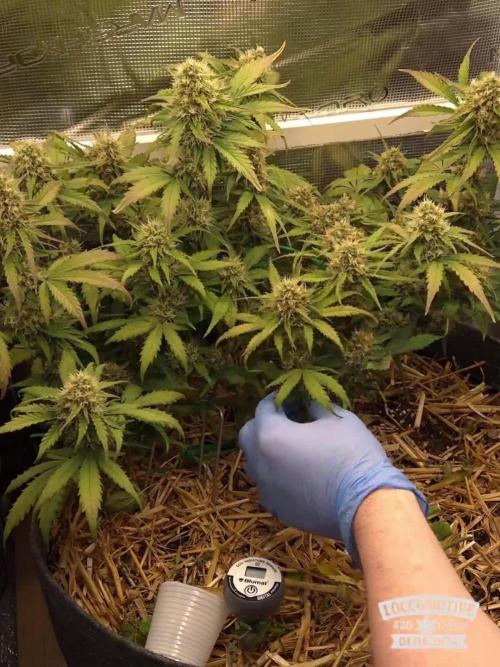
Flowers coming along nicely! Trichomes are starting to form on the fan leaves and my whole house smells like sweet berries! Im worried about my tent getting over crowded, and ive noticed moisture on leaves where leaves overlap. I defoliated lightly, and got another small fan to softly blow over the canopy.


Likes
14
Share

@LoccoMotive
Follow
🌿 Woche 8 - Zweite Erntewoche ️🌿
🌱 Wachstum🌱
Lady 2 wurde Ende Woche 9 also nach knapp 10 Wochen auch geerntet.
Bei ihr kam erwarungsgemäß mehr rum bei rum. 47g bei Pflanze Nr. 2
Heißt All in All 83g.
Die Mängel sind kaum noch zu übersehen.
Ich bin überzeugt das die Pflanze zum Schluss ihr volles Potenzial nicht ausschöpfen konnte.
Trotzdem haben es viele gute Buds geschafft und der Rest sieht auch rauchbar aus 😋
🌱 Living Soil🌱
Ich bin mit der Erde so semi zufrieden.
Aber wenn man die Umstände bedenkt, und das eigentlich zu kleine Beet, für gleich 2 Pflanzen.
Kann ich mich doch noch glücklich schätzen. Nächstes Mal vllt nur eine Pflanze 😜
Vllt hab ich auch hier und da was falsch gemacht.
Der Blumat hat mich mitten im Run auch im Stich gelassen.
Vllt war es hin und wieder doch etwas zu Trocken. Grade in der 2. Hälfte des Runs.
Bevor ich den nächsten Grow starte , werd das wohl überholen müssen.
💡 Licht & Schatten
PPFD 📈 gegen Ende ca. 950 µmol/m²/s.
☀️ Wetter
Die Temperaturen sind und bleiben brutal: 25–31 °C 🌡️🔥
🎶 The Grow must go on! 🌱✨


Likes
60
Share


@420DeepGrow
Follow
Día 22: 🔹Riego según la tabla de nutrientes BioBizz con una EC de 900 y un pH de 6.2.
🔹Pulverización con Rootbastic a 0.15ml/l.
✳️Nota: creo que finalmente el Sabado las pasaré a floración, 12/12.Leevarán ahora entre 3/4 semanas con unos 5 días de diferencia ( hay cañamones que puse más tarde).
Día 23: 🔹Pulverización con Rootbastic a 0,1ml/l
🔹Tengo que volver a regar, aplique poca agua ( 250ml x maceta) y le aplico 370ml x maceta ya que no dispongo de más agua sin cloro. La próxima vez las regare con 1/2 litro a cada una . Riego según lo tabla Biobizz con una EC baja 900-1000ppm


Likes
2
Share


@Kali_DC
Follow
RO watering run off
Peach Sherbet OG - 2076 PPM
Peach Sherbet OG #2 - 1009 PPM
Mimosa x Orange Punch - 1035 PPM
Mimosa x Orange Punch #2 - 964 PPM
Permanent Marker Auto - 2020 PPM
Permanent Marker Auto #2 - 2520 PPM
Glookies Auto - 1031 PPM
Glookies Auto #2 - 3460 PPM


Likes
26
Share


@ButterfliesLittleFarm
Follow
Hello Diary.
Two new diaries. Hulkberry and Green Gelato, both Automatic. Many thanks to RQS for these strains, and I am very happy to be starting with the new storys.
WHY HULKBERRY AUTOMATIC?
HulkBerry Automatic is Royal Queen Seeds’ revved-up version of Bruce Banner #3 Auto. She’s one of the most potent autos you can get your hands on, easily outperforming many photoperiod strains in this area. Her compact and frosty flowers provide a THC content of up to 21%, enough to satisfy the most experienced of smokers. Expect a wave of euphoria to crash over you after a vape hit or bong bowl of HulkBerry Automatic. The strain is motivating, increases alertness, and gets the creative juices flowing. She makes a superb smoke when listening to music and watching films, or when indulging in your own creative endeavours. Overall, she’s an excellent strain for daytime use.
LET'S START FIRST WITH THE FARM SET-UP:
Box - Secret Jardin DS120W 120x60x178
Lights - MIGRO 200+
Ventilation - Blauberg Turbo - E 100
Fan - Oscillating Koala Fan
Humidifier - Beurer LB 45
Soil - BIOBIZZ Light - Mix
Pot - 11L Fabric Pot from RQS
Seed - Royal Queen Seed
Nutrition - BioBizz and RQS Organic nutrition
I apologize in advance for the detailed documentation, or the large number of photos, but I enjoy it, and I think it will help others around tracking their plants.
LET THE DIARY START OFFICIALLY:
10/06/2020. planting.
I have prepared everything I need for planting. The 11lit fabric pot I got from RQS, also Organic Boost Nutrition and Mycorrhizza from RQS, Soil is Light-Mix from BioBizz and of course the seeds of the new strain Hulkberry Automatic. After adding 50g of pellets from Organic Nutrition and 5g of Mycorrhizze, I mixed everything well in the pot. After that I watered well and soaked the soil, I dug a hole with a wooden stick about 2-3 cm, I first put 1g of mycorrhize and then put the seeds inside. I lightly covered the hole with earth and put the pots in their new home. I planted two Hulkberries and one Green Gelato Automatic. The temperature was about 25 degrees and the humidity about 65%.
14/06/2020. She sprouted.
After 4 days, Hulkberries came out. In the meantime, I sprayed the surface of the earth a little twice. The temperature is still around 26 degrees, thanks to the summer and the high temperature that enters the apartment anyway. I regulate the humidity with a humidifier, I maintain it around 60% -65%.
15/06/2020.
Their first photo shoot, I also watered their with about 2 liters of water, which I only regulated p.H. at 6.3 with Plagron, Lemon Kick.
19/06/2020. Day 1.
Hulkberries is officially one day old. On that occasion I took another photo shoot to celebrate this big day :).
24/06/2020. First Feeding
First feeding. Their got a whole meal from BioBizz, Root-Juice, Bio-Heaven and Acti-Vera, p.H of water I regulated with Lemon Kick from Plagron.
25/06/2020. Day 7.
End of the first week. For now, everything is great. It is developing nicely, its conditions are almost perfect.
Hulkberry #1 - Day 7. - 9 cm
Hulkberry #2 - Day 7. - 10 cm
I think that’s all for this week, I’m happy that it’s starting all over again, following its development and looking forward to what’s to come. See you next week.

Likes
8
Share

@entony
Follow
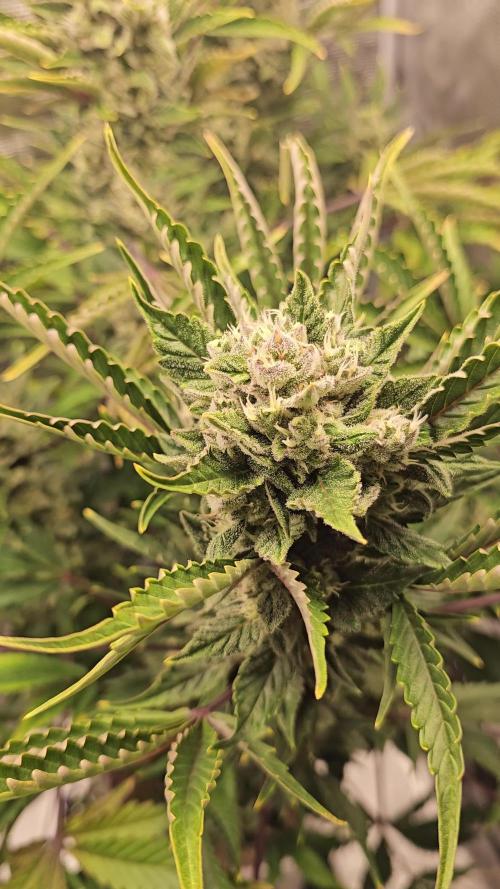
Nějak teď není moc času. Zkrátka jsem 3 holky postupně zkosil. Časová posloupnost není a která z ních je stardast už taky nevím. Celkově překvapili svoji chutí a vúní a celkem i množstvím. Každopádně auta už nechci a jak vypadne poslední topnuta ze stanu tak přijdou na řadu Hombrého fásty. Ať to roste a všem ať se daří.

Likes
7
Share


@WolverineGreens
Follow
Biggest bud- amnesia haze
Tallest plant- Bruce banner
Everything going great...the buds are getting bigger every day now and are getting stinky. Almost at the finish line...can't wait.
I think the do si do cookies or amnesia are gonna b the best of the batch


Likes
10
Share


@710Lino
Follow
NANA GLUE AND ICED WILDBERRY PART 2 RETURN OF THE CLONES NEXT THIS WAS FROM SEED

Likes
13
Share


@Dunk_Junk
Follow
Wow her flowers are packing the weight on this week!
Noticeably bigger this week.
The pistils on the top of the main cola have JUST started turning colour. Nowhere else though.
Likes
8
Share


@Kawannabic
Follow
Todas han germinado bien y rápido. Una de ellas no se pudo desprender de la semilla como se ve en el timelapse y la quitñe manualmente.
Likes
23
Share


@Chubbs
Follow
420 Fastbuds Week 6
Gorilla Zkittlez Auto
What up grow fam. These two girls are growing absolutely amazing. Very easy to grow up to this point. I did add 1tsp of each of General Hydroponics 3 part flora series to give them an added boost if needed. The colors they're starting to show on the leafs and flowers are mesmerizing. Starting to give off a smell so one could only hope it gets better from here on out.
All in all Happy Growing.
Likes
14
Share

@squalino
Follow
🌿 Journal de Culture : Mac 1 Autoflower – Début Semaine 4
On attaque la quatrième semaine et le moins que l'on puisse dire, c'est que la puissance de la Mac 1 est au rendez-vous. On entre dans une phase charnière : la préfloraison.
💗Un Grand Merci💗
Avant d'attaquer le vif du sujet, je tenais à remercier chaleureusement
💞@mia_biotabs et Mrs_Larimar 💞
pour leurs précieux conseils qui m'aident énormément à optimiser cette session. Un grand merci aussi à vous tous qui me suivez et qui m'encourage depuis le début !
Paramètres de Culture & État de la Plante
Âge : 27 jours
Passage officiel en préfloraison à 3 semaines et 3 jours (23 jours).
Taille :
Elle mesure actuellement 40 cm.
LST (Low Stress Training) :
Elle a subi un entraînement drastique hier. Sans ce LST, elle culminerait déjà à plus de 60 cm ! J'ai dû réduire sa hauteur pour garder une canopée homogène et gérer l'espace.
Lumière :
la lampe se trouve désormais à 65 cm de la canopée pour accompagner son début de stretch.
Climat :
Toujours stable (24°C jour / 21°C nuit) avec 50% d'humidité.
Manipulations & Observations
Côté technique, il y a eu du mouvement hier (04/05) :
Retour aux sources :
J'ai retiré les clips de palissage. Pour être honnête, je n'en suis pas fan. Je suis revenu à mes bons vieux bouts de ficelle pour guider les branches, je trouve ça plus précis et moins risqué pour les troncs.
Entretien :
J'ai procédé à un léger défeuillage pour libérer les sites de floraison naissants. Les feuilles de la Mac 1 sont tellement massives qu'elles bloquaient la lumière pour les branches inférieures.
Nutrition :
rien donné.
Toujours sur la lancée Biotabs, le sol est vivant et la plante ne montre aucun signe de faim, bien au contraire, elle est d'un vert éclatant.
Analyse de la structure
La plante est devenue une véritable athlète.
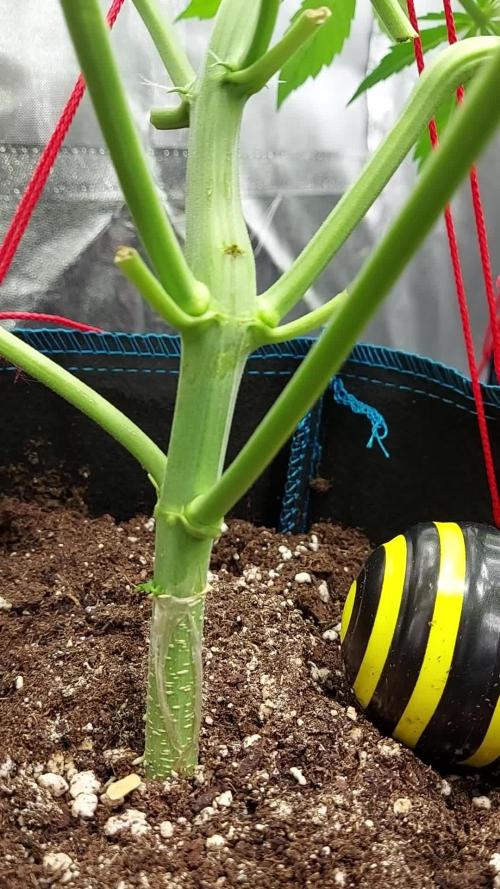
Le tronc principal, malgré la micro-fissure de la semaine dernière, a cicatrisé de façon spectaculaire et affiche une épaisseur impressionnante.
Les branches secondaires ont explosé et rattrapent la tête principale, créant une belle structure.
On commence à voir les premiers pistils apparaître nettement au sommet des apex, confirmant que le "stretch" est bien lancé.
La structure est exactement ce que je recherchais : une plante basse, large et prête à supporter le poids des futures fleurs.
Merci encore à tous et à toutes qui suit ce journal !
La préfloraison est lancée, c'est là que tout se joue. On se retrouve très vite pour voir comment elle s'étire !

Likes
1
Share


@DrGL_Thumb
Follow
Girls doing well, clearly see all hit with hit substrate 😂 but ChemDawg is despite the hit battling n fast 😂
Likes
8
Share

@Growfather1
Follow
Hello everyone,
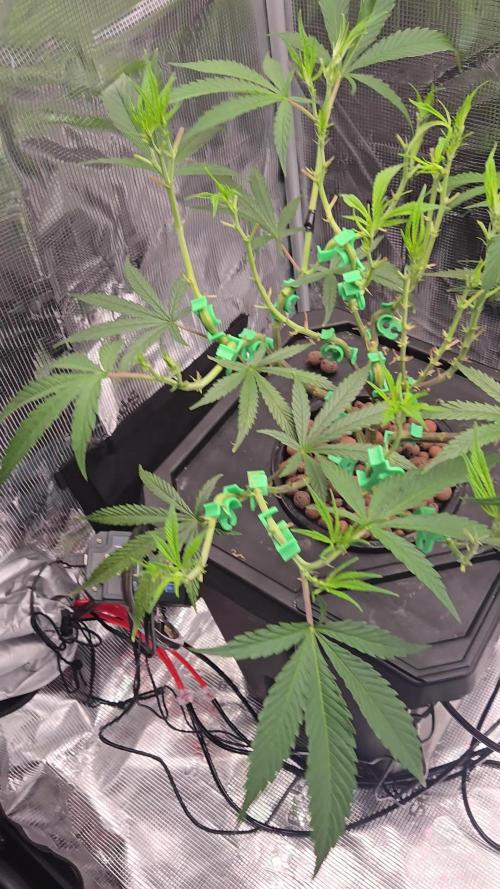
The plant is looking good for the roots i can't see the same, i see much new healthy roots but i see
leftovers from the rootrot.
I expect to go into flower next week first i need to setup a new tent for her.
Thanks for stopping by and have a nice weekend.
Growfather


Likes
52
Share


@Mr_Motalovah
Follow
Hello Growers & Tokers!
As you can see the hunt for those cosmic snacks seem to be on track!
I topped her at the seventh node. I'll let her bounce back from that then comes a good defoliation the switch to flower.
My plan is to have as an even canopy with about 8-10 colas.
That's about it for this week.
Take care out there and happy growing!

Processing
Likes
Comments
Share


@Sativagrad
Follow
This week an unclear problem occurred, many sheets wrapped up and looked like a chicken paw, I assumed that this was due to a powerful fan, reduced power, I was observing
Likes
241
Share


@Still_Smoq
Follow
📆 Harvest Week, 28 May - 4 June 2024
28-29 May - Observed and let the plant mature.
30 May- 3 Jun - Flushed plant.
4 Jun - Harvest (see pictures).
📑 The final week. Harvest time. Although I have destroyed my netting getting her cut the way I want to hang, it was well worth it. Larger limbs take a little longer to dry and that is what I need, a slower dry. For this reason I’m only removing larger and yellowing leaves. I’m hoping on 14 days in a closet controlled environment at 55% RH and 70 degrees F. Then it will be trimmed and placed into 1 quart mason jars with Boveda 62% TerpShield, and burped daily until a RH of 62% is maintained for long term storage.
Overall Grow Review:
With all environmental conditions met, this plant can get as big as you want it to. But to get big buds you have to carefully balance your nutrients to get maximum production. Reflecting back over the weeks, this is what ultimately caused the buds to be smaller than anticipated. I do not believe she was adequately feed during flower. This is a much bigger plant than I am normally use to growing, and I did not get into the habit of checking the solution PPM in-between scheduled weekly feeding changes. So when she started flowering I suspect she became a more heavy feeder, nutrients should have been changed twice per week or every 5 days depending. Only a guess. Would I grow it again? This is not my first Wedding Cake grow - so absolutely!
Smoq Report:
The smoke has a very strong effect that comes on slow and stays for a while! A nice head and body buzz that brings out talk and laughter. Nice for recreational or medicinal use. Will not couch lock at all, quite the opposite in fact!
🍶 30 May changed nutrient solution to flush solution
💧 Using reverse osmosis water with EC/TDS at 0
🐉 Flush Solution EC .0 at 70 degree F
🔆 Light power: one at 25%, and one at 50%, DLI 35 canopy coverage at 12hrs
😤 Using General Hydroponics, HGC728040, Dual Diaphragm Air Pump, 320 GPH
That is it for this week. Thanks for the look, read and stopping by.

Likes
5
Share


@UhhDoiigreen
Follow
Perfect to this point dense even colas. Smelling great covered in 💎 last week has been compost teas last one given today. Only water for the next 7-10 and nothing after that till harvest besides 36hr of darkness
Home stretch time
