


Likes
Comments
Share


@GarciasGarden
Follow
WEEK 2 DAY 14
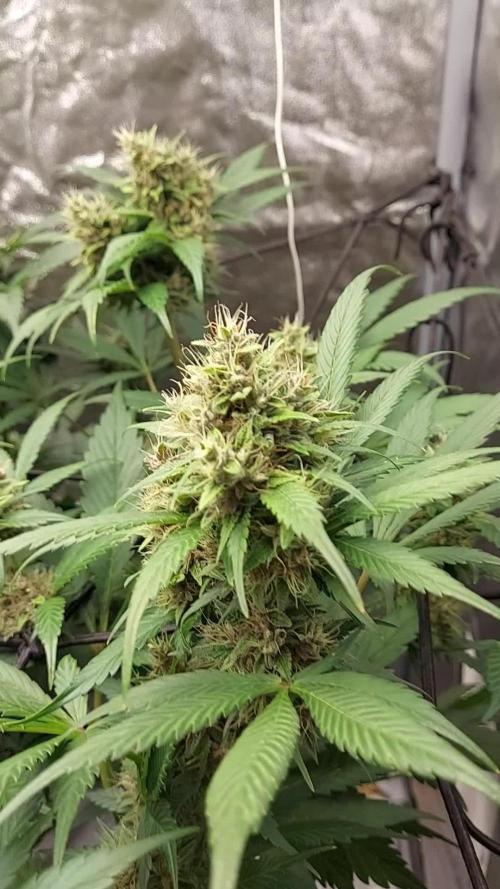
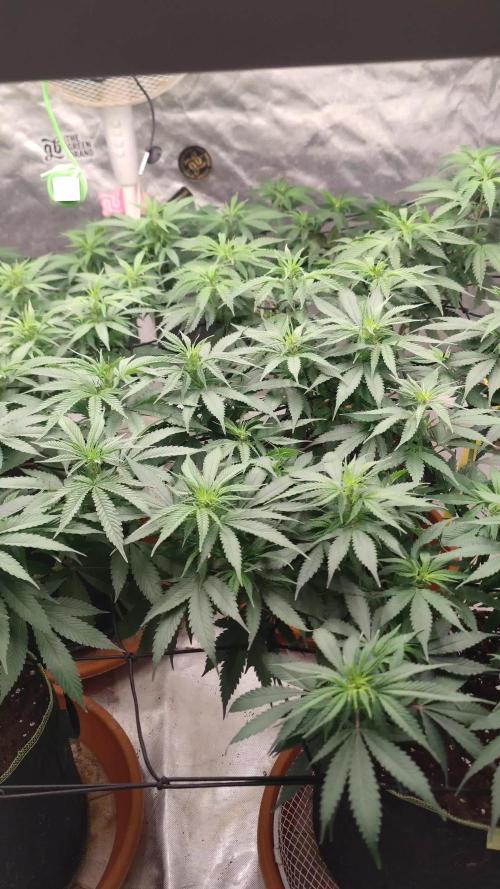
Since last week the babies have taken off! They didn’t have much light until yesterday when I added another 100w led and since then I’ve seen a huge difference ! They are looking super healthy the roots said fuck the pot and grew right through it I’m actually super interested in seeing how these grow up..
The 3 clones that were separate last week are now moved into one single pot to further develop the experiment.
They are on the same feed as the mother with flora grow/micro/bloom and cal-mag .
And In the last picture you can see my ghettos man way of cloning .. going to see which 2 out of 4 are better rooted and I will move those to a pot in about a week or so.
If you guys have any questions or want to know where I got these exotic seeds message me!! Or comment below !

Likes
72
Share

@squalino
Follow
Journal de Culture : Frost 1 -
Babouch (Semaine 8)
Génétique : Frostbanger (F2 Perso) | Système : Autopot 20L
📣 Remerciements
Un immense merci à toutes les personnes qui suivent ce journal depuis le début ! Un grand merci en particulier à@MIA_BIOTABSet à Mrs_Larimar pour leurs précieux conseils toujours aussi utiles. Merci à tous pour votre soutien !
🛠️ Configuration Technique
Éclairage :
Lumatek ATS 300W Pro (réglé à 75%)
Distance lampe/canopée : 50 cm
Climat :
Jour : 25°C / Nuit : 21°C
Humidité (HR) :
50% (gérée par le déshumidificateur)
Tente :
1m80 de hauteur
📅 Évolution & Floraison :
Des buds en "cornes", odeur puissante et retour de vacances
L'anecdote du retour de vacances (Alerte pH !) :
En rentrant de mes 4 jours à Rimini, j'ai analysé ma soupe et j'ai eu une surprise : le pH de mon réservoir Autopot était monté à 8 !
La cause :
Le bulleur installé dans le réservoir. J'ai appris à mes dépens que l'action du bulleur fait grimper le pH de l'eau à une vitesse folle. La plante a donc tournée avec un pH inadapté pendant presque 1 mois sans que je ne m'en rende compte.. (on apprend de ses erreurs 🤣)
Correction :
J'ai immédiatement retiré le bulleur. Pour stabilisateur ma cuve sur le long terme, je change de stratégie et passe sur le pH Down de Plagron (spécial hydro), réputé bien plus stable en réservoir passif.
État de la plante & Morphologie :
Malgré cette histoire de pH, Babouch montre une résistance incroyable. Les Biotabs font un travail de tamponnage exceptionnel en sous-sol.
Hauteur actuelle : 84 cm (+ 1 cm, le stretch est définitivement bloqué).
Développement des bourgeons :
Les têtes grossissent vraiment à vue d'œil et sont déjà particulièrement fermes au toucher.
Un phénomène marquant et très sympa : Babouch développe des "mini-têtes" sur les têtes principales, ce qui leur donne une forme originale en forme de cornes !
Couleurs & Odeurs :
Les fleurs commencent à arborer une magnifique nuance rosée. Quant à l'odeur, elle est déjà extrêmement forte, je suis vraiment étonné par sa puissance à ce stade.
Feuillage :
Toutes les feuilles montrent encore un vert bien profond et vigoureux, il n'y a absolument aucune trace de sénescence pour le moment. J'ai simplement quelques petites brûlures localisées sur certaines feuilles, mais rien de grave : c'est simplement dû à de la transpiration accumulée lorsque je manipulais la plante.
Nutrition (La demoiselle a faim) :
J'ai l'impression qu'elle est particulièrement gourmande en ce moment. Aujourd'hui, je lui ai préparé un bon repas manuel :
Apport de 5 ml de PK 5-8 Biotabs dans 1 litre d'eau (pH 6,3).
Elle devrait adorer ce boost pour accompagner le gonflement de ses "cornes". Le reste du temps, l'Autopot tourne à l'eau claire (et maintenant au bon pH !).
Résumé :
Une semaine riche en enseignements. La structure de Babouch est hyper solide, ses têtes sont denses, résineuses et commencent à prendre des teintes magnifiques. Maintenant que le problème de pH est corrigé et que le PK 5-8 est assimilé, la suite de la floraison s'annonce massive.
08/06
apport nutriments
dernier apport de nutriments
5 ml pk 5-8 biotabs dans 1 litres d'eau
stop autopots . passe en mode manuel pour le rinçage 14 jours
j pense que la fin est proche
À bientôt pour la suite !❤️

Likes
Comments
Share

@Catawbiense
Follow
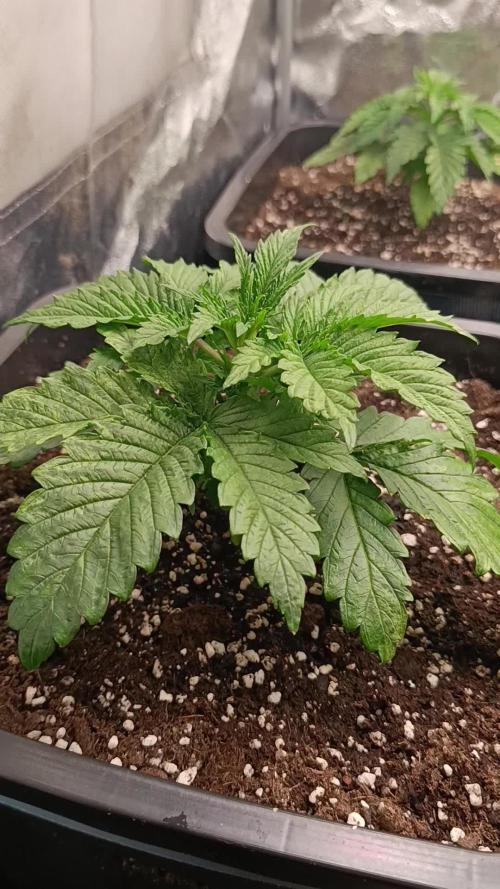
Die 5 Frosted Guavas stehen stabil in 18L Gold Label. Eine ist etwas kleiner, deshalb wird erst nach Ankunft der Mars Hydro E3000 getoppt, damit sie vorher aufholen kann. Zusätzlich stehen 2 White Raspberry Truffle als Backup im Zelt.
Beleuchtung läuft mit ~195 W (2× Honguan auf 50 %, Hortione auf ~70%). Der Wuchs ist kompakt und gesund.
Sobald die neue Lampe hängt, werden alle gleichzeitig getoppt für einen gleichmäßigen Canopy.
Mehr Updates folgen ✌️🌱

Likes
75
Share


@Roberts
Follow
Gushers is growing great under the Spider Farmer G5000/UVR40 lights, in the Athena blended line nutrition. She is bulking and, and smelling good. Her colas are developing nice, and a good frost layer. Everything is looking really good. Thank you, Royal Queen Seeds, Spider Farmer, and Athena. 🤜🏻🤛🏻🌱🌱🌱👸
Discount code: GROWERS20
Thank you grow diaries community for the 👇likes👇, follows, comments, and subscriptions on my YouTube channel👇. ❄️🌱🍻
Happy Growing 🌱🌱🌱
https://youtube.com/channel/UCAhN7yRzWLpcaRHhMIQ7X4g
Spider Farmer Official Website Links:
US&Worldwide: https://www.spider-farmer.com
CA: https://spiderfarmer.ca
UK: https://spiderfarmer.co.uk
EU: https://spiderfarmer.eu
AU: https://spiderfarmer.com.au
G5000 Light Amazon Link:
amzn.to/4643esa
UVR 40:
https://www.amazon.com/dp/B0BR7SGTHS
Discount code: saveurcash (Stackable)

Likes
47
Share


@rhodes68
Follow
12/17 Week 12
Wow Layla made to week 12 but this will be her last, trics are ready and just letting her dry out before harvest.
My wife says hers buds remind of Cleopatra from the Adams family... have to remember that new year for Halloween
Maggie - one gal @6.4PH + 12ml Peak Soul finisher maybe her last feeding as hair growth is slowing so looks like next week-ish
Those buds are really getting thick and heavy had to tighten up the support a bit.
12/19 HARVEST DAY LAYLA
Pics up top wet yield 578 grams
am happy
Into the dry boxes (took two) for a few days
UPDATE****
Dry weight 219 grams
12/20 Mag gets another feed still building buds same PH and PK as before.
12/21 Bud production slowing even after the feed so thats all for Maggie, just getting her preped from her on.
Likes
16
Share


@DrLaggis
Follow
🌱 Start: 17.07. 🌱
Hello everyone! This is my very first grow and I'm thrilled to share every step with you! 🎉 I'd appreciate any tips you might have to help me achieve the best results! 😊
Equipment:
I've geared up with an Indoor Grow Kit from MarsHydro along with some BioBizz supplements to ensure my plants get the best care. 🌿
🌼 Seeds:
I opted for Fast Buds seeds after hearing great things about them. They were delivered super fast—just two days! I’m especially excited to test the C4 strain. 🚀
I've begun soaking the seeds and setting up my space. Eagerly awaiting the transition to the next stage in a day or two! 🌱
📅 Update: 19.07.
All three of my C4 seeds sprouted 1-2 cm within just 1.5 days! 🌱 It’s often recommended that autoflowers be planted directly into their final home, so I'm following that advice.
I'm working on improving the air circulation in my tent to ensure the best environment for growth. 🌬️
I'm currently using 0.2L cups with big holes over the sprouts to maintain higher humidity during their initial two weeks. 💧
🎉 UPDATE 22.07. - THEY ARE ALIVE 🎉
My C4 sprouted on 20.07., and I'm overjoyed to soon share photos and a video of my little green buddy! 📸🎥
PS: My plant enjoys 2 hours of chill jazz music every day! HAHA 🎷🎶
Likes
2
Share


@4F1M6
Follow
Shes booming through the stretch! Got branches rowing up great as she fills right out. Did a big defoliating of most the leaves under the first net. Allow some air flow through the under skirt. Did a preventative treatment using dr zhymes. Than gave her a good shower to wash off any residual build up.
I'm just starting to see pre flowers coming in at the nodes. So she will still have some stretching period to go. I'd say atleast another week of stretching out and filling up my net. Before I start seeing those white stigma pom poms coming in at the bud sites. Lets see what this lady can do.
Until next update. Happy growing and stay lit fam.

Likes
16
Share


@UK_Grows
Follow
So apparently my camera does not seem to know what shade green it wants to use.
Red Pop #4 is without a doubt the strangest specimen in the group. It is displaying what appears to be polyploid traits in one of its tops. Along with a strange trait displayed by the petioles in attaching to the main stem in a vertical manner causing leave to grow vertically instead of horizontally.
It also needs far more nutrients than the rest as it has grown much larger despite bending the main stem 90 degrees at two seperate points.
Red pop #2 is a midget and has grown very weak.
On a more positive note, I have fixed my humidity issue and now average around 55%. Airflow was the issue. not enough air intake into the tent. Silly me.
Likes
47
Share
@Arcadium
Follow
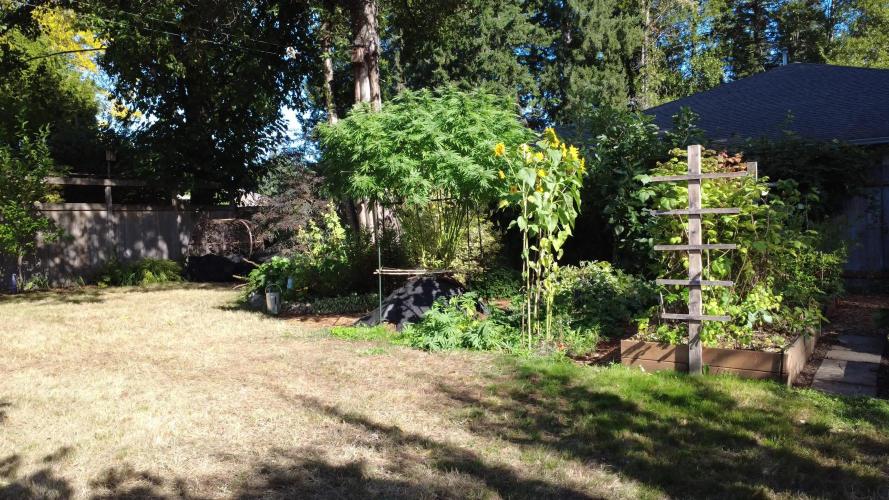
Well, atmospheric river on the way tonight, so I thought I'd do an early harvest, 42 tops in total! Even though it's a few weeks early, the buds are a really good size and very frosty. I also wanted to open the canopy up for the remaining buds and also check out how bad the rot was, and to my surprise really good! None of the main tops had rot, I spotted a half dozen smaller nugs during harvest.
All bud was washed, 3 buckets, baking soda and lemon juice in 1, then 2 clean cold rinse buckets. Snip top, snip off fan leaves only, wash in bucket 1,2 3, hang to dry outside for 15 min, then bring into basement for drying. Will hang dry for 7 days, sweat in paper for a day or 2, then light trim and into grove bags. Bucket 1 after wash was NASTY, grey, couldnt even see the bottom, please wash your outdoor!
After harvest I took some more pics, still TONS left to "hopefully" ripen over another 2-3 weeks.
Even being this early, the trichomes were looking good. I mostly do Rosin and Edibles, so I don't need max swollen buds. We have 98% humidity over nights, and there's no way to fully ripen in that kind of weather.
This is my new favorite strain so far, this was the earliest harvest I've had in a while, buds are great, uniform, almost no budrot so far.
I bought bubble bags to try out some hash washing. I fresh froze some small stuff from another plant. If it works out and the rest of this doesn't rot out I'll fresh freeze a ton. I have a small Rosin press to so I finally get to try out some Live Rosin!

Likes
14
Share


@AngryBird
Follow
Day42 from seed. Day15 of flowering.
Going to feed today as shes dried out in the greenhouse.im abit worried about moisture levels inside the greenhouse during the night. Especially when it rains because you can actually see the condensation on the inside. Overall shes really blooming.
Day 45. Greenhouse is working a treat. Fed again today. Shes sticky and sweet smelling abit piney and lemony look at the growth
Day 48. Due a feed again as shes dried out again. Taking alot more feed in the tent. Shes bloody beautiful 😍
Likes
563
Share


@Ju_Bps
Follow
Hello my friends 👩🌾👨🌾,
This 8th flowering week was good 👊, maturation Buds continue 🌲❄️, I thought it will be the last week, but need one more.
The end is for this week end I think, for moment trichromes not really full milky, and I like something like 20% amber.
I've started flush with flash cleaner
The senesence is started on the #3.
💦 1 Watering this week 1.8l/plant .
Water + flash cleaner
PH@6
Lamp @100%
Bisous 💋😘, and see you next week.
Thanks community for follow, likes, comments, always a pleasure 👩🌾👨🌾❤️🌲
Mars Hydro - TS 1000
https://www.mars-hydro.com/ts-1000-led-grow-light
Mars Hydro - FC3000
https://www.mars-hydro.com/fc-3000-samsung-lm301b-led-grow-light
Mars Hydro - SP3000
https://www.mars-hydro.com/sp-3000-samsung-lm301b-greenhouse-led-grow-light
The High Chameleon - Bisous Au THC 💋💋🌲🌲😘😘
https://www.thehighchameleon.com/shop/bisous-au-thc-83
Likes
11
Share


@Vegasgrowermx
Follow
So i had some some confusion going on i though it turn out to be a male since there was no white hairs so i kind of just let it go thinking of breeding it with 2 clones of NYCD was kind of busy to put up pics but to my surprice turn out to be a female so was kind of happy but mad lmao 😂🤦♂️AND ITS ACTUALLY DAY 19 OF FLOWERING
Likes
2
Share
@Chrisandweed
Follow
Pues HOY, miercoles 22 de abril, hago el cambio de fotoperiodo, a 14-14! De momento todo va según lo planeado, main lining hasta este punto, vigorosas y recias, se sienten muy sanas y beben muchisimo, de momento 3 litros por planta cada dos dias, veremos a ver ahora con la floracion.
Ahora esta primera semana voy a hacerle diferentes aplicaciones buscando cosas jajajajaja hoy la voy a hacer aplicación foliar del delta y no recuerdo si tocaba tambien a riego. Luego, algo que tengo ganas de ver, es usar el calcio ahora entre esta semana y la siguiente de aplicación foliar, pero en esta ocasión no solo para fortalecer la planta, sino para activar la hormona Ca²+ creo que se llama, que en sí es el mensajero de la planta que le dice, eeehh, haz mas resina que estás tirando poca! Y así la fuerza.. habrá que ver jajaja pero bueno, hoy arrancan las 14 horas de luz y 14 horas de oscuridad 🔥🔥
Las plantas, el dosel lo tienen sobre los 40cm, espero no tener que hacer super cropping, no soy fan.
Actualización jueves 23-04-2026: el video es del despertar tras sus primeras 14h de oscuridad. Aún no hay porqué ver nada respecto al cambio de fotoperiodo, lo interesante es lo vigorosas que están en el momento del cambio 🔥🔥🔥🔥💪🏾💪🏾💪🏾


Likes
28
Share


@Trickybis82
Follow
Hello my fellow growmies,
Please find this week pictures and updates. I am into the final stretch with Runtz Muffin & Wedding Cheesecake.
After this week I will put them onto ripen for there last couple feeds before I then start the flush process.
The smell coming off these plants is ridiculous lol it makes the room smell like a fruity cake factory 🏭 🤣.
Grape gusher is a little behind the other girls but that is fine because she is a giant with so many bud sites perfect!
I will update next week.
Peace and love people!

Likes
6
Share


@BudeCo
Follow
Feliz com o retorno das meninas que revegetaram na 3 semana de floração.
Ficaram por 15 dias com luz 24h.
Agora já estão novamente com 3 semanas de 12x12. Recuperação Ok.
Mas devem ficar com aspecto de rabo de raposa no final da floração.


Likes
Comments
Share

@TheGrowHouse
Follow
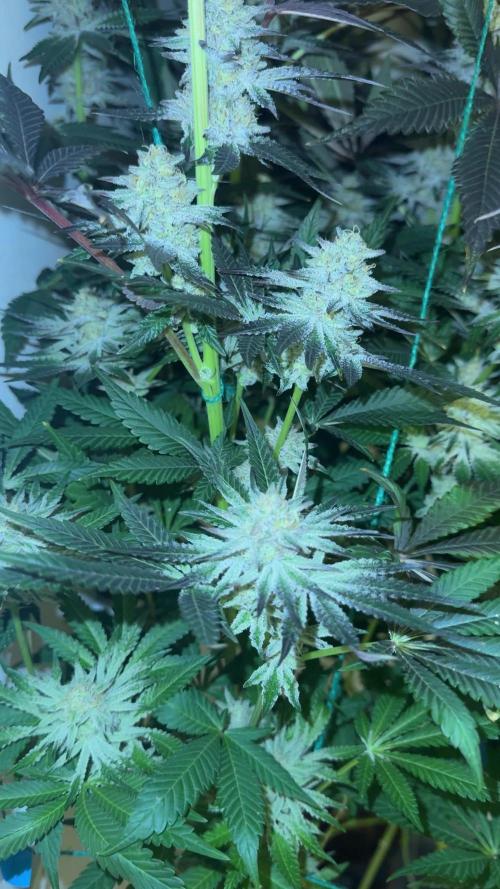
Day 56 flower getting very close to harvest now just a bit longer needed only water from here on out 💚😍🙏

Likes
10
Share


@valiotoro
Follow
Photoperiod buds 🤩
The smell is absolutely divine very fruity,sweet & tropical🍋🍊🍉🍌
Solid like a diamond 💎
Bay harbor butcher’s trim to show the density
Likes
34
Share


@Ashbash
Follow
Just water the past week to save on nutes.
I think this is the final week for the two Green Gelato plants. I will post trichomes later but I see at least 5 percent amber but I'll have to make sure it's not sugar leaves.
Royal Gorilla is still waaaaaay behind, I'm gonna chuck a couple of autos in while that finishes since they don't mind the different lights too much. Not sure what I'm gonna grow next proper tho lol. Thinking something from Barney's again.

