


Likes
Comments
Share


@Batista
Follow
This week nothing special. We stopped training and are just giving water and fertilizers. We're using a lower dosage than recommended by the manufacturers and so far the plant has not shown any apparent deficiency.

Likes
278
Share


@Metatronix
Follow
A big hello to all the cannabis growing gardeners...and all the other visitors that came across my grow journal.
I apologise for the late updates, what you see on the photograph is what i found growing after my 5 day Christmas absence. i actually took the photographs on the day of my 41 birthday.
During this time the four plants drank a lot of water that nobody was refilling, normally it was ok, this time though when i came beck the ph was at 5.6 after i replenished the missing water it jumpted to only 5.8.
It happened first time to me so i thought "give it a couple of days girls will drink and the replenished fresh water with PH of 7.4 will up my reservoir", Unfortunately it was a bad choice, plants started to drink less and less every passing day, so at this week end started adding PH+ (first time since a long time, my PH+ bottle was bought in 2015 ;)
During the week only added PH+ and PK 13-14.
----------------------------------------------------------------------------------
The SE 7000 is hanged at 28 cm. over the canopy and runs at 550W.
This whole grow's main sponsor is Spider Farmer. You can easily obtain all the great grow equipment we use at: spider-farmer.com
A big thank you to Jessie and the whole Spider Farmer crew for supporting me with the newest technological advancements in horticulture. Thanks to them what i do here is possible.
Thank you SeedsMafia for giving me the opportunity to try out your stock.
seedsmafia.com/en/feminized-cannabis-seeds/moby-dick-feminized.html
Plagron did send us their Contest package for the Power Buds competition .
Thank you for your visit, please leave a like and hope to see you beck here in about a week.

Likes
3
Share

@Elemental
Follow
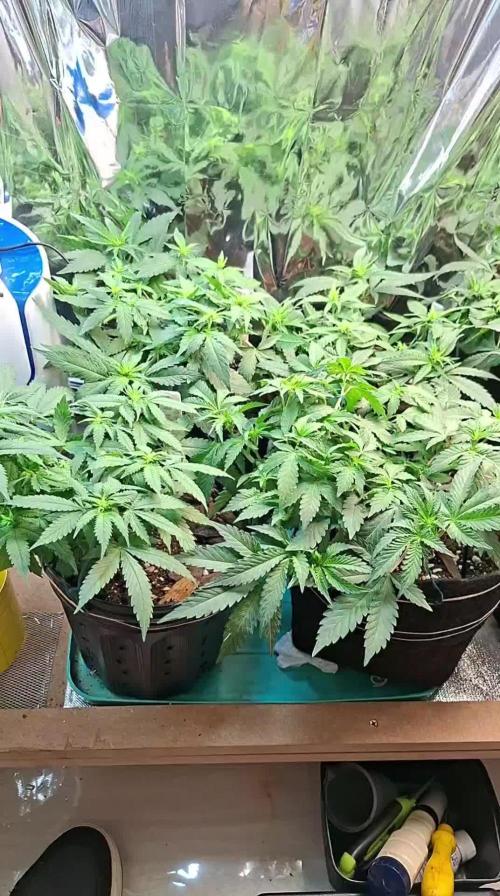
0.1) Observação Geral
Todo o cultivo foi conduzido com monitoramento constante e ajustes precisos de intensidade luminosa (DLI e PPFD), temperatura e umidade, garantindo condições ideais em cada estágio do desenvolvimento.
1) Substrato e Nutrientes
O cultivo foi realizado utilizando água mineral com pH balanceado durante todo o ciclo.
Fase vegetativa: fertilização com BioGrow.
Floração: alimentação com Flowermind.
A mistura do solo foi composta por 50% de substrato reutilizado, rico em nutrientes do cultivo anterior, e 50% de novo solo (proporção 70/15/15), resultando em uma base equilibrada e fértil.
2) Germinação – 19 de agosto
As sementes foram germinadas utilizando água mineral + peróxido de hidrogênio em copinhos de gelatina individuais. Permaneceram por 24 horas na solução líquida, seguidas de 24 horas no escuro total sobre papel toalha umedecido com a mesma água, dentro do mesmo recipiente. Os copos foram abertos apenas a cada 12 horas, em ambiente de baixa luminosidade.
Todas as sementes germinaram com sucesso.
As sementes com raízes de aproximadamente 2 cm foram transferidas para vasos de 1 litro, com adição gradual de substrato conforme o crescimento das plântulas, prevenindo o tombamento dos caules.
3) Fase de Plântula
a) Conduzida sob lâmpadas de 35W e 50W dentro de uma caixa de papelão personalizada, equipada com coolers e exaustor para controle de temperatura.
b) Aplicação de FORT (enraizador) em uma rega, após o aparecimento do primeiro conjunto de folhas com cinco pontas.
4) Topping – 10 de setembro
Foi realizado o primeiro corte apical para incentivar maior ramificação e uma distribuição mais equilibrada de energia.
5) LST (Low Stress Training) – iniciado em 13 de setembro
O treinamento começou três dias após o topping, com amarrações graduais dos ramos para promover a abertura do dossel e melhor penetração de luz.
6) Transplante – 27 de setembro
Transplante realizado para vasos de 4 litros, com rega leve e adaptação gradual à nova base de substrato.
7) Início da Floração (Troca para 12/12) – 6 de outubro
O fotoperíodo foi ajustado para 12 horas de luz e 12 horas de escuridão, marcando o início oficial da fase de floração.
8) Defoliação – 10 de outubro
Remoção estratégica das folhas grandes de ventilador (fan leaves) para melhorar a circulação de ar, otimizar a distribuição de luz e estimular o desenvolvimento dos buds.

Likes
2
Share


@Keep_it_Cleannabis
Follow
Everything going good , some get feed today. Starting really smell amazing, my runtz always puts in the work💪💪
Processing
Likes
10
Share


@CanadianFillmore
Follow
Start of flushing for the blueberries, both blueberry plants have very heavy, sticky, stank buds, I'm looking forward to harvesting these beauties!
Start of the last week of nutes for the super lemon haze, she has packed in the weight, buds have filled out nicely and stickier than the blueberries. She's still hungrier than the Blueberries, taking an extra 2 liters of feed each week. If the trichomes are showing cloudiness by day 5 of this week, I'll flush her early.


Likes
6
Share


Likes
119
Share


@PEAKYPLANTERS
Follow
Ok ,let's GOOO!
These buds are eager to gain weight and develop under this phenomenal light and seem to enjoy excellent health thanks to these excellent nutrients😋🤗🤗🤗

Likes
6
Share


@rvabudman
Follow
The plant took off this week. I am relatively new so was working through getting my PH measuring/balancing down. Now that I have established a better method the plant responded well. Put in a scrog to help even the canopy for the future. The other plant I have running is a bubblegum autoflower that is a few weeks older (right).
Personally I really loved the look of the gold leaf at this point, it had a very nice spiral look to it almost like an xmas wreath.

Likes
6
Share


@Naujas
Follow
My house is full of sweet chocolate and fruit aroma:) her flowers are full of shiny trichomes :) the girl only bloomed for 57 days, but she is already ready, maybe her flowering sped up in my grow box, high temperature 33°, because of that under my arm my light was set to 85%. From the first days, the girl showed fast and healthy growth:) I made a timelapse video, but unfortunately due to problems with the SD memory card, it takes 3-4 days at the end of the video, besides, my tent is too small for that :D I also made bubble hash from sugar leaves myself :) I tried Zamnesia seeds for the first time - I hope that someday this seed bank will offer me its products to try again :) thank you all. you were together :) good luck with the growing.


Likes
Comments
Share


@Cannabalkon
Follow
In den ersten zwei Wochen haben wir sie praktisch einfach wachsen lassen, da sie Kathi’s kleines Experiment war.

Likes
9
Share


@Mr_nugs_lover_David
Follow
This ladies got pretty big for real, hands down the biggest autos I've ever had grown in 7l pots, excellent performance, and the flowers start to stink really strong, there is one pheno which is more developed than the other 2 phenos but the 3 have developed really good and they are producing a lot of sticky and stinky trichomes! Let's see how this will end up! Can't wait 🤤
Likes
9
Share


@0JuJu0
Follow
Planted in 25L Pot with pre-fertilized compost soil and a little bit of coco, perlite and little pieces of old woodsticks.
As a fly protection i use spiders and there web to solve this problem because thats the only one i have. So when you see in my tent, webs and the little bit of soil on the bottom what keeps the tentfloor dry and is also good for the spiders, please keep that in your mind.


Likes
2
Share

@Hannoizboyz
Follow
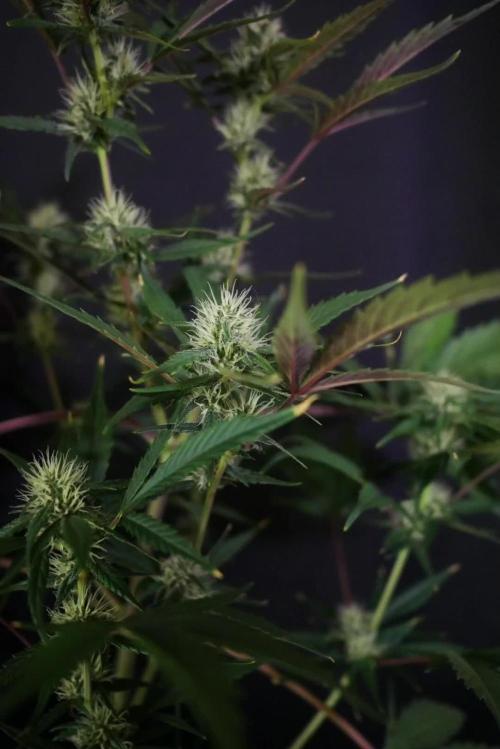
Sehr gute Woche die Lady macht sich gut und verändert ihre Farbe. Die Blüten ist sehr stark
Und zeigt sich von ihrer besten Seite
Likes
4
Share


@pzwags420
Follow
Day 1 week 1 flower I switched my lights to 12/12 as my clones were getting taller then I would like so I flipped them a little earlier then intended. On day 3 I defoliated lower growth(suckers) to focus growth towards top of the canopy. On day 4 I changed out my reservoir and added my flower nutes. On day 6 I defoliated my plants to increase air flow lower in the canopy. On day 7 of week 1 flower the clones are doing well. They are still stretching, the leaves look really healthy and I can see the beginning of flower clusters forming.

Likes
58
Share


@nonick123
Follow
Bienvenidos a la semana #1!
Parece que la experiencia previa con la lámpara LED 50W me está yendo mejor en este round
He mantenido la lámpara a 28 cm desde germinacion lo que me ha dado unos 250 PPFD a la cota del substrato
Medición hecha con la app "Photone" y el móvil (gracias @Chubbs).
Igual no es preciso como un luxometro, pero las plantas están respondiendo bien y no se ha estirado mucho (espero vuestros comentarios! ) y tiene un color verde brillante sin signos de estrés (toco madera! ) por lo que me sirve de referencia.
Las plantas han estado desde el día #1 al día #8 con la garrafa de plástico a modo de invernadero.
El día #9 se ha eliminado la garrafa de plástico al ya tener las dos primeras hojas verdaderas, y he ajustado la lámpara a 34 cm para tener los mismos PPFD que con la media garrafa
He puesto en la sala un ventilador doméstico a unos dos metros de distancia que refresca la sala y hace que las plantulas se muevan ligeramente para que se endurezcan los tallos.
El día #9 se ha regado también con 100 ml de agua embotellada a una distancia de unos 9 cm del tallo para favorecer que las raíces se crezcan hacia el exterior de la maceta.
Por último, he colocado una nueva versión de la protección antigatos casera.
Gracias a @massivetids @Creepy_Steve @GMSgrows @Chubbs @Clutch por vuestra ayuda en los comentarios y en las grow question!
La semana que viene nueva actualizacion!

Likes
19
Share


@HeavyHead
Follow
Great week. Really starting to take off in growth. Onto full strength nutrients and going full power on the lights now :p
Going to start my LST soon possibly this week or early next week.
Will add more pictures and edit as the week goes :)
Likes
10
Share


@iLoveGoodWeed
Follow
She is getting big and so far non-issue with the ladie. Looking forward to next week's
Likes
7
Share

@DESERT_DANK_FLAVER
Follow
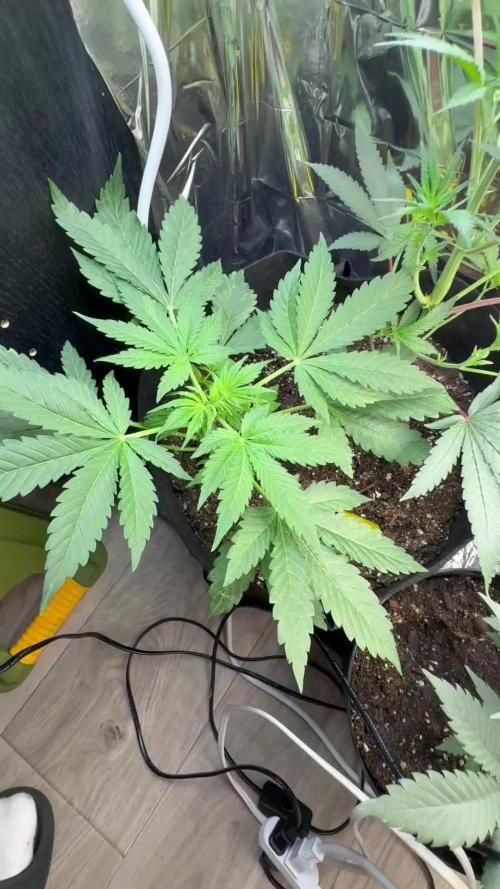
So only two are really goin!! I fucked up on one somehow idk why :0, but these two are glowing!! The one I snapped in half is growing so symmetrical now !! In the hey Abby, other one in coco , 5 gal pot sharing her home with a cut of mine. (Brainstain).
