Processing
Likes
4
Share
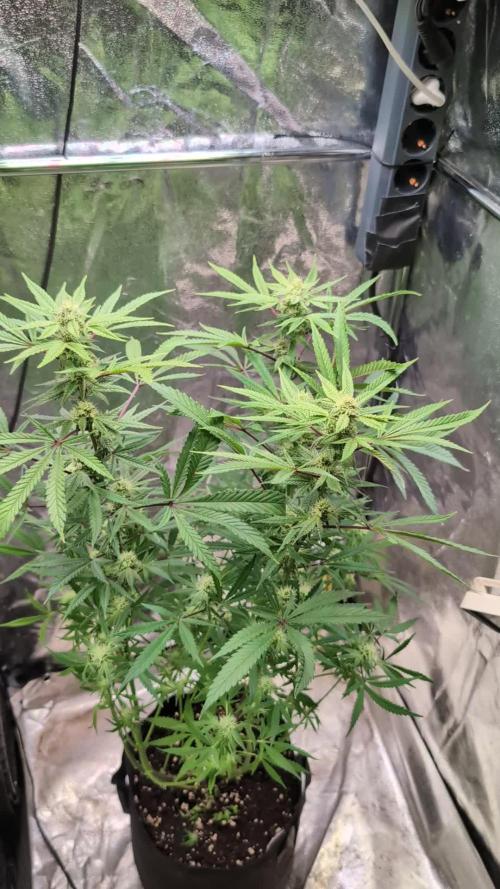
Time for her to go to the dark room. She has finally finished up her growth it was my first time growing this strain I will do much better next time up. Now it is harvesting and curing then testing to see how she taste. Didn't get much out of her but the best things come in small packages.I will keep GD updated on the curing and how much did I come out with hope I have better luck next time on the size I really learn alot from the GD family.
Likes
115
Share
Greetings, fellow cultivators! We've officially crossed into the much-anticipated flowering stage with our beloved Cherry Cola Auto, and let me tell you, it's nothing short of a horticultural fiesta! The transformation over the past week has been nothing short of magical, with our once lush bush evolving into a budding beauty. Last week was a game-changer as I bid farewell to the training supports that have guided our Cherry Cola through her bushy phase. Now, she's free to express herself, growing wild and embracing her natural beauty. The transition from veg to flower has been seamless, and I'm witnessing a symphony of bud formation that's simply breathtaking. One of the marvels of autoflowers is their ability to veg and preflower simultaneously. It's like witnessing two acts of a play at the same time – the plant is reaching for the stars while also gearing up for the grand flowering spectacle. Cherry Cola's growth rate is nothing short of impressive, and I find myself in awe of this dynamic phase. With the shift into flowering, I've made some adjustments to our nutrient regimen. The Start Booster has gracefully bowed out, making way for two new players on the stage – P-Boost and Topbooster. P-Boost, a phosphorus booster, is a soluble wonder that not only enhances blooming but also contributes to improved water pH. It's like giving our Cherry Cola a backstage pass to a nutrient orchestra. Meet the New Stars: P-Boost and Topbooster: P-Boost, with its organic acids and phosphorus punch, is playing a vital role in stimulating protein, hormone, and vitamin production. It's a symphony conductor orchestrating the blooming processes. Meanwhile, Topbooster, the dynamic duo partner, is enhancing the flowering response, producing larger fruits with more fibers, resins, and sugars. It's like a magical potion for quality and flavor enhancement. Oh, did I mention that our Cherry Cola looks perfect to my eyes? She's a vision of green excellence, and I'm captivated by the flawless symmetry of her growth. Every day, she inches taller, embracing the flower formation with grace and poise. As we wrap up this Week 1 Flower report, I'm left in amazing of the beauty unfolding before us. Cherry Cola Auto, with her wild growth and budding allure, is a testament to the marvels of cultivation. Stay tuned, green enthusiasts, for the next thrilling installment as the floral overture continues! Genetics Cherry Cola Auto @Fast_Buds @fastbuds_genetics_official @fastbuds_official @fastbuds_espana Nutrition: @aptusholland @aptus_world @aptus_ Love, Care, and Attention: @dogdoctorofficial As always, thank you all for joining me on this journey, for your love, and for it all. My horticultural odyssey would never be the same without you. Your love and support are cherished, and I feel both honored and blessed to have you in my life <3 <3 <3 #aptus #aptusplanttech #aptusgang #aptusfamily #aptustrueplantscience #inbalancewithnature #trueplantscience #dogdoctorofficial #growerslove #fastbuds #specialplants #homegrown #fastbuds #cherrycola #CultivatingBeauty #NatureArtistry #HomegrownMagic #GreenPassion #JourneyWithPlants With true love comes happiness. Always believe in yourself and always do things expecting nothing in return, with an open heart. Be a giver, and the universe will respond in ways you can't even dream off. Friendly reminder: all you see here is pure research and for educational purposes only. Growers Love to you all <3 <3 <3
Likes
15
Share
Fastest-developing plant I've seen to date. She's a bit leggy, but for I've seen plants take a month or more to reach this height and leaf development. Having a 12/12 schedule 600W sodium lamp is helping, and the increasing temperatures as we head into spring. No sign of root reaching beyond the (large) rockwool cube, but that's normal. Sometimes it takes several months for them to properly get going in these cold climes.
Likes
25
Share
🌱 VEGETATIVE (4 weeks) The Runtz seed, placed in a root-riot cube within a DWC net pot, successfully sprouted by day 4, under an 18/6 light cycle (50W at 50cm). The first week saw the seedling establish itself, with roots extending into the DWC reservoir. During the second week, despite slightly low humidity and temperature, the seedling demonstrated robust and rapid growth. Light intensity was increased to 75W. Towards the end of this week, I removed the first set of true leaves as they were growing too close to the substrate. The third week marked a noticeable increase in the plant's water uptake (1 LT/day), which prompted me to raise the nutrient solution's EC to 1.0. The plant showed significant development while maintaining a compact stature – a trait I appreciated. In the fourth and final week of vegetation, as odors began to emerge, I installed a carbon filter, raised the EC to 1.2, keep the pH in the right range and boosted the light intensity further to 150W. By the end of this phase, the plant was bushy, compact (21 cm height), and healthy. 🌸 FLOWERING (8 weeks) For the first week I switched the light cycle to 12/12 and introduced a new nutrient solution adding Power Buds to the mix. During the second week I was impressed to see preflowers clearly visible as early as day 10 of flowering. So, during the third week I made a substantial defoliation session to manage the plant's increasing bushiness, which I knew would be crucial for later-stage light penetration and humidity control. In the fourth week I introduced a PK 8/9 booster, Green Sensation, thereby increasing the phosphorus and potassium concentration in the solution, water consumption around 3 LT/day. Towards the end of the week, I performed another significant defoliation, including the removal of lower, light-starved branches, to which the plant responded well. During the fifth week the stretching phase concluded, with the plant reaching its final height of 69cm. Its focus shifted to bud development, and the foliage began to adopt a darker hue. At this point, my role was primarily to maintain stable environmental parameters and a correct pH in reservoir. During the sixth week buds were visibly swelling daily, the plant remained in excellent health, and resin production became more pronounced. For the seventh week I implemented a change in feeding, completely cutting the nitrogen from the DWC solution, using only Green Sensation at a higher concentration. In the eighth and final week of flowering (week 12 overall), I performed a complete DWC reservoir change. I filled it with plain tap water and maintained this for 4 days leading up to harvest. On day 56 of flowering (84 from seed), the Runtz plant appeared perfectly ready. The buds were dense and glistening, pistils mostly browned and retracted, and trichomes displayed a good mix of milky and some amber. Immediately after harvesting her, I removed the fan leaves, deciding to dry these as well due to their remarkable resin content. ✅ DRYING The entire plant was hung to dry inside the grow box, which was kept completely dark with constant, gentle air circulation for 8 days. The average VPD during this period was maintained around 1.2 (approximately 20°C and 50% RH). Once this drying period was complete, I trimmed off all the sugar leaves. These resinous sugar leaves will be combined with the already dried fan leaves and larf buds, and I plan to use them to make cannabutter for edibles. ⚖️ Dry weight After the 8-day drying period, and once all the remaining small leaves and branches were removed from the buds, I weighed the final product: The harvest yielded: - 150 grams of dense buds and 5 grams of finger hash. For edibles: - 30 grams of larf and a large amount of fan and sugar leaves. ✅ CURING For the curing process, the dried buds were placed in a large, airtight glass jar. This jar was stored in a dark location within a room maintaining a stable temperature of around 20°C for a total of 45 days. The burping schedule was as follows: Day 1-7: twice daily for 10 min. Day 8-10: once daily for 10 min. Day 11-14: every other day for 10 min. Day 15-21: every 3 days for 10 min. Day 22-30: every 4 days for 10 min. Day 31-45: No burping. 📑 SMOKE REVIEW - At 15 days cured a vegetal note is still quite present and the smoke is a bit harsh, typical for a short cure. The effects are already pleasant and potent, very promising. - After 30 days of curing, the Runtz has improved considerably. The vegetal smell has mostly faded, giving way to a much more defined sweet and fruity fragrance reminiscent of candy and berries. The smoke is noticeably smooth, euphoric effects are dominant. - At 45 days, Runtz has expressed its full potential and is now perfectly cured for daily enjoyment. The aroma is intense and complex, an explosive mix of sweet candy and tropical notes. The effects are potent, starting with an uplifting cerebral euphoria that evolves into a pleasant body relaxation, without leading to couch-lock. 🍕 I also made cannabutter which I used to finish a risotto. The result was insane – both the risotto itself and the potency of the cannabutter were exceptional!
Likes
22
Share
привет всем, все идет нормально !я не смог найти точно когда и сколько нужно runtz для цвета (((((( он вроде начинает цвести а уже 49 дней прошло (((( а в остальном я превысил рост каждого растения почти ,мне пришлось все поднимать и перестраивать ,высота Do si Dos достигает почти 180 см ,думаю на этом он остановится,или мне нужно будет вешать лампы на потолок 😂 и так glue gelato & wedding cake 140 cm gorilla glue 150 cm Dos si Dosi 170 cm runtz 105 cm
Likes
2
Share
@TTerpz
Follow
Buds starting to form!!!! Day 2 of week 8 4/3/25 UPDATE: Flushed with Fox farm sledgehammer ph’d at 6.8 Soils were low at 5.8 4/5/25 update: fed with nutes 4/7/25: watered with plain water ph’d at 6.5 4/8/25: did a slight heavy defoliation to get ready for week 9!
Likes
10
Share
@BodyByVio
Follow
This week I Supercrop all the plants and spred them out over both lights. One more week of Veg and they are ready to explode Check me out on Instagram @growmorestressless
Likes
27
Share
@Borberad
Follow
Die letzte Woche verlief weiterhin Problemlos der THC peak sollte erreicht sein und das Pflänzchen hat schön die Farben gewechselt bishin zu einem dunklen Violett. Die letzten Wochen haben sich definitiv gelohnt, was das Thema Go Fast bei 74 Tagen zu 12h Nacht jedoch etwas einschränkt. Wenn wir die 10 Tage Zeit welche das Blümchen zum Wechsel brauchte abziehen bleiben noch 63 Tage Blüte was für eine Fast Variante doch etwas lang ist. Ob es an der hohen Temperaturen oder dem Strain den wir erwischt haben gelegen hat können wir nicht beurteilen. Dennoch blieb der gesamte Anbau ein Vergnügen und das Blümchen war durchweg schön anzuschauen.
Likes
42
Share
Day 56: nutrients like plan Last feeding Pictures are taken on day 56 --------------------------------------------- Super frosty buds but still a bit fluffy.❄️ Happy growing 🦍🌱
Likes
25
Share
@BudHaks
Follow
She is getting fat! What a great plant she is - again, little to no deficiencies, other than some light burn but I could not complain to have such strong genetics for my first ever grow! Trichomes are not too cloudy, so still a while to go but what an AUTO!
Likes
112
Share
welcome back, brothers of the old weed! we apologize for the interruption of services, but we went for a swim in the sea to recover stronger than before!our sprouts seem to be very happy and are gaining weight very well! I hope you enjoy our content! a kiss to all, see you soon
Likes
4
Share
@pzwags420
Follow
On day 1 I changed out my reservoir. I lowered my nutes to 650 ppm(25% reduction). I adjusted the PH down to 6.1. My left plant has some burnt tips from either PH shift or over fertilization. My hope is that the lower ppm will help to resolve the issue before it spreads. On day 2 I adjusted the reservoirs PH from 6.3 to 5.9. On day 3 the reservoirs PH is 6.0. I installed my new 200 watt HLG Rspec. I adjusted PPFD readings to 700-1300 PPFD on all tops. On day 4 I adjusted the reservoirs PH from 5.8 to 6.2. On day 5 I adjusted the reservoirs PH from 6.4 to 6.0. I diluted my nutrients in my reservoir by removing one gallon of nutrients from the rez and and adding 2 gallons of straight tap water to the rez. This brought the nute concentration from 770 ppm to 540 ppm as the plants will be entering the ripening stage in a few days and they have too much nitrogen judging by the extremely dark green leaves and burnt leaf tips on some branches of the left side plant. The buds seem slightly smaller then my last run which may be due to an excess of nitrogen and maybe not enough light as some of my tops are taller then the others making proper PPFD challenging. All in all the girls are coming along nice and I look forward to the final weeks of flowering 😀 On day 6 I adjusted the reservoirs PH from 5.9 to 6.2. I think I have halted the nute burn as I haven't seen it progressing any more on the leaves. I will continue to monitor closely during these final weeks. The trichome production is increasing with some trichs on top of colas starting to go cloudy. The pistils are turning brown with roughly 40-50% are turning brown all signs I'm getting closer to the harvest window 😆. I dimmed my light to give 600-1000 PPFD to tops. On day 7 I reduced my temps to 75 during the day and 68 at night. I adjusted the PH of the reservoir from 6.6 to 6.1. My reservoirs ppm was too high so I diluted the rez with 2 gal of tap water. This brought it down to 480ppm. The average ppfd to all 14 tops is 604 with no top receiving more than 1000 ppfd
Likes
49
Share
@FoTwenny
Follow
Fo' Twenny here with another update on our Blue Dream lady bred by Humboldt Seed Organization! Any advice, suggestions, or constructive criticisms are always welcome. Now on to the details! 9/13 - Day 35: Premixed soil to prepare for upcoming transplanting. SOIL MIX DETAILS: Mixed into a 50 gallon container that will be kept in a warm environment to help innocculate to promote a vast and diverse microbial life in the rhizosphere. 2 Part - Royal Gold Tupur INGREDIENTS: Coco fiber, aged forest materials, perlite, and basalt 1 Part - Fox Farms Ocean Forest INGREDIENTS: Aged forest products, sphagnum peat moss, earthworm castings, bat guano, fish emulsion, and crab meal. 1 Part - Roots Organics INGREDIENTS: Perlite, Coco Fiber, Peat Moss, Composted Forest Material, Pumice, Worm Castings, Bat Guano, Soybean Meal, Alfalfa Meal, Fishbone Meal, Kelp Meal, and Greensand. Also contains beneficial mycorrhizal fungi: Funneliformis mosseae, Rhizophagus intraradices, Septoglomus desertícola .5 Part - Wiggle Worm Soil Builder Pure Earthworm Castings .5 Part - Ancient Forest Humus .5 Part - Coarse Grade Perlite Inocculated by mixing 1 cup of Extreme Gardening Mycos Watered with pH 6.5 h2O 1 Tsp/gal Real Grower's Recharge 1 tsp/gal Hi-Brix Molasses 2 tsp/gal Fox Farms Kangaroots 9/16 - Day 38: This cultivar is looking really good! She's one of the bushiest in the garden! She may end up being a challenge to keep in her own lane, especially in flower. I will probably end up havingbto do quite a bit of pruning with her. I did notice some white blotches on a few leaves as well as several other plants in the garden. I'm not sure if it's just water spots from my helper's carelessly watering causing water spots from the Nutrient solution or the start of a PM infection. Never really dealt with PM, but decided to spray them with some serenade. I also sprinkled with a little more White Dutch Clover seed on top soil. 9/17 - Day 39: I installed the new 320w GeekLight in the 24" x 48" veg tent. GOOD NEWS: I upgraded the 24"x48" tent to Samsung LM301H boards. I ordered a 320w straight single piece heatsink with 3 boards from Geeklight. I went with the 3k spectrum and switchable UV/IR since all my autoflowers bloom under this light. $306 USD after all is said and done. It took 9 calendar days to ship from China. https://app.alibaba.com/dynamiclink?touchId=1600101815945&type=product&schema=enalibaba%3A%2F%2Fdetail%3Fid%3D1600101815945%26ck%3Dshare_detail&ck=share_detail&shareScene=buyer NUTRITION: ⬇️Mixing Rundown⬇️ Foliar Feed & Nutrient Solution 2 gal tap h2O run through x2 KDF filters Start ppm 630 Start ph 7.8 2.5 ml/gal Gold Shield Silica Supplement .5 tsp/gal Fox Farm Gringo Rasta Cal-Mag I always adjust pH prior to adding any microbial innocclants. pH @ 8.1 .33 tsp/gal ph down pH: 6.5 PPM: 730 Serenade 3 tsp/gal Filled Spray bottle with 32 oz of the 2 gal mixed solution. Add 2 tsp/gal of Fox Farm Flower Kiss (.5 tsp 32oz) 6 tsp/gal Optic Foliar Transport PPM: 749 pH: 6.4 Added 1 tsp Recharge to the remainder of feed solution (to 1.75 gal) in the sprayer. ______________________________ 9/20 - Day 42 (Technically the last day of week 6): Feed! 🚿 She has 4 main tops and they're all pretty even in height. I defoliate earlier/heavier on taller tops to help the shorties to catch up. 👩‍🔬NUTRIENT SOLUTION👩‍🔬 ⬇️Mixing Rundown⬇️ 12 oz tap H2O run through x2 KDF filters Start pH: 7.9 Start PPM: 630 3 ml/gal - Blue Planet Gold Shield Silica Supplement .5 tsp/gal - Fox Farm Gringo Rasta Cal-Mag 3 tsp/gal - Fox Farm Big Bloom 1.5 tsp/gal - Fox Farm Grow BIG .5 tsp/gal - Fox Farm Boomerang .25 tsp/gal - Fox Farm Wholly Mackerel .25 tsp/gal - Fox Farm Kelp Me Kelp You .125 tsp/gal - Fox Farm Open Sesame pH: 6.3 PPM: 1350 I always make sure pH is in the range of 6.0- 6.6 prior to adding any microbial innocclants. pH already in range, no adjustments needed. 1 tsp/gal - Grower's Choice Recharge .6 ml/gal - Mammoth P. .5 tsp/gal - Kangaroots pH 6.4 PPM: 1420 ________________________ Thank you for stopping by my garden! This girl is just one of 16 strains in my photoperiod SOG with 2 additional wildcards in the mix. Want to see all the strains I have running? Please check out my other diaries & give me a follow! Happy growing my friends! ☺️🌱 Peace, ☮️✌️ Love, 💚🤟 & Frosty Nugs! ❄️🌲 - Fo' Twenny
Likes
Comments
Share
Having cal mag issues going to hit the grow store tomorrow am and see can I get some organic cal mag and see if that helps other than that no real issues 2/24 I’m going sit my dumb ass down and chill I did a defoliation and man I over did it I think it’s pretty aggressive and i don’t know what I was thinking I was just clipping away 🤦🏾‍♂️…… anyway got some calmag for the color issues only going 1/2 tsp see how that goes hopefully when the new growth and more stretch happens it’ll look a lot better I’m also bottom feeding the calmag hope that works too
Processing
Likes
7
Share
@Ruuddata
Follow
#Crop King Seeds Planting 3 Seeds Using 2 Different Techniques to germinate the Seeds - The First 2 Seeds were germinated (Jul 2nd) using the water / paper towel technique * The seeds were dropped in a half glass of bottled water (It stayed afloat) and kept in a closed dark area. * After 12 Hours the 2 seeds were pushed down to reach the bottom of the glass using my finger. * After 24 hours the 2 seeds were transferred / Now using the paper towel method to complete the germination - The last seed was germinated (Jul 3) using just the paper towel method * This method took longer to break the seed surface. On Jul 6 Decided to transfer all 3 seedlings into the Aerogarden. * Seed G1 had about 5cm roots. Some flowers already sprouting * Seed G2 had about 3 cm roots. Still had seed top. * Seed G3 had only just cracked . No length