


Likes
Comments
Share


@BastiFarm
Follow
Sexta semana de vegetación, y esto sigue avanzando.
Haré cambios, al principio dije que no haría podas, pero igual hice poda apical a las 2 Kukulkán, ya que estoy haciendo esquejes y no puedo pasar aún a flora, y así controlo la altura de la 2 mas grandes
Hice transplantes de maceta a las 2 Kukulkán a una de 20L, el sustrato con mezcle con mycojordan de @elite91_latam
Ph:6,5
Ec:1,4
Temperatura:24 grados
Humedad relativa 55%

Likes
8
Share


@Cannabis_Sativa
Follow
the Germination process was very easy and had no problems to sprout in paper towel. After she first touched water it needed 5 day to get root and open shell with her tiny white baby leaf and next I put it in to the pot in coco coir it was already watered and i just put the cup on top next day she was fully green and strong stem with little hairs <3


Likes
30
Share


@Sonic_Y
Follow
Day 29:
Pre-flowering did start. Changing now to Hesi Nutrients. Watered them with 1,25 l. Since they are not dried completely out. Wanted to boost them into flower now!
Letting them dry out now to the half of total weight. I'm a bit nervous about the nutrients cocktail though. :)
Day 32:
music for plants:
"Jules Reidy - Trances"
"Cousin - HomeSoon"
"Yara Asmar - synth waltzes and accordion laments"

Likes
19
Share


@Papa_T
Follow
This was my very first international trip outside of North America. This was in March 2023.
I’m off to Tenerife. Here are just a bunch of photos from that trip. I had a great time.


Likes
8
Share


@CannabisCultivate
Follow
These little ladies have been moved to their fabric pots and so far seem to be doing well. We had an issue with damping off and unfortunately lost some others. We look forward to a nice easy grow before the outdoor fun begins, hopefully it grows without a hitch!

Likes
1
Share


@Marihuano
Follow
this week we did the topping following the guidelines of our more experienced friends.

Likes
1
Share
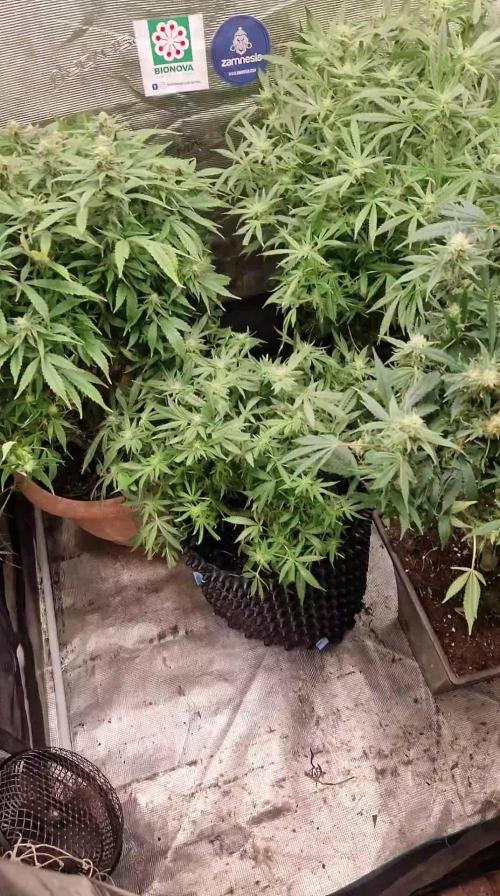

@Olduffybastard88
Follow
Finshed strexhing a few days ago some plants nore ahead than others and looking to finsh on some of the plants I flipped a little bit ealier


Likes
55
Share


@w33dhawk
Follow
19.07.21 Anfang der 4 blüte Woche alles läuft soweit OK hab die Lampe heut wieder 3cm höher gehängt da einige Blatt spitzen anfangen zu verblassen denke mal das das Licht zu intensiv war, hoffe natürlich das ich die Ladys nicht über düngt habe. Hab auch die bloom dosis um 1ml/L herabgesetzt also jetzt nur noch 3ml/L anstatt maximaldosis 4ml/L. Blätter von den gegenüberliegenden buds fern halten war heut auch wieder angesagt und unterm netz halten sowieso......
20.04.21 wie gedacht hatte meine Pflanze Licht stress glaub ich zumindest die oberen Blätter sind heller geworden aber jetzt fängt sie auch noch an ihre Zähne am Rand der Blätter hoch zu Rollen glaube das ist überdüngung Hab es mal wieder übertrieben......
21.04.21 danke erstmal an alle die mir so schnell auf mein Hilfe gesuch geantwortet haben. Ich hab mir diesbezüglich meine Gedanken gemacht und mich entschlossen das ich den Dünger wieder runter schraube da ich ja auf gut abgestimmter Erde und nicht auf coco züchte sollte ich wohl eher weniger benutzen dessen bin ich mir jetzt bewusst geworden (hätte ich auch selbst drauf kommen können ich dussel). Die Lampe lasse ich jetzt auf 30cm Abstand da ich nicht das Gefühl habe das nach 2 Tagen 30cm das verblassen weiter fort schreitet (wird aber weiter beobachtet). Morgen ist giessen dran werde dann nur Wasser mit green sensation geben und beim nächsten giessen dann wieder mit minimal Düngung weiter machen um die Pflanzen nicht zu sehr zu stressen....
22.04.21 hab heute gegossen und auf dünger verzichtet soweit bis auf Green sensation 1ml/L und hab nochmal drüber nachgedacht wann das Problem mit den hoch rollenden Zähnen der Blätter anfing das war nach dem letzten giessen 2tage später nach dem ich wieder sugar royal gegeben hatte hätte den wohl lieber wieder weiter unten anordnen sollen von der menge her naja ich lerne dazu Fehler müssen sein sonnst hätte ich ja nix zum lernen is ja auch langweilig......
23.04.21 glaube die Ladys mästen sich jetzt da wo gestern noch minimale Lücken an den buds waren sind jetzt keine mehr das Wachstum is eingestellt seid 4 Tagen kam nix mehr an Höhe dazu. Ab jetzt kann sie Dann auch Figur an nehmen und ordentlich Gewicht zu legen hoffe es geht weiterhin so gut voran bis jetzt bin ich mega glücklich das es so gut klappt Ach ja und das Blätter runter schieben unters netz hab ich jetzt ein gestellt es wird einfach zu klebrig da zwischen den buds und ich will die trichom Köpfe nicht permanent berühren, nicht das ich noch irgendeine krankheit mit an schleppe oder andere Keime bzw. Beschädigungen anrichte an den Köpfen (ich desinfizieren meine Hände immer gründlich bevor ich an den Pflanzen hand anlege meistens doppelt und dreifach, hab aber trotzdem schiss man Weiss ja nie was so an Bakterien und keimen überlebt).....
24.04.21 hab heute nix ich wiederhole NIX gemacht an den Pflanzen war einfach zu faul war sogar zu faul zwischen durch mal zu schauen was die Temps und die Feuchtigkeit so machen deshalb kann ich heute nicht viel erzählen.......
25.04.21 diese woche lief auch wieder garnicht mal so schlecht ich bin echt erstaunt darüber das die Pflanzen so gut voran schreiten drückt mir die Daumen das das so bleibt.......

Likes
14
Share


@GrowsHimself
Follow
Fed compost tea with added Bio Pk on Wednesday, plain water all following feedings.
Not really having to do much with her at the moment, occasionally defoliate to let some light and air in at blocked sites. She is swelling nicely.
She seems to be growing well without any issues.
Likes
44
Share


@Aedaone
Follow
As soon as I got these seeds I dropped them in a bowl of water @10am on April 30th. Planted directly into soil 7pm at sundown on the 30th. I wet the soil before planting. We had good temperature for germination week. The evenings were still lower 60's but the days warmed up above 70 °F. May 1st it was cloudy but 80° F. We had good sunshine on the 2nd. We received a heavy rain in the afternoon and intermittently that night into the morning of the 3rd. Our temps cooled off with the rain and we didn't get above 72° F on the 3rd. Two popped on the 3rd and the last one on the 4th. It was a little wetter than I prefer, but our soil drained well and fastbuds genetics can handle the less than perfect condition. The above listed nutrients were premixed into the soil at the listed rates per gallon of soil.
Likes
11
Share


@NoTraceJamaica
Follow
These Photos/Videos Document 9 weeks 1 day, busy times for me so didn't get to upload as much, what led me here : i feed nutrients every watering (still)😊, defoliation on day 39-41 , removed most lower branches that weren't exposed to direct light (could have done more)😔 on day 53, lower bud sites were also removed (should have done more)😆


Likes
14
Share


@gottagrowsometime
Follow
Really great gentics. Love the smell coming from this girl as she grew. And my god it didn't disappoint. The strenght of the stone is out of this world. I can't remember it 100% as it was months ago. Id say i wouldn't remember regardless as I do recall a lot of head dropping and drooling mashed out of it.
Very strong thc, excellent taste, good yields. Ease of growing. No real issues debilitating
issues even though grown in a very high stress environment.
10☆ all round. Can't wait to try more from this breeder. I'll be updating my other diary that was ran with this Jealousy Dankness and adding weekly updates on the ones I'm doing now in the coming days.
Got over 85 grams from this if I recall. Not as much as the others, id say she was in the top 5 for yield.

Likes
44
Share


@Cogollo_eu
Follow
**Encontrarás la traducción a español al final de la descripción**
From/Desde: 05/04/19 || To/Hasta: 11/04/19
From day/Desde día: 43 || To day/Hasta día: 49
You can find the Money Maker Diary here:
** Podéis encontrar el diario de las Money Maker aquí:**
https://growdiaries.com/diaries/25667-gorillamakingmoney-gorilla-vs-money-m
-----IMAGES & VIDEOS-----
Video 1:
Complete week 7 in 2 minutes (Original frame rate modified), i used something composed by me playing with Logic Audio, please don't blame me 👉😳👊
Video 2:
Complete growing stage plus some flowering days in 2 minutes
Photo 3:
Additives used at day 5, all but Iguana
Video 13:
Overview video of the Gorillas and the Moneys
Photo 14:
Nutrients & additives used on day 9, again all but Iguana
-----WEEK SUMMARY-----
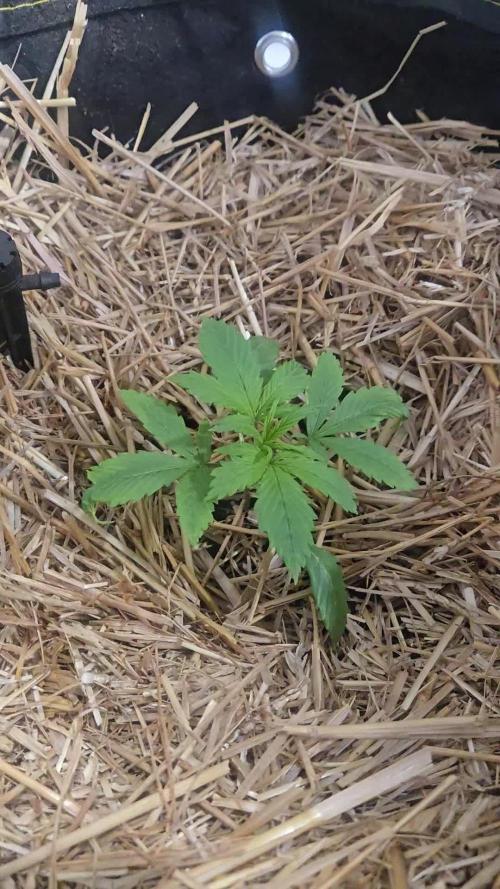
Finally I decided to Switch to 12/12 the first day of this week, and at the end of the week i will leave the SCROG mall fixed. As you can see it's not a tru SCROG as the man-lining plant is taller than the others and there's also height differences among it's colas. In the other hand i'm very happy on how the plants are distributing themselves after i removed the training structures. I removed those structures to prevent more stress to the plants, as they have recieved a hard training and i want to give them a breath and also grow as they like.
You can see how many vegetation they have, it almost cover the 85-90% of the tent, in the middle of flowering week 3 i will perform a massive defoliation.
This week i can see how the Gorilla with the main-lining is developing more defined and taller colas than the other plants, let's see how they evolve in some weeks.
Also this week i will apply the last foliar irrigation, just to help them a bit.
-----WATERING CALENDAR-----
05/04/19 - 1.250 ml with all week nutrients -(Foliars, Bloom Stimulator & Bloom Nutrition) @ 1.1 E.C. PH6.4
- Foliar application of 250 ml of water with (Foliar Nutrition & Plant Vitality+) among the 4 plants
09/04/19 - 1.250 ml with (Sensizym, Bloom Stimulator, Bloom Nutrition & bud Ignitor) @ 1.4 E.C PH6.4
*****ESPAÑOL*****
-----IMÁGENES Y VÍDEOS-----
Vídeo 1:
Semana 7 completa en 2 minutos (Frame rate original modificado), he usado algo que he compuesto jugando con el logic audio, disculpadme por esto 👉😳👊
Vídeo 2:
Fase de crecimiento completa y algunos días de floración en 2 minutos
Foto 3:
Aditivos usados el día 5 excepto Iguana
Vídeo 13:
Vídeo general de las Gorilas y las Moneys
Foto 14:
Nutrientes y Aditivos usados el día 9, de nuevo todos menos Iguana
-----SUMARIO SEMANAL-----
Finalmente he decidido cambiar a 12/12 el primer día de esta semana y al final de la semana dejaré fina la red de SCROG, como veréis no es realmente un SCROG pues la planta con Man-Lining tiene colas más largas que las demás y todas son un poco desiguales entre si. Por otro lado estoy muy contento en como se están distribuyendo las plantas después de haberles quitado las estructuras de entrenamiento, las he quitado para quitarlas stress ya que han tenido un entrenamiento duro y quiero dejarlas respirar e ir por si solas a partir de aquí.
También podéis observar como tienen mucha vegetación que casi cubre el 85-90% de la superficie del armario, a mitad de semana 3 de floración les haré una defoliación masiva dejándolas peladas.
Esta semana ya puedo observar cómo la Gorilla con man-lining está creando colas más definidas y largas que el resto de las plantas, veremos a ver en unas semanas como evolucionan.
Por último esta semana también aplicaré el último riego foliar para ayudarlas un poco con el cambio de estado y el stress recibido.
-----CALENDARIO DE RIEGO-----
05/04/19 - 1.250 ml con todos los nutrientes semanales excepto -(Foliars, Bloom Stimulator & Bloom Nutrition) @ 1.1 E.C. PH6.4
- Aplicación foliar de 250 ml de agua con (Foliar Nutrition & Plant Vitality+) para las 4 plantas
09/04/19 - 1.250 ml con (Sensizym, Bloom Stimulator, Bloom Nutrition & bud Ignitor) @ 1.4 E.C PH6.4



Likes
6
Share

@DogDoctorOfficial
Follow
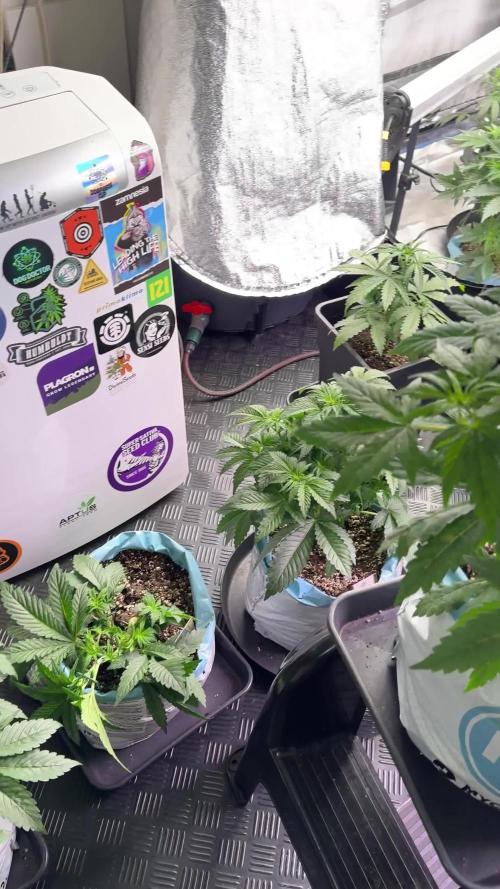
🌱 GMO Cookies — Week 5 (12/12 From Seed)
Late Veg / Pre-Flower Transition
General Vibe
The girls are feeling amazing this week — calmly exploding, super elegant, and bushing up beautifully. Structure is compact yet full, with a very balanced expression across the canopy. No rush, no stress — just plants doing plant things.
Training & Structure
We’re continuing with very gentle LST — mostly bending and positioning leaves rather than aggressive branch work. The goal is simple:
• Open light pathways
• Encourage lateral growth
• Let the plants decide their final shape
They’re responding incredibly well: tight internodes, bushy profiles, and strong posture. You can clearly see the progression in the photos from the beginning to the end of the week.
Growth Stage Observation
By the end of this week, we’re starting to see early pre-flower signs. Nothing dramatic yet, but the transition is clearly beginning.
➡️ Next week’s update should start showing more defined flower development.
⸻
💧 Nutrition & Water Strategy
This week we introduced CalMag Pro — not because the plants are asking for it, but as a proactive step heading into flower.
Why now?
• We’re using collected rainwater + dehumidifier water, which is extremely soft
• Before stacking base nutrients and supplements, we need to build a proper mineral foundation
• This ensures stability and availability later, especially during stretch and early flower demand
This is preparation, not correction.
Autopot Zone
We’re running two feeding zones in the tent (6 plants total), which is why you’ll see different measurements in the diary photos:
• Autopot zone: mineral-based recipe only
• EC: 2.29
• pH: 6.0
• (Organics don’t play well with Autopots — keeping it clean and stable)
• Solution temperature: ~22–23°C across both zones
• Slightly warmer on purpose to support root activity during colder weather
⸻
🌡️ Environment
• Humidity: ~58%
• Temperature: ~21°C
Outside conditions have been tough this week (4–5°C with 90–98% humidity), so honestly, we’re happy with how stable the room is holding. More importantly, the plants are reacting calmly and positively, which always matters more than chasing textbook numbers.
CO₂ remains unchanged at ~666 ppm — steady and sufficient for this stage. We’ll reassess during flower.
⸻
💡 Lighting & PPFD
• Top light: 100%
• PPFD: ~700–850 (depending on plant size)
The girls are praying to the light — no pushing, no forcing. We let them grow how they want to grow.
Under-Canopy Lighting (LumiFlora)
By the end of this week, we’re turning on the under-canopy lighting for the first time.
Why now?
• Plants have grown past the fixtures
• It’s time for them to start recognizing photons from all directions
• This prepares lower growth for the coming stretch and flower set
We’re starting very gently at ~30% power, then increasing slowly based on plant response. No shock, no rush — just layered light introduced with intention.
Huge thanks to LumiFlora for supporting this phase with under-canopy lighting.
⸻
🔁 Quick Recap (For Newcomers)
• 12/12 from seed
• Gentle, observation-first approach
• No aggressive training or forcing
• Focus on structure, balance, and plant response
• Slow, intentional buildup heading into flower
You can jump in right here and be fully up to speed.
⸻
What to Expect Next Week
Expect:
• Clearer pre-flowers
• Stretch beginning to express
• Training adjustments as structure reveals itself
Don’t expect:
• Heavy defoliation
• Sudden pushes or drastic changes
• Forcing the plants into anything they’re not ready for
We observe, adapt, and respond — always.
⸻
🙏 Thanks
Massive thanks to everyone following along, sharing energy, and supporting the diary — and welcome to everyone new joining the journey.
As always:
Growers helping growers.
Trust the plant.
Trust the process.
Much love 🌱
👽 New team member
Meet Mr. Baggy
Our new fluffy alien/beaver/whatever-he-is friend, won through a Grow Diaries contest.
Expect to see him around — he’s officially part of the grow now.
Week 5 Veg/pre-flower | 8×8 Tent | Master Conditions
🌍 External Environment (Context) • Outside temperature: ~5 °C
• Outside RH: 92–96% (very high humidity)
• Strong seasonal pressure influencing internal stability
⸻
🌡️ Internal Tent Conditions
• Tent temperature: ~21.8 °C
(noted drop due to cold external temps)
• Tent RH: ~58%
→ Very good considering outside conditions
⸻
💨 Airflow & Circulation
• Primary airflow: Bottom → top → wall return
• Pattern: Full-room vortex circulation
• Additional fans: Central airflow to break blind spots and mix layers
• Goal: No stagnant pockets, uniform VPD across canopy
⸻
💧 Water Source & Rationale
• Water: Dehumidifier water + rainwater
• Base EC: force
• Systems designed to support plant intelligence, not override it
FOR DISCOUNT CODES AND MORE JUST FOLLOW THE LINK https://website.beacons.ai/dogdoctorofficial
📲 Don’t forget to Subscribe and follow me on Instagram and YouTube @DogDoctorOfficial for exclusive content, real-time updates, and behind-the-scenes magic. We’ve got so much more coming, including transplanting and all the amazing techniques that go along with it. You won’t want to miss it.GrowDiaries Journal: https://growdiaries.com/grower/dogdoctorofficial
Instagram: https://www.instagram.com/dogdoctorofficial/
YouTube: https://www.youtube.com/@dogdoctorofficial
⸻
Explore the Gear that Powers My Grow
If you’re curious about the tech I’m using, check out these links:
🔆 Lighting & Environmental Control
• Future of Grow — Advanced LED lighting technology
https://www.futureofgrow.com/
DISCOUNT CODE: DOG20
• Lumiflora — Under-canopy LED lighting
https://lumiflorade.com/
• TrollMaster — Environmental controllers and automation gear (past collaboration)
⸻
Genetics
• Zamnesia Seeds — Genetics used in this project
https://www.zamnesia.com/
⸻
🌱 Soil, Substrates, Boosters & Root Support
• Plagron — Substrates, bio mixes, and supportive products
https://plagron.com/en/
⸻
🎒 Storage, Curing & Preservation
• Grove Bags — Curing and storage solutions
https://grovebags.com/
⸻
📸 Photography Equipment & Tools
(Not sponsors, but part of my creative toolkit)
• Sony A6700
• Sony full-frame macro lens + few more
• Stacking photography workflow - learning
• iPhone (for behind-the-scenes shots)
We’ve got much more coming as we move through the grow cycles. Trust me, you won’t want to miss the next steps, let’s push the boundaries of indoor horticulture together!
As always, this is shared for educational purposes, aiming to spread understanding and appreciation for this plant. Let’s celebrate it responsibly and continue to learn and grow together.
With true love comes happiness. Always believe in yourself, and always do things expecting nothing and with an open heart. Be a giver, and the universe will give back in ways you could never imagine.
💚 Growers love to all 💚
📸 P.S. – The Eye Behind the Lens
All photos in this diary (for now — except for the ones showing the camera, which I took with an iPhone) are taken with a Sony A6700 paired with a Sony full-frame macro lens and a few more.
Photography is part of the story — it’s how we share the fine textures, the glow, and the quiet details that words can’t always capture.
I’ve also started experimenting with photo stacking — a technique where multiple images, each taken at a slightly different focus point, are layered together to create one perfectly sharp image from front to back.
It’s not digital enhancement or AI; it’s pure photography — a way to reveal the plant’s beauty in microscopic depth, from trichome to petal.
You’ll even see a few shots of "ghost me" capturing the shots — camera, lens, setup — because every grow deserves not just to be cultivated, but documented like art.
FOR DISCOUNT CODES AND MORE JUST FOLLOW THE LINK https://website.beacons.ai/dogdoctorofficial
NEW DISCORD - Official Server Invite Link : https://discord.gg/ksjAkA5T74

Likes
22
Share

@MARCTAKAHASHI
Follow
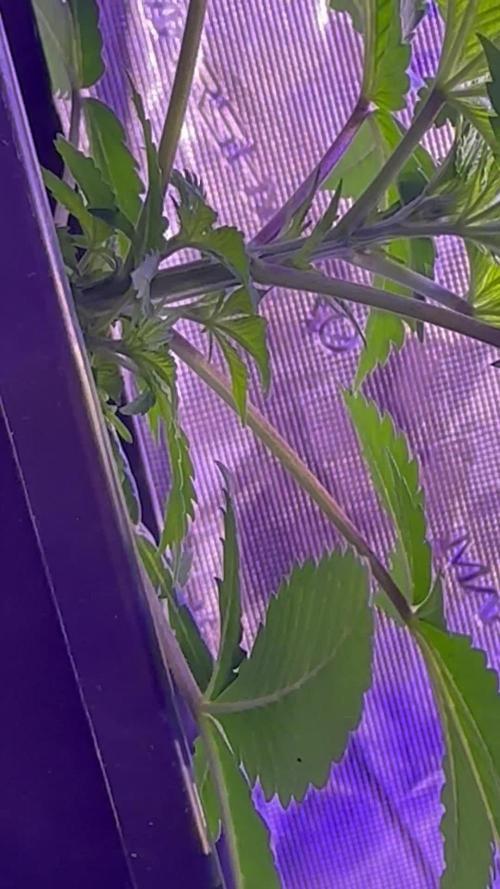
Semana 2 de crecimiento vegetativo completada.
La primera foto de esta actualización corresponde al día 15 de crecimiento vegetativo y día 21 desde la emergencia.
La Super Boof sigue mostrando un crecimiento fuerte y compacto, con tallo principal grueso, internudos cortos y buen desarrollo de las ramas laterales. Durante esta semana se adaptó muy bien a la maceta de 7 L y llegó a formar el sexto nudo.
La iluminación se aumentó progresivamente hasta aproximadamente 290–350 PPFD con la Mars Hydro FC-3000 y la Adlite Blue, manteniendo un fotoperiodo de 18/6. La planta respondió bien, sin signos visibles de exceso de luz, carencias ni sobrefertilización.
En el riego se utilizó ATA Rootfast a 0,5 ml/L y ATA Terra Leaves a 0,5 ml/L, ajustando la solución final a pH 6,5.
Al final de la semana se realizó el trasplante a la maceta final de 50 L. El cepellón estaba muy bien colonizado, con abundantes raíces blancas y sanas. Durante el trasplante se aplicó Micro Vita de Top Crop alrededor del hueco del cepellón para favorecer la colonización del nuevo sustrato.
Después del trasplante se realizó un riego de asentamiento de aproximadamente 7 litros, repartiendo cerca de 1 litro alrededor del cepellón y el resto por el sustrato exterior. El siguiente objetivo será dejar que la planta se recupere y vuelva a crecer con fuerza antes de realizar la primera poda de formación.


