


Likes
Comments
Share


@Gutismoke
Follow
Yea yea yea it’s showtime. She hasn’t given me any problems so far hopefully she stays that way been pretty easy grow with her so far

Likes
50
Share


@Kitties_and_Colas
Follow
~_~_~_~_~_~_~_~_~_~_~_~_~_~_~_~_~_~_~_~_~_~_~_~_~_~_~_~_~_~_~_~_~_~_~_~_~_~_~_~_~_~_~_~_~_~_~_~_~_~_~_~_~_~_~_~_~_~_~_~_~_~_~_~_~_~_~_~_~_~_~_~_~_~_~_~_~_~_~_~_~_~_~_
5/30/22
🤘🐱 Some explosive growth this week! Everyone is now getting (super) mild nutrients with every watering, color looks uniform and the tops are of equal length ...first sign of bud sites are appeared this week, I hope we get a little more stretch out of her before she goes hard into flower ...I think she's a pretty good size for her age but a long way away from utilizing the 5gal pot she's sitting in...I think the heat might getting to her a little bit, it doesn't seem to be affecting growth (yet )but a few of the leaves are slightly curved as if they want to "taco" but aren't quite there yet..its been a crazy week shuffling 50+ solo cups between 3 tents but we were able to unload most of them and reclaim some of our space, all 3 420FastBud autos are in their final location, all will finish flower under a single 315watt CMH on an 18hr cycle...not too much else to report, thanks as always for dropping by and happy harvests everyone!!
❤️💡🌱😽💨
~_~_~_~_~_~_~_~_~_~_~_~_~_~_~_~_~_~_~_~_~_~_~_~_~_~_~_~_~_~_~_~_~_~_~_~_~_~_~_~_~_~_~_~_~_~_~_~_~_~_~_~_~_~_~_~_~_~_~_~_~_~_~_~_~_~_~_~_~_~_~_~_~_~_~_~_~_~_~_~_~_~_~_


Likes
51
Share


@eldruida_lamota
Follow
De nuevo familia, os actualizo la siguiente semana de estas maravillas, cookies gelato.
Hubo problemas ambientales, los cuales al romper el ciclo salieron plátanos , pero los pillamos a tiempo rociamos y eliminamos todos los posibles plátanos.
Veremos cómo avanza pero no se abandonará ningún trabajo, hasta el final.
.
La humedad esta al 45% la temperatura está entre 21/25 grados , y como siempre el ph , ya que es de lo más importante,está en 5,8/6,0.
.
AgroBeta:
1 ml x L Flowering black line , vía radicular.
0,2 ml x L Beta shark, vía radicular.
0,3 ml x L Tucán , vía radicular.
0,1 ml x L Betazyme, vía radicular.
0,05 ml x L Gold Joker, vía radicular.
0,2 ml x L Silver, vía radicular.
.
Hasta aquí todo familia 🕸️ , un saludo y buenos humos fumetillas💨💨💨.


Likes
4
Share


Likes
18
Share


@JO_GROW
Follow
Another nice, trouble free week.
She has responded well to the ramp up in nutes and is looking good now she's been defoliated (again!). Seriously girl would turn into a hedge if left to her own devices.
Having to really keep an eye on the humidity and empty the dehumidifier twice a day but it's doing it's job so...... can't complain!
Have a merry Christmas all!

Likes
23
Share

@LetUsGrowTogether
Follow
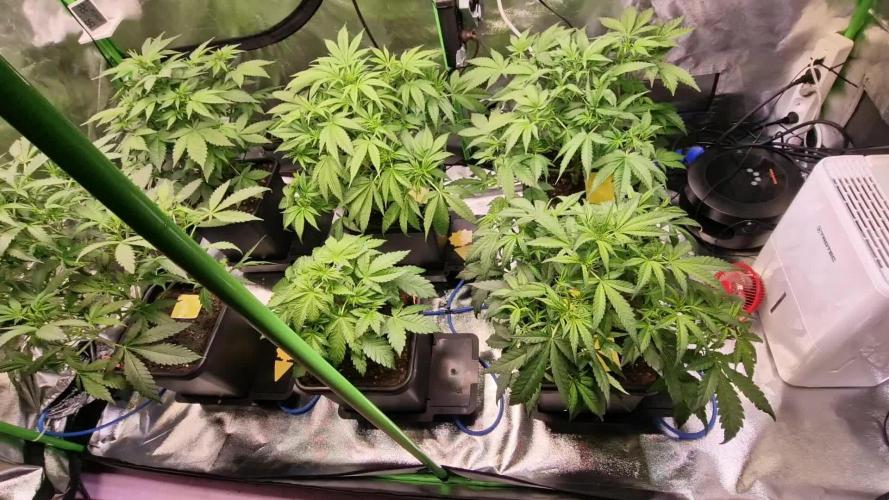
Hallo Growfreunde, da bin ich wieder mit einem kleinen Update 🤗😁.
Heute ist Tag 5 nach der Umstellung auf 12/12. Der stretch sollte sich bald bemerkbar machen, aber sollte keine Probleme geben, Platz ist da😎💪. Ich habe diese Woche den Tank das erste Mal nachgefüllt, allerdings diesmal mit nur 20L, damit das Wasser nicht so lange steht. Es hatte sich ein kleines CalMag problem angedeutet, was sich aber schonwieder eingependelt hat. Entlaubt habe ich auch. Große Fächerblätter wurden entfernt, aber sehen tut man dass nach 2 Tagen schon nicht mehr😅😅. Ende Woche 2 werde ich nochmal lollipoppen und entlauben, danach wird nix mehr gemacht. Mal sehen ob der Dünger bis zum Ende reicht😅.
Hab heute, 13.10 nochmal die Positionen der Töpfe verändert und die Pflanzen auch anders angeordnet. Nutze jetzt fast die vollen 2m breite😁😁 mal sehen ob ich das ganze Zelt voll kriege🤣🤣😂😂. Was schätzt ihr so was an ertrag raus kommt?! Bin echt gespannt🤗🤗🤗🤗🤪. In 2-3 Tagen mach ich nochmal ein Update, bis dahin liebe Growfreunde 💞💞💞

Likes
2
Share


@CannaIGrow
Follow
Transplant week! Some of the girls in the tent started to droop but this one didn’t! She’s looking pretty good to me
Come hang out with us in the discord!
Likes
55
Share


@Ultraviolet
Follow
2nd net is up. Early bud formations are promising. holding up to the extremes pretty well, some leaves taking minor damage, but overall, she is holding up, gave her 1 night at 50F see how she would react, stressful. Not advised as it messes with her metabolism, but I want to see if it triggers any anthocyanin response. Love to see her purp up but no signs yet. Remember, For every molecule of glucose produced during photosynthesis, a plant needs to split six molecules of water. This process provides the hydrogen needed for synthesizing glucose and other organic compounds, while oxygen is released as a byproduct.
Homework.
If Rubisco activity is impaired and it cannot properly function or regenerate its substrate, the plant's leaves are likely to turn a pale green or lime green, a condition known as chlorosis. Essentially, Rubisco activity is highly regulated and susceptible to various environmental and metabolic factors that can cause it to become inhibited, leading to an apparent failure in RuBP regeneration due to a lack of consumption.
Rubisco regeneration is intrinsically linked to nitrogen supply because Rubisco is a major sink for nitrogen in plants, typically accounting for 15% to over 25% of total leaf nitrogen. The regeneration phase itself consumes nitrogen through the synthesis of the Rubisco enzyme and associated proteins (like Rubisco activase), and overall nitrogen status heavily influences the efficiency of RuBP regeneration. RuBisCO is a very large enzyme that constitutes a significant proportion (up to 50%) of leaf soluble protein and requires large investments in nitrogen. Insufficient nitrogen supply limits the plant's ability to produce adequate amounts of RuBisCO, thereby limiting the overall capacity for photosynthesis and carbon fixation. Maintaining the optimal, slightly alkaline pH is crucial for the proper function and regeneration of Rubisco. Deviations in either direction (too high or too low) disrupt the enzyme's structure, activation state, and interaction with its substrates, leading to decreased activity and impaired RuBP regeneration. (Lime/yellowing)
Structural Component: Nitrogen is an essential building block for all proteins, and the sheer abundance of the Rubisco protein makes it the single largest storage of nitrogen in the leaf.
Synthesis and Activity: Adequate nitrogen supply is crucial for the synthesis and maintenance of sufficient Rubisco enzyme and Rubisco activase (Rca), the regulatory protein responsible for maintaining Rubisco's active state. Nitrogen deficiency leads to a decrease in the content and activity of both Rubisco and Rca, which in turn limits the maximum carboxylation rate, Vmax, and the rate of RuBP regeneration Jmax, thus reducing overall photosynthetic capacity.
Nitrogen Storage and Remobilization: Rubisco can act as a temporary nitrogen storage protein, which is degraded to remobilize nitrogen to other growing parts of the plant, especially under conditions of nitrogen deficiency or senescence.
Nitrogen Use Efficiency (NUE): The allocation of nitrogen to Rubisco is a key determinant of a plant's photosynthetic nitrogen use efficiency (PNUE). In high-nitrogen conditions, plants may accumulate a surplus of Rubisco, which may not be fully activated, leading to a lower PNUE. Optimizing the amount and activity of Rubisco relative to nitrogen availability is a target for improving crop NUE.
Photorespiration and Nitrogen Metabolism: Nitrogen metabolism is also linked to the photorespiration pathway (which competes with carboxylation at the Rubisco active site), particularly in the reassimilation of ammonia released during the process.
To increase RuBisCO regeneration, which refers to the process of forming the CO2 acceptor molecule Ribulose-1,5-bisphosphate (RuBP) during photosynthesis, the primary methods involve optimizing the levels and activity of Rubisco activase (Rca) and enhancing the performance of other Calvin-Benson-Bassham (CBB) cycle enzymes.
Biochemical and Environmental Approaches:
Optimize Rubisco Activase (Rca) activity: Rca is a crucial chaperone protein that removes inhibitory sugar phosphates, such as CA1P (2-carboxy-D-arabinitol 1-phosphate), from the Rubisco active site, thus maintaining its catalytic competence.
•Ensure optimal light conditions: Rca is light-activated via the chloroplast's redox status. Adequate light intensity ensures Rca can effectively maintain Rubisco in its active, carbamylated state.
•Maintain optimal temperature: Rca is highly temperature-sensitive and can become unstable at moderately high temperatures (e.g., above 35°C/95F° in many C3 plants), which decreases its ability to activate Rubisco. Maintaining temperatures within the optimal range for a specific plant species is important.
•Optimize Mg2+ concentration: Mg2+ is a key cofactor for both Rubisco carbamylation and Rca activity. In the light, Mg2+ concentration in the chloroplast stroma increases, promoting activation.
•Manage ATP/ADP ratio: Rca activity depends on ATP hydrolysis and is inhibited by ADP. Conditions that maintain a high ATP/ADP ratio in the chloroplast stroma favor Rca activity.
Enhance Calvin-Benson-Bassham (CBB) cycle enzyme activity: The overall rate of RuBP regeneration can be limited by other enzymes in the cycle.
•Increase SBPase activity: Sedoheptulose-1,7-bisphosphatase (SBPase) is a key regulatory enzyme in the regeneration pathway, and increasing its activity can enhance RuBP regeneration and overall photosynthesis.
•Optimize other enzymes: Overexpression of other CBB cycle enzymes such as fructose-1,6-bisphosphate aldolase (FBA) and triose phosphate isomerase (TPI) can also help to balance the metabolic flux and improve RuBP regeneration capacity.
Magnesium ions, Mg2+, are specifically required for Rubisco activation because the cation plays a critical structural and chemical role in forming the active site: A specific lysine residue in the active site must be carbamylated by a CO2 molecule to activate the enzyme. The resulting negatively charged carbamyl group then facilitates the binding of the positively charged Mg2+ion. While other divalent metal ions like Mn2+ can bind to Rubisco, they alter the enzyme's substrate specificity and lead to dramatically lower activity or a higher rate of the non-productive oxygenation reaction compared to Mg2+, making them biologically unfavorable in the context of efficient carbon fixation. The concentration of Mg2+ in the chloroplast stroma naturally increases in the light due to ion potential balancing during ATP synthesis, providing a physiological mechanism to ensure the enzyme is activated when photosynthesis is possible. At the center of the porphyrin ring, nestled within its nitrogen atoms, is a Magnesium ion (Mg2+). This magnesium ion is crucial for the function of chlorophyll, and without it, the pigment cannot effectively capture and transfer light energy.
Mg acts as a cofactor: Mg2+ binds to Rubisco after an activator CO2 molecule, forming a catalytically competent complex (Enzyme-CO2-Mg2+). High light + CO2) increases demand: Under high light (60 DLI is a very high intensity, potentially saturating) and high CO2, the plant's capacity for photosynthesis is high, and thus the demand for activated Rubisco and the necessary Mg2+ cofactor increases. Mg deficiency becomes limiting: If Mg2+ is deficient under these conditions, the higher levels of Rubisco and Rubisco activase produced cannot be fully activated, leading to lower photosynthetic rates and potential photo-oxidative damage.
Optimal range: Studies show that adequate Mg2+ application can enhance Rubisco activation and stabilize net photosynthetic rates under stress conditions, but the required concentration is specific to the experimental setup.
Monitoring is key: The most effective approach in a controlled environment is to monitor the plant's physiological responses e.g., leaf Mg2+ concentration, photosynthetic rate, Rubisco activation state, and adjust the nutrient solution/fertilizer to maintain adequate levels, rather than supplementing a fixed "extra" amount.
In practice, this means ensuring that Mg2+ is not a limiting factor in the plant's standard nutrient solution when pushing the limits with high light and CO2.
Applying Mg2+ through foliar spray is beneficial to Rubisco regeneration, particularly in alleviating the negative effects of magnesium (Mg) deficiency and high-temperature stress (HTS). While Mg can be leached from soil, within the plant it is considered a mobile nutrient, particularly in the phloem. Foliar-applied Mg is quickly absorbed by the leaves and can be translocate to other plant parts, including new growth and sink organs.
Foliar application of: NATURES VERY OWN MgSO4 @ 15.0g L-1 in a spray bottle. For those high-intensity workouts when 1 meal a day is just not enough!
Foliar sprays are often recommended as a rapid rescue measure for existing deficiencies or as a supplement during critical growth stages, when demand for Mg is high. Application in the early morning or late evening can improve absorption and prevent leaf burn. The plant was getting a little limey yellow in the centre. Shortly thereafter, she was back in business, green mostly regenerated. The starting point [of creativity] is curiosity: pondering why the default exists in the first place. We’re driven to question defaults when we experience vuja de, the opposite of déjà vu. Déjà vu occurs when we encounter something new, but it feels as if we’ve seen it before. Vuja de is the reverse—we face something familiar, but we see it with a fresh perspective that enables us to gain new insights into old problems.
Confidence is evidence... nothing more. You are confident because you have driven 10,000 times, you are confident because you have spoken 10,000 times. People think confidence is a feeling, but it's not. If you want more confidence, then you need to create evidence, take more shots, collect more data, build more experiences, take more risks; fail, confidence doesn't come first; it is the reward you get for doing the work. no one else wants to do.
Likes
13
Share


@MJ_LIVINGSOIL
Follow
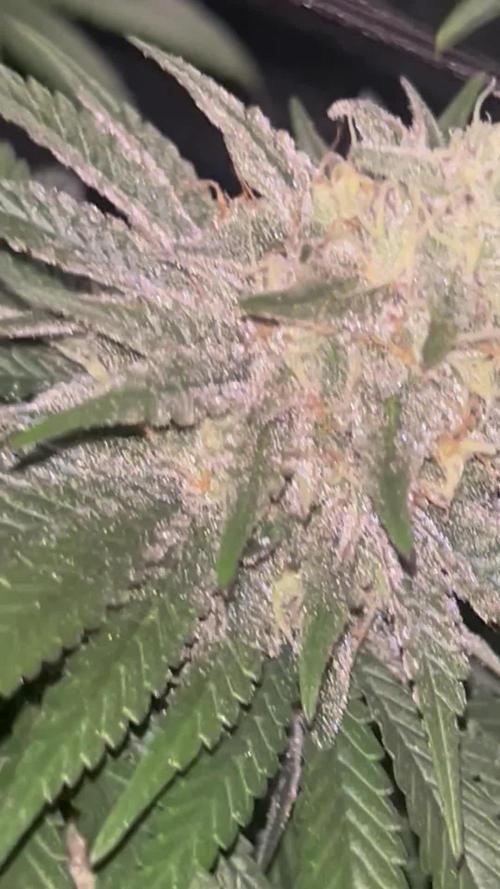
We plan to pre-flowering in next week. In this week we are stop topping in these girl. And make
160 cola per 1 plant and training with maintenance cut for Top bud every cola.
We use compost tea and craft organic fertilizer to take nutrient to soil and plant can use it for flowering stage.





Processing
Likes
31
Share


@The_Bearded_Grower
Follow
welcome to day 5 of veg and i must say she looks very good and strong. still upset i cant get voodoo juice but vitathrive is as good a replacement as i have.
any questions shoot me a comment
like my work hit that like button and maybe check out my other diary's
stay safe and keep your stick on the ice
Day 9 of veg 10/07 man she is growing fast. did the transplant today

Likes
7
Share


@BushDoctor740
Follow
Strawberry 🥧 I feel like her milky trichomes were starting to turn a little amber on some of the more mature buds so I chopped her down.Indica dominant strain so I wanted to let her go as long as possible.Smells great I’ll update a smoke report after she dries and cures.I think I’m going to use the majority of this one for some Rick Simpson oil and see how she turns out :)
Likes
72
Share


@BodyByVio
Follow
This will be the last week i will Feed. I m keeping TDS at 400PPM and PH at 5.8. This week I took out the Silica Blast, Great White and also stoped the CO2.
Also I lowered the water temp to 66 degrees.
Lights on temp is between 75 and 80 degrees, lights off between 65 and 72.
I’m trying to keep humidity as low as possible around 45%
week 10 will be flush week.
Likes
22
Share


@DeepRootsGrowTrees
Follow
Week #18 GSC By Kannabia
Week #18 Mar 8th-15th
Week #7 Flower
This week she's looking beautiful purple through out the plant the orange in the buds. Stay Growing!! Thanks for stopping by!!
Likes
7
Share


@FlavoursUk
Follow
Shes doing well, growing big and healthy. Buds are smelling strong and stacking up nicely. Purple looks beaut'. Cant wait to see the end product of this one. Stay tuned.

Likes
2
Share

@GrowdadGage
Follow
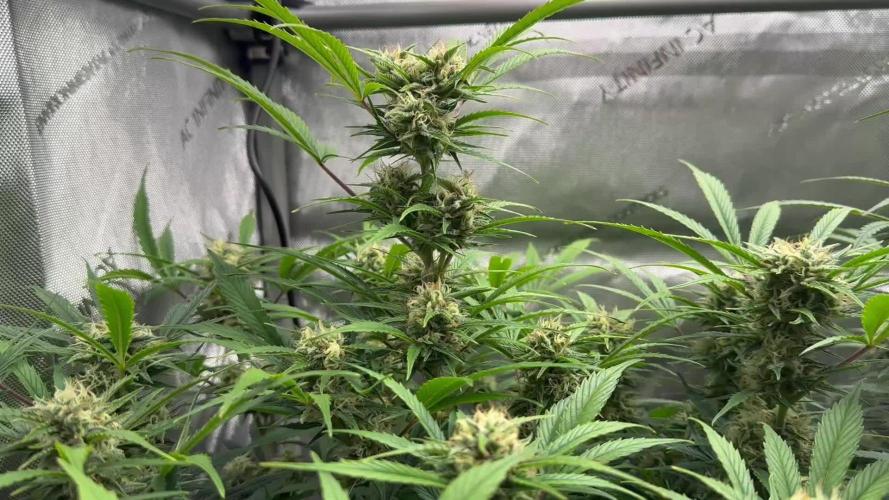
These girls are coming in nicely. I was impressed with how well the one plant I chose to top responded at first but now seeing the buds growing and coming in it’s lacking in comparison to the two plants that were just given low stress training.
Maybe it’ll catch up by the end but either way still very impressed with the Bruce Banner #3 Auto especially with the frost it’s starting to develop now 😁👌

Likes
21
Share


@Hydronaut
Follow
Hoping that this week will not be a tennis match with my PH and my nutrient solution. Last week I saw my solution drop a full point in a matter of hours - consistently. I also ditched the PH up/down dosers crutch two grows ago, and I am not missing it as the intel is far better without them. IMO PH dosers do not give you real-time feeding feel from your plant - yet they adjust your PH to the "Perfect" level. Less is more in this craft, and in more ways than not. There is a balance between technology, automation, efficiency and most importantly - humans. If we removed the human element out of a grow, the product will be inferior, right?
- trichome check showed mostly cloudy, with a few random amber if one looks hard enough.
She’s ripening nice and reservoir running fairly normal for late flower. Wonder if that zero water filters-gone-bad caused my major PH crashes.
Fed her KookBloom dry only this week and now in a 2 day flush. Should be about 10% amber.
