




Likes
1
Share

@c1note
Follow
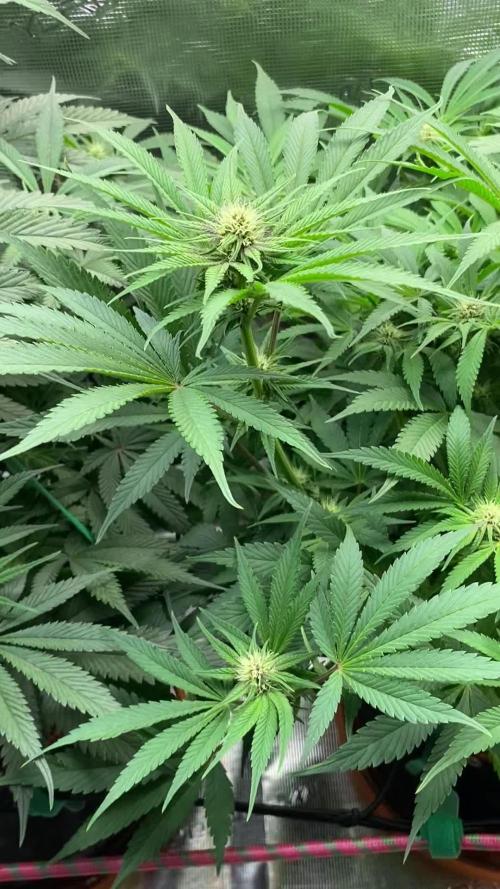
30.11 runter mit CannaPk13/14 von 1ml/L auf 0.75ml/L. HesiBoost 1ml/L auf 2ml/L. 4L Solution mit Ec 2.2.
28.11 Canna Boost ist leider leer, wird mit Hesi Boost ersetzt. Morgen kommt noch Canna Pk13/14 rein. Generative Phase 2 hat begonnen, schraube später die Temp. auf 15-17°C für paar Stunden runter mit der Hoffnung auf Purple Buds. VPD 1.2 PPFD 800-1000.
27.11 Start Woche 4. 2l mit 2.25 Ec. DLI 38 - 42. VPD 1.20.


Likes
11
Share


@Skunkiest_bender39
Follow
Die Mädels legen richtig los und machen endlich weiter mit Höhenwachstum. Die Töpfe sind seit ca 10 Tagen durchwurzelt. 2L Wasser reichen Max 5 Tage meist eher 3-4Tage. 1x wöchentlich 7ml/L düngen funktioniert meistens sehr gut.
Die neue europäische Dünger Serie von Advanced Nutrients ist super!


Likes
21
Share


@3lementa1
Follow
I've been taking off all the lower shoots coming off the main stems. I don't want to lose sight of the main colas I'm focusing on. Once we're in flower I'll start leaving more of the side branches, at this stage none will reach the light by the end of flower. I'd rather do the hard pruning now before the switch.
I'm going to keep them in veg for another week. The mainline structure is working really well.


Likes
35
Share


@PapasGrow
Follow
From seed to harvest 105 days 😼
Fast Photoperiod strain with monster yield🌲
Strong high with relaxing, chill effect. Tastes like candy. 🍭
The plant was drying for 6 days in a dark cool room. 2 weeks into curing with Boveda 62%.
On scale - 450 grams of quality buds, 32 grams of smaller buds. And about 100 grams is already smoked.
The trimmed material is also resinous and almost filled up a 5 liter jar.
Very happy with the results of Green House Feedings!

Likes
14
Share


Likes
4
Share

@SWITCH420
Follow
Hi folks,
I'm coming here to start the process of ending this grow journal. I harvested about three months ago and the weed is definitely cured. Photos are about to come — I'm doing a real studio photo shoot for those buds, they deserve it!
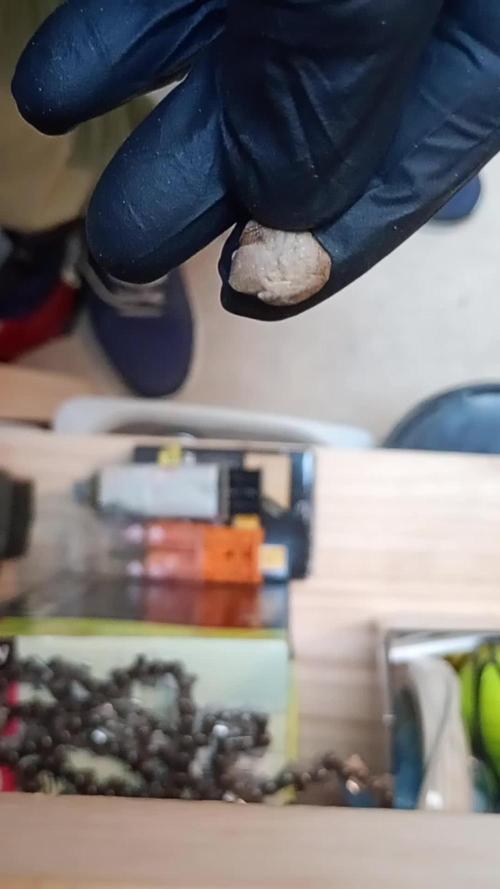
While waiting for the shots, I made some pretty damn dank hash temple balls using the iced water extraction method (solvent-free) with my little washing machine. It's a mix of the 8 strains I grew here — never ideal to mix different kinds of resin... but man, this is some serious dedicated work, so I'm making myself happy with that 14g shiny temple ball in the end 😉
Here are a few details about my process for you guys (and don't forget — you can do it with fresh material! Fresh frozen is always tastier. Also, the drying process is much more efficient and faster with a freeze dryer, but... you need the budget for that. I don't, so I go with the air drying method — check it out below):
1. Get your dry trim, then cure it properly for at least a month (I did 3 months). Smell it — mmh, sweet, dried to perfection. ✅
2. Freeze it, delicately wrapped in a freezer bag.
3. Let a large amount of tap water sit for at least 24h to remove chemicals like chlorine, then use it to make plenty of ice cubes — don't be shy, especially if you're not working in a cool environment.
4. Prep your washing machine: add trim between two layers of ice, fill up with clean water (as much as you can, large vortex is better than a smaller one), then make it seat for 30 min (45 min for thicker buds) the time that the dried green material gets wet again.
5. Prep your filtering tools: catch bag, different mesh bags, spoon, etc.
6. Wash as many times as you can before green contaminants appear, as these lower the quality of your hash — don't hesitate to go up to 8 to 12 washes if the resin still looks clean! Important: each wash has its own specific duration, and they get progressively longer as you advance through the process. Frenchy Cannoli (a true hash legend) provides a detailed timetable for this — from as little as 30 seconds to 1 minute for the first wash, all the way up to around 25 minutes by wash 8. Make sure to follow that schedule rather than using the same duration for every run or running it too long the first wash !! It could breaks to quickly your precious material before you collect all the trich's and the quality would be lower in the end.
7. Collect the wet resin in the mesh bags with a frozen metal spoon, make patties with the resin, and let them sit over some towels in order to drain as much water as possible (place a tissue made for hash collecting over the towel).
8. When the patties are a little dry to the touch, wrap them as they are in the tissue and place them in the freezer for 48h or more.
9. With an iron strainer, microplane your patties over the biggest flat surface you can get! It's important that your micro pieces of hash dry widely and don't get too compacted. Any failure in the air drying process will nucleate rot, ruining your hash in the end and making it a poor product — eventually something to throw away. Sad when you think about all the phases of the process to get to this point!
10. So, in order to air dry properly, you must — it's not optional — lower the RH of your dry room to 35% or slightly below, never above and let it dry as long as needed until the material feels like dry sand. For myself, I found 10 to 15 days is ideal. The room must be very lightly ventilated (not directly on your resin!) and in complete darkness — the goal is to preserve all those delicious terpenes! Ideally, temps around 60°F or 16°C
11. Now that it's dry, collect your resin with a large thin spatula! Make a little mound between two layers of PaperHash, boil some water, and fill up a wine bottle with it!
⚠️ From this point on, to avoid exposing your carefully dried resin to a more humid environment — which could ruin all your hard work — everything must happen in the same drying room. Keep working at 35% RH until your temple ball is tightly and airtight wrapped in PaperHash. (And don't forget to drink water — it's dry in there! 💧)
12. Start to slowly press your resin. Magical moment. Finally....
13. Press 3 times for 10 to 15 minutes in order to really decarb your hash — because that's what it's all about! Between each press, try as best you can to shape a patty... until the final press, when you'll be able to form that magical shiny temple ball (it only shines with gloves on, guys 😄)
14. You are now allowed to try it — for quality control purposes only, of course!
15. Because you want to age your hash for the sweetest 5-star smoking experience: wrap your temple ball in a large piece of PaperHash — if you can get that brand it's ideal, or another kind (check https://thepressclub.co) as long as it's organic!
16. Place the wrapped temple ball in a glass jar and store it in a dark, cool place.
17. Wait a minimum of 3 months before opening it.
18. Open, smell, touch — you'll be amazed. Roll it up with some weed or tobacco or both (I do both) / Or get a Hooka... you are smoking some true primo aged hash made by yourself! Taste the difference and realize all the path from choosing the seeds online until this first amazing puff ... 🙏
I want to credit my inspiration for making this kind of hash to the great Frenchy Cannoli, who has shared all his knowledge through amazingly rich tutorial content that you can find online with a bit of searching. 😉 Peace Frenchy 🕊️☮️




Likes
5
Share


@MarkyMalarky
Follow
Very happy with progress so far. Very straightforward with the top dressing and watering in with tap water left out for chlorine evaporation and pH 6.5-6.8.
Making nutrient additions weekly. Watering as needed.
Thinking about when I want to begin LST.
Likes
7
Share

@Marijuanaut
Follow
💚💛❤️
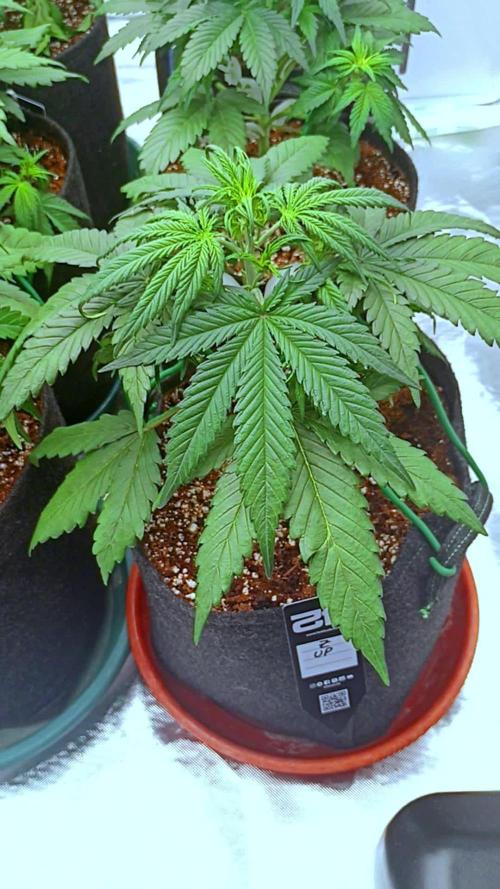
Well, the blackout effects are showing now with some stunt grow! 😞
Small but bulky branches that are very hard to work/train with... defoliation before some bending clips and already snapped a few 😤
Already installed the net but I don´t think theres much to be done... guess I´m just let them go wild and do their thing. 😅
💚💛❤️

Likes
22
Share


@BlumenBot
Follow
4/3 - she is taking her sweet ass time gaining height and I'm getting bored with this grow at this point. I'm going to defoliate every other branch completely to the top to see how those differ from the ones that I leave more or less alone from this point forward. She is taking on a lot of water, every other day is a must.for?
4/6 - she got fed yesterday and needed more water today, she's showing a tiny bit of nutrient burn so I will be keeping it easy for a bit, I also chopped a lot of foliage out. Only the tops left and preflowers showing everywhere
4/8 - thirsty lady
4/9 - more water! Added cal/Mag, 6.2ph now, she's got something going on

Likes
Comments
Share


@Witch_in_the_Garden
Follow
Jan 23: soaking the autoflowering seeds
1 Thin Mint (TM)
1 Northern light (NL)
Jan 24: paper towel
Jan 26
NL sprouted
EDIT : None of the Thin Mints seeds made it
I had a lot of problem with the paper towel going dry since it's so dry here now in the middle of winter.


Processing
Likes
15
Share


@Rainy
Follow
Hey guys they are both happy, didn't stretch much because I stressed her at the beginning of the week with lolipoping and some little lst together with change of nutritions but all good expecting some stretch in this week and let's see how she will go 💪
Likes
14
Share


@NorthernChemist
Follow
July 11: Finally this week getting some heat with 25-30 deg C daytime highs. Plants are thriving with a lot of vertical growth and flowers starting to build. Resin is developing nicely. Purple Punch is going to be big and heavy by the looks of it.
Likes
1
Share


@El_gordito99
Follow
•Terza settimana•
Ciao amici !! In questa settimana c’è poco da dire le piante crescono bene, mantenendo irrigazioni costanti ogni 2 giorni con quasi un litro d’acqua per pianta. Da metà settimana, come anticipato prima, riprenderemo con la melassa 2 ml xL ad ogni irrigazione.
(Tutte le foto sono in ordine crescente)
