


Likes
Comments
Share


@hannabis420
Follow
10/10 indoor grow, highly resistant strain, quick to flower after only 5 weeks of veg... light stress being too close to the lights caused fox tailing buds...live and learn!

Likes
12
Share

@Nocone_Purple
Follow
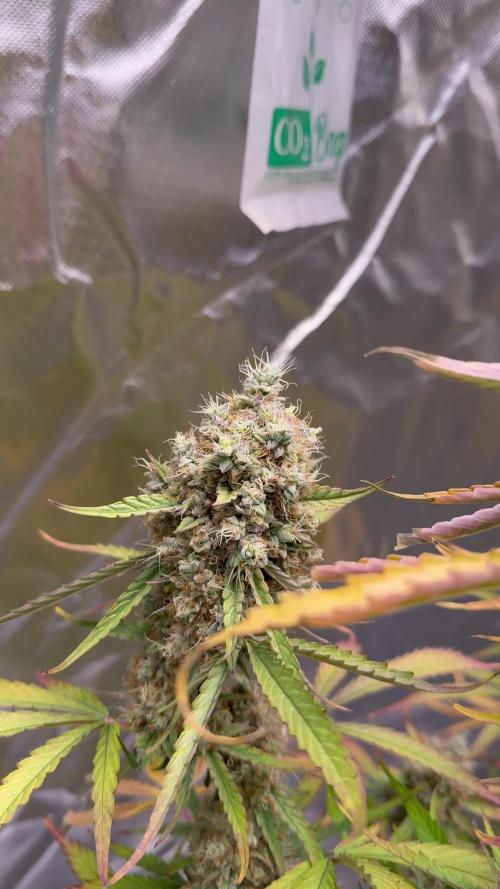
This week marked the final stretch of the grow the Epsilon F1 is now fully mature and absolutely covered in thick, frosty trichomes. The main colas have gained impressive density, with most pistils turning a rich orange while the trichome heads are mostly milky with a few amber ones starting to appear.
The fade is beautiful, with yellow and purple tones spreading through the fan leaves as the plant naturally finishes its life cycle and directs all remaining energy into the buds. The aroma has become more intense and complex sweet, fruity, and slightly earthy.
Overall, she looks perfectly healthy and ready for harvest very soon. A light flush is underway, and I’ll be checking the trichomes daily to harvest at the ideal point depending on the desired effect, either a bit earlier for a more uplifting high or a few days later for a deeper, more relaxing one.


Likes
8
Share

@bkickstand
Follow
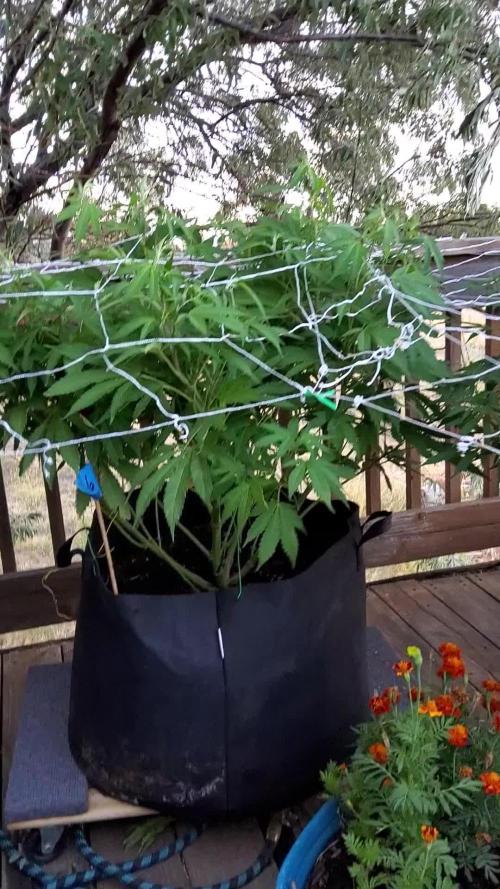
Week 18: Oasis Project Update
Everything is moving along steadily with the Durban Poison quartet. The canopy management continues to be a priority, and the plants are responding well to the trellis setup, staying lush and vibrant as they continue their vegetative growth.
The deck infrastructure is fully optimized. The sprinkler manifold and timer are installed and have been put through a successful test run, ensuring the garden remains consistently hydrated. Along with the photoperiods, the new relay batch of autoflowers, the marigolds, and the strawberry "security team" are all thriving under the current care routine. The garden is looking strong, and I feel confident about the current setup for the coming days.

Likes
2
Share


@R_atata
Follow
Erste Gehversuche Indoor. Living Soil aus Erde, Kompost und Perlit. Gegen Trauermücken wurden Nematoden gegossen. Von der Lemon Haze sind zwei Keimlinge kaputt gegangen. Der Dritte ist standhaft.
Auf in neue Sphären. 😀


Likes
10
Share


@Unkraut
Follow
nice strain with a rich terpene profile! sweet, gelato like, hard hitting smoke!
sadly my phenos had no banana taste but still very nice

Likes
11
Share


@MrMoMoGroW
Follow
Everything Is okay 😁 the girls stay very Happy and micorrize change the games 😁 . I adding Black humus and Bat guano too improbe and protect the microbial live in the medium.
Stay tuned for updates✌️✌️✌️
Little update... My cat ruined a branche 🤬 and I cut... The bud weight 26 grams wet... Not bad for 5 week 😁
Likes
1
Share

@Dabking
Follow
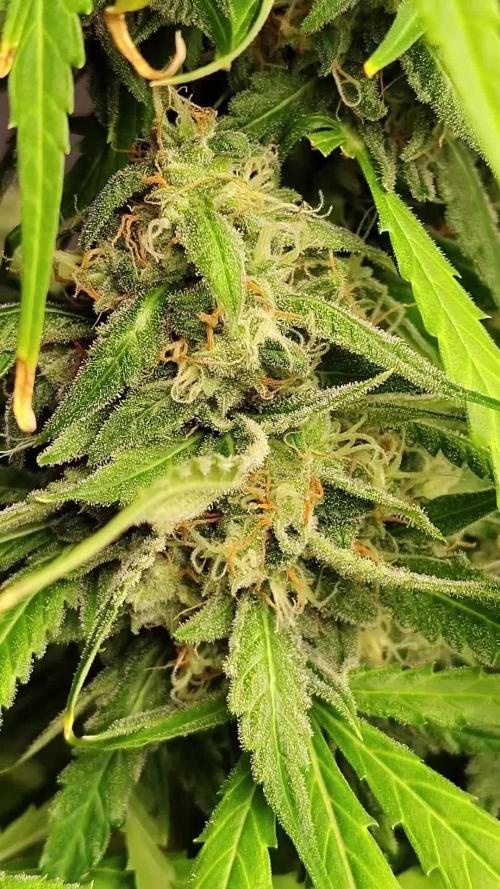
She smells even better than she looks. Can't wait to harvest🙏
Today marks day 97, and the trichomes look ready. Chop day today.

Likes
9
Share

@HOMEGROWBOOK
Follow
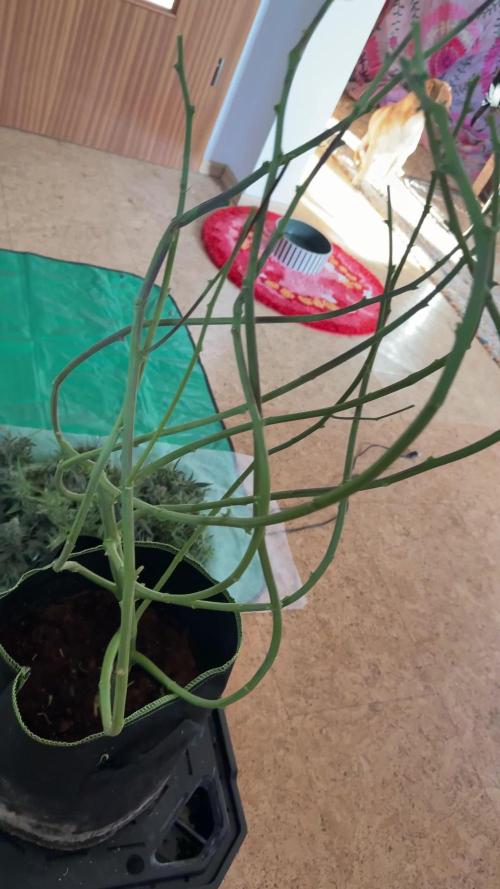
Ich war sehr zufrieden mit dem Ergebnis der Pflanzen. Sie waren gut zu formen. Leicht zu beschneiden und zu trainieren.
Diesmal konnten wir den Platz perfekt ausnutzen ohne Verbrennungen von oben zu riskieren.


Likes
7
Share


@Grisly
Follow
Harvest 2024
Total Hash: 102g
Total Kief: 95g
Total Flower: 3868g/138oz/8.6lb
Total Yield: 4065g/145oz/9lb/4kilo
———-/-////////—vs———-/////————/
Sugar Diesel #1: 117g
Sugar Diesel #2: 313g
White widow Clone: 14g
Dual OG:
112g
LA Affie North Field: 248g
Granddaddy Purple N: 63g
Black Raspberry Kush N: 210g
————————————————-
Total North: 1077g/38oz/2.5lb
————————///——/—————-/
Fruity Pebbles: 184g
Granddaddy Purp S H2: 54g
Granddaddy Purp S H1: 275g
Granddaddy Purp Total: 329g/12oz
Black Rasp Kush S H1: 160g
Black RaspKush S H3: 70g
Black Rasp Kush S H2: 511g
Black Rasp Kush S H4: 17g
Black Rasp Kush S: 758g/27oz
Blue Cheese S H1: 281g
Blue Cheese S H3: 83g
Blue Cheese S H2: 285g
Blue Cheese Total: 649g/23oz
Dr Grinspoon S H1: 485g
—————————————————-
Total South: 2405g/85oz/5.3lb
————————///——/—————-/
North Popcorn: 148g
BC Popcorn: 100g
GP Popcorn: 73g
BRK Popcorn: 65g
—————————————————-
Total Popcorn : 386g/14oz/0.9lb
————————///——/—————-/
Trim: 8lb
—————————————————
————————///——/—————-/


Likes
33
Share


@Pirangueiro
Follow
Fast, easy and amazing strain to grow! Tasty and smell super. Super lemon haze one of my favority!!!!
Likes
18
Share


@Leonweed10
Follow
A los 21 dias se realizó transplante definitivo a maceta de 7 litros a las 25 plantas,ya todo el cultivo mas homogéneo va tomando mas fuerza y mejor forma.


Likes
8
Share

@Gratak
Follow
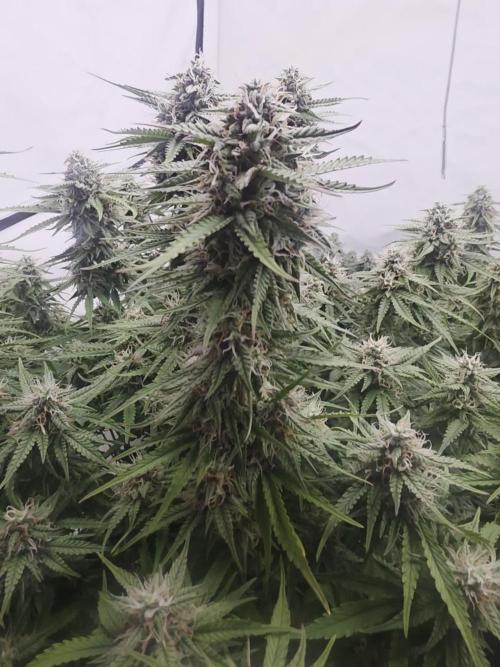
Ich bin mit der Entwicklung der Buds sehr zufrieden, wie jede Woche musste ich wieder ordentlich entlauben und die Pflanzen wieder genau anschauen.
Die Pflanzen beginnen bereits von selbst die Blätter ab zu werfen , also erhöhe ich meine Lichtleistung auf 100% für feste Buds am Ende.
Likes
46
Share


@DogDoctorOfficial
Follow
Hey there, green warriors and cannabis lovers! 🌱🔥 We’re now in week 3 of the flowering stage in our Runtz Battle, and things are really starting to heat up! This week brought an interesting twist as we had to make a strategic adjustment to ensure all our plants are on the same page. Let’s dive into the details and explore how things are progressing.
Week 3 Flowering Progress 🌿✨
Our Runtz plants continue to flourish, and here’s what’s been happening:
• Bud Development 🌸:
• The buds are filling out beautifully, with each day bringing more growth and resin production. The plants are stacking up nicely, with dense flowers forming at multiple sites. The F1 strain remains compact and uniform, showcasing tight, resin-packed bud sites.
• Environmental Stability 🌡️:
• We’re maintaining consistent environmental conditions with a room temperature of 30.3°C, water temperature at 18°C, and humidity at 51%. These stable conditions are key to supporting strong bud growth and overall plant health.
Switching to 12/12: The Light Adjustment 🌟💡
This week, we made a crucial adjustment to our lighting schedule:
• Why the Change? 🌞🌙:
• One of our plants hadn’t yet started flowering, so we made the decision to switch all plants to a 12/12 light cycle. This change is essential to trigger flowering in the plant that was lagging, ensuring it joins the rest of the group in producing those beautiful buds.
• How 12/12 Helps 🌿💡:
• The 12/12 light cycle mimics the natural change in daylight hours as summer transitions to fall, signaling to the plants that it’s time to focus on reproduction (flowering). This shift is a classic technique to ensure all plants in the garden synchronize their flowering process. The reduction in light hours encourages the production of flowering hormones, which will now help the plant that was behind to catch up and start forming buds.
• Impact on the Runtz Plants 🌸:
• The Runtz strains that were already flowering won’t be negatively affected by this change. In fact, the consistent 12/12 cycle can help to further boost their flowering intensity, ensuring that the buds continue to develop fully and evenly.
Nutrient and Care Strategy 🌱💧
Our focus on proper nutrition and environmental care remains a top priority:
• Watering and Nutrients 💧:
• With the Autopots still running smoothly, we’re continuing with Regulator and CaMg Boost in the reservoir. The nutrient-rich soil and organic inputs are keeping the plants well-fed, and the consistent hydration is ensuring steady growth and flower development.
• Lighting and Environmental Control 🌡️:
• The Lumatek Zeus 465 Compact Pro continues to provide powerful, full-spectrum light that supports the flowering process. With the 12/12 schedule in place, the plants are receiving the perfect balance of light and dark, critical for flower development.
• The TrolMaster Hydro-X controller remains essential in managing these conditions, keeping everything dialed in for optimal plant health.
Looking Ahead 🌟🌿
As we move deeper into flowering, the anticipation only grows. The 12/12 light cycle is now in full effect, ensuring all our plants are flowering together. The Runtz strains are on track to produce a stunning harvest, with each plant showcasing its unique strengths.
Stay tuned for more updates as we continue this green journey. The next few weeks are going to be thrilling as we watch these buds fatten up and reach their full potential! 🌟💚
#RuntzBattle #Week3Flower #CannabisCommunity #FloweringStage #LightCycle #12and12 #GreenMagic #LumatekZeus #TrolMasterHydroX #GrowStrong #StayPositive
Germination method 🌱 @thecannakan
Genetics Runtz F1 @zam.nesia Runtz auto @kannabiaglobal
Nutrition
@aptusholland 🌿
@aptus_world 🌎
@aptus_es 🌍
@aptusbrasil 🌱
@aptus_thailand 🌿
@aptus_portugal 🌳
@aptususa_official 🍀
@aptusplanttechnz 🌺
@aptusplanttechaus 🍃
Ambient controls🎮
@trolmaster.eu @trolmaster.eu.support @trolmaster.support @trolmaster.agro
Soil @promix_growers_eur @promix_cannabis
LED - @lumatekeu
Watering- @autopot_usa @autopot_global
Love and attention- @dogdoctorofficial
#aptus #aptusplanttech #aptusgang #aptusfamily #aptustrueplantscience #inbalancewithnature #trolmaster #trolmastereurope #trolmastersecrets #Autopots #RuntzBattle #KannabiaVsZamnesia #GreenJoy
As always thank you all for stopping by, for the love and for it all , this journey of mine wold just not be the same without you guys, the love and support is very much appreciated and i fell honored and so joyful with you all in my life 🙏
With true love comes happiness 💚🙏 Always believe in your self and always do things expecting nothing and with an open heart , be a giver and the universe will give back to you in ways you could not even imagine so 💚
More info and complete updates from all my adventures can be found ⬆️ link in the profile description ⬆️
Friendly reminder all you see here is pure research and for educational purposes only
💚Growers Love To you All 💚


Likes
57
Share


@PEAKYPLANTERS
Follow
Oh yes, my friends .... Peaky is back stronger than before to compete with the best!
Take a look at my updates
The best crops and
best regards


Likes
11
Share


@CanabisLoverHobbyGrower
Follow
Put on alot of size, I think they are coming to the end of the stretch now, loads and loads of bud sites and both look so healthy, roll on next week 😀 👌
