


Likes
Comments
Share


@Mrs_Larimar
Follow
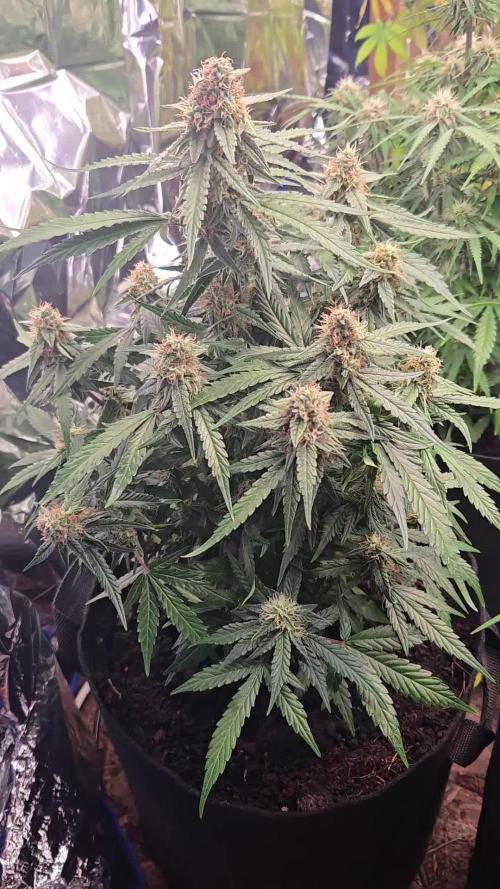
I had alot of Fun with this Grow, and a lot of Growers, had a Story about the Strawaberry Cough. Thank you all for sharing that with me!!! I learned alot about the heritage of this Strain and its appearing in Movies and Music. Mr. Kushman itself had a great Story about Strawberry Cough, and how he got them as a Present
But back to the Grow
fast Germinating, Germiating Rate 100 Percent, fast grower, and then the Journey began......
One Pheno turned out with Cottoncandylike Buds , The other Pheno with Fistsized Dense Buds
Booth showed a wonderful Scent, and they were a Pleasure to look
One Plant is still growing
Thank you @Miister_lee , for the opportunity to grow them
And LEGALIZE WORLDWIDE




Likes
5
Share


@Ziocannabis
Follow
Le sta facendo lei perciò è proprio brava per essere la prima volta
Sta seguendo le mie direttive che le faccio da un po' di anni indoor... Vedremo alla fine,tra circa un mese
Per adesso in video sembra bella, visto che non sono lì a vederle 😉 Buona Marijuana a tutti! 😅

Likes
Comments
Share


@BeggarsBelief
Follow
So everything took off in flower, I was super harsh with the defoliating which initially I regretted, but was surprised with how they packed out during the following weeks. In general it's impressive how hardy these plants are. Even the outdoor grows yielded some quality. Add some more nuets (overdrive and carbo load), before flushing about 14 days before harvest, next time I'll do this earlier and really the Runtz could have gone another week but my drying needs to happen in the same space as my growing for now. Apologies for the quality of image, I'm just using my phone and some bits I have to document, I collect records too, so expect weird noises lol. Build a rotating plat from a lazt susan I found, has been the best piece of kit added this season.

Likes
59
Share


@JeyGanesha
Follow
Gente!amici contadini eccoci arrivati all'ottava settimana di fioritura 💪 tutto procede come deve. La lotta biologica che sto facendogli con le mie care amiche coccinelle 🐞 funziona Super bene...fossero state tutte larve di coccinelle 🐞 era ancora meglio.si perché la voracità che ha la larva di coccis è incomparabile....poi le larve non volano aggirro. Stanno sulle foglie e mangiano tutto. Uova ragni rossi ecc....
Likes
2
Share


@Inside_growlab
Follow
My Black Lebanon is getting such incredibly beautiful colors. The terpenes are starting to come through, and it smells very, very herby, tropical in my opinion, but not even particularly sweet. Very interesting; I've never had this smell before! A few days ago, I watered it again with bio enhancer, and I also removed a little bit of foliage from them. I have to say that the bio line from Green House is really great so far, but apart from one or two minor flaws, it's really great!

Likes
10
Share


@CVK31
Follow
Went back through my calendar and found that today is first day of week 11 above the soil. Plant is doing really well, som3 of the large lower leaves are getting crispy-curly. Buds are very dense, mostly orange curled up hairs. Mostly cloudy with a lot of amber trics on sugar leaves. Hardly any amber on upper buds. Started flush a week ago but just couldnt bare the thought of stsrving this poor plant so I added a little cha-ching back. Shes super stinky, the most beautiful stinky Ive ever experienced. Ive found that its almost impossible to wash the smell off of my hands! Made a little slide show this morning while drinking my tea. Hope you like it!

Likes
7
Share

@420DeepGrow
Follow
📆 Semana 4
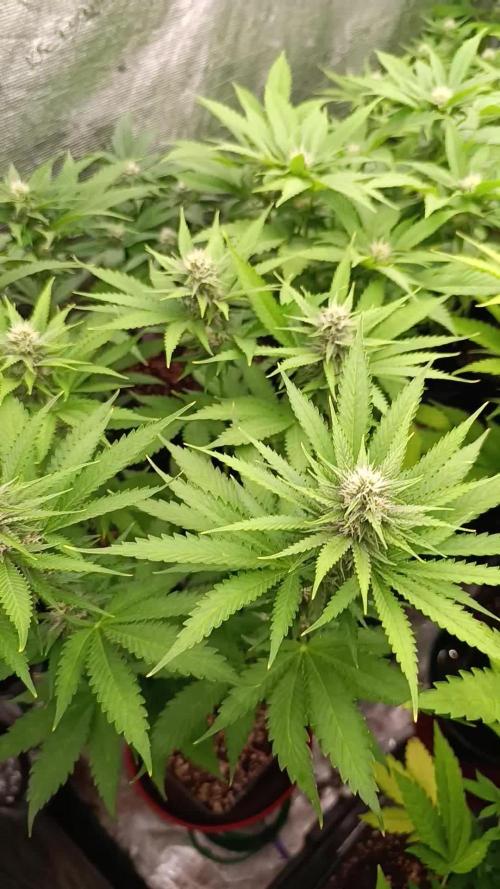
El stretch llega a su fin y la floración avanza con rapidez. Los cogollos comienzan a ganar volumen en todas las puntas y las flores empiezan a unirse a lo largo de las ramas, formando colas cada vez más definidas. La estructura se mantiene uniforme y aprovecha al máximo la luz disponible.
El consumo de agua y nutrientes alcanza uno de los puntos más altos del cultivo. El amarilleo de las hojas bajas continúa de forma progresiva mientras la planta prioriza el desarrollo floral y la producción de resina.
⚡ EC: 1.7–1.8
💧 pH: 6.2–6.5
🌡️ Agua: 21°C
🌫️ Humedad: 45–50%
💡 Intensidad: 1000–1100 PPFD
🔥 Nota de cultivo: Semana de máxima actividad floral y elevado consumo nutricional. Mantener el equilibrio del riego y la alimentación permitirá un engorde continuo y homogéneo.
¡Seguimos creciendo fuerte 💪!

Likes
28
Share


@cheetah844
Follow
Growing pretty well so far. I'm excited for this to be a good daytime strain to keep me motivated, in a good mood and hopefully not anxious. She'll be going outside so I'm strengthening her stem so she'll be able to handle outdoor stresses.
Likes
57
Share


@Fibro_Witch
Follow
Update for the week of 9/12
Unfortunately I wasn't able to upload these right after I took them, I pushed my migraine a bit too far when I took the photos and videos so I had to hide from the world.
Blueberry is still just amazing... and beautiful... and huge.... and smells sweet and fruity😋
She responded well to the Down to Earth minerals top dressing I gave everyone last week, they all did, but I wanted them to have some sugar this week so I switched back to liquid nutes for this week.
Otherwise I think everything is in the videos.
Happy growing to all of you!
I'm not going to try and make any promises about "Oh I should have more time to update" because that clearly has not been happening since I've been saying it the past couple weeks, so I guess stay tuned and thank you to all who have been checking in!


Likes
5
Share

@PavementPunk
Follow
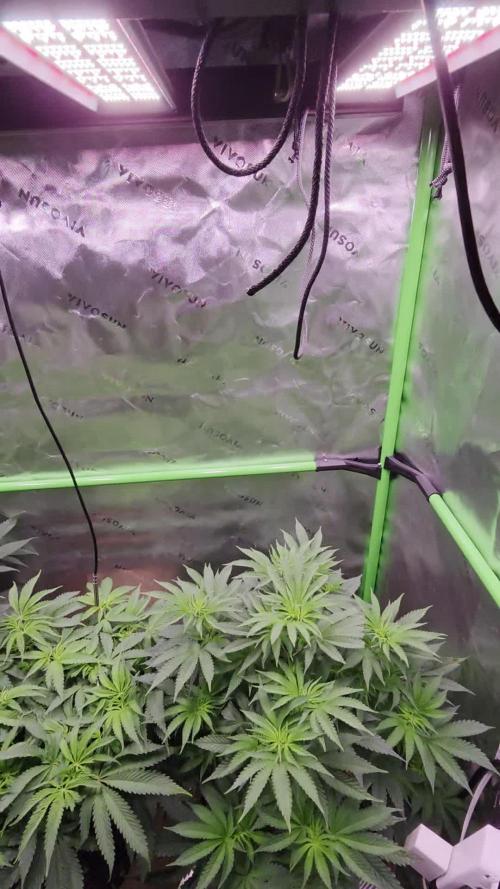
9/10/26 Gorilla Cookies — Flip to Bloom, Canopy Surge & Light Adjustment (Week 9 / Day 6 Flower)
Vital Stats & Environment
* Growth Stage: Flowering — Day 6 (8 Weeks 2 Days total)
* Plant Height: 12.0 inches (+3.0" vertical stretch since flip)
* Pot Size: 7.0 Gal fabric container
* Lamp to Plant Distance: 26.0 inches (Raised +5" from 21" to eliminate photon stress)
* Light Schedule: 13h on / 11h off (Flipped Sep 5)
Watering & Soil Care Log
* Sep 2 (8:01 PM - Day 27 Veg):
* 1.0 Gal water (pH 6.5) blended with 2 tbsp fresh aloe slurry to maintain systemic moisture and ease clone recovery.
* Sep 4 (1:02 AM - Day 28 Veg):
* 1.0 Gal plain water (pH 6.5) fed until reaching 10–20% runoff to wash through any residual salts before the flip.
* Sep 5 (12:13 AM - Day 1 Flower):
* Switched light schedule to 13h/11h to initiate flowering.
* Sep 7 (Day 3 Flower):
* Noticed downward leaf curling, edge tacoing, and slight tip burn with the light set at 80% power and 21 inches. Raised fixture to 26.0 inches to reduce light intensity.
* Sep 10 (12:02 AM - Day 6 Flower):
* 1.0 Gal plain water (pH 6.5) supplemented with mycorrhizae to support the expanding root mass.
Grower’s Notes & Plant Observations
Flip to Flower & Stretch Phase:
Gorilla Cookies has officially entered bloom, pushing upward from 9.0" to 12.0 inches tall. The symmetrical manifold structure has sent all secondary shoots reaching straight up toward the fixtures.
Light Distance Correction:
Under the new 13/11 photoperiod at 80% power, the 21-inch clearance proved too intense, causing new leaves to taco slightly and show minor tip burn. Backing the light off to 26 inches relieved the photostress, allowing the upper fans to relax and pray normally.
Canopy Structure & Health:
The central stem has developed into a thick, calloused wooden hub that anchors every primary lateral. Stripping lower undergrowth has kept the root bed breezy and clean, while the upper canopy forms a broad, even blanket of uniform pre-flower tops.
Likes
4
Share
@Gorillagrower
Follow
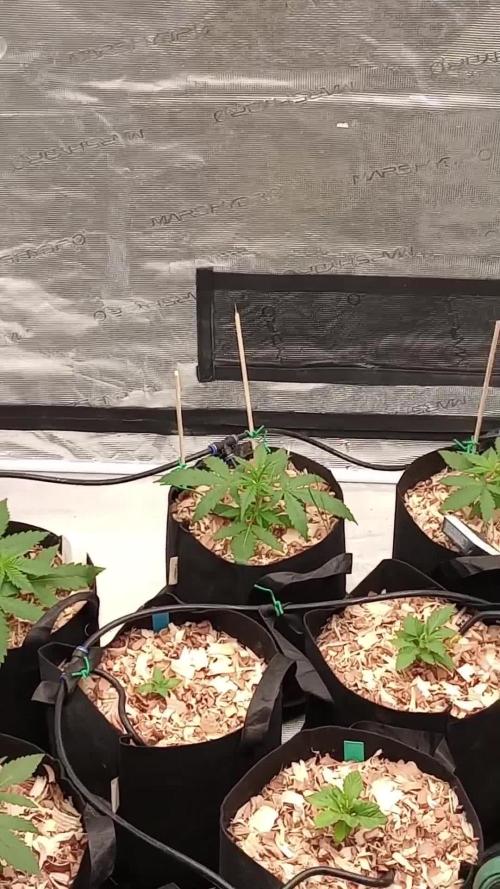
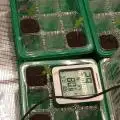
Week 5 and looking alive! Lol added a few things this week. Two infared heat lamps for warming up the cool start to their day. I also added a deep red light for evening and morning simulation.

Likes
9
Share

@AsNoriu
Follow
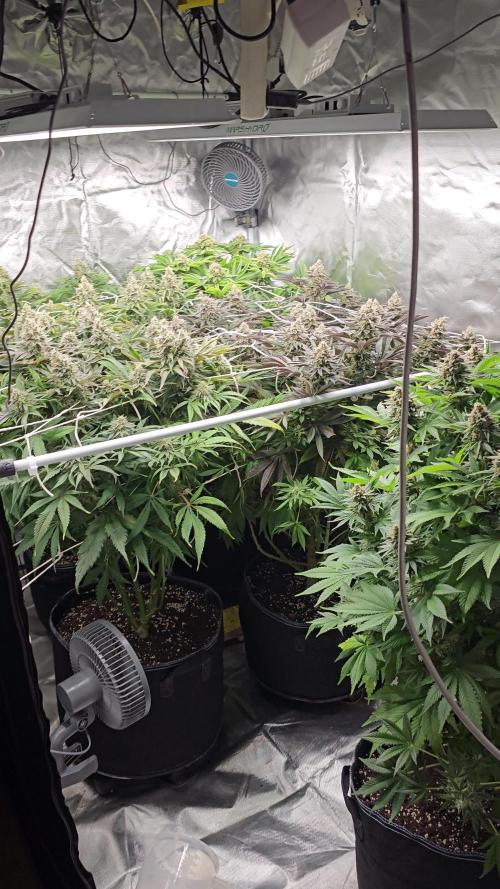
Day 122 since seed touched soil. Girl is on final stretch, took all nutes out last watering. Today gave 6.3 phed water for last time, maybe if few other girls will show signs of bulking, ill do one more watering.
Last week installed dehumidifier, so all environment is way better.
Fat girl, created nice colas and still bulking ...
Happy Growing !!!

Likes
4
Share

@Fank0
Follow
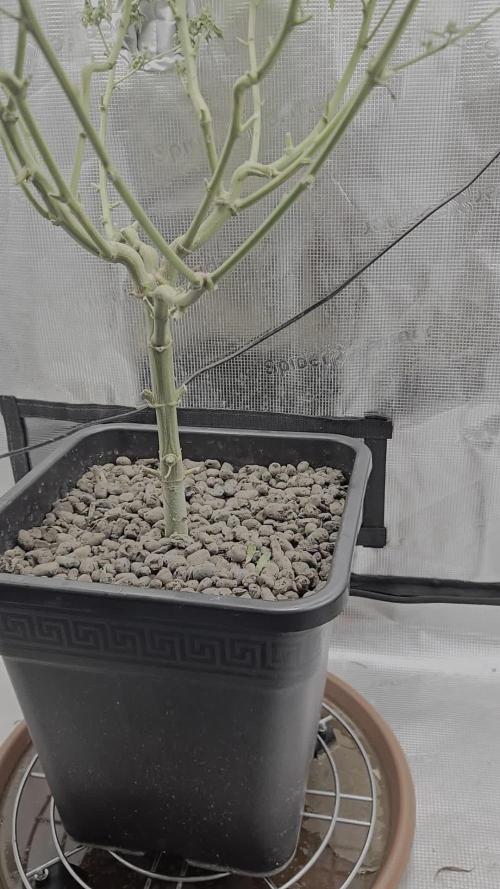
Vonku pekne peče, tropické teploty 33+°C, už len čistá voda, pár dní a bude kosa

Likes
90
Share


@CRiSPrGrow
Follow
these came down at 10 weeks and 4 days 509 wet after a wet trim expecting close to 300 finally let's see 🚀 all in all pretty stoked to try that chem ! trying on paper bags then it's jars, check back in later 😱 😱 😱 😱

Likes
Comments
Share


@Krautis_IndoorFarm
Follow
Update Tag 31
Heute war wieder Gießtag 💧 Jede Pflanze hat 1,5 Liter Wasser bekommen natürlich mit angepasstem pH-Wert von 6,5.
Dazu gab’s pro Liter:
• 1 ml Fish-Mix
• 1 ml Bio-Bloom Mix
• 1 ml Top-Max
• 1 ml Heaven von @biobizzwwo 🌿
👩🌾 Unsere Sorten:
• Auto Orange Amnesia XL
• Blue Dream Auto
• Auto Amnesia 47 XL
• Red Velvet Auto
💸 Seeds wie immer von @ganjafarmer.seed mit dem Code „krauti10“ spart ihr dort 10%! 🚀
Die Mädels entwickeln sich super und man merkt schon, wie gut sie die Nährstoffe aufnehmen. 🌸
#growupdate #biobizz #selbstversorger #cannabiscommunity #ganjafarmerseeds #


Likes
6
Share


@DeepRootsGrowTrees
Follow
Week #6 Gnomo Auto/ Kannabia
Week 6 Dec.2-Dec.9 Gnomo Auto she is in week 2 of flower and looking nice she has really grown the last 2 weeks both vertically and horizontal as she's bushy but starting to stretch.

Likes
6
Share


@Krissci
Follow
Kosher seems to be ahead of the other strains.
Will begin flushing today and final defoliation and LST
Likes
16
Share


@ButterfliesLittleFarm
Follow
Hello Diary,
Epsilon F1 is the fifth hybrid F1 strain from the Royal Queen Seeds lab that grows on my small farm.
This time, all three plants on the farm are Epsilon F1, but the soil mix in which they grow is different.
But before I describe the preparation, a few words about the strain itself.
EPSILON F1:
Epsilon F1 is the fastest of all of our F1 cannabis seeds, and combines genetic traits from some of the most notable cannabis varieties of the last decades, including Blue Dream, Blueberry, Amnesia Lemon Haze, and Black Domina.
She boasts delicious aromas, plenty of cannabinoids, and, like all RQS F1 seeds, unrivaled stability, resulting in a uniform crop that consistently produces buds of unwavering quality.
Plus, her autoflowering trait and extra-fast flowering time make Epsilon F1 an ideal choice for growers focused on getting to harvest as quickly as possible.
Epsilon F1 features a rich aroma that combines hints of fresh herbs and citrus with full-bodied earthy notes and touches of blueberries and lavender.
Epsilon F1 is a mid-strength variety, consistently producing solid levels of THC and a terpene profile dominated by myrcene, farnesene, ocimene, and limonene.
Not only do these terpenes impact Epsilon F1's delicious aroma, but also its effects,
endowing it with a long-lasting, physically relaxing stone that soothes the entire body (predominantly courtesy of myrcene, linalool, and farnesene), mixed with an uplifting, motivational kick (from limonene).
SET-UP ON MY LITTLE FARM:
Box - Secret Jardin DS120W 120x60x178
Lights - MIGRO 200+
Ventilation - TT Silent-M 100
Filter - Primaklima filter PK 100/125
Fan - Oscillating Koala Fan X 2
Humidifier - Beurer LB 45
Soil - BioBizz Light - Mix
Pot - 11L Air pots
Seed - Royal Queen Seeds
Nutrition - RQS Organic nutrition
Let's officially start the diary:
02/08/2023
Planting. I prepared a total of three pots, as usual.
And this time I used AirPots, which proved to be the best option. I've been using them since the beginning.
I used the soil from BioBizz Light-Mix.
Pot #1 - I first put Easy Boost Organic nutrition in the form of pellets into the ground, then I added SeaWeed and Mycorrhiz in the recommended doses and mixed everything well.
Pot #2 - I also put in Easy Bosst Organic nutrition, Seaweed and Trichoderma. Also in doses according to instructions.
Pot #3 - Along with Easy Boost Organic nutrition, I put Bat Guano and Trichoderma.
After I prepared the soil, I soaked all the pots well with water and made small holes in which I placed the seeds.
I then placed the pots in the Grow Box where the temperature was around 28 degrees and the humidity was around 55%.
05/08/2023
I sprinkled a little water on the surface of the soil. Not too much.
06/08/2023
All three plants sprouted.
07/08/2023
I watered the plants with a little water. Approximately 0.5 liters per each plant.
10/08/2023
Watering. Each 0.5 liters of water.
That's all for this stage, see you soon and thanks for your support.