


Likes
Comments
Share


@HanoverFist
Follow
Began flowering early this week.
Installed drain tray for bottom watering all pots.
Watered with recharge, kelp, fish emulsion.
Top dressed with castings and compost.
Installed scrog.
Lights at 80% and being raised toward 100% daily

Processing
Likes
17
Share


@Ashbash
Follow
Lemon AK is getting really fat this week. Smell isnt as strong as the zkittlez but it definitely smells lemony. Looks a little airy as its foxtailing quite a bit i think. Just too hot damnit. Zkittlez is conspicuously missing this week....will see why next week :)

Likes
14
Share


@BushDoctor740
Follow
Last of the 5 Papaya Cookies still going strong.Ive given her just plain water when the pot is dry.She is still showing some signs of new growth and has more time to develop.cut the last Papaya down trichomes were cloudy. I’m going to dry her a little differently than the rest.Im going to hang in small branches on hangers as I’m trying to avoid any molding on the big center cola.Drying at 67 degree and 62 percent humidity and she smells amazing.
Likes
19
Share


@ProfessorAutoflower
Follow
Week is going great. Started out the week by transplanting into a 3 gallon fabric pot. In one week the roots easily reached the little, solo cup size pot it was in so I'm glad I decided to transplant. The day after transplant the plant showed no signs of stress. The following day which is today, the plant looks great. No drooping at all with the leaves straight out soaking up the light.
%%%%%******** Check out the transplant video on The Weed Tube *********%%%%%%%
*****************Subscribe and b e entered to WIN********************
https://www.theweedtube.com/video/transplanting-autoflowers---nl-auto-bad-idea-good-idea--100301

Processing
Likes
16
Share


@Andres
Follow
they are 2 purple afghan kush and it shows the difference .. the second one measures 130 cm and started its flowering process ... they always feed organically .. as well as only with fish tank water...

Likes
3
Share


@PatronEl
Follow
Now a bunch of other stuff arrived and I can finally use fans for her! Also the hygrometer arrived and I was SHOCKED! It showed a humidity of around 40% and up to 28 degree. I dont even know how she survived that long ? After I witnessed the horrifying truth I searched restless for a humidifyer that fits into the room, and where I can also see the humidity, since I could not believe my eyes with the hygrometer

Likes
Comments
Share

@Yaadmanlabs
Follow
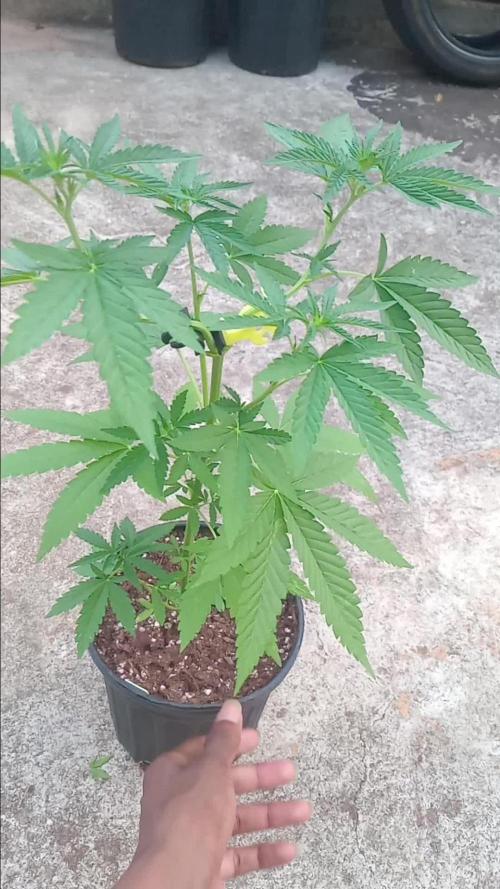
This looks amazing. Thinking of putting her straight in the ground in a few weeks
Likes
14
Share


@ao_grows1978
Follow
Well, not the biggest yield from my little mainline...28g of keeper buds and 28 grams of trim and little buds for RSO. The smell from the buds is hard to pinpoint. A little pine, a little sweet, a little chicken soup. Very much on the earthy side and affects are smooth and sedating. 100% some chill, social smoke or great for anxiety.

Likes
31
Share


@420DeepGrow
Follow
Gracias al equipo de AnesiaSeeds, Marshydro, XpertNutrients y Trolmaster sin ellos esto no sería posible.
💐🤯 39%Thc Wham Boom:
Sube al ring con WHAM BOOM de Anesia Seeds, donde la energía electrizante de Wham choca con las vibraciones frías de RS54, creando una variedad que es todo equilibrio, potencia y sabor. Este peso pesado feminizado ofrece una mezcla perfecta de 50% Sativa y 50% Indica, proporcionando una experiencia que te hará flotar de euforia mientras tu cuerpo se sumerge en una serena relajación.
WHAM BOOM es una productora prolífica, con rendimientos en interior de 600g/m² y en exterior que alcanzan la asombrosa cifra de 900 - 1200g por planta. Con una floración de entre 65 y 70 días, esta variedad está lista a principios de octubre, lo que la convierte en una competidora ideal para los cultivadores que aspiran a una cosecha de campeonato. Con una imponente presencia de 100-140 cm en interior y 160-220 cm en exterior, WHAM BOOM se alza como testimonio de su destreza genética.
🏠 : Marshydro 1.50 x 1.50 x 1.80, carpa 100% estanca con ventanas laterales para llegar a todos los lugares durante el grow
https://marshydro.eu/products/diy-150x150x200cm-grow-tent-kit
🌬️💨 Marshydro 6inch + filtro carbon para evitar olores indeseables.
https://marshydro.eu/products/ifresh-smart-6inch-filter-kits/
💻 Trolmaster Tent-X TCS-1 como controlador de luz, optimiza tu cultivo con la última tecnología del mercado, desde donde puedes controlar todos los parametros.
https://www.trolmaster.com/Products/Details/TCS-1
🍣🍦🌴 Xpert Nutrients es una empresa especializada en la producción y comercialización de fertilizantes líquidos y tierras, que garantizan excelentes cosechas y un crecimiento activo para sus plantas durante todas las fases de cultivo.
Consigue aqui tus Nutrientes:
https://xpertnutrients.com/es/shop/
📆 Semana 1:
Gran comienzo primaveral después de una germinación excelente. La etapa de plantula se desarrolla con normalidad.
Esta semana aplico tierra de diatomeas espolvoreada en el sustrato para proteger las plantas y las rocio con una solución de cola de caballo para prevenir futuros hongos.
Potencia de la lámpara: 40%

Likes
4
Share


@Organic473
Follow
Got this seed from the the purple cookie kush v1 surprisingly she sprung up…hopefully it’s a fem but a male would be nice for some pollen. Whatever comes I’m ready.

Likes
44
Share


@Roberts
Follow
Casey's Rollex OG is on the verg of bulking. She is doing really well. The leaves are praying, and she is looking healthy. She is starting to get some resin on the early Cola sites. She is likely due for a solution change this next week. Everything is looking good at the moment. Thank you Spider Farmer, and DutchFem Seeds. 🤜🏻🤛🏻🌱🌱🌱
Thank you grow diaries community for the 👇likes👇, follows, comments, and subscriptions on my YouTube channel👇.
Thank you Happy Growing 🌱🌱🌱
https://youtube.com/channel/UCAhN7yRzWLpcaRHhMIQ7X4g

Likes
18
Share


@Manic
Follow
I feel like they could be more light green in color but they are growing really well. Alaskan purple seems to be growing a little lower than the blueberry but I'll bet it's just the genetics. Overall haven't been feeding them water til the soil is dry on top with the ffof, and they seem to respond well to it with no discoloration or burns. Haven't used any nutes and don't plan to til the week of flowering or a week after depending on how the transplant goes. Will add more pics throughout the week, if anyone notices anything I'm missing feel free to spill the beans.
Likes
1
Share

@Canivent11
Follow
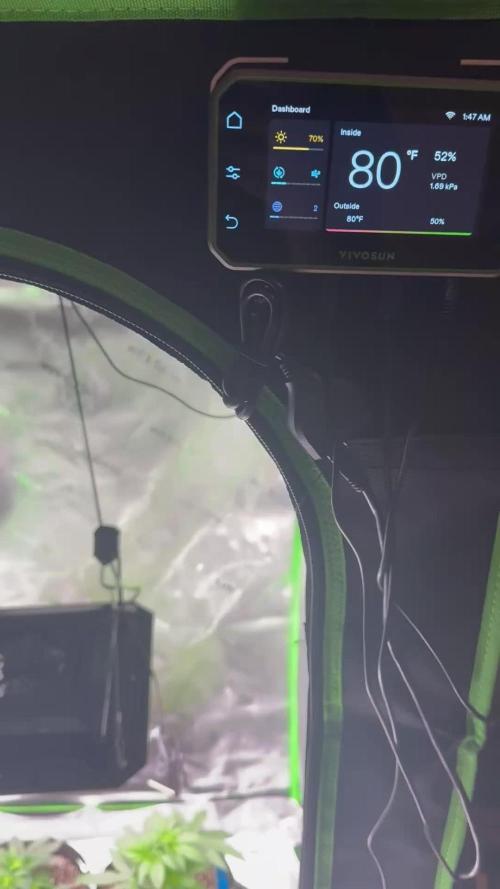
Topped and still only watering. Fox Farm OF doing the heavy lifting and the girls are thriving

Likes
5
Share


@RastaRick
Follow
Keeping natural form. Blackberry gum is huge as I heard from others. Did some heavy defoliation.. first time ever so it's an experiment. Flooded my tent with no tray... Needed to redo connections on the tubing... Then flooded with a new tray, needed to secure the AQUAVALVES on one autopot base.... Looking good. Still running 24 hrs... Rock and roll 🤘


Likes
64
Share

@Roberts
Follow
Baked. Omb auto is doing good this week. Looks like I got past the magnesium issues I was having in prior weeks. She just got some training and us ready for another week. I imagine she will start shifting into flowering very soon. Thank you Bomb seeds. 💣 🤜🏻🤛🏻🌱
Thank you grow diaries community for the 👇likes👇, follows, comments, and subscriptions on my YouTube channel👇. ❄️🌱🍻
Happy Growing 🌱🌱🌱
https://youtube.com/channel/UCAhN7yRzWLpcaRHhMIQ7X4g

Likes
14
Share


@MadeInGermany
Follow
Flowering day 3
since time change
to 12/12
Hey guys :-)
The ladies are developing really well 😊.
Was poured 2 times with 1 l each (groundwater see description at the bottom)
They were placed in the flowering tent and, as always, a few cuttings were taken.
Everything was made clean.
Fresh osmosis water is applied and the plants are sprayed and checked.
Stay healthy 💚🙏🏻
👇🏼👇🏼👇🏼👇🏼👇🏼👇🏼👇🏼👇🏼👇🏼👇🏼👇🏼👇🏼
You can buy this Nutrients at :
https://greenbuzzliquids.com/en/shop/
With the discount code: Made_in_Germany you get a discount of 15% on all products from an order value of 100 euros.
👇🏼👇🏼👇🏼👇🏼👇🏼👇🏼👇🏼👇🏼👇🏼👇🏼👇🏼👇🏼
You can buy this strain at :
Clearwater Seeds
Water 💧 💧💧
Osmosis water mixed with normal water (24 hours stale that the chlorine evaporates) to 0.2 EC. Add Cal / Mag to 0.4 Ec Ph with Organic Ph - to 5.8 - 6.5
MadeInGermany

Likes
159
Share


@BarrieGrower
Follow
Did not get up to see the plants this week, been watching the weather though. The weather was fine, next week looks a bit cooler and three day of rain, not great.
First plant was hung a week and trimmed the first oz and a half. Looks like I may get five or six off this plant.
The trimmed buds look fine. They were squished bringing them back. In my wisdom I bagged it inside five bags to avoid the smell and complaints driving back and that happened. Well I did not get any complaints though. Trimming is a bit of a chore now, oh well. Won't do that again. Buds look good and all is well.
I may try to get up next week to see them.
Cheers.
Likes
47
Share


@Sativfaction
Follow
En esta segunda semana aumento la intendidad del LED hasta alcanzar 18.000 LUX en la punta de las plantas, manteniendo la distancia de 50cm.
En uno de los riegos agrego nitrógeno (Fish Mix), en otro Bio Heaven, y siempre CalMag, ya que parto de un agua de baja mineralización (EC 0.05)


Likes
3
Share


@Kokot
Follow
Did a little more lst… let me know if im doing something wrong or could be doing better, i appreciate every single tip and opinion.
Likes
4
Share

