Likes
Comments
Share
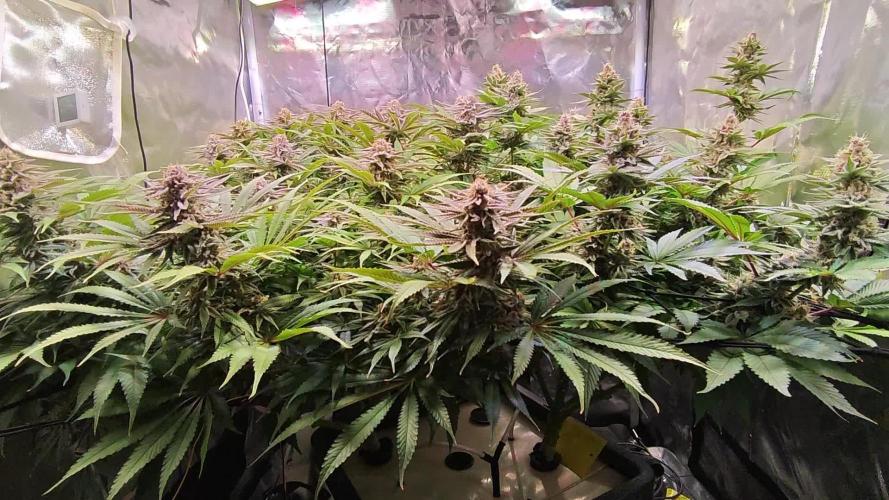
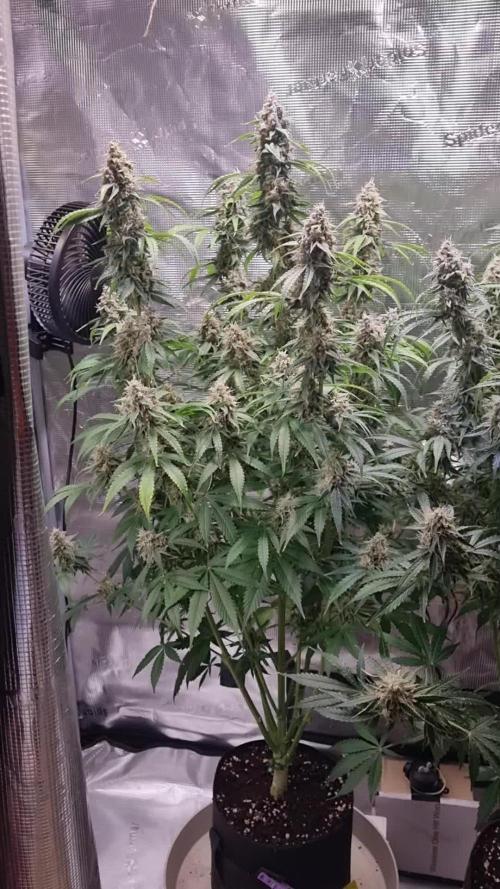
This plant looks gorgeous on her 3rd week after planted, great development, let's see how she keeps developing, looks like it's gonna be a big girl guys,
Likes
10
Share
LSD Zamnesia Tripping 🙂 | Fresh Frozen, Ice Water & Temple Balls — Week 16 From Seed First of all… Yes 😄 We are once again dividing the harvest reports into multiple chapters, and once again we apologize for that. But honestly, there was simply no way to fit: * harvest, * drying, * trimming, * curing, * smoke review, * macro photography, * fresh frozen work, * washing, * extraction, * and hash making… …into a single GrowDiaries update without rushing through important parts of the process. And this part? This part deserved its own spotlight completely. Because this week was not about flower anymore. This week was about resin. Living resin. Fresh frozen material. Ice water extraction. Patience. Cold temperatures. Sticky hands. And slowly transforming trichomes into beautiful hash. For everyone joining only now, quick recap: These LSD girls were grown under 12/12 from seed from the very beginning. Minimal training, mostly natural structure, gentle leaf manipulation, and environmental balance instead of aggressive intervention. Part of the harvest was dried traditionally and already covered in the previous report. But another part… …never got dried at all. Straight during harvest, selected flowers were removed fresh from the plants and immediately vacuum sealed before going directly into the freezer. No drying. No curing. No waiting. Fresh frozen. And that changes everything. The goal here is preservation. When flowers are frozen immediately after harvest, a large portion of the volatile compounds: * terpenes, * flavonoids, * aromatic compounds, * and delicate resin characteristics… …can remain much closer to their living state compared to traditionally dried material. This is why fresh frozen extraction became so respected in modern hash making. It captures a version of the plant that only exists for a very short moment in time. Alive. Wet. Fresh. Fully expressed. And honestly? Opening those frozen bags weeks later felt like reopening harvest day itself 😄 The flowers still looked incredibly resinous even after sitting frozen for weeks waiting for wash day. Now let’s talk process. For the wash itself, we used the Bubbleator machine courtesy of Zamnesia , and honestly huge thanks to them for providing it. They knew I wanted to start exploring ice water extraction properly, and they were kind enough to support the journey. The setup itself is actually beautifully simple. First: ice. Lots of ice 😄 The machine was filled partially with ice first before adding the fresh frozen material inside the working bag. The flowers themselves were placed inside a closed 220-micron washing bag. This is important because the bag keeps the plant material contained while still allowing the trichome heads to separate during agitation. After placing the material inside: * more ice on top, * cold water added, * everything submerged, * and then… …we waited. Around 30 minutes or so. And this step is actually extremely important. A lot of people think washing starts when the machine turns on. But honestly? The wash starts before that. This resting phase allows the frozen material to: * slowly rehydrate, * absorb water again, * become fully saturated, * and most importantly… * become extremely cold throughout the entire plant material. Why does this matter? Because trichomes become brittle at very cold temperatures. The colder everything gets: * the easier the resin heads separate, * the cleaner the release becomes, * and the less physical force is required. That is also why ice exists under and above the material: * lower temperatures evenly, * protect the resin, * and maintain the cold environment throughout the wash. Once the water temperature approached near freezing… …the machine came alive 😄 And honestly? Watching the water slowly transform during the wash is always magical. At first: just ice, water, and flowers. Then slowly: foam, cloudiness, resin separation, and finally that beautiful milky golden water hash makers love seeing appear. Meanwhile on the side, we prepared the filter bags. We did not use every single micron separation individually because honestly sometimes over-separating becomes unnecessary depending on goals and material quality. Instead, we focused on collecting the grades we actually wanted to work with and enjoy. And then came one of the most satisfying parts of the entire process: Collection 😄 Slowly lifting the bags. Watching the resin gather. Carefully scraping. Separating grades. Observing texture and color differences. Beautiful creamy resin everywhere. Some lighter. Some slightly darker. Some sandy. Some greasy. Every layer carrying slightly different characteristics. After collection, the resin was carefully freeze-dried. And this part also requires patience. First freeze drying. Then breaking it apart. Then more drying. Then more waiting 😄 Depending on environment and conditions, full drying can take several days because trapped moisture inside hash is dangerous long term. Rushing this step can ruin months of work later. In this case, the process stretched closer to about a week before everything felt properly stable and ready to work. And honestly… This is where the magic really started. Once dry enough, we allowed the hash to rest briefly before beginning the hand-working process. No extreme heat. No giant pressure. No fancy machinery. Just: room temperature, body warmth, gentle pressure, folding, rolling, stretching, and patience. The room itself stayed around 15°C, which turned out to be perfect for working the resin slowly without overheating it. And this step matters far more than many people realize. When hand-working hash properly: * oils redistribute, * compounds begin merging, * terpenes spread through the material, * oxidation starts slowly, * texture evolves, * and curing begins transforming the resin itself over time. You are not simply “rolling hash.” You are starting a living curing process. And slowly… The texture changed completely. From sandy loose resin… to creamy material… to sticky dough… to smooth beautiful temple balls. Honestly, seeing that transformation happen in your hands never gets old 😄 Final result? Three temple balls total: * two smaller ones from smaller micron collections, * and one large main temple ball that became the true star of the session. Final weight: 46.5 grams.( big one ) And honestly? I was extremely happy with that result. Especially considering the quality, texture, color, and how beautifully this LSD washed overall. Once formed, the temple balls were wrapped carefully in parchment paper before being vacuum sealed for long-term curing. And now? They rest. Months. Maybe longer. Waiting. Because the goal here is not “fresh hash.” The goal is evolution. Traditional temple ball style curing allows: * oils to redistribute, * compounds to merge, * texture to transform, * aroma to deepen, * and the entire resin profile to mature over time. Almost like aging wine. Or curing cheese. Or fermenting traditional products slowly and intentionally. This is medicine with patience built into the process. And honestly… That part alone deserves respect. We also included: * detailed process photos, * collection stages, * macro photography, * texture closeups, * curing progression, * and multiple stacked macro images showing the resin in insane detail. Some of these stacks reached: * 62 frames, * 87 frames, * 114 frames, * and even 152-frame focus stacks. Because honestly, hash under macro magnification becomes another universe completely. The textures stop looking real. Tiny resin mountains. Oil rivers. Micro-crystals. Glossy surfaces. Soft creamy structures. It almost starts looking geological instead of botanical 😄 Mr. Baggy of course supervised the entire operation like the professional resin inspector he clearly believes he is. And next week… The final chapter arrives. Smoke review. Curing review. Flower review. Hash review. Terpene evolution. Effects. Textures. Lessons learned. Mistakes made. And final thoughts after this entire LSD journey from seed to cured medicine. And finally… Thank you. To Zamnesia for the genetics and the Bubbleator. To Plagron. To F.O.G. To all the LEDs, gear, and equipment involved. To GrowDiaries. To the community. To the OG followers. To the new curious visitors. To the silent supporters. To the skeptics. To the lovers and even the haters 😄 To everyone spending time sharing this strange beautiful plant journey with us. Wishing everyone: cold water, sticky fingers, healthy plants, beautiful resin, and enough patience to let good hash become great hash 🌱
Processing
Likes
32
Share
This should be interesting. Let's see what we can do with this one. Thanks Short Stuff. Auto Gorilla OG is possibly the most exciting strain we have ever had the pleasure of working with. She is tall, incredibly vigourous, smells delicious and has potency levels which are off the hook. We had heard a lot about Gorilla Glue #4 and managed to get our hands on a cut of this super-strong and highly resinous strain which has being causing such a buzz. We then set about crossing it with our favourite Auto OG Kush until we had Auto Gorilla OG.  The results have blown us away… The trichome count is just out of this world with resin ‘gluing up’ your scissors when you harvest her and mountains of sift being produced when you are manicuring the dried buds.  When growing Auto Gorilla OG get ready for some explosive growth from day 1. This strain is really vigourous and pushes out branches and bud sites in all directions while reaching a height of up to 1-2 metres (4 feet). Once she has finished her stretch she will start filling out and the buds will become super chunky and resinous as the trichome production goes into overdrive. The smell has classic OG funk elements with pine scents and earthy aromas but there is also some extra special fruit salad candy in the mix which makes it one of our favourite smelling strains.  The potency of Auto Gorilla OG is not to be taken lightly; she is one of the strongest strains we have ever tried, autoflower or photoperiod. Tests have shown THC levels in excess of 23%. The effect of Auto Gorilla OG is very fast acting with an instant all over body buzz and a very uplifting head-high. We have found this strain great when you need to get stuff done but also very good for the end of the day when you want to wind-down and even get to sleep. The high is long lasting and can go on for 2 or 3 hours before mellowing.  Due to the massive trichome production of Auto Gorilla OG she is the perfect strain for making hash, Rosin or extracts from so nothing is wasted. Auto Gorilla OG is part of our Boutique Line of cutting edge Autoflowering cannabis genetics.  The Boutique Line contains the most up to date autoflowering genetics which are pushing the boundaries of what can be done with autos. All the strains in the Boutique Line are big, tall, heavy -yielders and have been produced’ in-house’ by Shortstuff’s master breeders.
Likes
13
Share
@Lfuego22
Follow
Good week. Day 41-48 from clone about day 21-28 in veg 3 weeks in clone
Processing
Likes
5
Share
JULY 26 - DAY 72 - Entering her 4th week of flower like a boss, she isn't as thirsty as her Meph counterpart but still bulking nicely JULY 28 - DAY 74 - Looking great! JULY 29 - DAY 75 - Fattening up and she looks like she can get substantially bigger, as the pistils are bright white.
Likes
32
Share
Bewässerung: 500ml jeden 3 tag in der ersten Woche pH-Wert: 5,8 EC-Wert: 0,6 Temperatur: 30ºC Luftfeuchtigkeit 68% Schädlingsbekämpfung: PPFD: 200 µmol/m²/s DLI Düngemittel: mineralischer Dünger NPK 7-3-5 Besonderheiten: wir versuchen bei diesem Grow Effektive Mikroorganismen aus. Die Opfer Linsen sind wieder da 😜 👌Wenn denn Promo Code AOSP15 bei dem Kauf von Fast Buds Samen anwendest bekommst du 15% Rabatt!!!👌 -Tag 8 Heute hat sie Nematoden bekommen 😝 -Tag 10 Heute wurde sie mit mineralischen Dünger gegossen 7-3-5 -Tag 12 wir haben ihr wieder etwas Dünger gegeben 😌 -Tag 14 Heute hat sie nur Wasser bekommen
Likes
1
Share
flowers really packing on weight this week. I've had to tie up supports and stripped off quite a few of the older fan leaves. I've started the flush this week to go with the strain timings. any flush advice would be appreciated.
Likes
66
Share
@Hashy
Follow
Week 3 Light settings 18/6 on at 6.00am off 0.00am Light power= 46% 109w Radiator settings LIghts on Turn on if temp drops below 21.4c Turn off if temp goes above 21.5c Lights off Turn on if temp drops below 19c Turn off if temp goes above 19.1c Humidifier settings LIghts on Turn on if humidity drops below 59.9% Turn off if humidity goes above 60% LIghts off Turn on if humidity drops below 49.9% Turn off if humidity goes above 50% Extractor settings temperature 24c with 1c steps Humidity 62% with 2% steps Max speed 8 Min speed 1 VPD aim 0.5-0.9 Wednesday 8/2/23 Day 15 5.00pm Turn pots 90 deg Thursday 9/2/23 Day 16 8.30pm #1 Feed 1.5L Ec=1.06 Ph=6.4 Run 0.2L Ec=5.24 Ph=5.5 Moved #1 to right #1 Height= 10CM Dist= 60CM DLI=19.0 Friday 10/2/23 Day 17 Did nothing #1 not quite kicked into gear yet Saturday 11/2/23 Day 18 8.00pm #1 moved to centre #1 Height= 11CM Dist= 59CM DLI= 19.6 Extractor settings temperature 25c with 1c steps Humidity 62% with 2% steps Max speed 8 Min speed 1 Sunday 12/2/23 Day 19 4.30pm Leaf tuck all 3 #1 still small but managed to expose a few nodes. 8.30pm removed humidifier and moved pots nearer centre of the tent. A bit more leaf tucking. Monday 13/2/23 Day 20 7.30pm #1 Feed 2L Ec=1.04 Ph=6.5 Run 0.4L Ec=3.02 Ph=5.7 Tuesday 14/2/23 Day 21 #1 Height= 14CM Dist= 55CM DLI= 19.1 Round up for the week. Again it's been a fairly productive week with the grow. Didn't quite hit my VPD target but I wasn't far from it. There is enough foliage that I managed to remove the humidifier from the tent. #1 Wedding Cheesecake FF is where I'm expecting her to be at, she is smaller then the others but I'm sure they are just rapid in growth. I didn't top/fim this one when I did the others as I wanted her to catch up a bit in height 1st. Probably veg for 1 more week and switch to flower. Power used for week Light (1.96+1.96+1.96+1.96+1.96+1.95+1.95)=13.7Kw Extractor (0.05+0.05+0.05+0.06+0.06+0.06+0.07)=0.4Kw Fans (0.31+0.30+0.30+0.30+0.3+0.31+0.39)=2.21Kw Humid (0.05+0.02+0.0+0.0+++)=0.07Kw Radiator (1.44+0.9+1.04+0.68+0.6+0.92+2.61)=8.19Kw Total for the week=24.57Kw Back in a week. Thanks for stopping by.
Likes
65
Share
Day 29: Watered the plants 0.3L with nuts 600 ppm, 1276 us/cm, PH 6.4 Day 31: Watered the plants 0.5L with nuts 533 ppm, 1134 us/cm, PH 6.2 Performed a more aggressive lst Used neem oil to prevent pests Day 33: Performed more lst Did some defoliation 75% light Day 34: Watered the plants 0.5L with nuts 588 ppm, 1251 us/cm, PH 6.3 Day 35: Performed more lst Plants already recovered from topping Day 36: Watered the plants 0.5L with nuts 622 ppm, 1329 us/cm, PH 6.4 Added bloom Topped the 2 younger plants
Likes
15
Share
@Lontra
Follow
Tag 29: 🌱: Beginn Woche 5. Da ich denke, dass wir mittlerweile in der Vorblüte sind, trage ich diese als erste Blütewoche ein. Es gab ganz leichte Anpassungen am LST, ich werde die Lady jedoch vermutlich von nun an in die Höhe wachsen lassen. Desweiteren wurden einige der untersten Fächerblätter, die bereits vollständig verschattet waren, entfernt. Auch 1-2 kleinere Blätter, die nach innen wuchsen und den Blüten die Sonne nahmen, wurden entfernt. Leider ist mir auch eines der größeren Fächerblätter abgebrochen, das ich noch behalten wollte, aber ich denke sie wird es verkraften. 💧: Die Erde ist immernoch feucht. 💡: Die Beleuchtung ist unverändert (DLI ~40, Abstand zur Pflanze ca. 35cm) Tag 31: 🌱: Bisher lasse ich sie einfach erst mal wachsen, ich denke jedoch darüber nach die nach innen wachsenden Fächerblätter morgen doch noch mal zu entfernen. 💧: Die Erde ist immernoch feucht. 💡: Die Beleuchtung ist unverändert (DLI ~40, Abstand zur Pflanze ca. 35cm) Tag 32: 🌱: Heute wurde erneut die Schere angesetzt und ein paar der nach innen wachsenden Blätter sowie ein paar kleinere Triebe im Inneren entfernt. Das LST wurde nur minimal angepasst, um eine einheitlichere Höhe zu erreichen. 💧: Die Lady wird so langsam etwas durstiger und so gab es heute wieder ca. 3 Liter Nährstofflösung. Diese wurde jetzt etwas erweitert und entspricht nun ca. 50% Bio Bizz Düngerschema. Zusätzlich dazu gab es dieses mal auch CalMag+Bittersalz. 💡: Die Lampe wurde ein paar klicks nach oben gehangen um die Werte in etwa konstant zu halten (DLI ~40, Abstand zur Pflanze ca. 35cm) Tag 34: 🌱: Heute wurden nur die Blätte etwas sortiert, um den Blüten mehr Licht zu geben. Mittlerweile haben die höchsten Triebe etwa 20cm (vom Boden aus) erreicht. 💧: Die Erde ist noch feucht. 💡: Die Lampe wurde noch ein Stück weiter nach oben gehangen, um die Beleuchtung in etwa konstant zu halten (DLI ~40, Abstand zur Pflanze ca. 35cm) Tag 35: 🌱: Ein paar der untersten, im Schatten liegenden, Blätter wurde entfernt, sowie 2-3 kleine Nachzügler Triebe aus dem Inneren. Das LST wurde ein wenig angepasst. Ich denke darüber nach noch ein paar mehr kleine Nebentriebe (vor allem aus der Mitte) zu entfernen, damit der vorhandene Platz besser für die größeren Triebe genutzt werden kann. Über Gedanken/Meinungen/Ideen dazu würde ich mich freuen 😉 💧: Zu Tagesbeginn ließ sie ihre Blätter ganz schön hängen und die Erde war ziemlich trocken, also gab es auch heute wieder etwa 3 Liter Nährstofflösung. 💡: Die Beleuchtung ist unverändert.
Likes
13
Share
@Naujas
Follow
91 days!!! This week, I gave the girl 2 waterings with biobizz nutrients, it also rains and receives rainwater:) I don't know how it will be with this project, according to the plan there should have been a harvest already, because it is an auto strain, I am going on vacation in August for 3 weeks so I don't know if she will survive, the other project participant has already given a harvest and this one doesn't even bloom, and the planting day is the same:) !!!.
Likes
26
Share
@GrowGuy97
Follow
Day 14, Two of the Orange Sherbets are a little behind & the one I’m trying to pull back from nutrient burn.. So far the White Widow Autos by Seedsman have been doing the best! Day 17 two of the Orange sherbet are a little behind the rest of the plants but overall I would say everything is going good! Seems like the orange sherbet that had the nutrient burn is starting to bounce back! Day 19 They are all really starting to take off! Probably gonna do some LST tonight or tomorrow!
Likes
7
Share
ciao ragazzi ho fatto i flush a inizio settimana e oggi (circa 10 gg dopo) ho raccolto la pianta sono molto soddisfatta a sviluppato una cima centrale molto grossa e anche tutte le cime secondarie hanno lavorato bene è ricca di tricomi molto appiccicosa con un profumo dolciastro!!! in generale l'esperimento fast Buds è andata benone siamo nell'attesa di scoprire quali varietà rappresenta questa bellissima pianta!!!🌱🌱 💡questo splendido risultato non sarebbe stato possibile senza la mia meravigliosa lampada led Viparspectra XS2000 veramente un ottimo prodotto ve la consiglio se volete dei bei rami forti adatti a sostenere le cime grosse che ottieni!!! this well-known brand offers different solutions look at the official website https://viparspectra.eu/ or Search for it on Amazon: Amazon US: https://amzn.to/30xSTVq Amazon Canada: https://amzn.to/38udUVe Viparspectra UE: bit.ly/ViparspectraUE Viparspectra USA: bit.ly/ViparspectraUS continuate a seguirmi 💪 lasciate un like 👍 maryjane23😛
Likes
11
Share
@Albargina
Follow
Esta semana les toca a las pequeñas la dosis de PK para poner bien firmes esos cogollos, pues las Katana van a ser algo espectacular vogollos nevados de resina y como los puños de Bud Spencer 🤣🤣🤣 las Gorilla Ultra CBD son preciosas, y en especial hay una que apesta, peeo apesta que hecha para atrás una maravilla!!
Likes
72
Share
_____ Week 9 | Day 56 - 63 | 2nd week of Flower ______ Day 64 🌞💧 - each Plant 3 Liter, with small drain - i give her 25% less fertilizer than indicated by Advanced... Day 68 🌞💧✂️ - each Plant 3 Liter, with small drain - defoliation and starting with Lollipopping. ____________________________________________________________________________________________ Light - 12/12 h - 560 Watt - 2x 200 Watt Toplight - 4 x 40 Watt Lightbars PPFD - 900 - 1000 µmol Temp. avg. - 23,0° Hum. avg. - 64 % RLH
Likes
15
Share
@Krissci
Follow
So busy it's hard to keep an accurate diary Lost a plant to root rot. Now have 8 full sized plants.. 9 is in a mini pot. Overall things are going well. Newest addition is Green planet - Rezin BLOOMBASTIC Silicia Cholorine remover (reduces ph) No major issues. But have to raise ph levels. Day 6 - mostly support training as buds are now swelling.. Have time to take individual pics
Processing
Likes
6
Share
ladies and gentelmans I think we have overcome the stress of the cold nigths and, I think I also have the stress produced by the H2O in the flower pot. Last week was stopping all (I think the roots are with a problem) but with the help of the microrizes we go for the good way,😜. but 2 days ago she wakeup with good energy She show me that don't need wattering, yet ( i don't undertand, becouse the land is dry😳
Likes
22
Share
@funkyb
Follow
finishing week 3 of stretch. Plants started to look pale, unclear if it was leaving the rez on too much vs. just hungry for higher EC. Towards end of week pulled them out of the trays and put drip trays in to give them a top-feed with generous runoff + some recharge. Pics of that are more in next week's photos.
Likes
18
Share
Flowering Day 35 I’ve starting steering vegetatively this week which means less stress on the plants to increase bud size. Watering has been frequent with low EC. Lower VPD along with other veg crop steering techniques used. Buds getting bigger every day
Likes
13
Share
Hello Smoking Buddies, how is growing? Another Beautiful week here in our gardening, and the flower are showing an amazing growth rate on the last few days. Day 64 - The plants were trained and defoliated, I noticed that some leaves are getting yellow on the plant 1, I suspected it is due to overfeeding. Day 67 - As suspected, the plan 1 shown more sighs that something is wrong, I'll water it with water only and wait a few days to take a decision Keep Growing 😎